
Von Croy in the Guide Slot
by
Bedazzled
This tutorial was made for Amber Light. Tools required WADMerger & Strpix.
Begin by making a new wad containing only Von Croy and the Guide, save it giving it a descriptive name. I have named it 'both' for this tutorial.
If you look at their respective mesh trees in Animation Editor, you will find both trees consist of 25 meshes and are of similar structure. This means that with very few exceptions we should be able to simply swap the characters meshes.
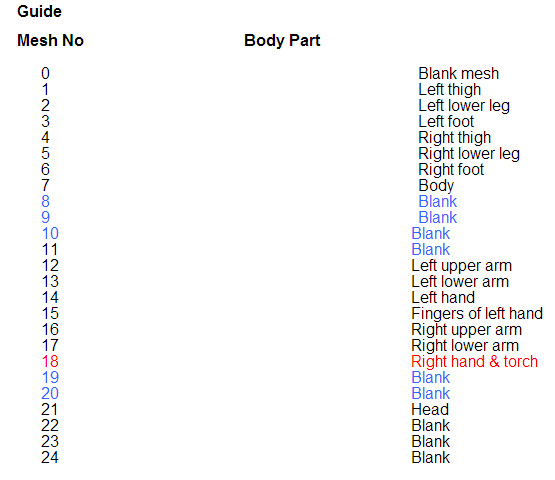
I have reproduced the list of meshes for both characters below; some meshes are not used by a character and these I have labelled as blank meshes. Other characters probably use these.
Where meshes are different I have colour coded them blue; the only mesh which will need working on is the 'Right hand mesh' which I've marked in red.

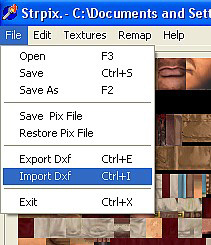
Open Strpix and open the Guide & Von Croy wad you made. The Guides meshes will be listed first in the meshes drop down window. Start by selecting mesh 25 and then select Export Dxf from the file menu on the top toolbar.
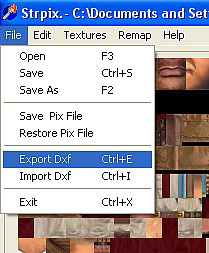
Export this mesh to a folder naming it with either its number if blank or whatever body part it represents. Do this for each mesh and on completion you should have 25 exported Dxf files.
Opening both the guides & Von Croy's Right hand mesh in Meta shows that the actual hand part of the mesh is identical. Therefore we can simply re-texture the guide's hand with the textures used on Von Croy's hand.
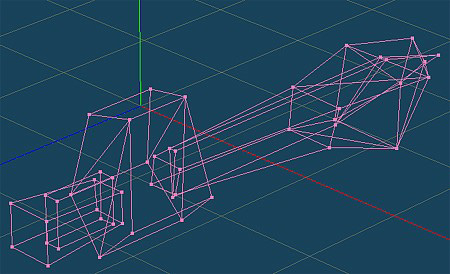
This
Screenshot shows the two hands overlaid in Meta
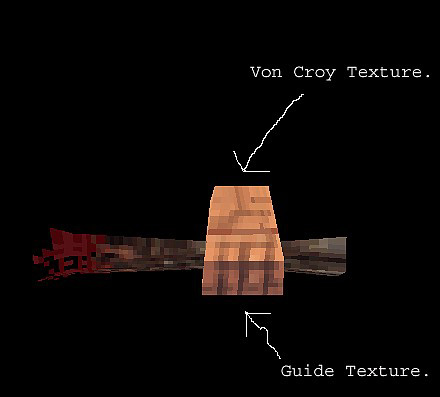
Now retexture the guide's right hand mesh number 18. The easy way to do this is by selecting a texture on mesh 43 Von Croy's hand and then selecting mesh number 18 and applying the selected texture. Once the hand is retextured export the mesh saving it as the right hand.
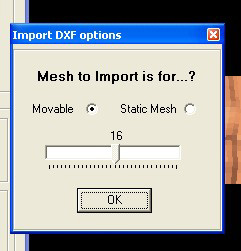
Now all that remains to do is to replace each of the guide's meshes. Select mesh 0 and from the file menu on the top toolbar select Import Dxf. Navigate to your saved meshes and select the correct saved mesh.
An import Dxf options box will appear; just click the ok button and the mesh will now be replaced in the render window.
Repeat this process for meshes 0 - 25. Then choose save from the file menu on the top toolbar & close Strpix. Now you can add the guide object to your wad using WADMerger.
Note: Make sure you also add the meshswap 2 object from the settomb wad. It looks like the guide but the game engine will substitute the Von Croy meshes in game.