
Flyby Cameras - advanced
by
George
I'm going to show you how to set up a flyby camera sequence step by step. The flyby I'm going to use is from the first level of Jungle Ruins. You can watch this flyby cam sequence by Raider X here:
The first thing you have to do is place all your
cameras so place a series of flyby cameras along the route you wish your
flyby to fly. If you place cameras close together, your flyby will move
slowly. If you place them far apart, your flyby will move quickly. Try
to have your flyby sequence fly smoothly. This is something you can have
fun learning how to do.
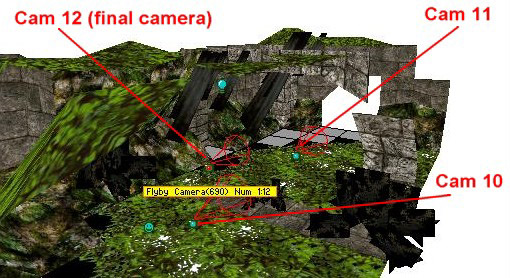
Here are the cameras as placed in the
Jungle Ruins flyby. The first two cameras are down by the roots of the
tree.
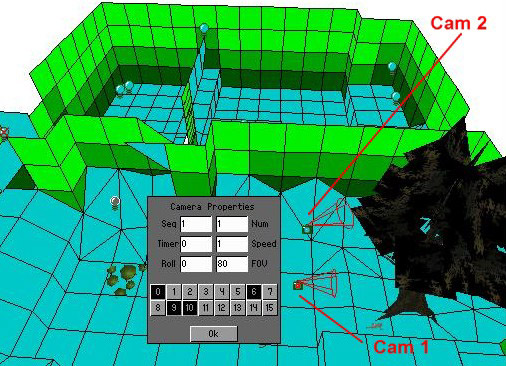
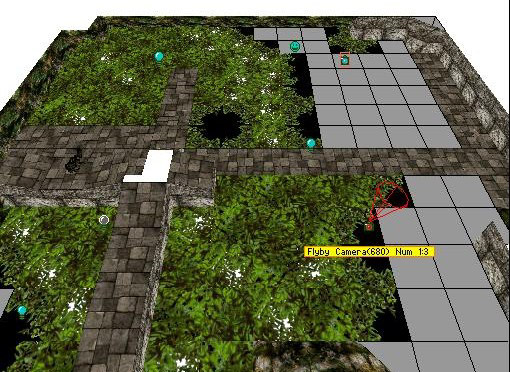
Camera 3 is on its own in this room as the flyby sequence is going up and the room is only 4 clicks high. Cams 1 and 2 are directly below and Cams 4, 5 and 6 are in the room above.

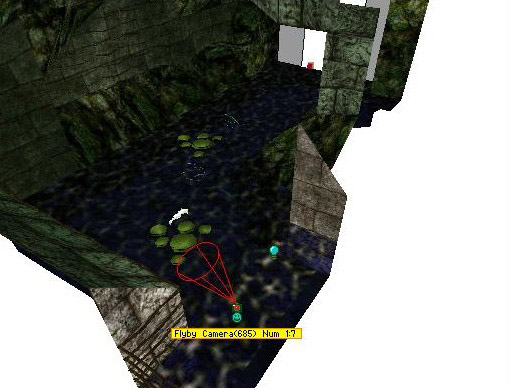
Cam 7 is on its own at the top of the waterfall.
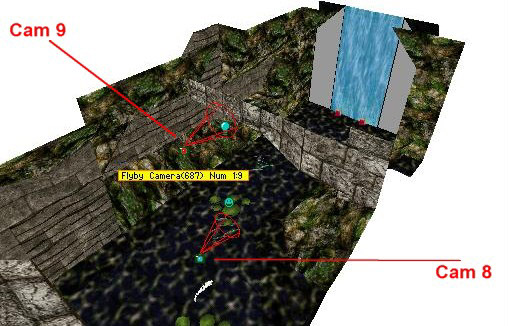
Cams 8 and 9 go straight up to join with cam 10 in the top room. Cam 11 heads in towards Lara and then swings out to cam 12, the final cam in the sequence.
Flyby cams can be moved around in the map using the
floor + and - keys and by using Ctrl and the arrow keys. You change a
flyby cams viewpoints (left, right, up and down) by using the Alt key
and arrow keys.
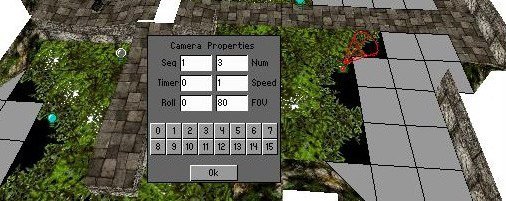
When you've placed your cameras roughly where you
want them, it's time to place the flyby camera sequence trigger. Bring
up the first camera's OCB box by highlighting the camera and pressing
the letter O key. It will look like this.

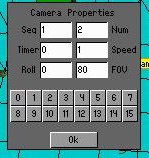
The sequence box (Seq) is the number of the
flyby cam. Each flyby cameras sequence must have its own sequence
number. All 12 cameras in this flyby will be numbered 1. This tells the
editor to 'fly' along all the cameras in sequence 1 and it won't go to
any other cameras in any other sequences.
The Number box (Num)
is the numbers of the cameras within each sequence. All the cameras
within sequence 1 must be numbered from 1 to 12 individually. This tells
the Editor to 'fly' along each camera in turn through sequence 1.
The Timer box
is used for making a camera pause or for jumping instantaneously to
cameras somewhere else in your level. More on this later.
The Speed box
is for speeding up flyby cams. You can enter values from 1 to 3, 3 being
the fastest. However, it's easier to place camera's further apart if you
want them to speed up as you use less cameras that way. Try it and see!
The Roll box
is for making your cameras bank like an aircraft from left to right, or
from port to starboard if you prefer. The highest value you should enter
here is 180 which equates to half a turn and will make your flyby fly
upside down. Minus values are used here to bank one way and positive
values to bank the other.
The Field of View (FoV) box is
for distorting camera angles and can be used to devastating effect if
used properly.
The OCB boxes all do different jobs as described
in this table.
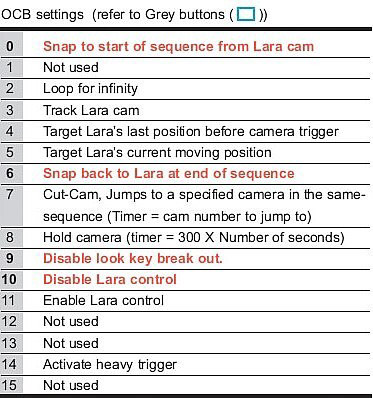
0 tells
the Editor to snap to the first camera in the sequence. If you don't
press this, the flyby will start from the normal camera view behind
Lara.
6 tells
the Editor to snap back to Lara after the sequence ends.
9 and 10 disable
the look break out function and Lara's controls while the flyby is
running.
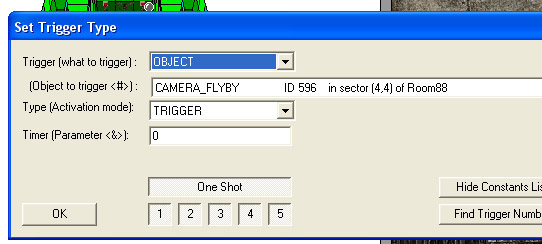
When placing this trigger it is important to also hit
the One Shot button, otherwise your camera will loop over and over again
and you won't be able to break out of it. Don't select FLYBY in the
trigger box either.
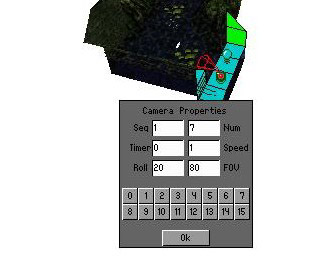
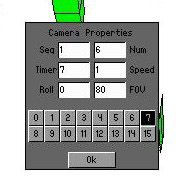
Now you have to go through each of the cameras in turn, opening their OCB boxes by hitting the letter O key and entering the cameras number in the flyby sequence in the Num box. Here you can see this for the second and third cameras. You must do this for all of them. There is no need to press any of the OCB boxes in any of these other cameras.
If you check camera 7 you'll see that the Roll box has a value of 20 typed in which makes the camera bank or roll. This is the camera right on top of the waterfall so you can see how the camera is affected by this value by watching the video.
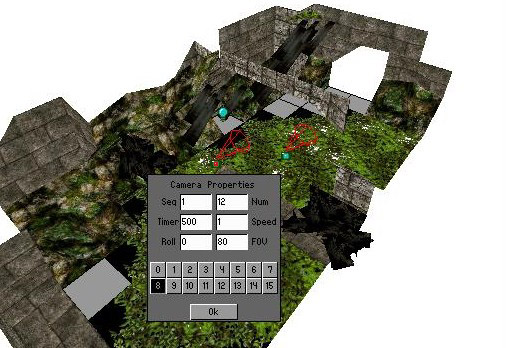
The last job we're going to do is to make the final camera 'hold' for a few seconds before it snaps back to Lara. This is done by pressing the 8 OCB button and entering a value in the Timer field. You can see from the YouTube video that a value of 500 holds the camera for a couple of seconds. You can make cameras hold for much longer and enter values well into the tens of thousands.
A Few Other Points
Flyby cameras can
trigger heavy triggers. The heavy trigger must be placed directly below
the camera on the floor of the lowest room. Also, you must press the 14
OCB button or the heavy trigger will not work.

When jumping to a flyby cam in another part of your level, you must type the number of the camera in the Timer box. For example, if a flyby runs through 6 cameras numbered 1-6 and then jumps to camera 7, type 7 in the timer field of camera 6 and press the 7 OCB button.
Sometimes this method won't work and you have to place a dummy camera. In that case you would jump from camera 6 to camera 8 and type an 8 in camera 6's Timer field and press the 7 OCB button. You can only do two jumps like this in one camera sequence as far as I'm aware and it can be fiddly to set up and get working so try to avoid it if you can. For more information see this additional tutorial by Uvavoo: