
Architecture - Building Caves
by
Terry Barrett (Dhama)
Start off with a 7x7 tiled room.
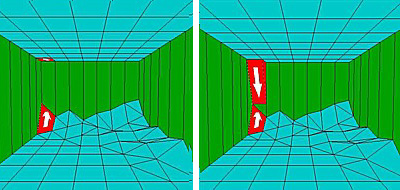
Position the mouse pointer in the far left corner of the room on the floor. Hold down the 'CTRL' key and click the 'left' mouse button twice. This displays a red square with an arrow pointing toward the corner.
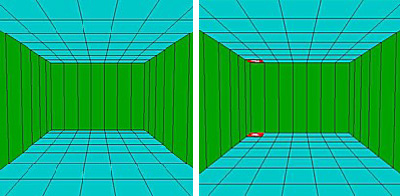
Keeping the 'CTRL' key down, click on the 'Floor' '+' 8 times. This will raise an angled part of the floor.
Holding the mouse pointer over the red tile, with the 'CTRL' key still down, click the 'left' mouse button. This will change the direction of the arrow to the right.
Still keeping the 'CTRL' key down, again raise the floor, but this time 4 clicks with the 'Floor' '+'. Now you will notice the floor to the right also raises.
Now move the red square to the tile on the right, and start the whole procedure again. This time raise the floor 6 times. You can raise the floor at any increments to give an uneven appearance.
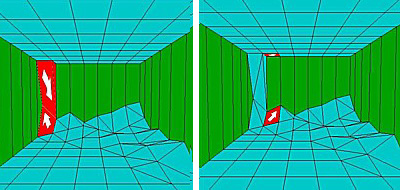
Repeat the whole thing on all the tiles along that wall and down the right hand wall, as in the following pic. Remember to keep the 'CTRL' key pressed all the time or only one tile will rise.
Now place the mouse pointer and select the next square back from the start square.

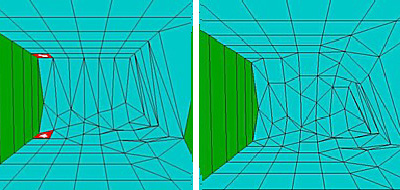
Now start the whole procedure once again, holding down the 'CTRL' key, positioning the arrow to the right corner of the tile and raising the floor around the room again, but this time not quite so high. See pic.
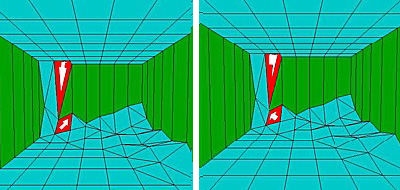
As you can see, the room is now taking shape. Raise a few more tiles in the same way to make it look less uniform (square) as in the pic below...
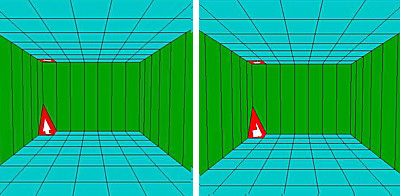
Now we must do the same with the ceiling. So select the ceiling in the top left hand corner. And the follow the same procedure as before, only this time positioning the arrow on the ceiling (WITHOUT THE CTRL KEY THIS TIME) pointing as in the next pic; toward the bottom of the ceiling tile (ignore the arrow on the floor tile).
Now, lower the ceiling tile till it reaches the floor tile using 'Ceiling' '-'.
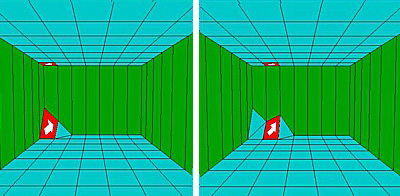
Press and hold down 'CTRL' key once again. Select the ceiling tile and position the arrow so that it faces bottom right. You will need to click the mouse a couple of times to get it there. If you miss it, keep click till it appears in the correct place. Again, ignore the floor tile arrow. Whilst still holding down the 'CTRL' key, lower that corner of the ceiling till it meets the floor tile nice and flush (together).
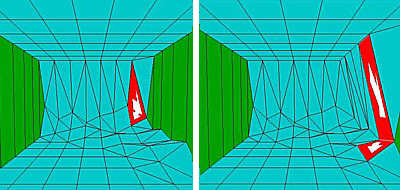
Once we have that initial ceiling tile done, we can now concentrate on the rest. So select the next ceiling tile to the right, and position the arrow facing as in the pic below.
Lower the ceiling till it reaches the floor tile. If a white wall appears, then you have gone too far. Just click up again to correct it.
Change the direction of the arrow so that it points as in the next pic.
Now hold down the 'CTRL' key and lower the ceiling tile. This time the adjacent tile to the right will also follow. Lower it till it fits well with the floor tile.
(Troubleshooting)
If the following happens, you have lowered the tile
too far. To correct it, just 'UNDO' it again till the white background
disappears.

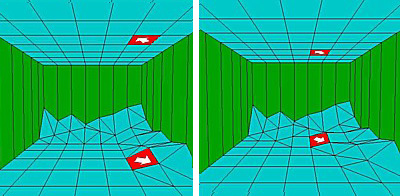
Now do the same around the room like you did with the floor, positioning the tiles arrow on each ceiling tile to the bottom right each time.
When you reach the end of the wall, position the arrow to the top right of the tile, and (not forgetting the 'CTRL' key) lower the ceiling again.
Now go around again (like you did with the floor, but with the ceiling. Position the arrow like this on the ceiling. Continue around making it nice and uneven.
To recap, use the 'CTRL' key to lower or raise tiles so that the adjacent tile also moves with it.
When texturing cave walls, find a nice rock texture and make it 256x256 pixels in size. It will comprise of '16' 64x64 TRLE textures. In order to apply these in the correct way, make a copy of the 256x256 texture and number each 64x64 cell. Add this to your texture map first and texture the room interior. When all the textures look fine and all the numbers appear in the correct place, swap the 256x256 texture with the original (without the added numbers).
(Troubleshooting)
Some tiles will only be triangles to texture, so
make sure they are rotated correctly. Don't be too concerned though,
because once lighting is added you may not notice them. If you do, just
go back and fix them.