
Raising Blocks
by
George

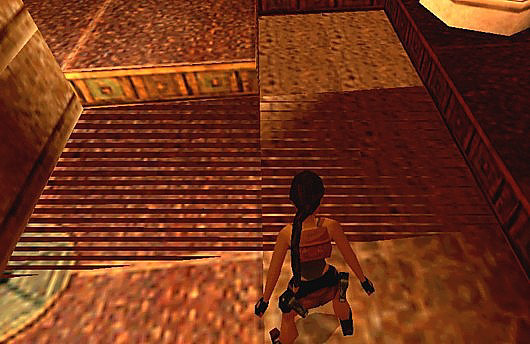
Raising blocks are one of the most useful and versatile objects in your WAD. The above screenshot is a good example of this, showing how you can use a raising block to fill a gap allowing a pushblock to cross. Other uses are:
As a door
Stepping stones across lava pits (don't
use death tiles under them in water rooms)
To raise a torch or
pushblock to a higher level
Lowered to reveal switches or puzzle item
pickups
Raising blocks come in two sizes, as can be seen in the following image, 4 clicks high and 8 clicks high. Used together, they can produce some clever and intriguing puzzles.

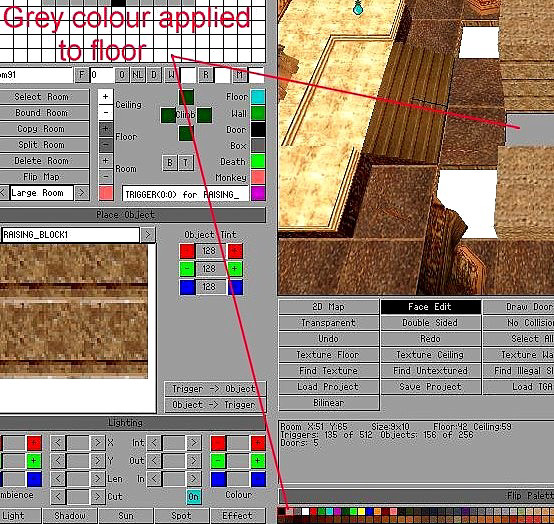
One major problem with raising blocks, however, which can be easily avoided, is that when triggered and lowered on floor tiles which are textured, you get horrid zig zaggy lines showing through. This effect will ruin the atmosphere of your level.
The fix is to texture the ground below the raising block with the grey colour from the pallette (next to the black sky texture colour). This isn't necessary if your block is made invisible to begin with and is only triggered once. However, if you intend to reuse your blocks and have them lowering again once raised, don't make them invisible and colour the floor tile with the grey colour as shown. The top of the block object will then be visible before it is triggered and can serve as a good clue to Raiders. Some experimentation may be required, depending on your set up.
OCB Settings
Raising blocks also have a few OCB settings, which can be useful.
OCB 0 - Blocks raise and lower with no screen shake.
OCB 1 - Blocks raise and lower with screen shake.
OCB 2 - Blocks immediately raise at the start of your level with screen shake. Once the block is lowered again, triggers act as normal.
OCB 3 - Same as OCB 1