Meta2tr - UV Mapping
by
Leonvdn
In this tutorial I will look at how to do some simple UV mapping using Meta2tr. As you may or may not know meta2tr is a fantastic program which has allowed builders to change the geometry, lighting and texturing of their levels. With it you can create shapes and lighting that would not have been possible in the room editor.
I will not go into the process of running tr4 files through meta2tr
here, just how to change and retexture parts of the geometry.
Below I have put one of my previous levels through meta2tr and opened
RoomAll.mqo, as you can see there are layers for each room in the level
and layers for each 256x256 block of textures in game. Each texinfo that
you used in the building of the level can be found somewhere in these
texture layers.
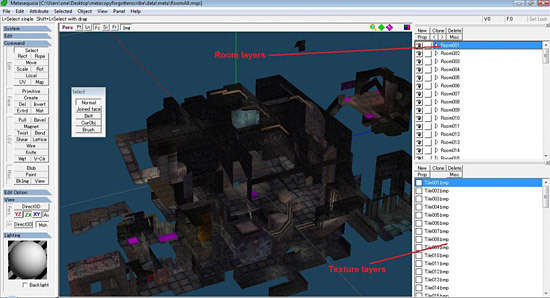
I am going to do a very simple UV map to fix one of my rookie texturing mistakes in forgotten scribe. The wall and the sloped platform don't line up properly which can cause incorrect lighting and cracks. Additionally the side of the sloped platform has a distorted texture. Usually if I find an area I want to work on I cut and paste the room to a new layer and rename it something like room38temp, (I will refer to it as TEMP in this tut) so I know where to put it back later.
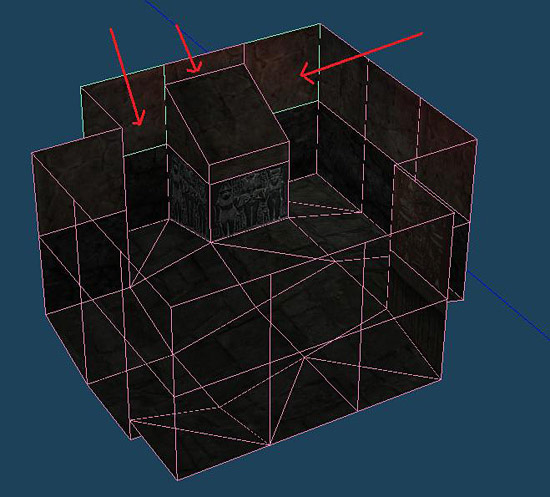
I'll fix that unsightly distorted side texture first. Select the side surface and cut it to a new layer. Meta has a nasty habit of selecting the wrong layer sometimes so always check that you have the layer selected that you want to use. Now whilst making sure the surface is selected, click on the UV button (on the command side menu) and then select the first texture in the materials panel. You should see something like this. (note, in these screenshots there is a second surface, please ignore that, it was a mistake, there should only be only one).
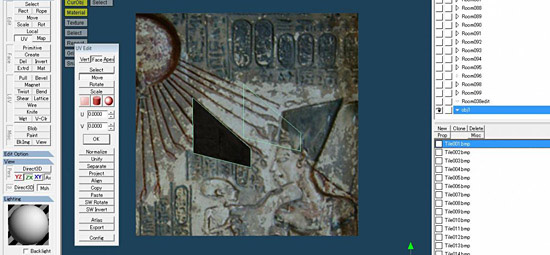
Scroll down the materials layers until you find the texture that had been originally used on the side of the slopes. As you can see it's mapped as a square which is different than the shape of the actual surface.
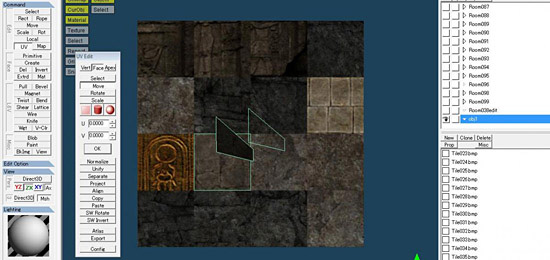
Click on Grid and Snap and you should see a grid appear over the 256x256 tile, you may have to adjust the grid size to match the 64x64 structure used by the editor. Making sure you have Move selected in the UV Edit panel. You can now simply click on all the points on the green outline and drag them to wherever you desire to create the intended shape. As you can see the surface is one click high on one side and three clicks high on the other.
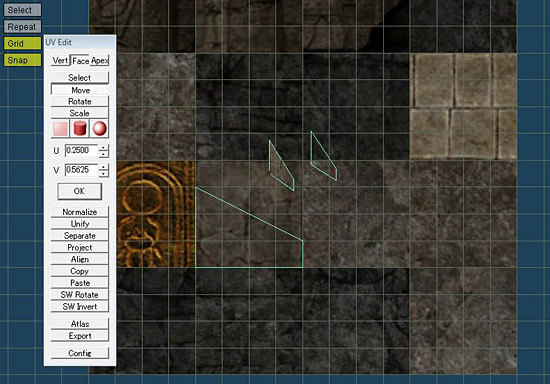
Click out of UV now and return to the main project. Drag the layer layer back into your TEMP layer and allow them to be combined. You should now see textures properly mapped onto the surface. Repeat this with the opposite side of the slope.
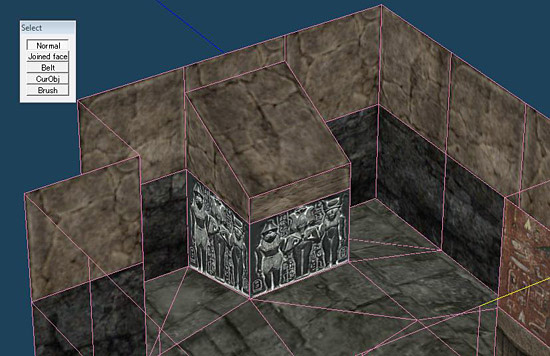
Ok, now I want to replace the wall textures on either side of the slope. What I usually do is create a new layer and using the create function make a new surface over the other one that properly lines up with the rest of the room. I then delete the piece of wall that was originally there. It should look a bit like this.
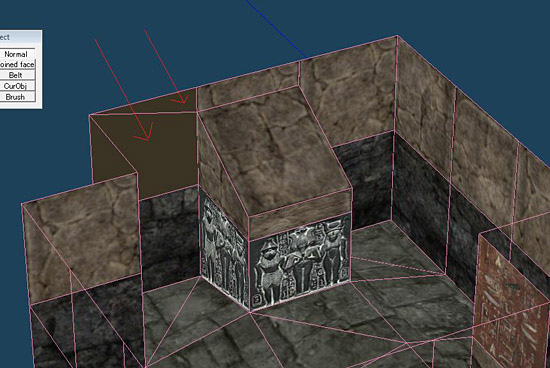
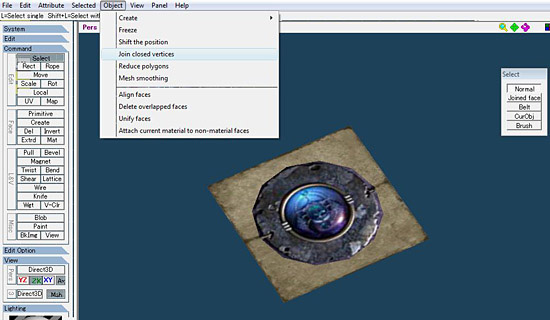
Hide all other layers, go to the objects menu and join closed vertices to make sure the two pieces of the surface are joined, I call this the orange juice move as the hotkey is ALT - O - and J in succession. If the two parts of the surface aren't selected do so now with the select tool. Click on UV again and scroll down through the tiles until you see the desired texture. When you do go to the Selected menu and click on set material to faces. You may not see an outline yet, press Atlas and something like this will appear.
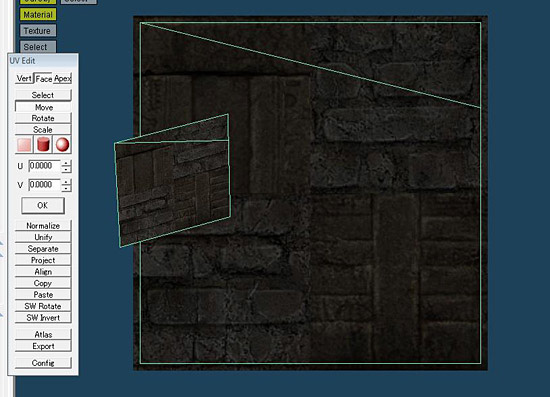
In my case I only want it to cover the top left corner and not the full 256x256 panel, so what I do is turn on the grid and drag each of the 5 points so that it's the right shape and size. If you want to use the whole 256x256 space then you may want to drag the corners to the edges so it matches neighbouring tiles with the same texture. Make sure not to go over the edges because this can have unusual side effects.
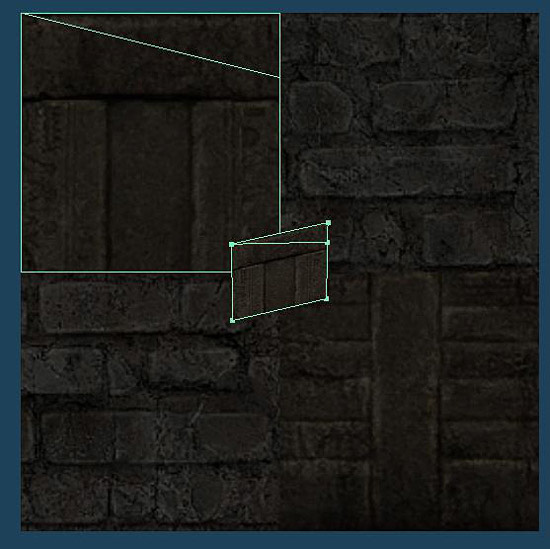
As before go out of UV and drop the layer into your TEMP. You can repeat
the process on the other side of the sloped platform. When you're done
combine all your temporary layers and make sure they end up back in the
original room layer. Make sure all the dots are connected using Object /
Join closed vertices to avoid cracks.
That's it really, for an extra example I have changed the black Egyptian
mural under the slope so they are no longer slightly crooked.
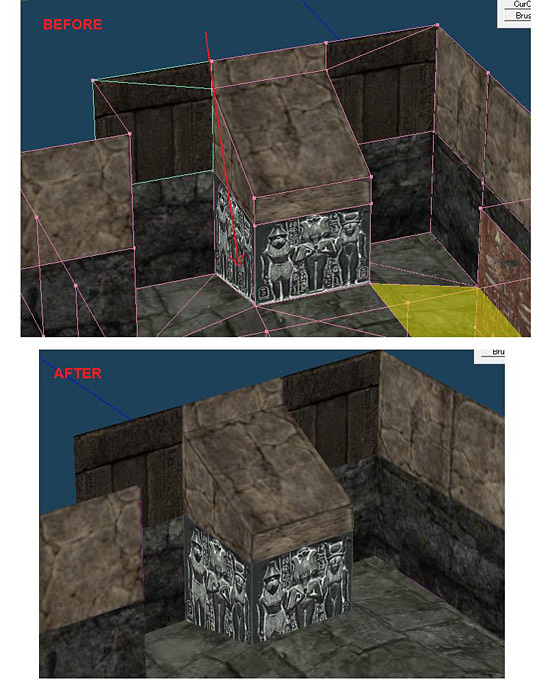
__________________________________________________
UV mapping on a circular object
In another example, I have made a flat circular object that will sit on
the ground in the space of a single tile. The circle is 0.4 blocks in
radius and I have used the create tool to draw a frame around it so that
it connects to surrounding tiles. What I want is to UV map the frame
with a generic ground texture and UV map the circle with a circular
texture. In the editor this would either have to be a different texture
for each segment of the circle or a square texture with magenta
transparency. In meta2tr we can just map straight onto the circle.
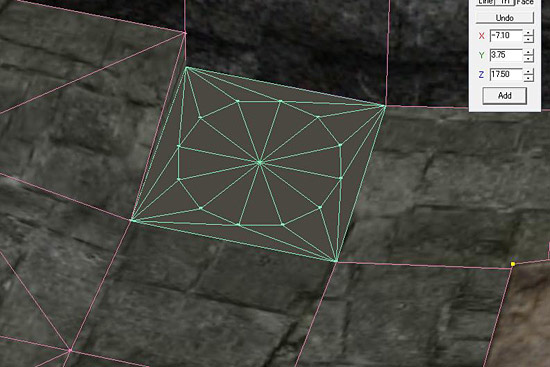
First split the frame and the circle into two layers. Hide the circle and make sure the frame is selected. Like before go to UV, scroll down to the desired texture then go to Selected & Set material to faces, then click Atlas. You should see something like the picture below. The problem here is that the frame is covering the whole 256x256 panel and I want to use the bottom right texture only. I will use the Select, Move and Scale tools to make the UV map fit where it is supposed to.
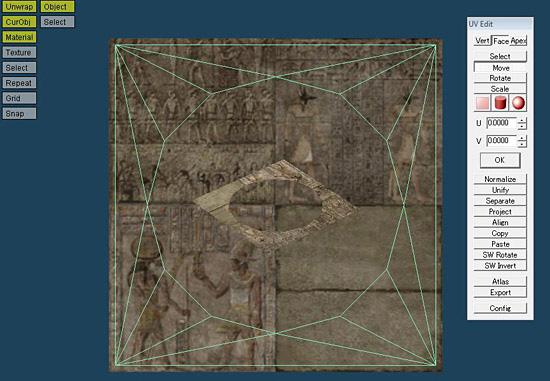
Turn on the Grid and Snap buttons. Click on select in the UV edit panel and whilst holding down shift click on each of the surfaces segments. When you have them all selected switch to Move and drag the bottom right corner of the green outline to the bottom right corner of the texture. If you have done it right the whole outline will move with it.
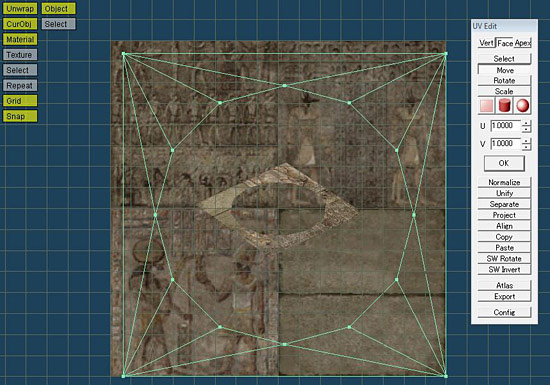
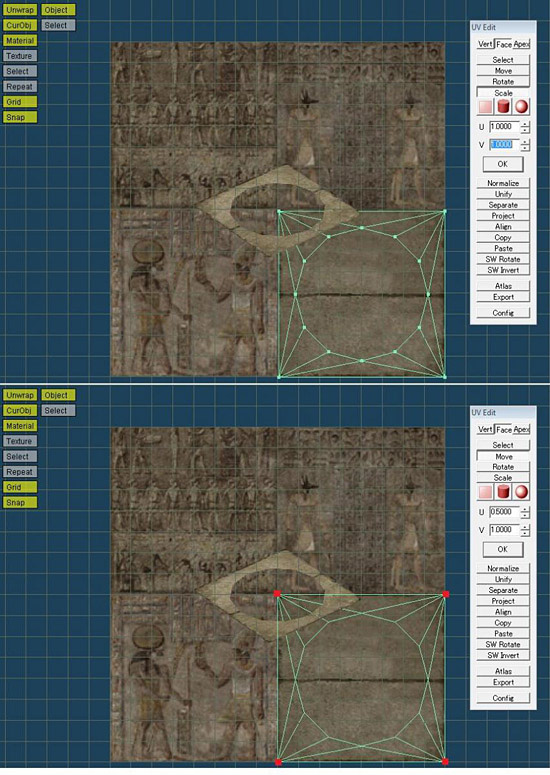
Now select Scale and using the same corner point scale the frame down to the approximate size of the bottom right tile. As long as it's almost right you can then go back to Move , click anywhere outside the frame to deselect it and then drag the four corners of the frame to the exact corners of the texture. (marked in red are the corners I have moved).
That's the frame done, now go to the circle layer and make sure that that's selected, once again go to UV and scroll down the texture tiles till you find the one you want to use. In my case I am going to use the purple circle texture seen below. Once again go to Selected & Set material to faces + Atlas to get a circle pattern mapped onto the full 256x256 panel.
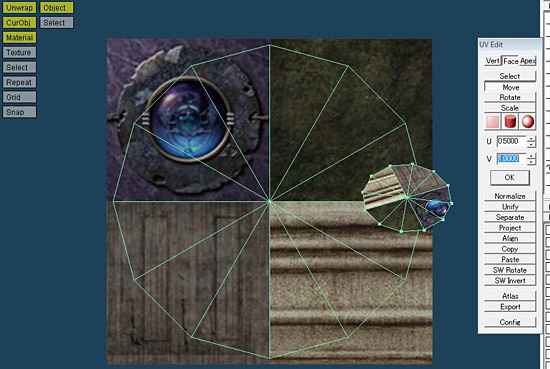
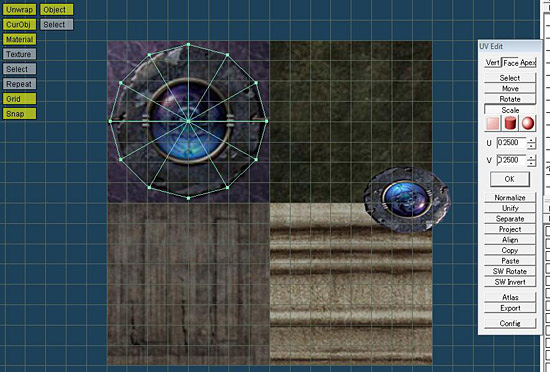
Again use Select to select each of the 12 segments but this time select the central point and drag it to the center of the purple circle.
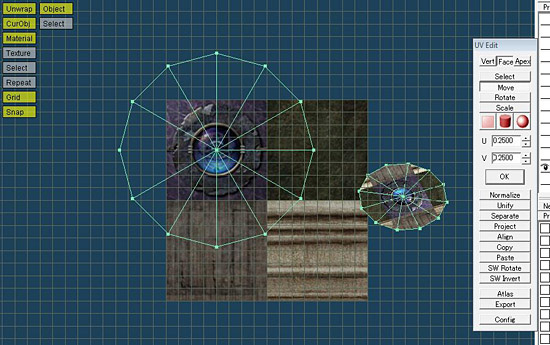
Now just as before use the Scale tool and pull the circle until it sits within the purple circle texture. It doesn't have to be as precise as with the frame, as long as its within the lines of the texture tile.
Exit UV, recombine the frame and circle by dragging them into the same layer and using Object / join closed vertices make them connect to each other.
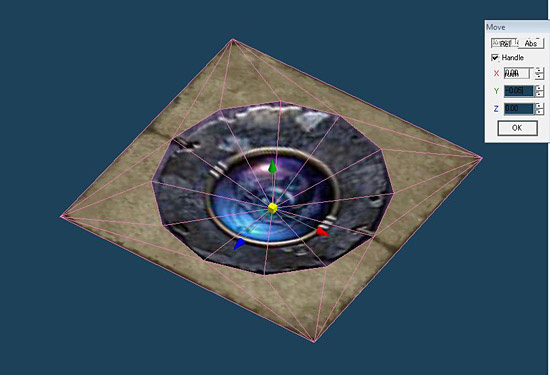
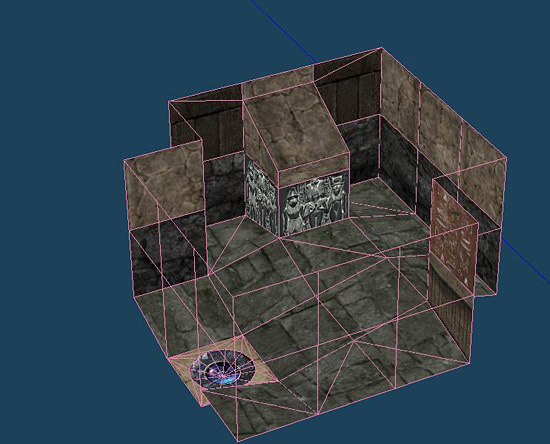
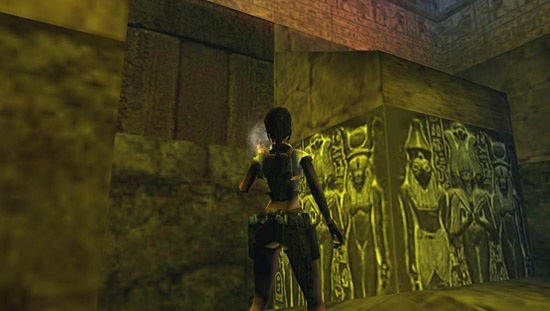
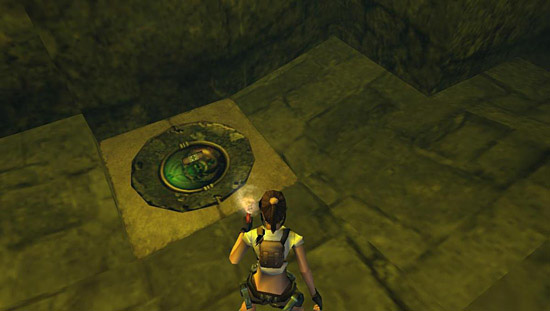
That's the basics. You can mess around with it now, below I have lowered the centre of the circle using the Move tool to turn it into a bowl, but the options are limitless.
__________________________________________________
Using project to UV map a broken wall
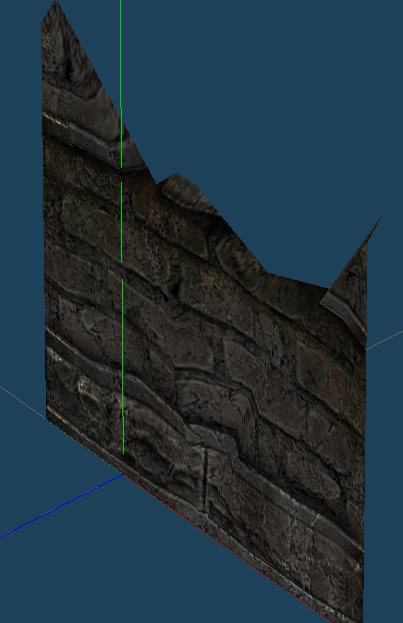
Here I have created an isolated fragment of wall, 2x2 blocks and flat,
perhaps to serve as a perimeter wall for a level. Note how I made a
narrow rim at the top to give the wall a 3-d look later and how the7
points selected (in blue) are at just the right locations to connect
with the surrounding geometry later.
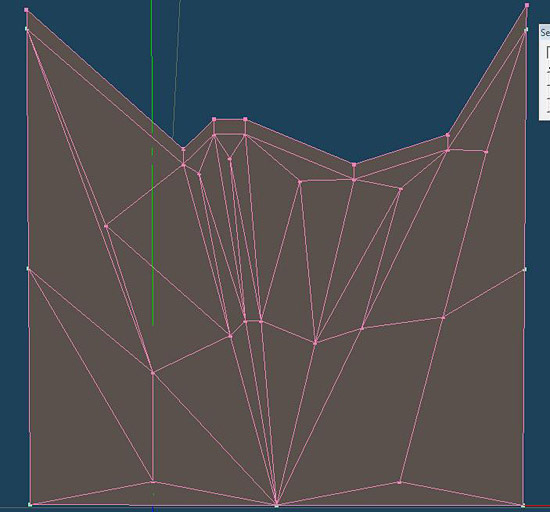
I want to map a 256x256 wall texture onto my object now, so I have selected the whole object, found an appropriate texture tile and as before gone to Selected / set material to faces. This time however instead of using Atlas I have moved the object so it sits in front of the texture tile (but doesn't overlap the textures edges, also don't ever leave any guidelines in your project, this causes errors).
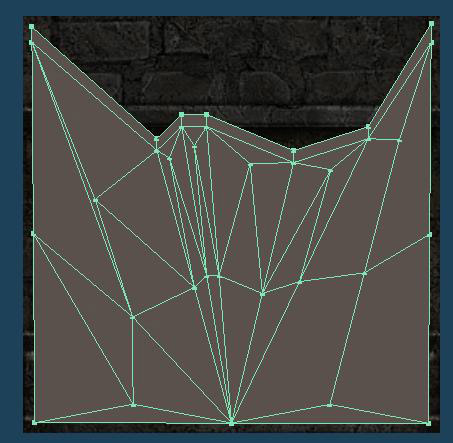
Next I mapped the texture onto the object by simply pressing Project in the UV edit panel.
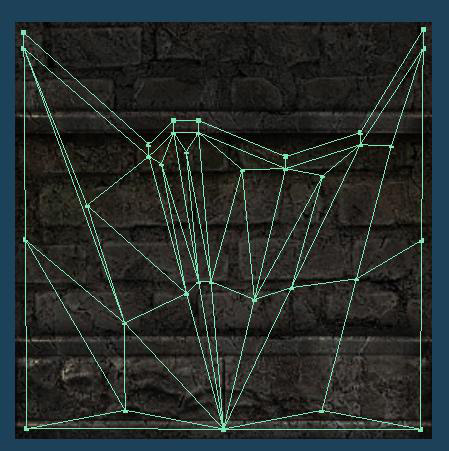
Then, just because I wanted to tile the same texture on either side of the object I dragged the 7 points I highlighted earlier to the appropriate parts on the grid.
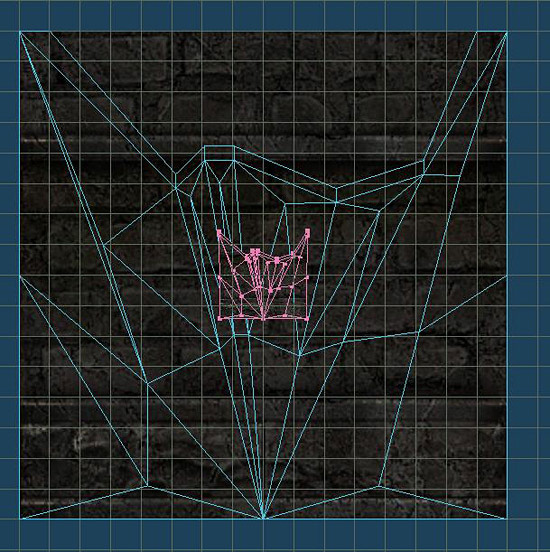
That's all the UV mapping done for now. Next I went back to the main workspace and selected the top points of the rim as shown.
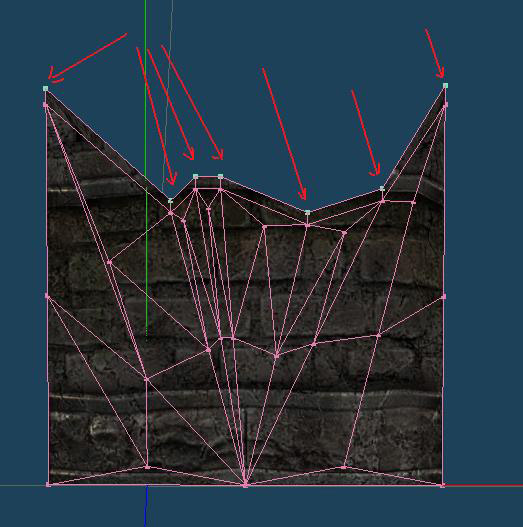
Then by clicking on move / Rel and changing the Z to -0.08 I bend the points backwards, thereby giving depth to a flat surface.
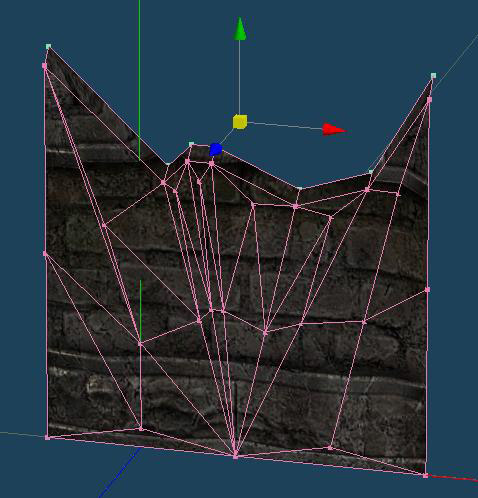
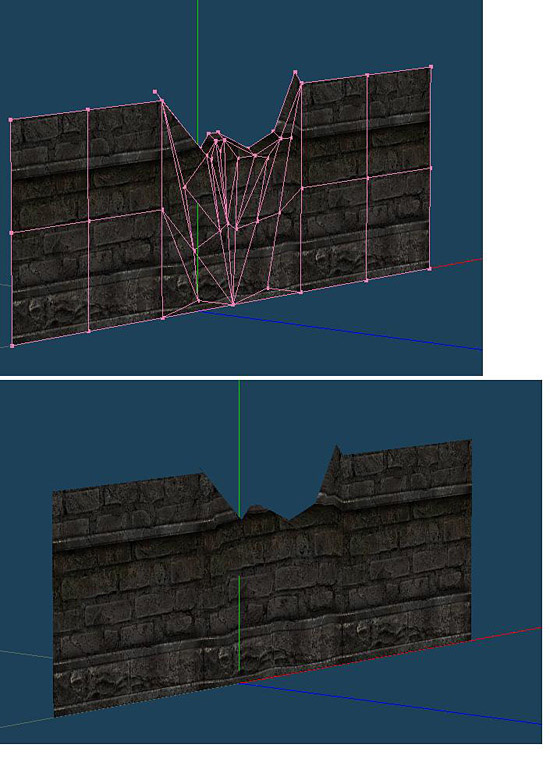
Using the move tool I moved some other points slightly in and out on the Z axis to make the wall a bit bumpy, now I have my piece of wall finished and ready to fit into a piece of room geometry.
I slotted my object between 2 blocks of 2x2 wall panels mapped with the same texture. As you can see they fit together quite nicely!
_________________________________________________
Magenta transparency
The way the editor works, textures that show up with magenta
transparency in game are mapped slightly differently. Below I want to
make a simple scarab decal. I have UV mapped a square panel. However if
I were to leave it like this, the magenta would be visible in game.
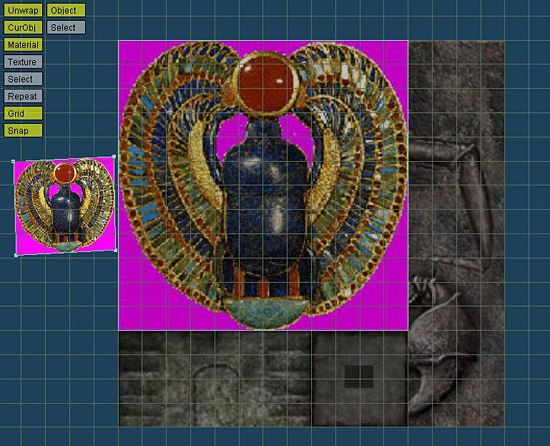
To change this click on Repeat and zoom out, you will see the texture repeated on all sides. By dragging the square onto the repeated texture panels you can give it different properties. See screenshot. For proper transparency I need to drag the scarab map one tile up by using the Select and Move tools again like before.
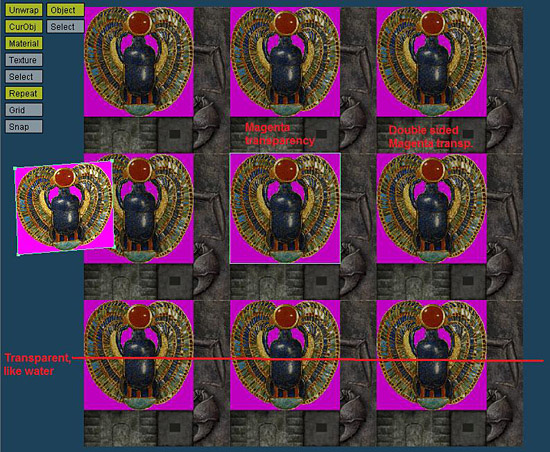
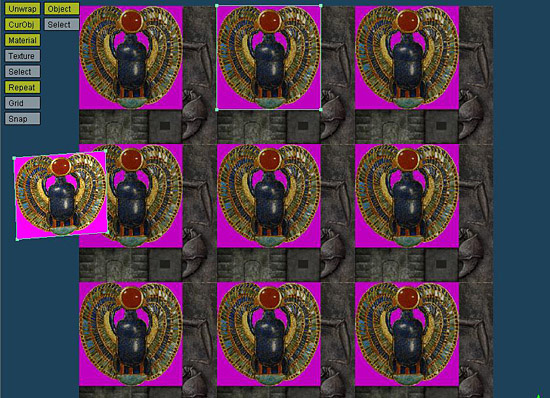
It should work now. Remember not to go outside the lines of the texture
panels.
__________________________________________________
Some handy tips
The mirror tool is your friend, especially when you're looking to create
a surface opposite to one you have already done like the one I did in
this tutorial. Anything you select can be mirrored on any axis by
selecting the surface, then going to Selected / Mirror. Since rooms are
often quite far from the central axis you may have the zoom way out to
find the mirrored surface. It can then be easily moved into place by
using the move tool.
Copy and paste is always your friend. For instance, make an object, copy
it a number of times and then made subtle changes to each object. This
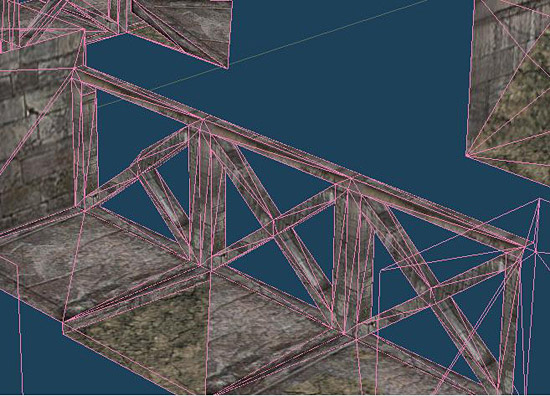
makes for a neat way to bring some variety to your level. Note the
broken railing in the picture before.
Being aware of the surrounding geometry whilst building can save you a
lot of time, all lines should connect for the best lighting.
__________________________________________________
Some advantages to using meta2tr to UV map
UV mapping allows for texturing onto shapes that the roomeditor skews or
distorts (as above)
One texture can cover multiple surfaces and look almost seamless. This
also doesn't seem to use up any extra texinfos in your level.
Finished areas can be copied, pasted and moved as many times as you
want, as long as they end up in the correct room layer.
You can use the levels main textures for objects in moveall as well to
create objects whilst cutting down on the amount of textures being used
in your wad.
You can create whole objects built into the room geometry which allows
for much better lighting as long as they follow the rules of crack mode.
You can use the MapMergeList.txt for this too but beware objects are
often the wrong size and can have imprecise coordinates especially when
rotated so they may not easily join vertices with the room layer. At
this point I prefer creating objects like I created the wall in this
tutorial; in RoomAll.mqo side by side with the actual room object. Do
remember that meta2tr does not change collision, so an invisible static
often needs to be made to provide collision.
Surfaces can be split into as many parts as you want, for instance a
single rock texture can be split into 8 with its surface bend in places
to give it a 3dimensional look. If bending a square surface always use
Selected / Triangulate selected faces. Otherwise parts of your wall may
blink out of existence. It can allow a wall to be split as many times as
needed unlike the editor which has limitations like say only two
horizontal splits above a door portal.