Adding a Custom Mesh to your WAD
by
Bedazzled
Imagine you have created a custom object in Meta; now
you need to know how to get it textured and added into your level's wad.
This tutorial will show you how, and also how to get it into a
specific slot.
You will need WADMerger and StrPix. The dxf file
of your object and the textures you want to use should be the correct
sizes required by the object and in 16 bit bmp format.
This is
the object I'll be using for this tutorial. It's a column from my first
level, and has 4 texture tiles. It will be placed into the Architecture
2 slot.
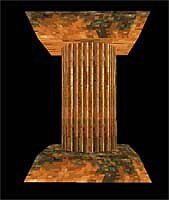
Open WADMerger and load in a wad which contains an
unwanted object in the slot you intend to use; in this case I used the
angkor wad.
Ensure that the object in the slot you intend using
has only one mesh.
Make sure the smartcopy feature of WADMerger
is switched off as shown below - the lightbulb should NOT be depressed.
Switching off smartcopy means the object you copy will remain in its
original slot instead of being moved into the plant 0 slot.
Copy
the unwanted object into a new blank wad. Now we need to add the
textures.
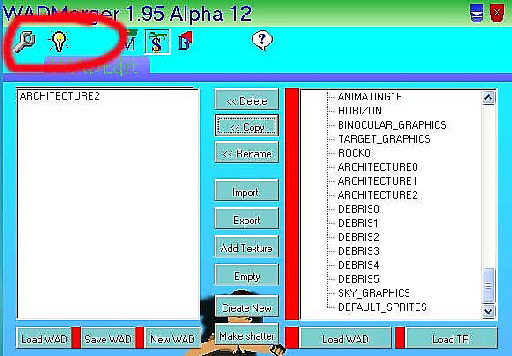
Click on the add texture button and a new window opens:
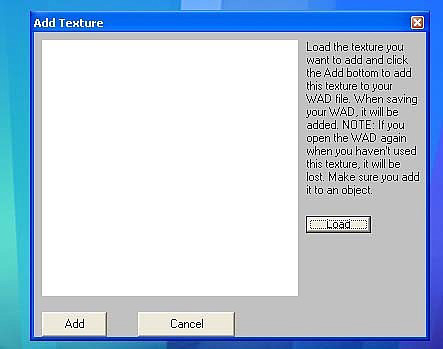
Click the load button, browse to your texture file
then press the add button. Repeat this process for each of the required
textures.
When you're finished adding textures save the wad.
We now have a wad containing an unwanted object and the textures we
want on our custom object.
Open StrPix and load in the wad you
just saved.
You should see the unwanted object, and also see the
textures for your custom object in the texture panel.
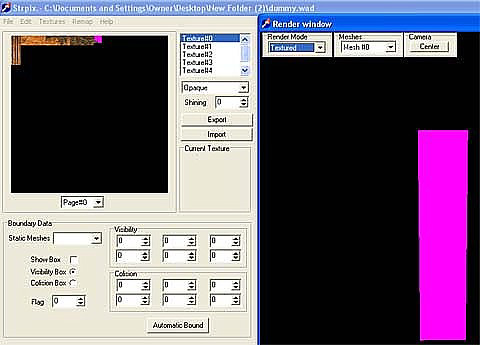
Click on file on the top toolbar and from the drop
down menu select Import Dxf.
Browse for your custom objects dxf
file and open it. The import Dxf options box will open.
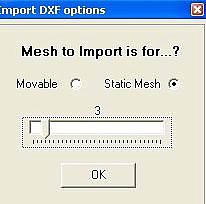
If your object will be in a static slot as in this
example, click the static mesh radio button & move the slider to a value
of 3 or 4 and click the ok button.
Adjusting the slider will
alter the brightness of the object in game. A setting of 3 or 4 is about
right for most objects.
Note the slider is only used with static
meshes.
Your custom object will now appear in the render window.
Texture it and save the wad.
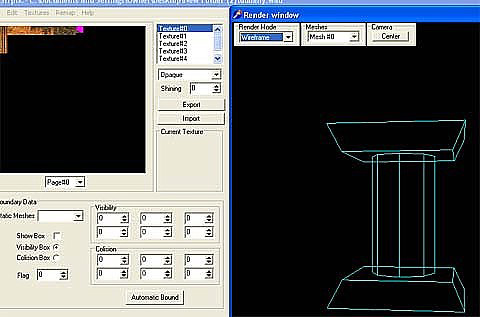
Now use WADMerger to add your new custom object to your levels wad.