Mirror Rooms
by
QRS
In this tutorial I will try to show how to
make a room with a mirror which shows Laras reflection in it. The first
step is not hard but the reflection part can be very frustrating to do
right. At least for a beginner. And yes, I'm talking of my own
experience about making a fully working mirror. The only experience you
really need following this tutorial is a few days of trial and error
with the editor. You also need some basic knowledge of the script files.
I will try and explain everything I can in detail but the basic stuff
like how to make a room, making doors, saving the project etc I will
leave out. Same goes for the basic script tasks. Why so? Well there are
tons of tutorials for that and don't forget the official manual! Also, a
mirror room is not the first room you should try and do! If you are
reading this and have yet to build a single rooms using the TRLE I
strongly suggest that you wait with this until you have some experience
of building a few basic rooms!
Note
1: There are a few things you have to
worry about before making this mirror project. Scroll down to the end
and read for further info and credits for the people who discovered
them.
Note 2:
In my example I use a room in which I already have a few rooms built.
Just ignore these rooms (to the right of the mirror project in 2d view)
as they have nothing to do with this example.
Note 3: I'm from
Sweden and I use a Swedish OS. Hence the strange words in the explorer
and calculator pics. I'm pretty sure that you can navigate using these
pictures anyway, as the menus are on the same spots in most of the
languages.
The Mirror
As I said earlier, this is the easy part. At least if you have some
experience in working with the TRLE. In this example I will show the
easiest way of making the mirror rooms. I can already hear you say
Did he say rooms? Is it more than one
room? I'm afraid it is. To make the mirror
you have to trick the editor into fooling yourself in seeing one room
with a mirror. Sounds complicated? Nope its not! The whole idea is the
make two rooms and put transparent textures between the rooms. The
problem is the reflection but more of that later.
Step 1
First
of all you need to make a room. In my example I have built a room of 7x8
squares. (Feel free to make it any size you want.) The height of the
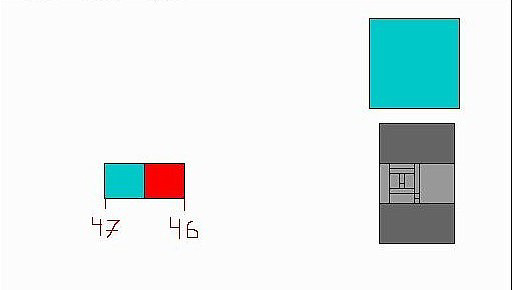
room is 12 clicks. The room number in my example is 46. ( I will refer
to this room as 46 from now on). Your first task is to texture the rooms
walls, ceiling and floor. It is not important right now to make anything
special. Just make sure that there are no black holes when you run the
game later on.

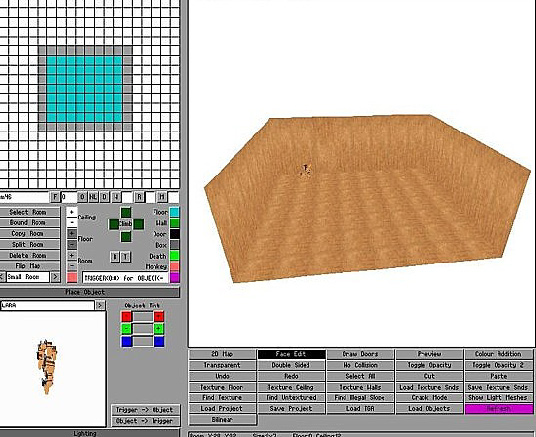
Step 2
Use
your right mouse button and highlight all squares in your room and click
on the copy
button. You should now have an exact copy of room 46. In my case the new
room is called 47.
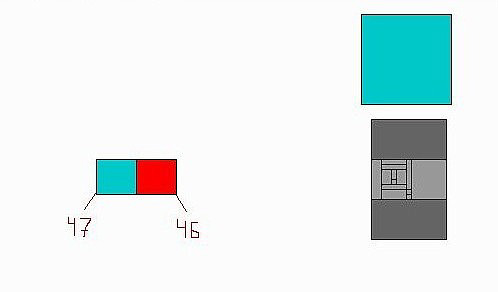
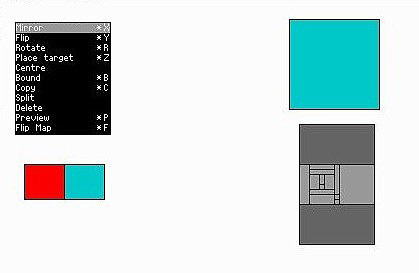
Step 3
Highlight room 47 and choose mirror
from the room dropdown menu.
Room 47 is now a perfect mirror of room 46!
Step 4
You
now have to make a door between the rooms. Make sure that you put room
47 to the left of room 46.
Highlight room 46, switch to 3d view and make a door on the whole left side to room 47.

Step 5
Now
you need to make the doors between the rooms transparent. Make sure that
Face edit is
on and you are in room 46. Highlight the door to room 47 and click on
toggle opacity
so the door will be highlighted red.
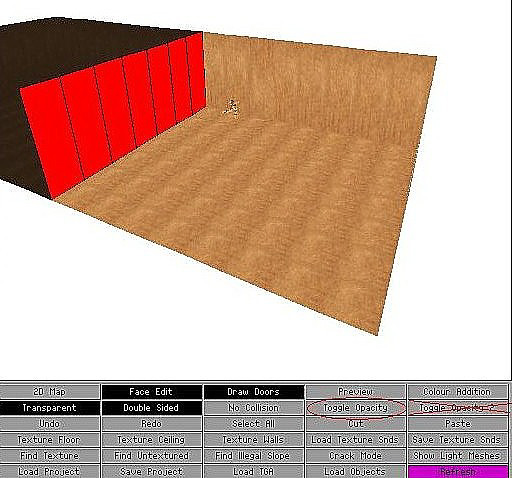
Now click on the transparent and double sided buttons and choose a good texture for the mirror. I suggest something simple for now as the perfect texture can wait until you are done with this tutorial. (Note that I darkened both the rooms so the transparent texture between the doors should look better for the tutorial. You can do that later on if you wish.)

Repeat step 5 starting from room 47 and apply
the same textures from that side.
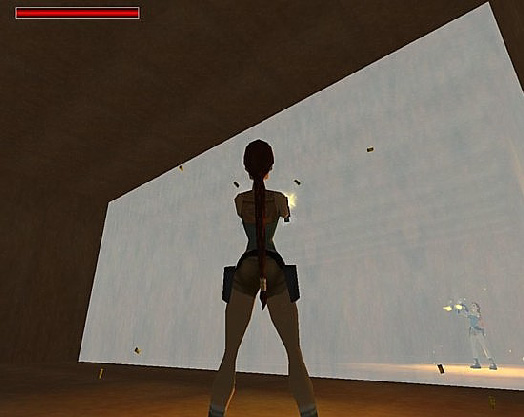
We are done!! At least with the
mirror. For making this look better and the transparent textures more
mirror like, you need to make the room darker. Feel free to experiment
with the lightning before proceeding to the next step. This is how it
looks when you start the game:
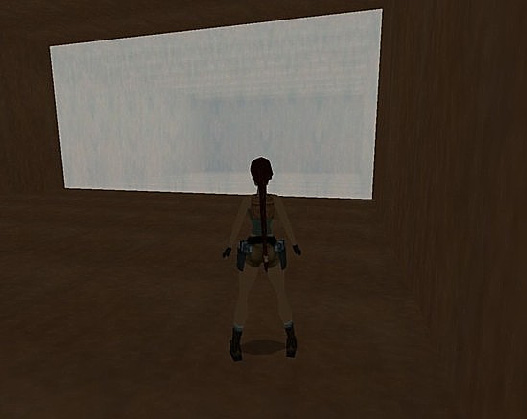
If you are in a hurry and will experiment with
the lighting effects later, you will see that Lara is still not present
in the mirror and that takes us to...
The reflection
This part is tricky so make sure that you follow these instructions
exactly before going on further on your own. Also, don't forget to read
the notes at the end of this tutorial first!! I will try to make sure
that you don't fall into any pits but it's up to you to backup your
scripts!! Ok don't be afraid. It is not as dangerous as it sounds. I
just want you to be careful ok?
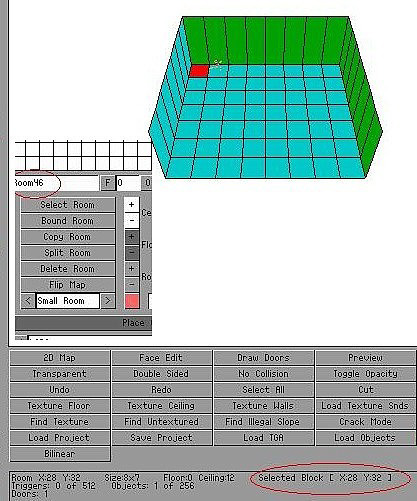
Step 1
Go to
room 46 and click on the upper left square. Check the coordinates for
that square in the info page under all the buttons. In my example it
shows Selected block [ X:28 Y:32]
Write down the coordinate for X on a piece of paper or if you have a
good memory just remember it. Also write down or remember the room
number (46)
Step 2
Now
its time to leave the editor. You can save your project now if you wish.
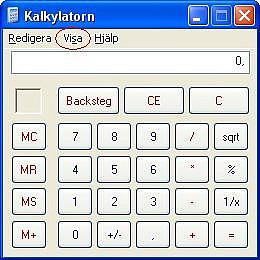
Use the built in calculator in windows and turn it into advanced mode by
clicking on advanced
from the view
dropdown menu (visa in my example).
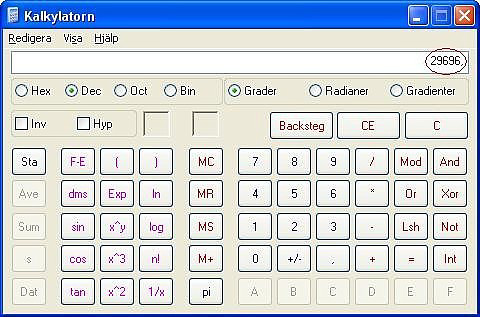
We now have to calculate a formula using the X coordinate. You did write it down right? The formula is: X+1*1024. In my example that makes 28+1*1024 = 29696.
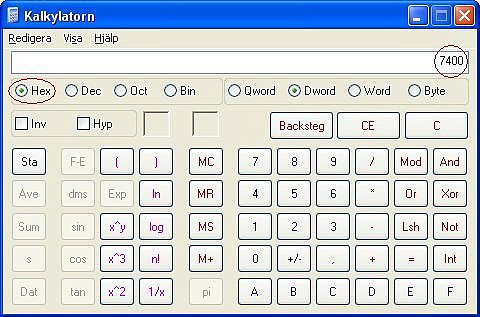
Check the hex button and see how it turns into something else. In my case 7400 but don't be surprised to see letters combined with the numbers. You now have the hexadecimal numbers of the formula and unlike the decimal 0-9 numbers we now have 0-9 + A-F to worry about. If you are not interested in that and want to keep making the reflection work just write down the outcome you get in hex!
Step 3
Important! If you are
using the new TRNG game engine to build your mirrors rooms, you will
require different script entries to get them to work. In addition to the
usual mirror rooms, you can now have mirrored floors and ceilings. You
will find the new scripts in the TRNG Mirror Room section below.
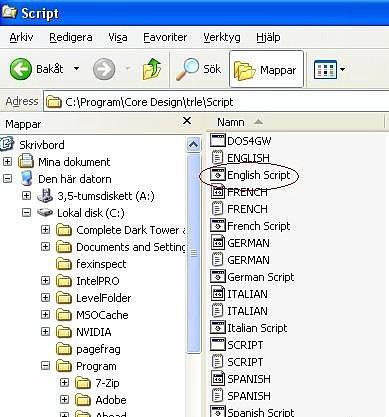
As I said earlier, I will not go into detail of how to find your
script file etc. (I have provided a picture from my example though!)
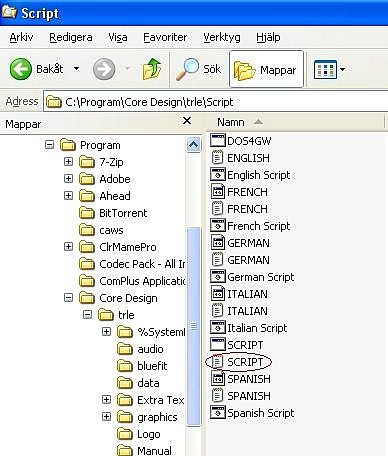
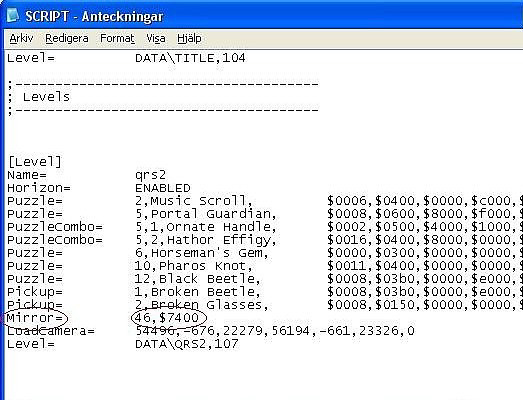
Open the
script.txt file in any text editor and
look after your level in the text. Put this text in a separate line in
your script for your level:
Mirror= 46,$7400.
46 is the
room number and the value is the hex numbers you wrote down earlier.
Step 4
Save
the script file back to itself and double click on the
English. bat file.
After a brief dos view of a dos window, leave with a grin on your face, cause you have completed the mission! If you did not save your project earlier in the TRLE of course. Now you only need to run the tr2pc program and start your level. Viola! Lara's reflection is finally in the mirror. This is how it looks:
Now you will need to set better lighting,
shadows, objects, better textures etc. to really get the right feeling
but I leave that to you.
Notes and
credits:
There are a few things you
should be aware of before making this project, otherwise the reflection
will not work. There might still be other factors that I'm not aware of.
I will update this tutorial as soon as I find out.
1. Make sure
that the mirror room is to the left of the normal room. (Credits to Oxy
for that info.)
2. You can't have any empty room slots with lower
numbers than the mirror room. In my example not any empty room slots
under 45. (Credits to Essgee for that info.)
ALWAYS make a copy
of your script files. Why not the whole script folder just to be sure?
Don't forget to run the English.bat
file after changing the script. It can save you from a few frustrating
hours of things not working.
A huge thanks too Oxy and Essgee for
the information and help in understanding how to make a mirror with
reflection. A special THANK YOU! To George M for helping me put together
all this info into a tutorial with pics and text. Also for hosting the
tutorial!
Good luck in making a mirror project and feel free to
use, copy and spread this tutorial as much as you like.
TRNG Mirror Rooms
In addition to having the usual mirror rooms, you can now have mirrored floors and ceilings. However, to get your mirror rooms to work in the new game engine new scripts are required.
Download project file to illustrate this tutorial - 15 Kb Zip
MirrorEffect= replaces the old Mirror= command.
MirrorEffect=
Syntax:
MirrorEffect= InFrontRoom, HiddenRoom, MirrorType (MIR_)
In
reality the old Mirror script command still works but you can't use the
new mirror type with the old Mirror command.
InFrontRoom
The room number in front of the mirror. This is the real room which
Lara will be able to enter and move around in.
HiddenRoom
The room number placed behind the mirror,
which Lara can't enter.
MirrorType
Specify a MIR_
value to set the mirror type. You can see the list of MIR_ values in the
reference panel of the NG Center program. Currently you can use
following values:
MIR_WEST_WALL
West wall is the setting
used for the old mirror. The west is the position of mirror from Lara's
position looking at the room in the NGLE.
MIR_FLOOR
The
mirror will be over the floor of InFront room.
MIR_CEILING
Mirror on the ceiling of InFront room. Note that if you wish use a
ceiling mirror it's advisable to use a very low ceiling otherwise Lara
won't be able to see her own reflection in the ceiling.
MIR_INVERSE_WEST
Inverse west is a horizontal mirror on the west side of InFront room, like the MIR_WEST_WALL. however, in inverse mirror Lara and other objects will be inverted, as in the original Tomb Raider game when Lara met an alien double.
Animating array
From this field you can set one (zero) or more indices of animatings present in InFrontRoom.
Using this array the engine will replace all your animatings in the correct position and orientation in the hidden room to simulate their mirror image in accordance with the mirror type.
Note that you have to place a couple of animatings: main animating you place in the desired position in InFront room, while the clone of this animating is place in the hidden room. It's not necessary to place the clone animating in the correct position but it's useful to place it in the same line (vertically or horizontally, in accordance with the mirror type) to permit to engine to find the right clone for each main animating.
If you are using a vertical mirror, place the main animating in InFront room where you desire and with the desired orientation. Then place another animating of the same type in the hidden room. In this situation it's important that you take care to place the clone animating in the same vertical line (i.e. same sector in 2d visual) as the main animating.
For horizontal mirror (like MIR_WEST_WALL) you have to place the clone animating in the same sector row where the main animating is. See the help file in the NGLE for more information about the correct position for clone animatings.
Notes
Theoretically you can also type the indices of other moveables in the Animating array; in this instance the moveable will be dynamically updated. To work with moveables like enemies you'll have to place them in the hidden room while the triggers to enable them will be in the InFront room where the triggers for enemies in front of room are also located.
You can find the room numbers to type in InFrontRoom and HiddenRoom field in the room list of the NGLE. Remember to always choose the smaller number when the numbers in brackets are different. For example, if you read this text for your hidden (or InFrontRoom):
Mirror Hall (34:30)
The real
room number is "30" and you must type this value in MirrorEffect
command.