Mist Ball Effects
by
Bedazzled
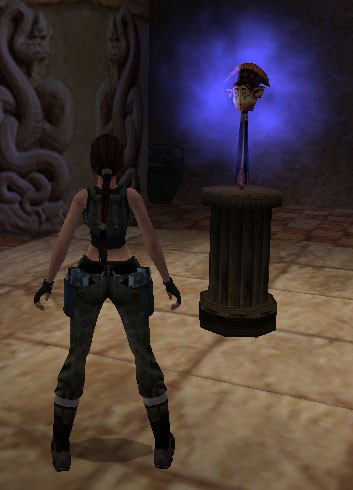
This is a short tutorial to show how the glowing mist ball surrounding the rotating pickup in my "Return to the Catacombs" level was achieved. I won't go into details with the Addeffect command as all parameters are explained in the reference section of the NG Centre. This screenshot shows the effect.

Note:
- The effect can only be applied to items placed in a movable slot, this is because at the present time static objects cannot be selected in the various trigger windows.
- The mist ball will appear to originate from the centre of the movable objects mesh or to be more specific the meshes point of origin.
- The size of the ball is determined by the parameter with the value of 12 in script of this example, the value of 12 is the default value.
- All script parameters must be assigned a value.
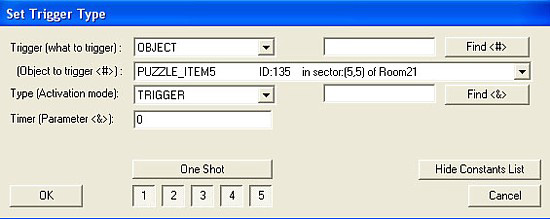
In order for the mist ball to work the object it surrounds must be triggered as in this case of a pickup puzzle_item 5. This trigger should be placed before Lara gets to the mist ball room making sure she can't miss it.

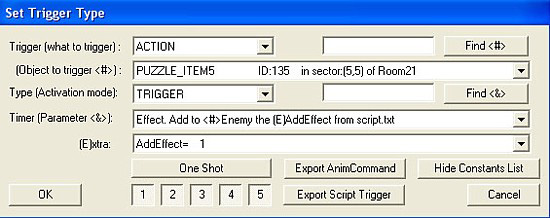
This action trigger activated before Lara reached the
mist ball room was then used to produce the actual mist ball, along with
this entry in the level section of the script.
AddEffect=
1,ADD_MIST,FADD_ROTATE_180+FADD_CONTINUE_EMIT,JOINT_SINGLE_MESH,
0,0,0,0,0,12,1,MIST_COL_BLUE,6

Known causes of a level crash at run time:
- The final parameter after the MIST_COL_XXX parameter being assigned a value of zero.
- A value of IGNORE entered in place of a FADD parameter.
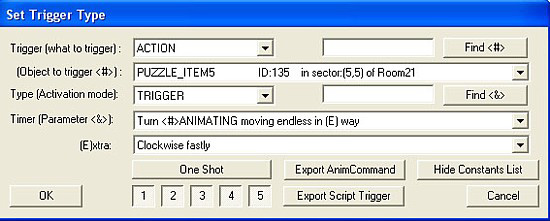
In order to have the pickup rotating this action trigger was used, once again the trigger was placed before Lara reached the room.

The Parameter of 12 can be altered to produce different size mist balls. In The Museum, parameters of 24 and 36 were used.
This effect applied to pushables will remove the pushable properties from the object because you can't trigger a pushable object. So this effect cannot be used on pushables.
This effect works on the Guide so it may well work on other animating objects such as enemies.
Different colours can be achieved by changing MIST_COL_BLUE to MIST_COL_GREEN or MIST_COL_RED for example. See the MIST_COL constants for more information.