Lara Croft Returns 1-16.
Author: Boris Samojlenko Homepage
Download: Russian Install...... English Install...... Hungarian Install
Level 1-16 Savegames By Harry Laudie
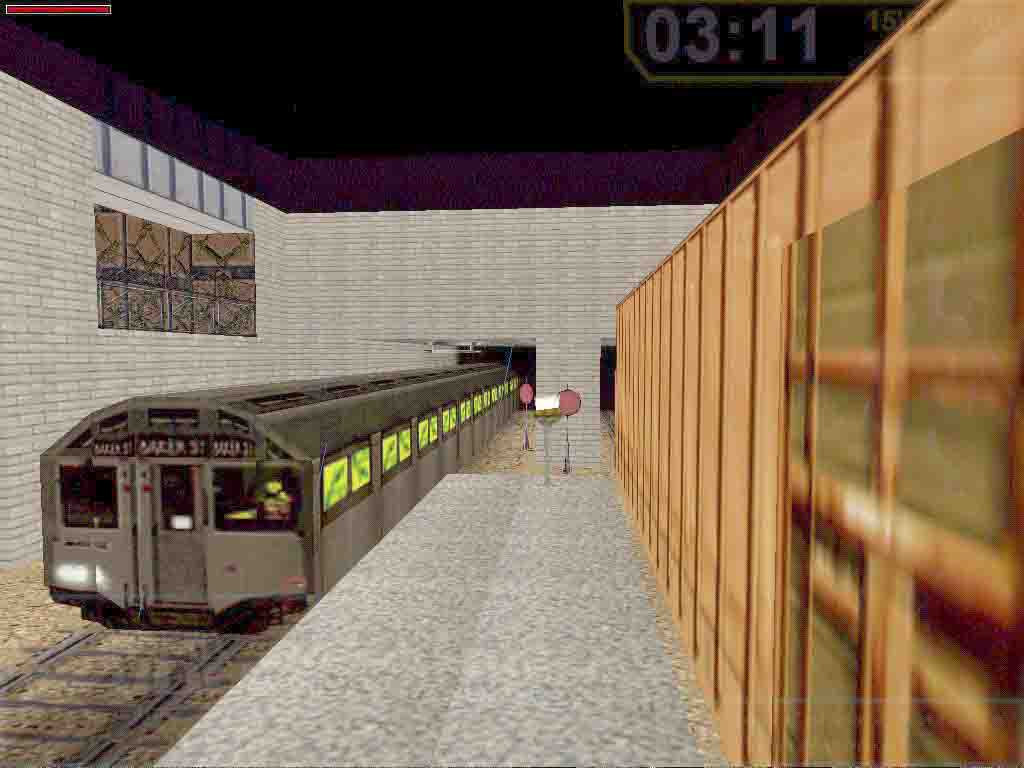
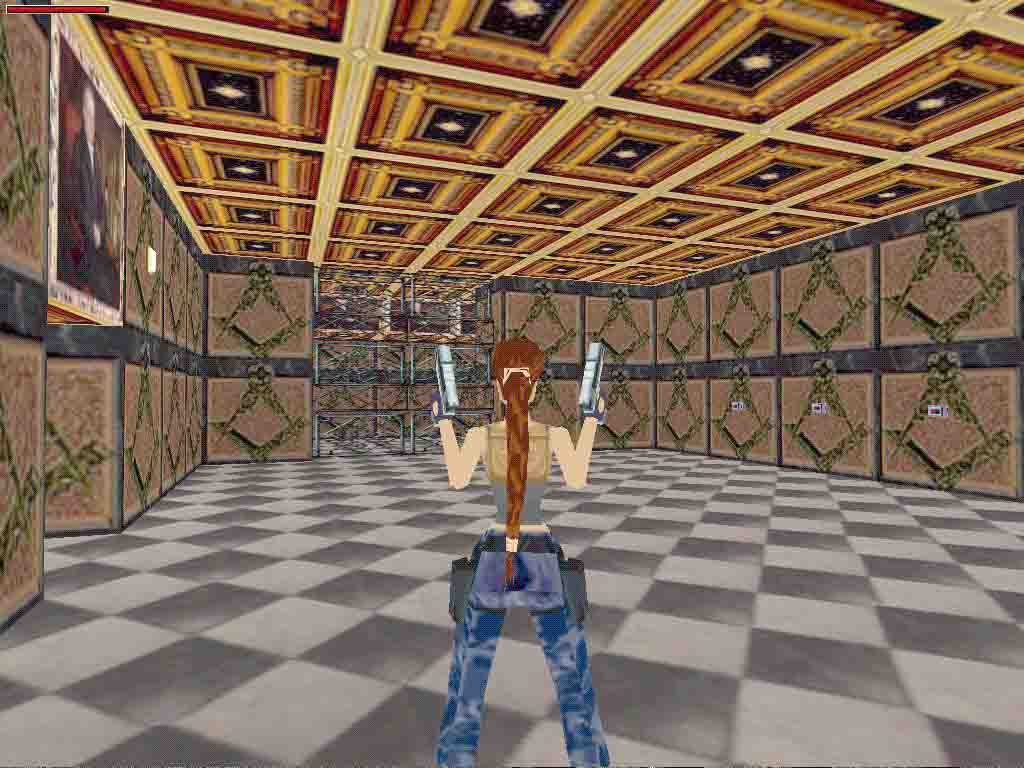
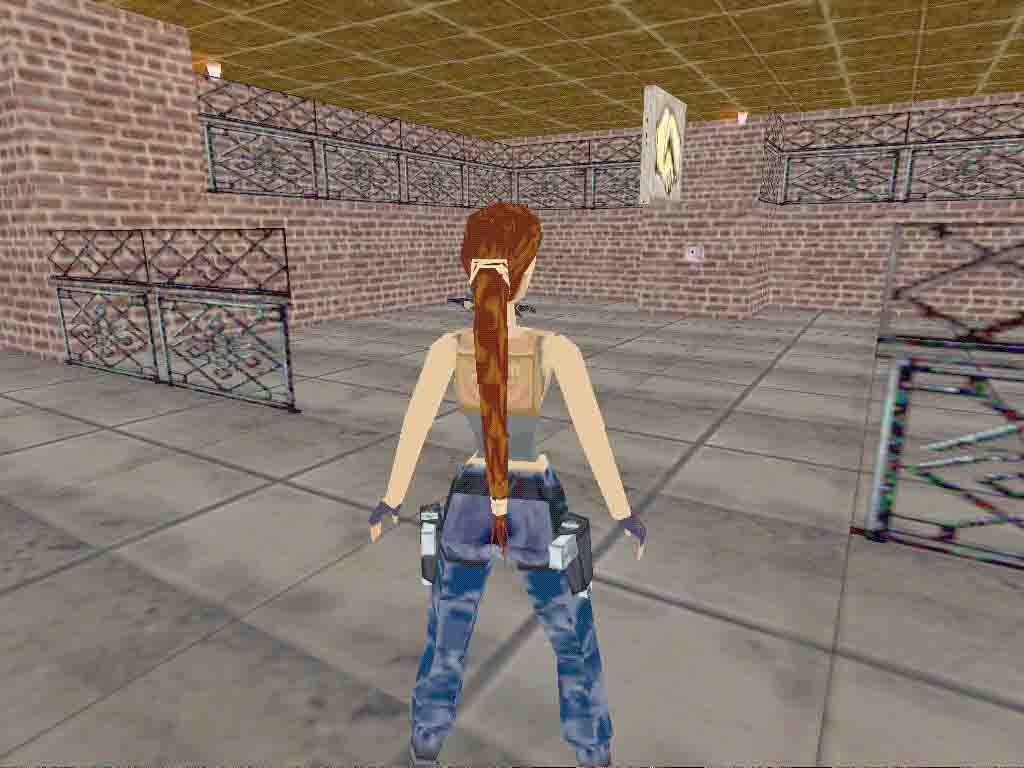
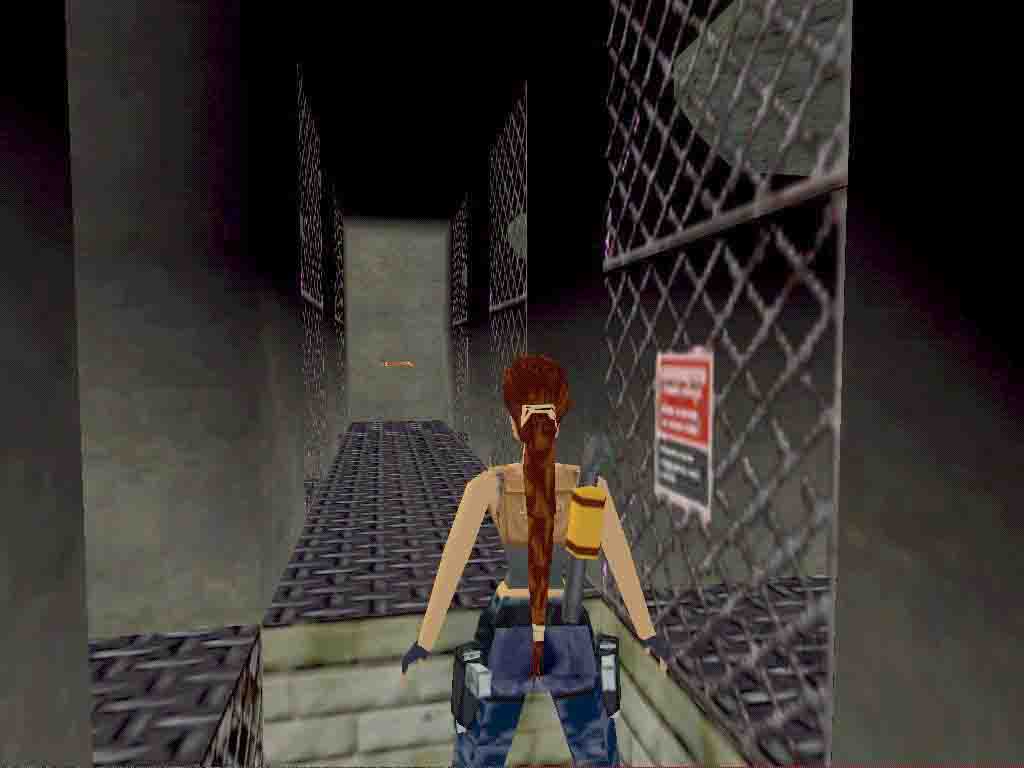
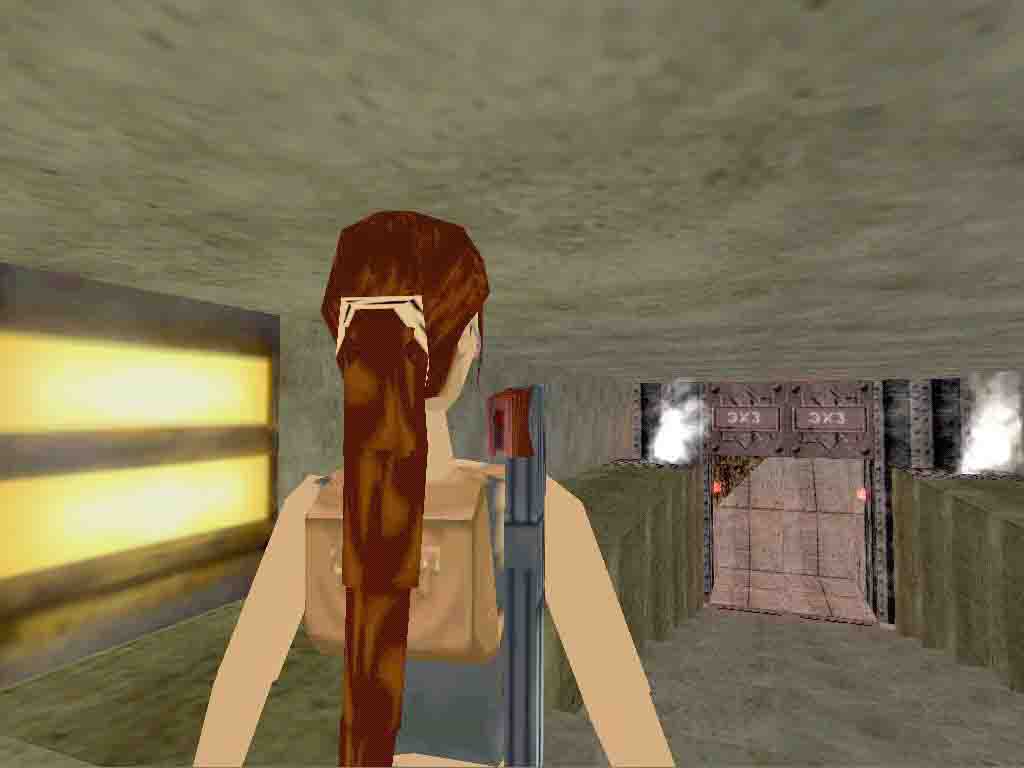
1. The Railway Station:

 Secret 1-3:

WALKTHROUGH BY ICEBERG
A
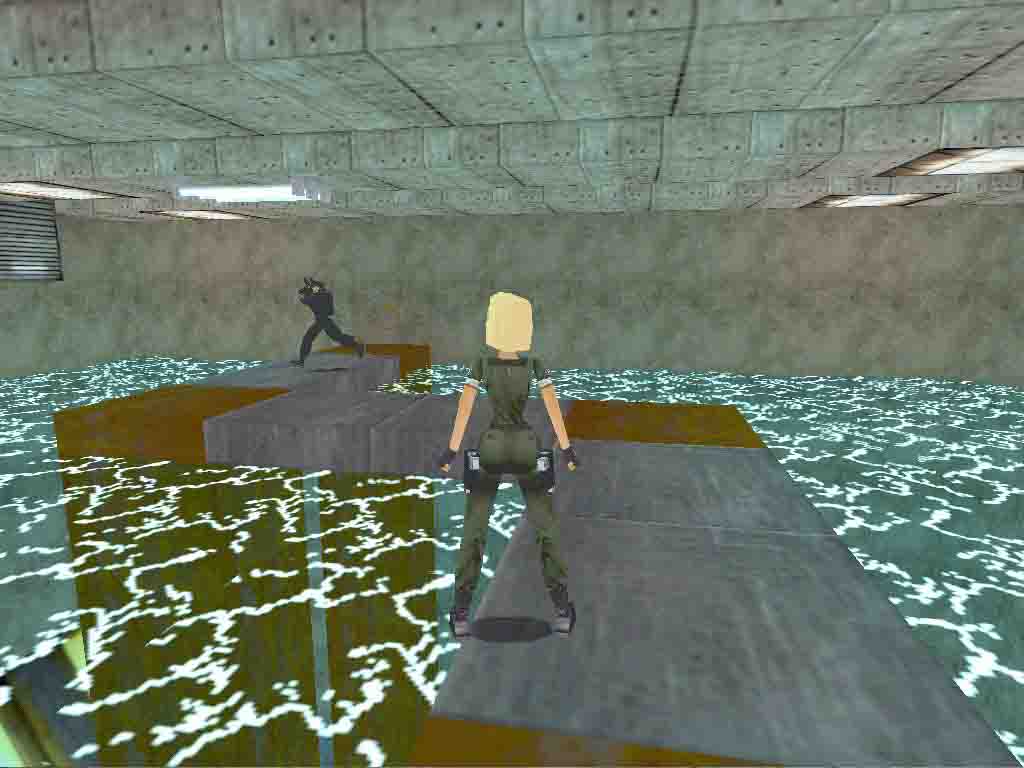
train passes by as an opening for the game. The action develops on a Railway
Station. Let's locate ourselves: There is a Central Building in front of which
there are 4 lanes.
Lane#1 is the one closest to the Central Building, that's the one used by
the train we just saw passing by.
Lane#2 is the next one, where three wagons are parked (orange, gray and rusty).
That's the lane near which Lara starts the game.
Lane#3 is the next one.
Lane#4 is the one far away from the Central Building.
To the right side of the Central Building (or: behind Lara), there are tunnels,
one for each lane.
Tunnel#1 is empty.
Tunnel#2 is closed.
Tunnel#3 has a train parked in there.
Tunnel#4 has a train parked in there.
To the left side of the Central Building (or: ahead of Lara), lanes #1 and
#2 end up in the "Chancer Lane - Safe Deposit" and lanes #3 and
#4 carry on into the far darkness of the night. With the exception of Lane#2,
the one with the orange wagon, all the lanes have trains parked on that side
of the Station. The trains are deadly, all of them. Lara will be electrocuted
if she touches them. The three wagons in Lane#2 are ok. Lara can climb them,
move underneath, jump in between. There are items to be picked up in the tunnels,
but some are hidden behind the trains. Until they move away Lara cannot pick
them up.
Because there are trains parked in the tunnels and Lara cannot get the goodies,
we will wait until they move away to explore them. So let's start with the
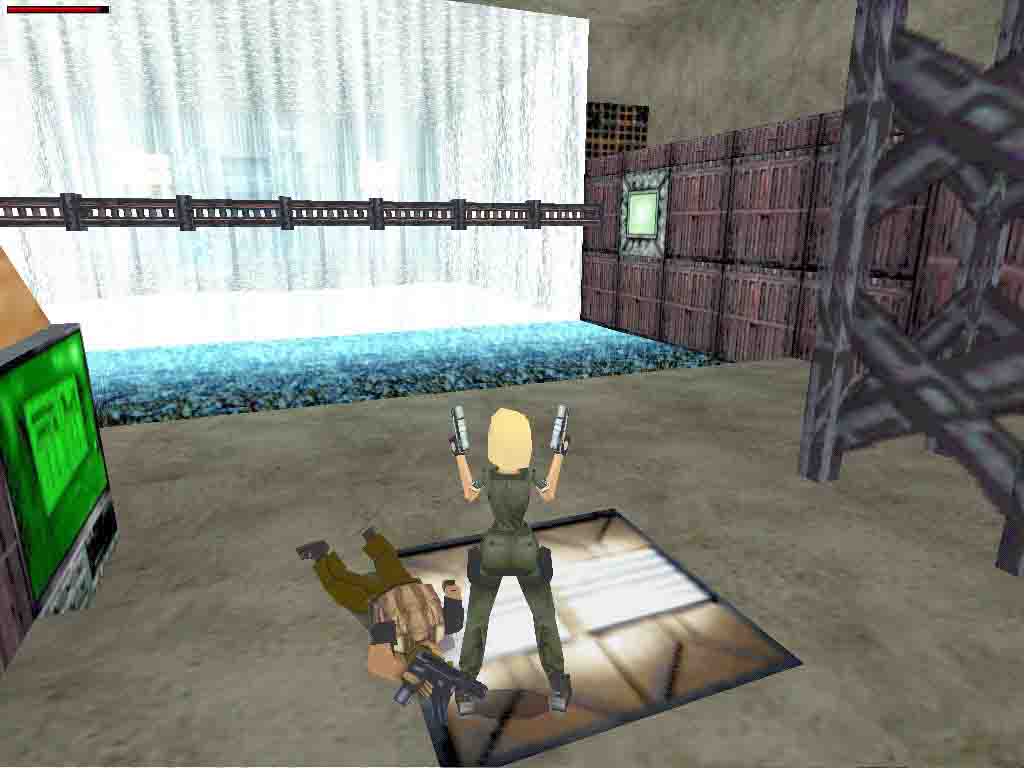
three wagons right ahead of Lara. Climb on the orange wagon, jump in, grab some harpoons (1) and Uzi ammunition (2).
Also, deeper into that wagon, there are shotgun shells (3) which also are Secret#1. Jump, hang and climb up. Once back on top of the orange wagon,
jump to the next and the next, on top of which there are some more harpoons.
Jump down to the floor, to the side where Lane#3 is. Go to the gray wagon
and look under. There is a Desert
Eagle (4) down there. Grab it, back out on Lane#3 side, turn around and look
for the small
Medi pack(5) lying on the ground by the rails of Lane#3. Hmmm... dangerous place
to make a pickup. Trains will move on Lanes #3 and #4 as Lara crosses the
area, so watch it and look for a safe place and let them pass by! The space
between the lanes is a good place to stop. Then go for the medipack, but watch
it again! More trains on the move! As a result of these train movements, Tunnel#3
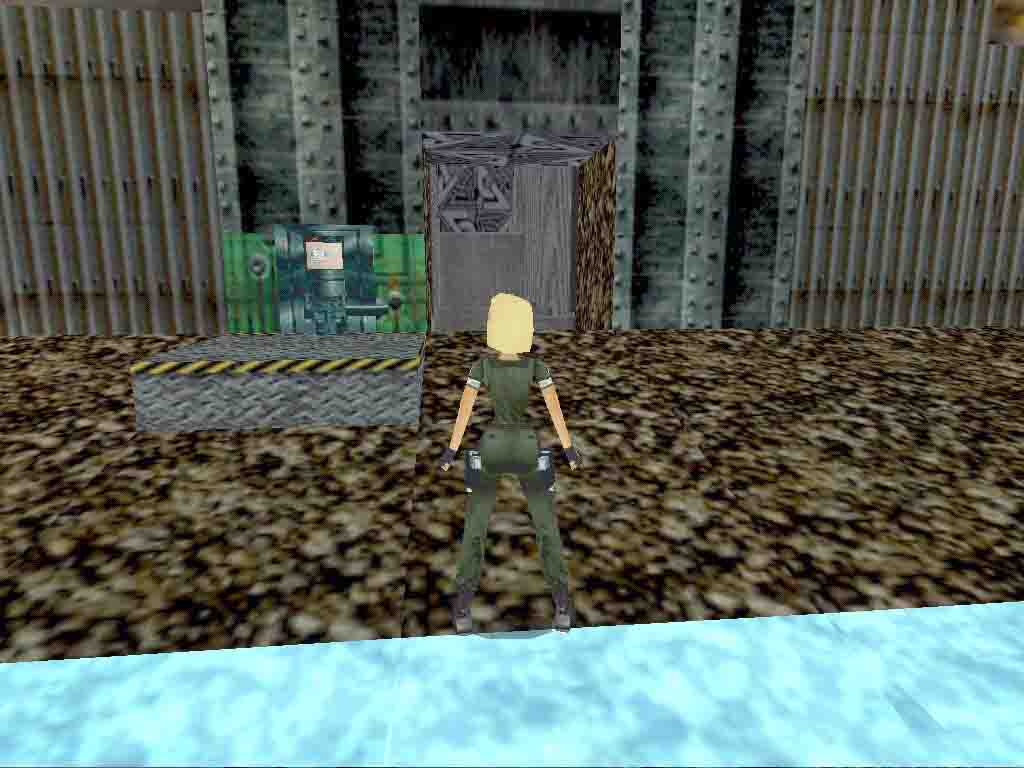
is now empty, so let's have a look in the tunnels. No point in going in Tunnel#4,
there is nothing in there to pick up. Let's go into Tunnel#3 and get some
shotgun
shells (6). Then Tunnel#2 for some flares (7). Then Tunnel#1 for a small Medi pack (8).
From there we will see some rockets (9) on the floor, on that side of Tunnel#2. Let's
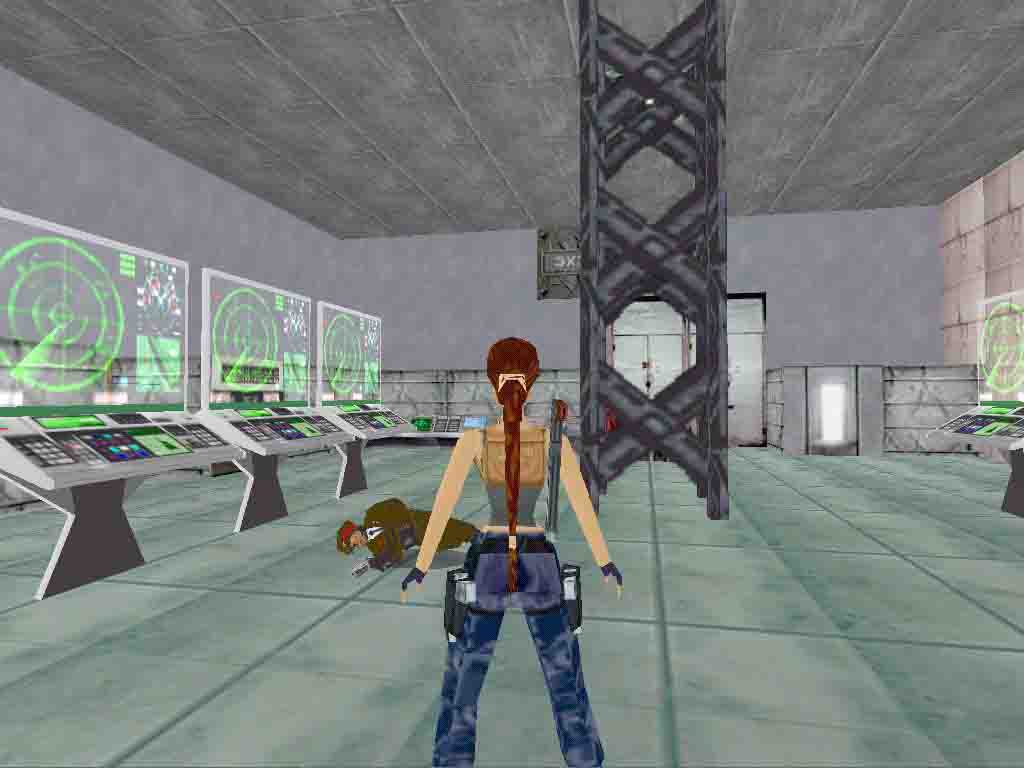
have them. Looking into Tunnel#2 from this side, we see a couple of rats,
and, in the distance, a switch on the wall. Go for the switch, it will open
a door somewhere in the Central Building. What about the rats? Well, what
about them? Why not carry on and let them try to follow you? Could be fun
to watch them, poor things! Head for the Central Deposit. There are some goodies
there to pick up. But Lane#1 has a train parked in there. To trigger it, let's
move towards the Central Building until we listen to the noise of the train
passing by. This will also trigger a raven. Let's go into the Deposit area
and find some Desert Eagle ammo (10)
and Uzi ammo (11) in Lane#1, where the train was. Making a turn back through Lane#2
a small
Medi pack (12) will be found. Move under the wagon to pass to Lane#3. The raven
and the rats will be following Lara. The raven may be a nuisance, it makes
too much noise, but the rats will just be running with their short legs. Not
much of a bother. Lane#3 has a small Medi pack (13), Lane#4 has nothing. By now the raven may be stuck in Lane#3, lost.
So leave him there. The rats would still be following Lara. So, there was
a door opening somewhere in the Central Building when that button was pushed,
a while ago. Ok, let's go for it. When entering the building, a not so friendly
guard (1)
and his dog (2)
will "hey!" you. Well, he started it! You know what to do! While
you're at it, you may as well handle the rats
(3). The door we are looking for is inside, on the right side. In there,
another trigger-happy guard (4) is waiting Lara. Handle that, get the ammunition (14) he drops. Find the moving block (right in front
of the door), pull it out and set it aside. The opening leads to a new room.
Down to the tunnel, kill a rat (5).
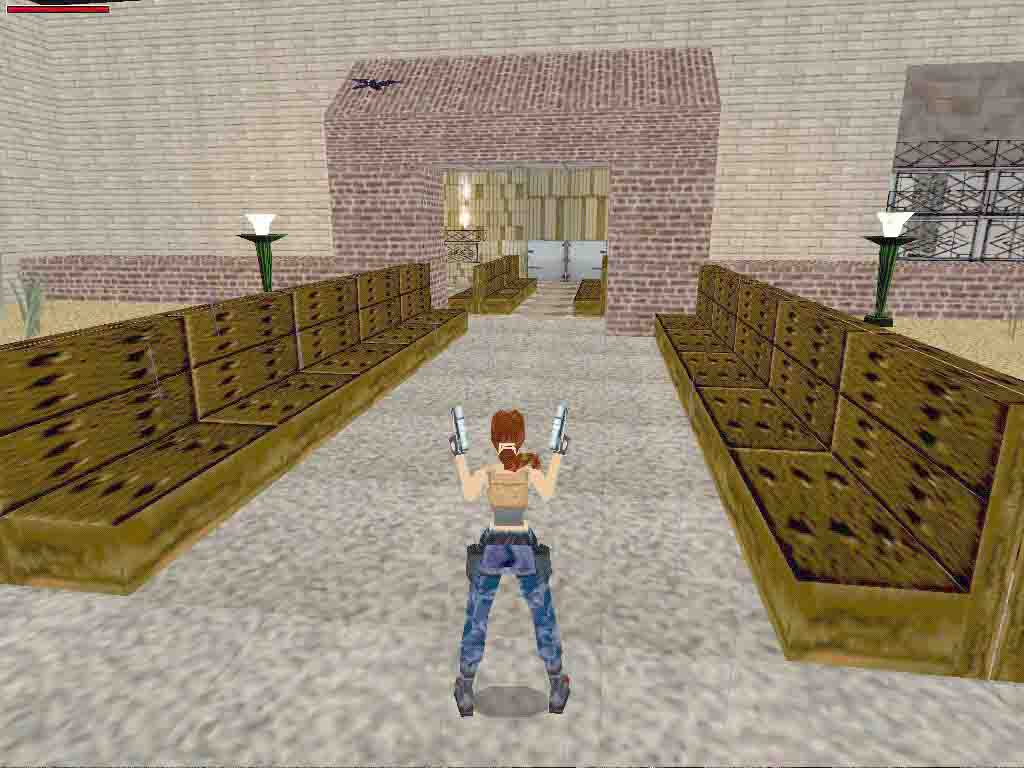
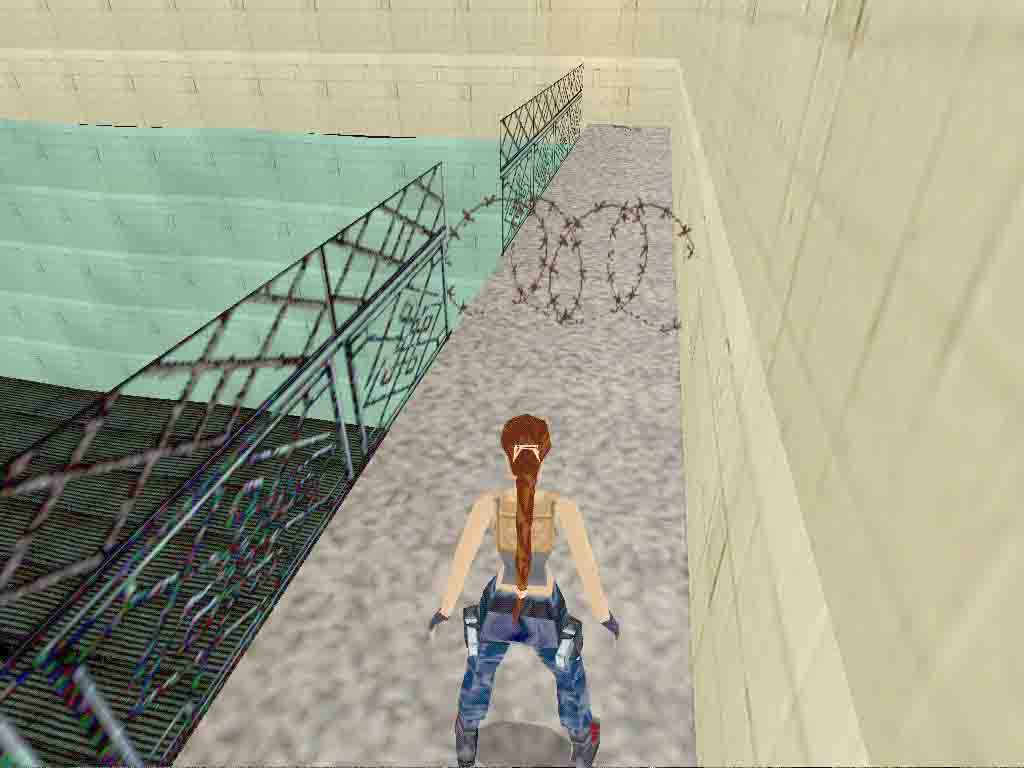
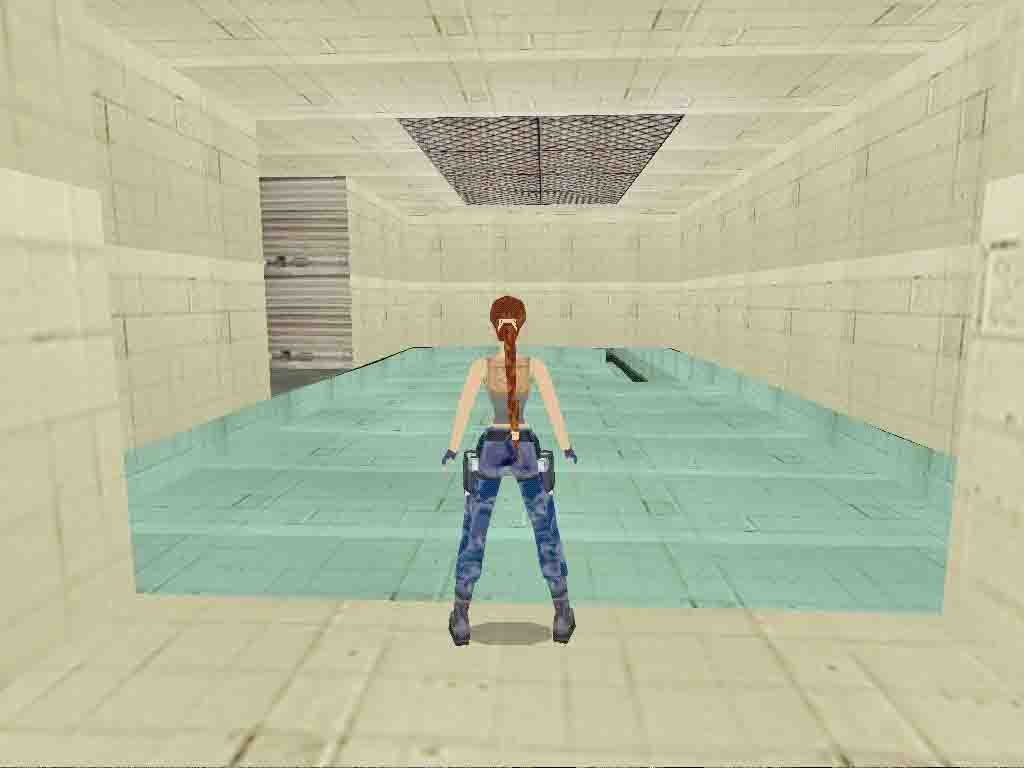
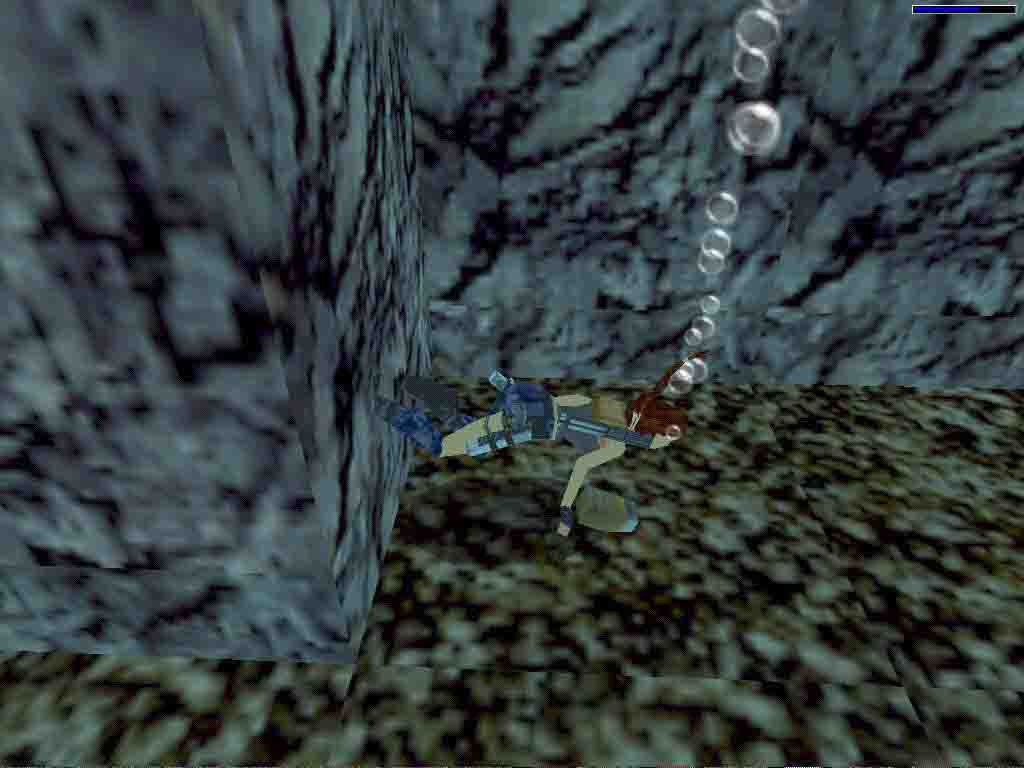
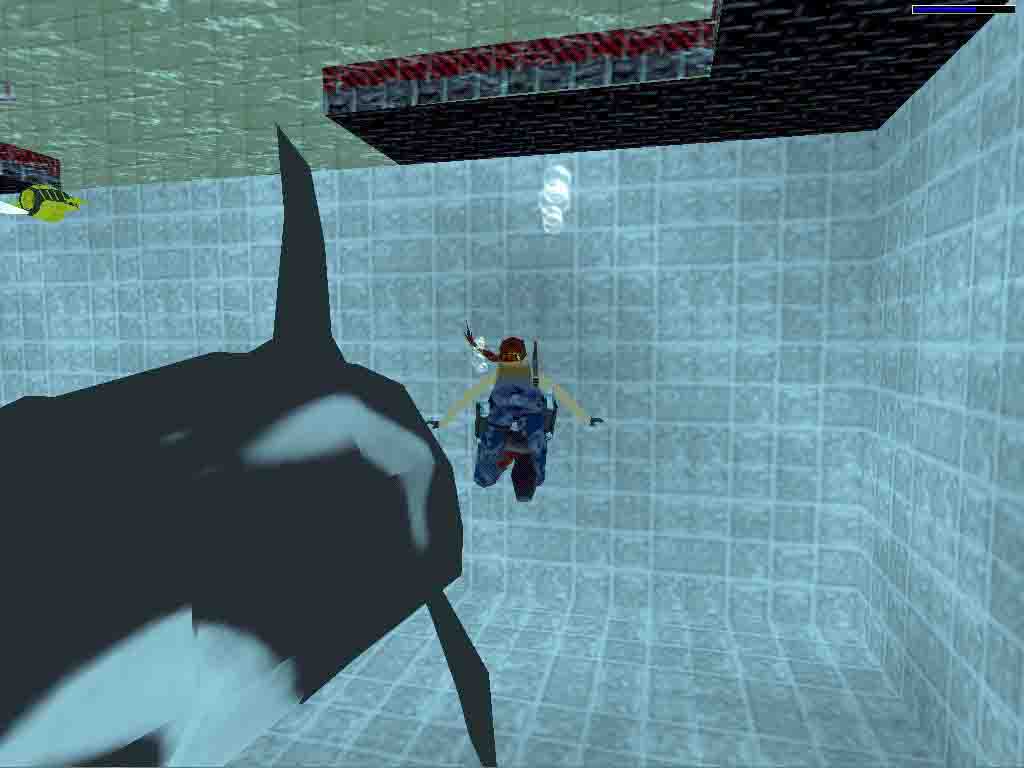
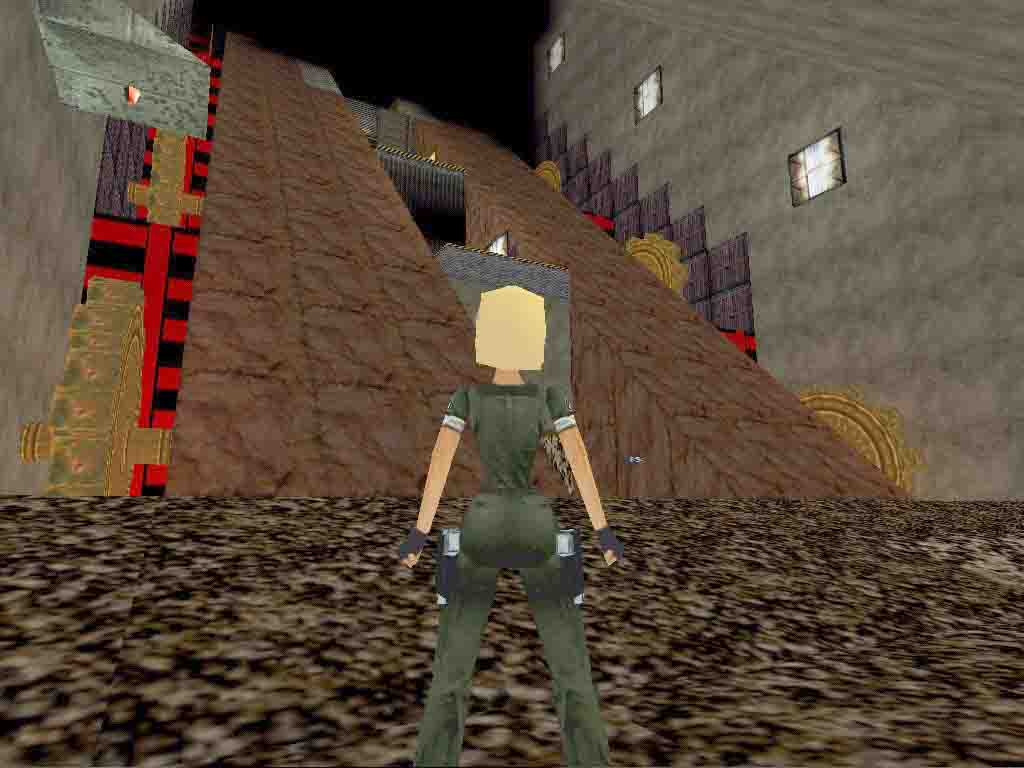
Lara reaches a huge room, with a huge flooded tank. There are two frogman (6,7) in the water. In the end of the platform, past (jumping over) the
barbwire, we find the harpoon gun (15). While running towards the barbwire, a fly-by camera will show the
tank, the propellers, we will hear a train moving. This fly-by camera will
distract you - beware of the barbwire! Define your strategy to handle the
frogman. Guns from above or harpoons in the water, that's your choice. Once
in the tank, stay away from the propellers while they are rotating fast. To
make them rotate slowly, find the underwater lever and pull it. Lara can now
swim across and find a large
Medi pack (16) and - important! - the Sledge Hammer (17).
Before leaving the tank, locate an underwater door and some more harpoons (18). Quit the tank. Quit the area through the tunnel. Back on the street,
more gun fighting is waiting Lara. Looking around, outside, there is a metal
door with a padlock. Time to use the Sledge Hammer on the padlock. ((( Now,
this could be better. For the Tomb Raider engine to recognize a puzzle like
this one, the piece on the wall must be in the CENTER of the tile, not shifted
to one side, as it is. Lara needs to be aligned with the center of the tile,
which she is not if she aligns herself with the padlock. The padlock should
really not be where it is. It should be a little bit more to the left))) To
solve this puzzle, the player must IGNORE THE PADLOCK and align Lara with
the CENTRE OF THE TILE, instead! Probably many players were already stuck
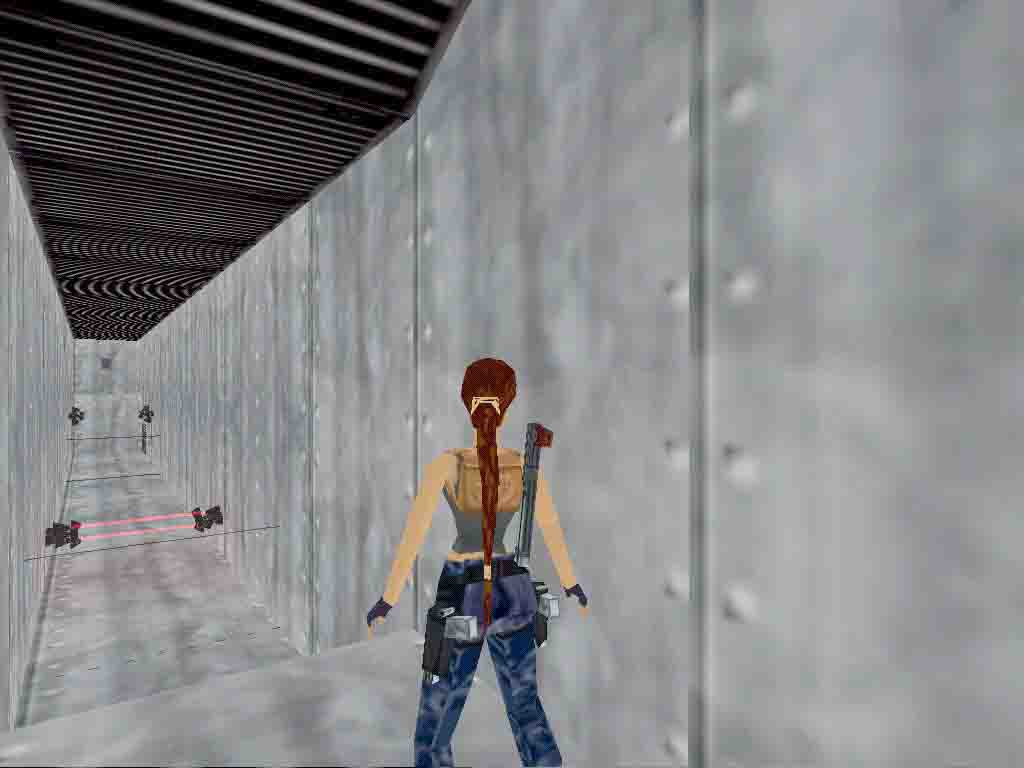
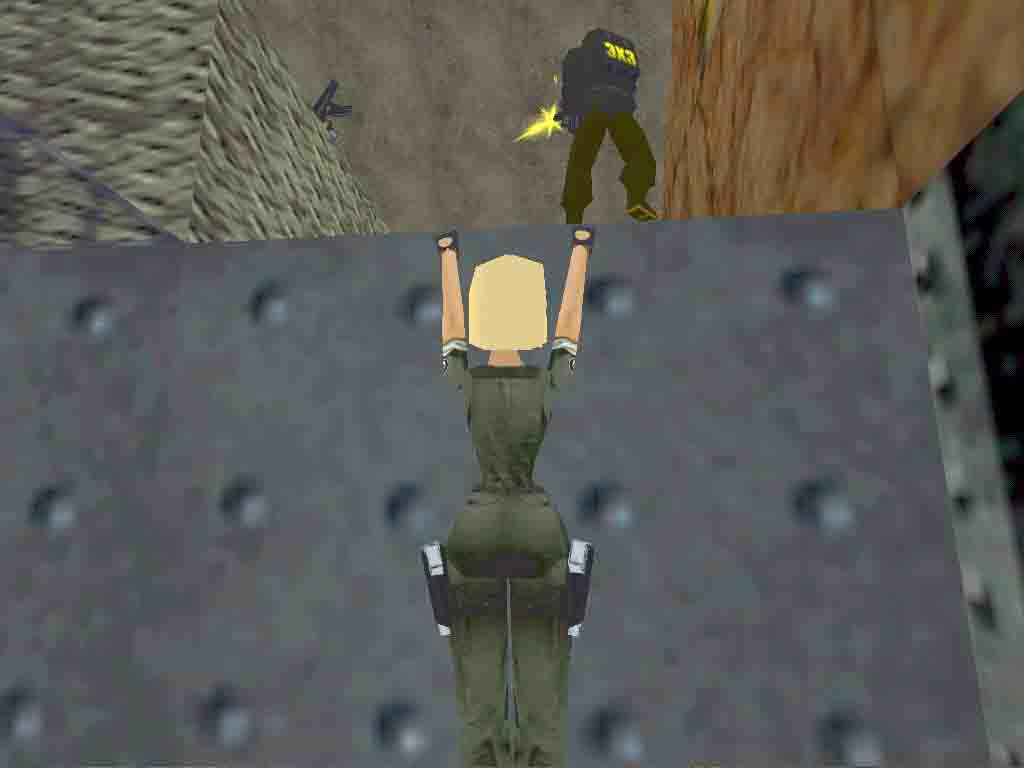
here! Go through the door, climb up. Upstairs, you'll be passing by an hatch
that will only put you back to the lanes at ground level. Ignore it. There
will be a sniper
(8), but the guy is a bit absent-minded. After the first shots he will
start moving and will eventually get stuck against a wall. Oh well, you'll
know what to do. Getting close to the outer grids and looking towards the
yellow slopes outside, you'll see some ammunitions (19). One of them cannot be reached, maybe a bug
- an invisible wall prevents Lara from reaching the ammos. But the grenades
(20) on the other side can be collected. Now the switch on the wall:
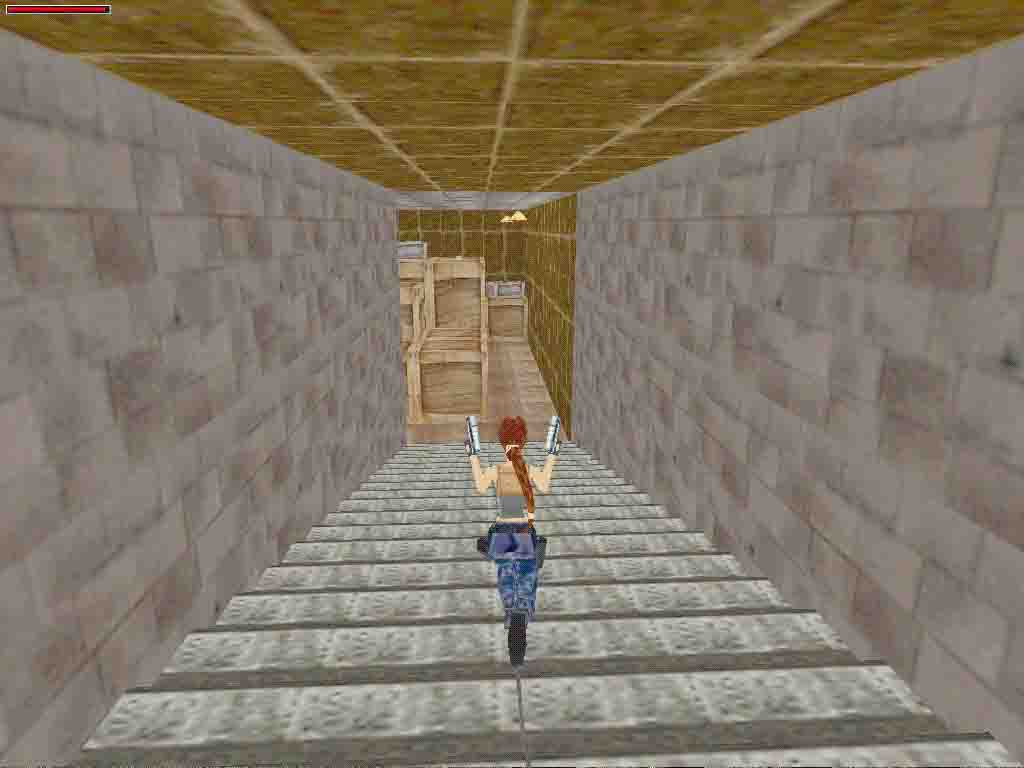
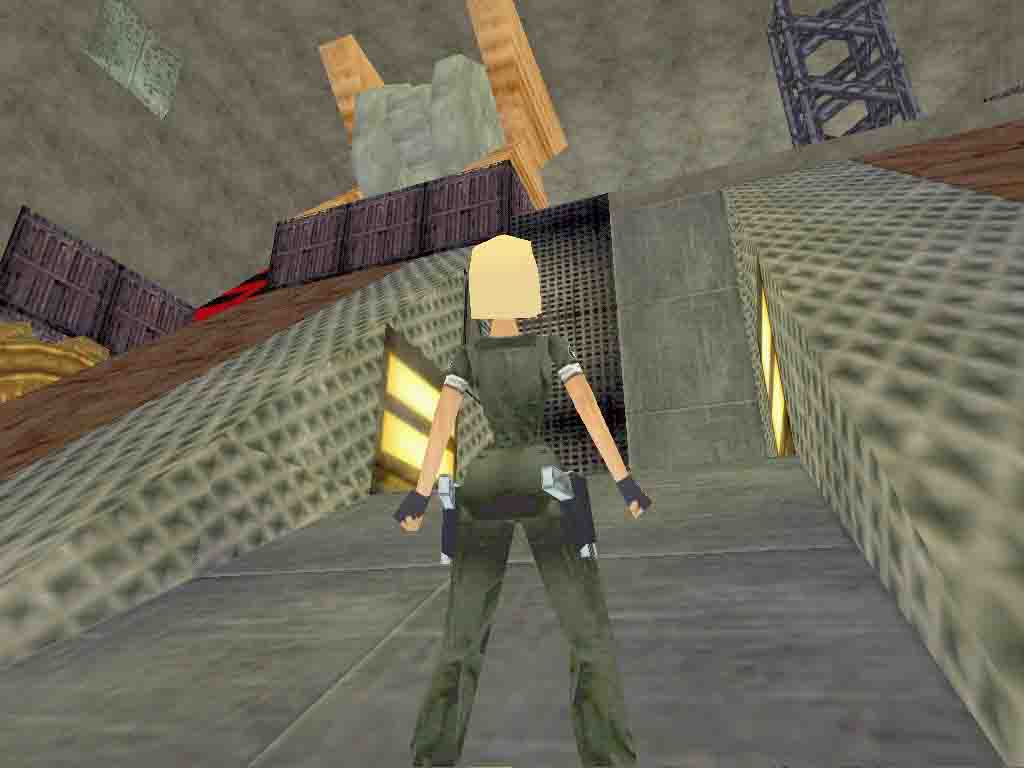
the idea is to press the button and make a timed run above and through the
wooden boxes. There is a timed door on the other side of the boxes. Not too
difficult. Thanks Boris, for NOT making just another short-timed-boring-door.
((( I always cheat on timed doors if they are too tight, therefore frustrating
the author's efforts to frustrate the players. I really do not get the point.)))
Going through the door, which will close behind you, go down the stairs. Straight
ahead, on top of the wooden boxes, there is a small Medi Pack (21) and a Key (22).
On the floor, near by, some more ammo (23).
In the corridor ahead there will be an absent-minded guard
(9). Take him and press the button. Now you're back to the Hall of the
Central Building. There still is a closed door in that area, but now you have
the Smuggler's Key. Time to use it. The door rotates in such a way that it
give you a left entrance and a right one. Take the one on the right side,
you'll be back here for the left side. Caution: be aware that the fire on
the candles located in the Hall are so hot that they burn Lara through the
wall! Do not touch the walls near those flames! Up the corridor, enjoy the
view over the railways. Carry on until you reach a room with 6 switches. One
of them will open a metal door you just passed by. All the other buttons will
call a guard (10)
that we start shooting Lara. To have some fun shooting guards, leave button#4
for last... (counting from left to right) Press the 4th switch, go through
the now open door, go down, down, down, until you have two possible ways.
One of them, the one on the right, seems closed. But that's breakable, so
shoot'n'break. Look out! Barbwire! Walk, do not run, through it, until the
wall on the other side. There is a clear space by the wall. Use to make Lara
climb down safely. In the end of the corridor there is some ammo
(24), which also are Secret#2. Go back up to were the barbwire is. Walk do not
run, take the other corridor. Step on the green trapdoor, it will open under
Lara. Small drop. Slide down to the room below. Burners. Lara turns her head
to the burners. Why? Go have a look. Not too evident, but there is a lever
on the wall by the burners. How to shut down the burners? Looking around,
there will be a guard stuck in a corner, there will be a switch on a wall
nearby a moving block that doesn't move... Get the guard (11), fetch the Key (25) he drops, press the switch to stop the burners, use the lever by
the burners to open the door. On the other side of the door there is a small
chamber with another lever. Use it. And zap! Lara is back on the water tank
- underwater. The small chamber is now flooded so all Lara has to do is swim
to the surface. Head back to the Hall in the Central Building. Back to the
rotated door, now take the path on the left side. Use the Key. A door opens
to another area. In this area all there is to do is activate switches that
will open a new door by the rotating door in the Hall. Do follow the path,
go to the first switch, press, climb up on the left side, follow the balcony,
find switch, press. Go back down to the floor, climb on the other side, follow
the balcony, find switch, press. Back down on the floor, out of that room,
back to the Hall in the Central Building. Go around the rotating door to find
a new passage. Straight ahead there is a big cashbox with a button on the
top, go press it to open an hatch on the floor. Down the hatch, find a lever
of the wall by a green trapdoor on the ground. Now, this is one of those situations
that can get you stuck. Operating the lever once changes nothing - but I can
we know that? So let's not go around the Station again and again looking for
something which is not there. The lever must be operated twice! Now the room
is flooded and a new huge passage is open. Go through it. Notice a switch
on the wall near the end of the corridor, use it, then go get a guard (12)
and a sniper (13). Take the Key (26)
that the guard drops. Go get a large Medi pack (27). Use the guard's Key to open the door to the
balconies above, go get the large Medi pack (28) on the left side and go find another button
on the right side. This will open another door in a previous room, so go back
to the flooded area and be ready to swim back to the room with the big cashbox.
However, before doing that, still in the flooded area, remember that green
trapdoor on the floor by the level? It is now open. Jump in there and swim,
swim and swim until you surface in a room with goodies - a large
Medi pack (29), and finally the Uzis (30) which also are Secret#3. Take a long swim back to the flooded area,
then from there to the room with the big cashbox. Go forward to find the newly
open door. And yet another button! Another door opens nearby. Pass this door,
that's the last one. Run to the darkness and the level will end.
End of the level.
Pickups: 30
Kills: 13
Secrets: 3
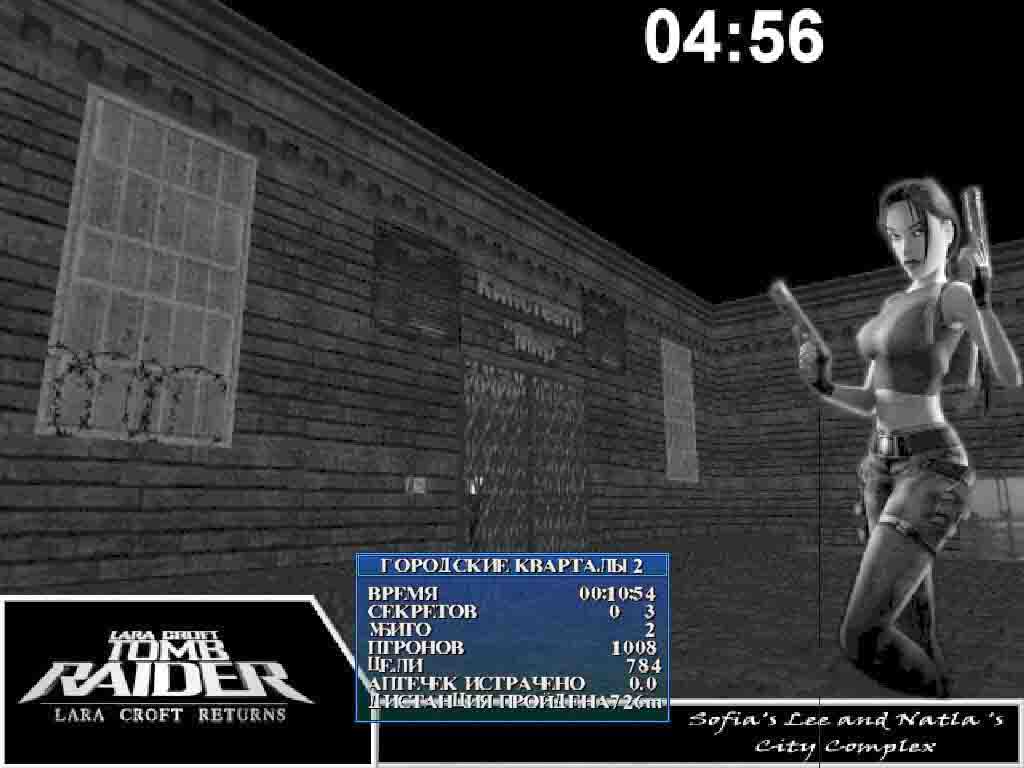
2. City Quaters:
 Secret:
Walkthrough by Harry Laudie
Go down either side of the platform and run down the road to the left. After the first pillar turn to the left and press the pushbutton. You get a cut scene of a door opening. Continue down the road and be careful of the fire jets and the bats. Go left to the open door. Slide, jump, slide, jump, slide, and jump to land on a safe place. Pick up flares (1). Jump again to a safe place and pick up a small Medi pack (2). Pull the switch and hear a door opening. Turn right, grab the crevice, and shimmy right to pull up. Go through the door, up the stairs and the ramp. Be careful of the barbed wire trap and pick up the Smuggler's Key (3). Get a cut scene of a raptor running around. There are pickups at the end but a flame is guarding them for now. Shoot out the black windows and kill the raptor (1) from the window. Get down and use the Smuggler's Key on the black gate behind you.
Enter
and the candles near the walls light up and you get a cut scene of the fire
going out. Go back there and pick up flares
(3), a large
Medi pack (4), Mp5
clips (5) and secret #1. Get back up and run down the hallway and the
level ends.
End of the level.
Pickups: 5
Kills: 1
Secrets: 1
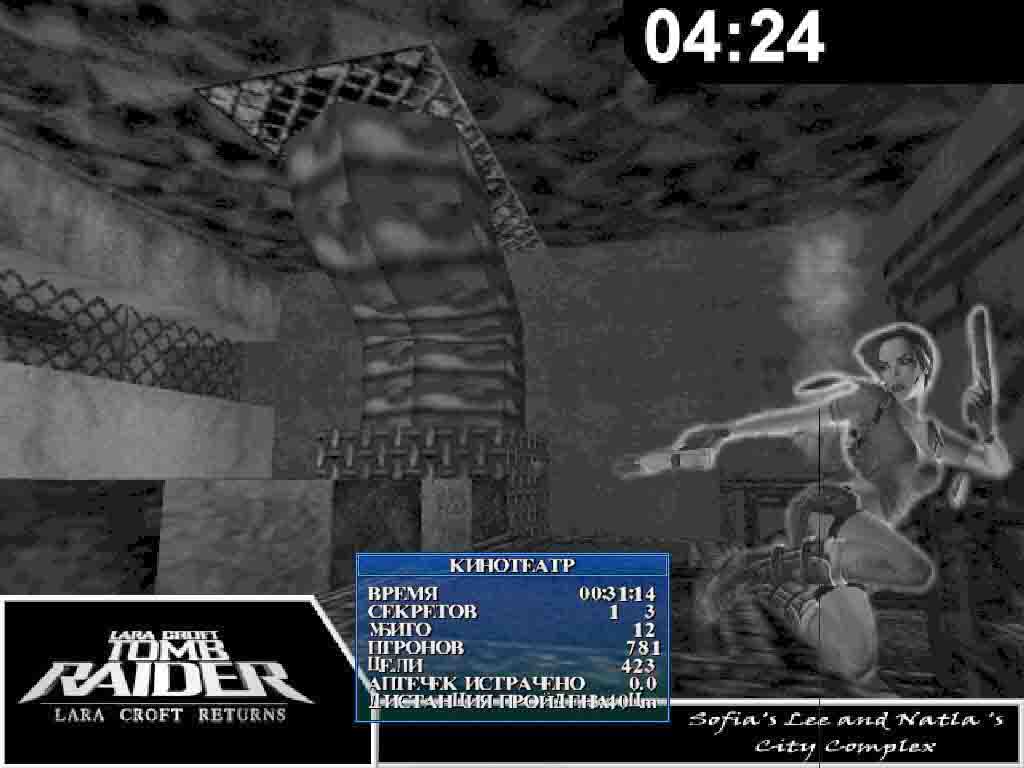
3. Cinema:
Secret: 
Revised Walkthrough by Harry Laudie
[Note] You must play these levels as a full game using Boris Samoilnko's script files. Some items are found in this level and must be carried over to the next level. [End note]
There is a closed door to your left. Go up the stairs to eventually enter a room and kill two guards (1,2). Pick up the Desert Eagle clips (1) and shotgun shells (2) that the guards drop. Go back to the stairs and see a crawlspace above them. Stand at the top of the stairs and jump up to grab it. Pull up into the crawl space. Do not stand up or you will fall out. Pick up a large Medi pack (3) and a key (4). Climb down and use the key to open the door beside you. Walk to the end the room and a trapdoor opens. Try to be on the right side so you fall into a safe hole instead of onto the spikes. Pick up Desert Eagle clips (5) and secret #1. Look across and pick up two Uzi clips (6,7). Climb back up and press the pushbutton on the right wall to get a cut scene of a door opening somewhere. Go back to the dead guards and turn right. Go down the stairs. On the second set of stairs keep right and pick up the key card (8) in the hole beside the spikes. Ahead you see the door you opened.
In the next room go to the left corner for a small Medi pack (9) and to the right corner for harpoons (10). Jump the floor gap and enter the open door. Follow the corridor to the right and up stairs. Use the key card and the door beside you opens. Follow the corridor and at the end shoot out the wire mesh sections near the bookcase. They sound like glass windows. Enter a large room and go up a ramp to a green platform with two black things. Behind them are a shotgun (11) and a key (12). Go back down to kill two guards (3,4). Go behind the green platform and use the key. Behind you are two doors that both open. Go to the right and follow the corridor to the left to pick up Uzi ammo (13). Return and enter the door into a cinema. There is a closed door on the left wall. Go the bottom of the cinema and climb the obvious ladder on the left wall. At the top back flip to a catwalk. Follow the catwalk to the other side. Go down a twisting tunnel and at the end pick up a large Medi pack (14) and some flares (15). Shoot the wire mesh to get inside the projector room.
Press the pushbutton and you hear the door in the cinema open. Shoot out the windows in front of the projectors and jump down. Kill a dog (5) and a guard (6) who drops a key (16). The key was hard to find because the guard fell on the key hiding it. Enter the open door. Use the Key and the door behind you opens. You also get a cut scene of the cinema door opening again. Go to the open door behind you and press the pushbutton. You get a cut scene of the door at the start opening. Get out of there back into the cinema and kill two guards (7,8). Continue back and kill two guards (9,10), one of whom drops MP5 clips (17). Go up the stairs with the spikes and kill another guard (11). Continue to kill a guard (12) near the water and end up at the closed door near the start. The door is timed so go back and press the pushbutton again. Run with sprint and jumps to get here and enter the door before it closes. Pick up the keys (18) from the floor. These keys are required for the next level.
Go
forward but stop before the floor blade. Jump, grab a ledge and pull up. Go
to the end to pull a switch and see the door open below you. Climb the black
wall there and at the top back flip to a ledge. Pick up Uzi
clips (19) from an alcove. Go pass the crushers to the end to pull
a switch. Get back down to the floor blade. Avoid jumping but run through
the floor blade, walk through the spikes and run through the second floor
blade. Crawl though the crawlspace and stand up at the other side. Run down
the corridor and as you turn the left corner the level exits.
End of the level.
Pickups: 19
Kills: 12
Secrets: 1
4. City Quaters 2:


Revised Walkthrough by Harry Laudie
[Note] You must play these levels as a full game using Boris Samoilnko's script files. Some items, such as the key, are needed in this level and must be carried over from the last level. [End note]
Go to the dark window on the left wall. You can pull up through the window and shoot them out from the inside. Pick up a grenade launcher (1) and secret #1. Exit the window go left towards the key lock. Use the key from level 3 to open the door. Go to the end of the corridor and climb a long ladder to the top. Pickup a small Medi pack (2) and enter a large room. The door closes behind you. You see a T-Rex behind a gate to your right. Go to the left and as you near the end of the room, the gates at the opposite end open allowing the T-rex (1) and two raptors (2,3) to escape. Enter into any crawlspace in the wall. On the other side crawl under the fan to prevent damage. Climb a block at the back and press the pushbutton. You get a cut scene of a trapdoor section outside dropping. Crawl back under the fan and through the crawlspace. Go up the ramp and pull up to a section above the ramp and from there you can kill the dinosaurs. Although if you wait, the T-rex will kill the raptors for you. You can run/jump over some sections to the far end to get Uzi ammo (3). It takes a lot of shooting for the T-Rex.
Go
into the empty cage and pick up two large Medi packs (4,5) and some grenade ammo (6). As you leave, press the pushbutton on the
wall. Two timed trapdoors drop in the main room. Run back to the ramp. Run/jump
the gap and run to either ladder on the other wall. Climb up to another catwalk
as the trapdoor closes behind you. Go to the middle and pull a switch. The
door opens behind you. Go there and slide into a long drop into water. Swim
down the tunnel and pull up at the end. Follow the short tunnel and as you
drop off the other side the level ends.
End of the level.
Pickups: 6
Kills: 3
Secrets: 1
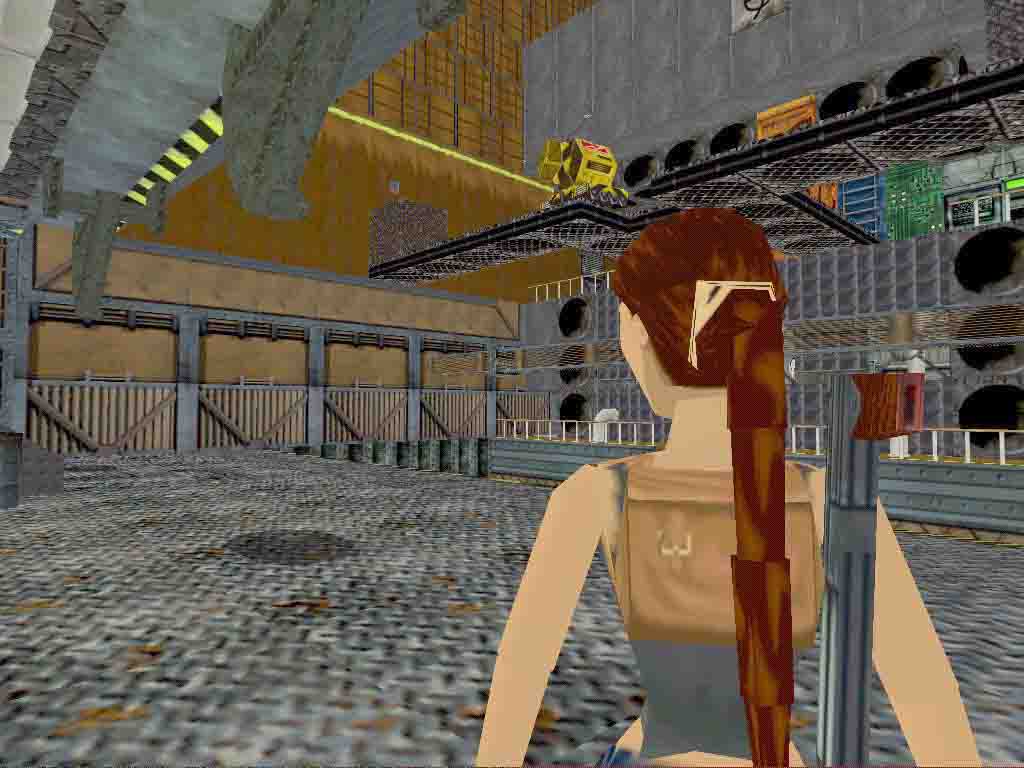
5. Old Factory:


 Secret 1-2:
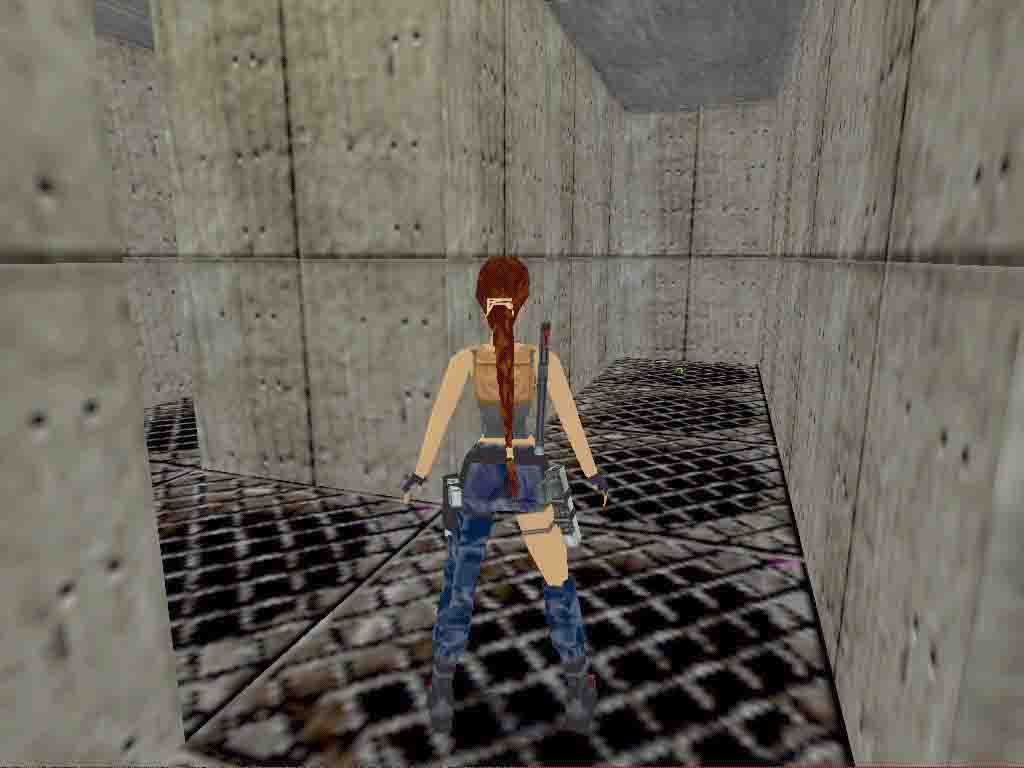
Revised Walkthrough by Harry Laudie
[Note] You should play these levels as a full game using Boris Samoilnko's script files. Otherwise some useful weapons will be missing. [End note]
Drop down the shaft and slide and at the bottom pick up a large Medi pack (1). Continue to the end and pick up a shotgun shells (2). Turn right and if you are lucky a guard (1) and a soldier (2) are at the other end of the tunnel in a position that you can kill them but they cannot shoot back. Pull up into the factory area and relieve the bodies of a Desert Eagle clips (3) and a MP5 (4). Go to the edge of the platform and look down at the deadly water. Slide down, grab and shimmy to pull up onto a flat area. Pick up the Uzi clips (5). Drop and grab and shimmy to the right to pull up again. Drop down to the steam plate and get a small Medi pack (6). Climb back up to the flat area and run/jump over the deadly pool to grab the ladder. Climb and pull up to kill a soldier (3) that comes from the room on the left side. Pick up a large Medi pack (7) from the dead soldier.
Go in either end door to see a deadly machine running around a track. Go to the left side and when the machine returns on its track follow it to a corridor and pick up a rocket (8) and secret #1. Run back out and push the movable cage to beneath the high switch on the wall. Pull the switch and a trap door opens above you. Climb the ladder into the next room. In front of you is another ladder with a trapdoor at the top. To the left is a covered pushbutton. Turn around and see another covered pushbutton above a block on the left wall. There is a switch above a block on the right wall. And, of course, there are two deadly machines running around the tracks. Behind the orange pillar is a small Medi pack (9). Go to the switch and pull it. The cover on the pushbutton behind you opens. Go there and press the pushbutton and the cover on the pushbutton near the ladder opens. Go there and press the pushbutton. Now the trapdoor opens and closes rapidly but you can climb through it. Climb up the ladder and at the top back flip. Kill a guard (4) and pick up some Uzi clips (10), Desert Eagle clips (11) and a small Medi pack (12) from under the fan.
Climb the ladder in front of you. Kill a guard (5) and a soldier (6) who drops a grenade shells (13) and flares (14). Behind a pillar you can pick up Desert Eagle clips (15). On the back wall there are two small Medi packs (16,17) and a large Medi pack (18). In front of this platform is a deep drop over the machines and a zip-line. Take the zip-line to the other side but drop before the fire block. On the other side are a motor, a closed door, and a wheel on the wall. Go and turn the wheel. Notice the gauge beside it (great detail). The motor starts and the door opens. Go inside and up some stairs. As you turn the corner kill a guard (7). At the top you exit over a large open area with movable blocks. Pull/push the movable blocks on the sides to the centre in front of the high movable block. Pull/push the high movable block to the other end. Climb it and jump to grab a monkey swing. Monkey swing to the other side.
Use the green health crystal and climb the ladder. Go left and drop to a beam. Follow the bream to the other side to a device that needs something. Climb the device for a small Medi pack (19). Behind the stopped motor on the left is another small Medi pack (20). On the other side are a swinging device and two deadly machines. Jump behind them to grab the ladder on the far wall. Climb up the ladder and into a tunnel with three crushing pistons. Turn around and see a key that you need on the far side. Go through the pistons and pick up a large Medi pack (21). Follow the tunnel and through a crawlspace. Stand up and continue to drop to other wall. Kill a soldier (8) who drops a rocket (22). Kill a guard (9) who drops Uzi clips (23). Go to the corner to pick up the Key (24). Back down to the device and use the key. The door above opens so go back there. Notice another pressure gauge working.
Go through the door and follow the tunnel. Slide down into some water, get a green health crystal, and jump into the next room. There are railings and rocks on both sides. At the bottom is deadly water. Go to the far left corner and step back from the railings. Stand jump the railings to a pillar near the rocks. Go to the right and jump to grab a ladder. Climb up since if you go down you die on a deadly platform. Pull up onto a roof beam. Go over the beams into a tunnel on the opposite side. Go in and at the other end slide down. Kill two guards (10,11) on the floor and a guard (12) on a walkway. The guards drop a large Medi pack (25) and Desert Eagle clips (26). Also pick up MP5 clips (27) from the floor and a small Medi pack (28) from a corner ledge. Climb to the walkway and look down to see numbers on the floor. Go right and turn the wheel to get a cut scene of the outside area flooded. A trap door opens above you so climb the ladder. Follow the crawlspace to the other end and drop into the water. Swim into the tunnel on the far wall and pull up into a room with a closed door. Pick up the Key Card (29) from the corner.
Swim out and there is a huge amount of shotgun shells (30) and secret #2 in the far right corner on the bottom. Exit the water to the left of the underwater tunnel as the platform is now safe. Climb the ladder back up to the beams. Go back to the floors with numbers. Step on 1,3,5,7 in that order and the door at the back of the room opens. Anything else will close it. I see 3x3 in many places but that did nothing. I used prime numbers as a last guess and it worked. Enter and run down the room and hear alarms blaring. Enter the far doorway and fall to a wire mesh floor. Kill three solders (13,14,15) and go to the far end of the room. Pick up a small Medi pack (31) on a sloped side block. Climb down a ladder to the main warehouse area and kill two guards (16,17) there. Pick up Uzi clips (32) from one guard and a large Medi pack (33) from behind the boxes on one side. Back to the ladder and climb up. Notice the locked door beside you. Climb to the top block and monkey swing to a middle walkway.
Go left to a corridor and pull a switch. You get a cut scene of a door opening below above a platform. Get to the ground floor and the boxes in the corner. From the top box jump up and grab. Monkey swing to that platform and go into the door. Climb the ladder there and back flip at the top. Go down the corridor and a trap door opens. Go into the room and find a crowbar (34). Get out and back to the ground floor and use the crowbar on the locked door. Go in and climb a block, jump over a barbed wire pit and pick up flares (35). Walk through the green water to the other end. Just before the fire turn around and look up for a ladder. Climb up and kill a guard (18) and notice the locked door. Climb the fish-bone ladder to a corridor. Follow it noticing a closed door to the left. Drop down at the end to a beam. Find a good place near the centre and drop into the water. Climb up on a platform and press a pushbutton on the wall. Alarms go off and a soldier (19) appears so kill him. He drops a grenade shells (36).
Pull the two switches at both ends of the hallways and you get a cut scene of underwater doors opening. Dive into water and find a hole in the bottom corner. Swim and pick up flares (37). Swim into a nearby upper opening and swim to the right. Swim through a narrow passage under an overhang and eventually surface in a room. You can also find a green health crystal in the water as well. Kill a guard (20) at floor level and two soldiers (21,22) above you on ledges. Pick up a large Medi pack (38) from the floor. Notice the closed door to the left side. Use the blue box in the corner and the V-shaped pillar to get to the where the soldiers were. Go there and get a green health crystal. Pull the switch and hurry back down to the ground and jump into the timed door in the far corner before it closes. Climb the boxes as stairs and at the top get a cut scene of a key. Enter the room and crawl onto a low mound in a corner to pick up the Key (39). The door besides you now opens. Do not explore the open door on foot. The game either crashed to the desktop or my PC froze up every time I was near a black pit.
Get into the mine car and ride it up an incline to a door. Use the END key with the left or right arrow key to exit the mine car. Get out and pick up harpoons (40) from the corner. Press the pushbutton to open the door and get back in the mine car. Go up another incline and the mine car stops. Get out and climb a ladder in front. Pull up and as you go down the corridor the door ahead opens. Go through and the door closes behind you. Go left and down the fish-bone ladder. Use the key to open the door and go in. Pick up a large Medi pack (41) and Uzi clips (42). The door ahead opens as you approach. Run up the ramp towards the closed door and the level ends.
[Note] The level ends and you still have a key card. When you start the next level the key card is gone. [End note]
End of the level.
Pickups: 42
Kills: 22
Secrets: 2
6. Factory Bay:
Revised Walkthrough by Harry Laudie
[Note] You should play these levels as a full game using Boris Samoilnko's script files. Otherwise some useful weapons will be missing. [End note]
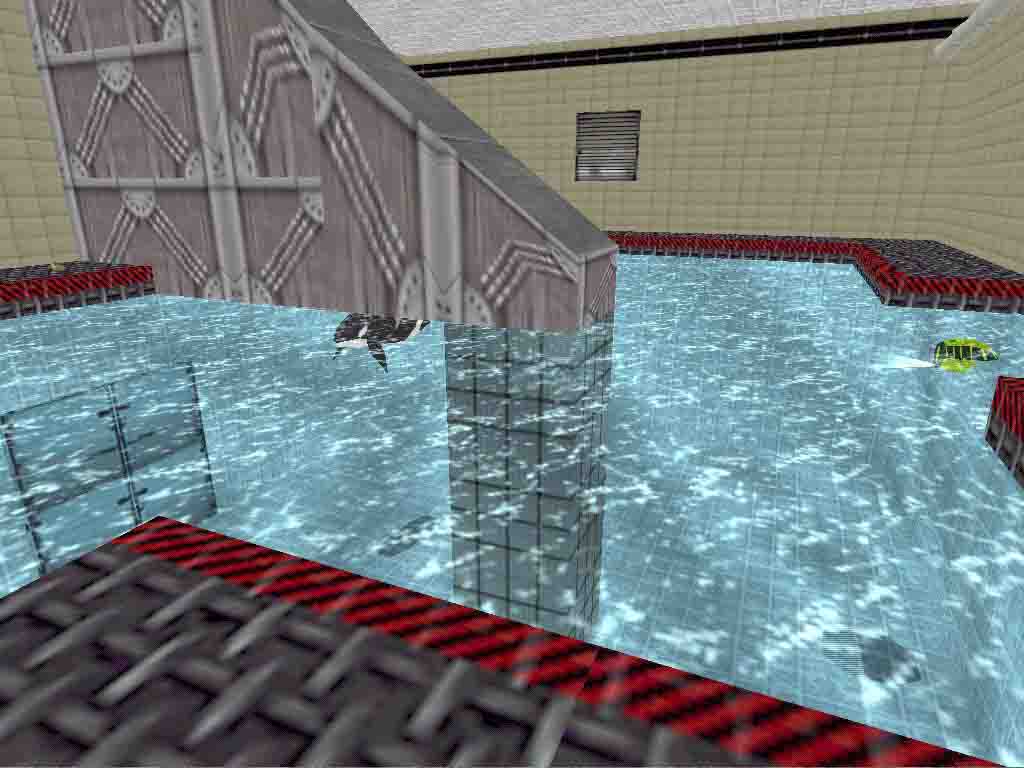
Pick up a large Medi pack (1) and as you approach the door it opens. Kill the guard (1) in the corner. Go to the right to get a view out the window. Fantastic. Go to the left onto a ledge and climb a black wall into a corridor. Go to the end pass the steam and slide down. You could do fancy jumping over the lasers but it was easier to grab a monkey swing. Monkey swing over to the switch. Pull it to open the crawlspace door behind you. Get in and pick up Desert Eagle clips (2) and shotgun shells (3). Pull the other switch to open the door in the hole beside you. Drop into the hole and go up the ramp to pull a switch. Continue in the same direction and watch out for a fire pit in the corner. You are back at the hole and a trap door has opened. Drop into the hole and slide down into a water pool. Swim left and circle around to the left corner and pull up. Pick up shotgun shells (4) and run around the ledge to a key lock. Kill the soldier (2) and pick up the key (5) that he drops. There is a small Medi pack (6) in the far corner by the slide. Use the key to open the underwater doors. Lara does not take aim at the killer whale but it doesn't hurt Lara either. Dive into the water and swim down the underwater corridors and into the water you saw from the window.
Pull up to the platform with a ladder. Climb the ladder and go left at the top. Climb up to the wire mesh walkway on the side of the building and go to the end block. Pull up and monkey swing across the water. Follow the solid platforms along the side of this building and at the end jump to a sloping wall and grab it. Shimmy left until you can pull up. Jump the gap to the switch and pull the switch to open the door beside you. Go into the opening and walk onto a trapdoor that opens underneath you. You drop into a corridor and kill two guards (3,4). Pick up a Key Card (7) and Desert Eagle clips (8). There is closed door in the corner and a closed door to the right. Holster your guns and run down to the other end of the corridor. Press the two pushbuttons and the closed door at the other end opens. Go there to pick up a second Key Card (9) and see a prisoner running in circles. Use the two key cards to open only the one door in the corner.
Go inside and safety drop to a triangular piece of broken stair. Jump down to the broken stairs and go to the switch on the wall. Pull the switch to hear a grate opening. Go down the stairs into the water and swim into the crawlspace. At the end stand up and press a pushbutton. Swim back and at the bottom of the stairs a door has opened. Go in and at the end go left but watch out for hole in the corner. Pick up some harpoons (10) and pull the switch to get a cut scene of barbed wire and a closed door. Go to the end, drop, and release and grab another ledge below. Pick up Uzi clips (11) and pull the switch for the same cut scene. Drop down another level for a large Medi pack (12) and another switch and cut scene. Drop down one more level for a small Medi pack (13) and a switch. This time the cut scene shows too doors opening by the barbed wire. Go to either end and drop down. Walk through the barbed wire and slide down and stop in front of a fire. The green square to the right is deadly so go left. The door opens and you kill the two guards (5,6) that come out. Here you can monkey swing over the deadly green square to get three shotgun shells (14,15,16).
Go back to the door and carefully get in as it closes behind you. The room is full of deadly trip wires. Using some lucky stand jumps, make your way to the back and press the pushbutton on the back wall to open a door. Forget about the key card for now. Go to the door and walk through the barbed wire. Go down the corridor and enter a small maze. Go into the right tunnel and at the end, you can find grenade shells (17). Go into the left tunnel and at the end, find a hole with a ladder. Climb down the ladder to the bottom. Crawl under the steaming pipes and turn a wheel. You hear an explosion and get a cut scene of the room under water. Go back to the ladder. Where the ladder breaks back flip to a ledge. Then jump forward to the higher ladder and climb up. Go back in the flooded room and watch out for the barbed wire at the door exit. It is now safe to pick up the Key Card (18). Exit the room by a hole in the back wall to the right by the yellow pipe. Just climb the black wall to get into the hole. As you go through the crawlspace you get a cut scene of the water outside.
Sometimes you can see the killer whale. At the end go left and hear a trapdoor drop. Climb the wall at the end, climb through the open trap door and you are back outside. Go to the wall where the key card reader is located next to an open door. Use the Key Card in the card reader and get a cut scene of a door opening. Go inside the open door near the key card reader and pick up grenade shells (19) and Uzi clips (20). Climb the ledges and enter the open door to pick up harpoons (21) and flares (22). You overlook a very deep pit. Jump and grab the black grid-like wall to the right. Get into the climbing position and shimmy left. Follow the wall down and then back up until you can drop in safety to a flat ledge. Slide down a small slope and pick up shotgun shells (23). Go down the corridor to enter a room with three ladders. Grab the ladder above the entrance. Climb a bit then back flip, slide and grab another ladder. Climb a bit then back flip, roll, and grab another ladder. Climb near the top then back flip, slide and grab the last ladder. Climb to the top and go down a corridor. Enter a room to pick up harpoons (24). Kill a soldier (7) who drops MP5 clips (25). Kill a guard (8) who drops Desert Eagle clips (26). Walk to the corners to pick up Uzi clips (27), shotgun shells (28) and Desert Eagle clips (29). You may have noticed a trap door and two switches on pillars.
Press both buttons and two trapdoors drop. Go down one floor to pickup MP5 clips (30), a small Medi pack (31), grenade shells (32) and a rocket (33). Go down the next trapdoor to the floor below. Around the corners of the room are a large Medi pack (34), and two flares (35,36) and a triangular hole to the floor below. Drop down the triangular hole to the floor below. Go the white doors and pull the switch beside them. They open so enter a corridor with flames on blocks. As you enter the black area at the end the level ends.
End of the level.
Pickups: 36
Kills: 8
Secrets: 0
7. Way Of Natla:
Walkthrough by Harry Laudie
[Note] You play as Natla. All weapons are lost but all the ammo remains.
[End note]
The level begins with Natla I suppose, since she doesn't look like Lara. You begin in a room with a guard in the corner. Try to not shoot the guards in black, as they are helpful. Go through the door and go to either side until you reach a wall with a pushbutton. There are closed doors in both corners. Press it and turn around to see a closed door in the right corner has opened. Go there to press a pushbutton to open the door in the left corner. Once there climb onto a platform above you and then climb higher into a tunnel. Run down to the end to a T-junction. The right is deadly so go left and slide into a room with water. Surface to a platform that has a guard who is running in circles at one end. To the other end is a pushbutton on the wall. This controls a very tightly timed underwater door. Press it and side flip and you should end up in front of the door. Immediately swim forward as the door closes behind you. Swim down the tunnel and surface in a large open area and a huge machine.
Stay in to water while a guard in black kills the thug (1) for you. Go to the dead body and pick up the P2 battery (1) that the thug dropped. On the sides are wheels over deadly lava so go to the middle of the machine. Watch the side drill and go to the back to climb a ladder. At the top climb a block and jump to a crawlspace at the back. At the other side, turn, pull up and then drop back as a guard kills a thug (2) for you. This thug leaves nothing. Turn around and climb the ladder. At the top climb the black wall to the left to reach the top level. There is a rotating machine, a waterfall between two water pools and a thug. You have to kill the thug (3) yourself, as there are no guards here. Again the thug leaves nothing. Go to the other side of the pools and use the battery in the receptacle to open the door. Go in and up the strangely shaped steps and through a doorway onto a beam. The floor with the rockets is safe but there is nothing there and I couldn't get back up. At the far end is a tunnel with a closed door. Go the green box in the middle and press the pushbutton and the level ends.
By the way, another interesting point (to me anyway)
was that the author had changed the passport picture to Natla and cover to
the Russian flag. Real attention to detail makes an interesting level.
End of the level.
Pickups: 1
Kills: 3
Secrets: 0
8. Subterreanean Mines:

Walkthrough by Harry Laudie
Lara starts on top of a ramp. Go to the bottom into the next room. Climb a block on the left for MP5 clips (1). Go to the block on the right and jump up the incline. Monkey swing to the slope and drop. Jump, jump and land on a platform above some lava. Climb up and shoot out the window. Go down the tunnel and hear something start to move. You pass a closed door on the right. As you pass over some special floor tiles you get a cut scene of that door. At the next door with a special floor tile you get a cut scene of that door opening. As you go back over the tiles the door closes. So from the door with the special tile, jump up to grab a monkey swing. Go over the tiles and into the open door. Pick up shotgun shells (2) from a special floor tile. You get a cut scene of the second door opening. Back out and use the monkey swing to that door. Go inside and around the corner you see a wall drill and some moving hooks. You see a track with a close door at the end.
Go down and kill the guard (1) at the left side. Press the pushbutton near him and the door above the track opens. Go to the far right corner and jump into an alcove behind the boxes. Pull a switch there to open a trapdoor not seen yet. Go through the open door and into another room. Run around to get a guard's attention. However, you have help and a friend kills the guard (2) for you. From the middle of green platform you can kill a guard (3) on a column. That column has a ladder on it but a trapdoor blocks it. Use the pushbutton on the left column to open that trapdoor and climb up. Go left for another pushbutton. This opens a door at the ground level and activates a guard (4) on the opposite corner. Kill him and go down to the ground floor. The open door is in the right corner from the entrance.
Go in and pick up a Desert Eagle and clips (3) from the floor. There is the open trapdoor on the floor (from the switch in the dark alcove). On the other side are a wooden door and a pushbutton. Press the pushbutton to open the door. Go in and down a ramp and kill a guard (5). Get into the crawl space and down the other side. From here you can kill a guard (6) on the platform below. Jump to the ledge to the left and then to a platform in the left corner. Pick up flares and Uzi clips (4) and jump back. Notice the closed door up there. Go down the ladder at the end and jump to the crevice on the wall and shimmy left to the ledge. Run to the end to press the pushbutton. The machinery starts and the door opens at the top. Kill the guard (7) that appears. Jump the lava and climb up the ladder. Jump to the door and onto the other ledge to get a large Medi pack (5). Enter a tunnel at the back and pick up flares (6). Follow the tunnel to a room and get MP5 clips (7). You have two choices here. Choice #1: Go back to the trapdoor, drop into some water and swim down through some tunnels until you reach a pool. Choice #2: Just go to the far right corner of the room and fall into a hole and drop into the same pool. Surface and climb up and immediately jump to a block. From the block kill a large creature (8) that explodes when it dies (looks like from the movie Alien). Run up the incline killing eight large flies (9,10,11,12,13,14,15,16) as you go. At the top pick up a small Medi pack (8) and the wall rises over a lava pool. The clear platform ahead is a trap. Use the blue platforms to get to the other side of the lava. Doors open as you approach. Slide down and more doors open. Two large creatures (17,18) attack. One will drop Desert Eagle clips (9) when dead.
Go to the far right corner for a wall switch. Pull the switch and a timed door opens behind you. Go there and through a tunnel to a crawlspace. Crawl in and at the end stand up in a room with a strange floor. Kill two large flies (19,20) and follow the incline in the far left corner. At the end a door opens for you and you emerge in front of a lava lake. Kill a guard (21) with a strange arm in the far side. There are four closed doors, two on each edge and a light column in the middle. Run around the edges and pickup a large Medi pack (10). Follow and go up an incline to a pushbutton and notice the door beside it. Press the pushbutton and four doors open. Four large creatures (22,23,24,25) emerge and fire blue spheres at you. Kill them and then go into the doors they came from. Pull two switches to open the timed door near the pushbutton ramp. Another guard (26) with a strange arm attacks. If you wait to kill him the timed door closes and you have to pull the switches up and down to open it again. Climb the block and drop into a hole for two small Medi packs (11,12). Get back out and pull up to the platform above and into a tunnel. Follow the tunnel and press a pushbutton. Climb the ladder and you are back in the room with the columns.
From the hole go straight and up an incline. A friend will kill a guard (27) for you. Continue until the end and climb a ladder. Go down the corridor and into a purple colored doorway. Notice the purple colored corridor to the left. Go to the right and find a place where you can climb up onto the walls. From there jump the walls to the other end and find a rocket launcher (13). Get down and search this labyrinth for Desert Eagle clips (14), MP5 clips (15) and shotgun shells (16). Get back to the entrance and then go to the purple colored corridor to the left. Follow this until you meet a friend. Follow him through the labyrinth until he guides to an incline. Or you may have found it yourself while searching. Go up the incline and a door closes behind you.
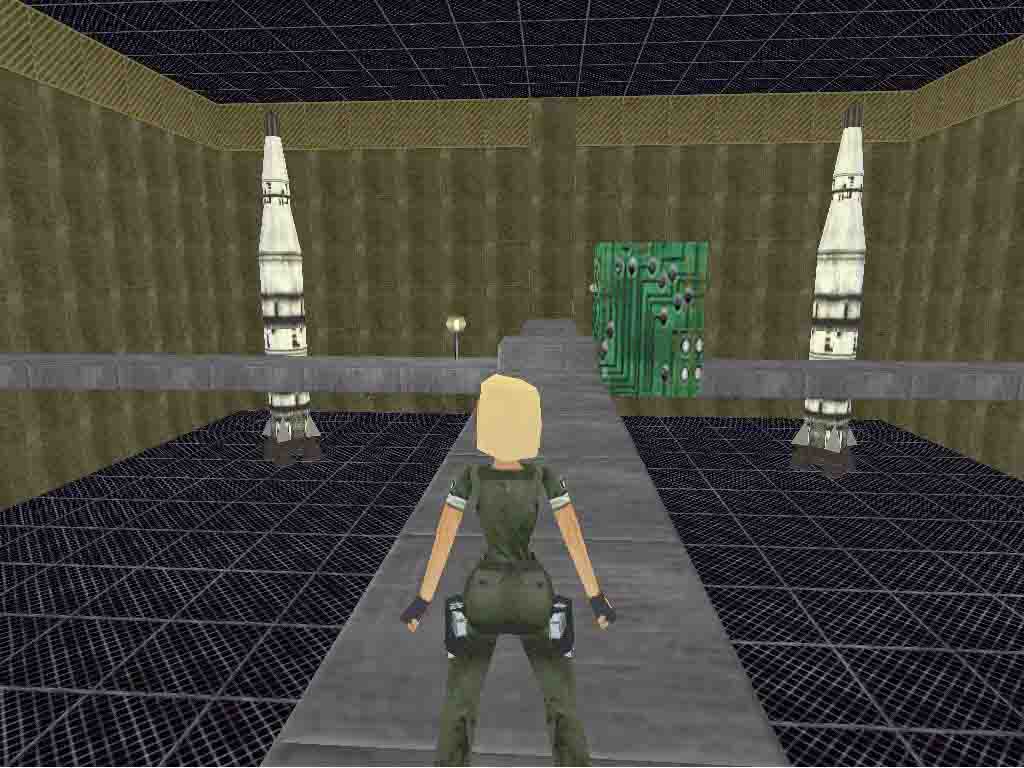
Pass a closed door on the right and enter the door
that opens ahead of you. Now the rockets are ready to launch and the room
shakes. I do not know if the following sequence is timed or not timed. However,
enter the rocket launch area. Press the button on the green box and get a
cut scene of the door opening in the corridor. Go there and start climbing
a ramp as more scenes of the place collapsing are shown. Enter a room and
start jumping over blocks. A cut scene of the light column also appears. After
a few blocks stop to press a pushbutton. A trapdoor opens ahead. Go there
and climb up through the hole. Run along the right wall to the end and press
another pushbutton. Do not run to the rockets or you die. Go back to the hole
and up a ramp. Follow through to a door that opens and enter a control room.
On the right side are seven doors and seven switches. At the end on the wall
is a chart showing which pushbuttons to press to de-activate the launch. Press
the correct green pushbuttons and a door opens behind them. Press the wrong
pushbutton and you die. Press the pushbutton inside the open door and everything
goes quiet and a door opens beneath the sign. Go inside the door and up the
ramp and the level ends.
End of the level.
Pickups: 16
Kills: 27
Secrets: 0
TR3 - LARA CROFT RETURNS 9: THE TEMPLE OF THE TWIN by BORIS SAMOILENKO
Walkthrough by Harry Laudie
Slide down the ramp and run to a room with a large hole in the middle. Safety drop from the hole to a black ledge below it. Safety drop from the ledge to the floor. Face the door and notice a very hard to see switch handle on the right wall. Pull it and the door opens. Go through the door and enter a room with pillars and a movable block. Two switches are obvious. There is a third switch on the back of the pillar to your right. Move the block and pull the switches to open the gate at the end of the room. Enter a large deep room with ledges and switches.
Run/jump to the nearest ledge in front. Jump to the ledge to the right and finally to a ledge in the right corner. Drop down to a slope and other ledge. Run off the ledge to the right to land on a sloped blue pillar. Slide down and drop to a blue platform. To the right you see tunnel with a closed gate and a shimmy ledge on the far wall that is also blocked by a gate. Go left to run/jump to a platform. Use the switch there and get a cut scene of the gate blocking the shimmy ledge opening. Jump to a pillar near the far wall and down to the ledge to use a switch. Climb back up and get back to the blue ledge. Jump/grab the shimmy ledge and shimmy to the far right. Pull up and drop into the alcove. Climb the other side and crawl to the far wall. Get down and jump to another ledge with a blue column and use the switch there. This opens a gate ahead of you. Go around the column and jump the ledges and then to a pillar on the far wall. Safety drop to the ledge and go to the column to pull a switch. The door at the floor area is now open. Run back to the wall where you dropped and use the climbing ladder on the ledge to get to the floor area.
Go through the door and see a small volcano in front of you. In the back of the room are ledges. Back flip from the volcano slope to the first ledge. Jump to the second ledge and pull up into the hole in the ceiling above you. In the room centre is a pillar requiring four items. On the back wall are four gates. Go to the block on the left wall and pull the switch. A blue gate on the other wall will open. Enter the gate and run down a tunnel. Enter a large room with pillars and gates. Run/jump to the left side of the sloped pillar in front. Get to the ledge where you can stand. Run forward to pick up the P2 star (1) from the floor in front of a ladder. Get to the middle ledge and enter the alcove. The gate in front of you opens. There are still two closed gates to the sides.
Enter the tunnel and at the end use the ladder to get to the ground floor. Enter the floor area and behind the short alter in front of you is the first Serpent Stone (2) although it looks like a mask. At the far wall is a closed gate in front of a golden gate. Go around to the left side of the room. At the wall is another closed gate. Use the star there and the gate opens. Run up the slopes but stop at the end before you fall off. Follow the blue columns around the room and reach a switch. Pull it and get a cut scene of a gate opening in the alcove above. Go back and climb the long ladder to the top. Enter the gate and around the left corner is the second Serpent Stone (3). Pick it up and get a cut scene of the gate on the floor area opening. Back to the floor and to that gate. Enter and pull the switch and get a cut scene of the gate opening above the ladder where you got the star. Climb back up and then climb that ladder. It is dark so use a flare. You will find a shotgun (4), Uzi ammo (5) and the third Serpent Stone (6). You get a cut scene of the final gate in the alcove opening. Also notice the closed gate as you leave. Go to the alcove and enter the gate to get the fourth Serpent Stone (7). You get a cut scene of the last gate opening. Go back and climb the ladder to get to the gate. Follow the tunnel and exit on the blue ledge. Jump to the shimmy ledge and flow around as before to get to the floor area. Go back to the volcano room and get into the hole in the ceiling. Now use the four Serpent Stones in the middle column. Each stone gives a cut scene of the other blue door in the floor area. The last stone shows the door opening. So go to the door and enter it.
Go
up the ramp, the door closes behind you. As you enter the room the boss (1) appears in the middle and starts
throwing fireballs at you. If you pull your guns you notice that they do not
work. The right rear alcove contains a closed door. Run to the far left corner
and jump into an alcove. Go to the left and enter an area with a high wall.
Run to the left and follow to an opening in the wall. Go to the corner and
use the slope to climb up onto the wall. Even in this area the fireballs can
reach you so do save often. Climb the wall and run to the right. Jump the
gap and pull up to the back wall. Run over some black tiles over the lave
pit to the back wall. Turn and climb to a higher black tile floor. Run to
the front and pull a switch and hear a gate opening. Climb the wall in front
and go right to cross a black tile bridge. At the end you see the gate you
opened. Go there and run left and jump onto a block in the left corner with
a switch. Use the switch and side flip to a ledge over the door. Turn right
and run to a bridge over the central area. Run over the bridge and fall to
the left corner to pull a switch. Drop to the central area and now jump into
the right alcove. The door is now open. Enter the room and climb the blocks
to a switch. You get a cut scene of a statue with a blue gem in the central
area. Drop down and enter the central area. Now you guns will work. Shoot
and side flip a lot and eventually the boss explodes with a yellow blast.
Pick up the item that he leaves behind the level ends.
End of the level.
Pickups: 7
Kills: 1
Secrets: 0
TR3 - LARA CROFT RETURNS 10: BACK IN CHINA by BORIS SAMOILENKO
Walkthrough by Harry Laudie
Start in an area facing a closed gate. Kill a snake (1) in a bush in front of you. Turn left and kill a snake (2) in a bush against the wall. In the corner, left of the snake and skeleton is the Smuggler's Key (1) hidden in a bush. Get it and open the gate. Go to the other gate and it opens for you. Enter and it closes behind you. Ahead is a Shiva statue and at the back of the room are a closed door and a blue key lock. Go to the right corner and climb the ladder. At the top, back flip and roll to grab a platform. Pull up and jump to the bridge in the middle of the room. There are a few openings here. Start with the right side and jump to the ledge with the switch. Pull it and the door on the other side of the ledge opens. The Shiva (3) also comes alive. At this point, I went down to kill the Shiva to stop the screen from shaking. Then climb back to the bridge. Go to the open door and pick up shotgun shells (2). Enter the door and follow the tunnel. Above the spikes is a rolling ball. I ran through the spikes and jumped the blades losing a lot of health but the ball did not fall. Approach the crawl space and a gate opens inside it. Crawl in and at the end immediately stand up and run to the switch on the opposite wall. Pull it to open a gate to the left. Run there and jump onto the ledge while a spiked wall moves in behind you.
Pull the switch and the gate opens beside you. Run down the tunnel to a platform above the first Shiva room. Turn right and jump to a platform ahead in the corner. Pull the switch and a gate below opens. Drop and grab the ledge. Release and grab again and pull up into the crawl space. Pick up a large Medi pack (3). Continue crawling underneath the blade to the end. You overlook a pool of water. On the far side is an area with a crazy monkey running on it. Drop into the water and swim over there. Kill the monkey (4) to get back a small Medi pack (4) from the thief. Look for an underwater gate with an underwater lever above it. Pull the lever and enter the door and it closes behind you. Pull the next three underwater levers to open gates and finally pull up into a short tunnel.
At the end of the tunnel safety drop into a large room filled with skeletons and dead bodies. Go to the second room ahead and be careful because the floor grate will drop you onto some lava. Approach the second Shiva (5) and it comes alive. Jump over the lava to the first room and shoot the Shiva from there. Where the Shiva initially was you find a golden key lock. After it is dead go to the left side of the pit. Notice an opening on the other side of the pit. Take one step back and stand jump with grab. You should end up in the opening and not in the lava. Pull the switch to open the gate beside you. Follow up the ramps to a switch. Pull it and get a cut scene of a gate opening. The trap door above you also drops. Climb up into the first Shiva room. Again climb the ladder and back flip to the platform above. Jump to the platform in the corner ahead of you and enter the gate you opened. Inside is a large room with red pillars. At the back is a closed golden door. To the left is a hole. In the hole are ladders and many blades ready to cut you in half. I grab a ladder and quickly released and grabbed the ladder again. After many tries I got past the blades and onto the floor.
Now for a lot of jumping. Jump to the first slope, slide and grab, and shimmy right. When stopped by a wall, pull up, back flip, roll and grab a slope behind you. Shimmy left and when stopped pull up and back flip with no roll. Jump a few slopes and eventually slide to grab a slope in the corner. Pull up back flip and jump forward with a right curve to more slopes. At the last slope jump left to a slope where you slide down and grab. Shimmy right to a platform where you can rest and save. Turn around to enter a tunnel. At the end of the tunnel pick up a shotgun (5) from the floor. Look up to the left to see a switch. Go to the right and start climbing the blocks. Jump to the central blocks and jump over the slope. On the other side grab and shimmy left before you drop to a ledge. Turn around and jump to a ladder area. Slide down to the right to pull that switch. You get a cut scene of some golden doors opening back in the red pillar room. Slide down and traverse your way back to the ladder. Climb the ladder, as the trap door at the top is open.
Go to the right and the doors open. You are back in the first Shiva room. Again climb the ladder and back flip to the platform above. Jump to the platform in the corner ahead of you and enter the door you opened. Inside is a large room with red pillars the golden door at the back is open. Go there to pick up the blue K2 key (6). Get back to the first Shiva room and use the key to open the door. Go up the stairs and emerge on a balcony above a deep room. There are two Desert Eagle clips (7,8) on either side of the balcony. To the right is a ladder with a closed trap door at the top. Use the ladder at the balcony centre to get to the ground floor. A trap door closes behind you. As you move about two Shiva statues (6,7) come to live. Kill them with great difficulty. When done, climb a block and pull the switch. You get a cut scene of the trap door above the top ladder dropping. Pull a movable block to the ladder and use it to grab the trap door and climb up the ladder. Go to the corner and climb the other ladder to get up on the top walkway.
You see a golden door on the far left side. On the right side is a hard to see opening that leads to a maze. Start by going left into the maze and find a golden K3 key (9) hidden in a corner. It is a simple maze actually with only the key to find. Pick up the key and get a cut scene of the golden doors on the other walkway opening. Go there and slide down the slopes to land in front of the golden key lock in the second Shiva room. Use the key and the door opens. Enter a large room with green statues. Go to the corridor on the other side and run down the corridor. As you approach three doors the front doors open. Notice a golden key lock on the left door. Run to the end and a Shiva (8) comes to life. Kill it and get a golden K3 key (10) where the Shiva initially was. Go back and use the key and the second door opens. At the end is another Shiva (9) statue. Approach it and it comes to life. If you lure the Shiva outside the door you can get back into the corridor and shoot the Shiva easily as it does not follow you back into the corridor. When dead go to the corridor end and pull the switch to open the third door.
Enter
the third corridor and walk onto a bridge over a deep lava pit. Safety drop
from the bridge to another bridge beneath it. Look around for a switch on
the floor area beneath you. Go to that side and safety drop to a slope and
slide down to a flat area. Use the switch and a platform rises. Use it to
get to the other side of the pit. Go to the other side of this area and climb
down a ladder. Jump the platforms and finally jump to a column. Then jump
to an island and pick up the K4 dagger (11). The door at the wall opens. Stand jump with
grab is helpful here. Enter the door and use the crawl space. At the other
side of the crawl space, stand up and climb the ladder. At the top climb another
ladder. About half way up this ladder back flip to a ledge with another ladder.
Climb this ladder to the top and enter a small room. Go out the door and run
down the valley area until the level ends.
End of the level.
Pickups: 11
Kills: 9
Secrets: 0
TR3 - LARA CROFT RETURNS 11: RESEARCH BASE by BORIS SAMOILENKO
Walkthrough by Harry Laudie
Start on a rooftop in front of a helicopter. Go in front of the helicopter passing over a grate in the floor. Approach the door in the building behind the helicopter and the door opens. Kill the two guards (1,2) that emerge and pick up two large Medi packs (1,2). Try to kill them before they go through the fence or you cannot get the Medi pack from the outside ledge. Enter the building and go down the ramp. Go right at the bottom and pick up the Desert Eagle (3). Go back to the left side and when you stand of a green trap door, it opens and you drop onto a ledge over a trench. Go right and around to the other ledge to get the harpoon gun (4). Before dropping into the trench, climb a back ledge for Uzi clips (5) and harpoons (6). At the end of the trench, press a pushbutton on the left wall and the door opens. Go to the right and climb a ladder. At the top, press a pushbutton and get a cut scene of the door closing and revealing another corridor. Go there and onto another roof area with a green trapdoor. Kill a guard (3) and pick up the Smuggler's Key (7) that he drops. Climb the boxes to get onto the small building roof. Jump to the ledge on the left and go to the end to use the key. You get a cut scene of the trap door opening on the roof below you.
Climb down the ladder into a room. Go through the only door into a room with workmen at consoles who are too busy to notice you. There is closed door to the right side. Press the pushbutton on the left wall to open it. Kill the guard (4) that attacks and pick up the MP5 clips (8) that he drops. Go through the door into a room with a large pool. Kill the three frogmen (5,6,7) that are shooting at you. Use the Desert Eagle and you take less damage. Notice a closed trap door at the pool bottom. Across the pool are two closed doors. Dive into the pool and pull an underwater lever on the right wall. You get a cut scene of a door opening revealing a pushbutton. Swim back to the entrance and pull up to a platform above the door. Jump to a platform to your right. Jump and grab the ceiling to monkey swing across the pool to that pushbutton. Press it and the door to the right opens. Jump to the slope and slide down to grab. Shimmy right, pull up and enter the door. At this point the alarm horn also mercifully stopped. Go left into a room with a flooded floor. In the far corner pick up a blue fuse (9) [called Serpent Stone in the demo]. Exit and return to the entrance room and notice the high crawl space immediately in front of you. Enter it and at the end use the blue fuse. You get a cut scene of the trap door in the pool opening. Go back to the pool.
Dive into the pool and swim through the trap door. Follow a tunnel and pull up to a ledge while two frogmen (8,9) attack you. Go forward to see a closed door to the right. Go left into a room and kill a guard (10) and the alarm is back. Look at the ceiling to see two high crawl spaces. Pull the blue movable block to the opposite corner and climb up. Crawl to the end of one to stand up. Pick up two sets of harpoons (10,11) and a small Medi pack (12). Press the pushbutton on the wall to open the door below. As you exit go to the other crawl space. Go there and pick up a small Medi pack (13), harpoons (14) and MP5 clips (15). Get down and go through the door. Kill a guard (11) and drop into the hole in the floor to land on a brown bridge structure. You can see the ocean out the window [great detail]. On one side is a very deep pit. On the other side is a pushbutton on the wall. Go there and pull a movable block under it. Press the pushbutton and get a cut scene of a yellow door opening. Enter the crawl space that was behind the movable block and go to the end. Pull a switch on the wall and get a cut scene of the pit filled with water. Go back there and kill two frogmen (12,13) in the water. If you do not see them, swim to the other side and they appear. At the other side, pull a movable block back and shoot out the grating window behind it.
Drop into the hole, kill a guard (14) and pick up a large Medi pack (16) and Desert Eagle clips (17) that he drops. Continue to drop into a room with a pool. Get into the water and kill three frogmen (15,16,17). Or get out and kill them after they appear. On the wall of the pool is an underwater lever. Pull it and dive down to the bottom. On one side is another underwater lever. Pull it and swim to a bottom corner to go through an open door. Follow the tunnel and pull up in room. There is door and a keyhole at the far side. Pick up harpoons (18), Desert Eagle clips (19), Uzi clips (20), and a large Medi pack () from one side of the floor. On the other side pick up three sets of harpoons (21,22,23) and a small Medi pack (24). Get into the crawl space above the key lock. On the other side you seem to be behind the closed door. Enter a room to kill a guard (18) and notice some closed doors. Run up the stairs in the open doorway and at the end reach a place to press a pushbutton on the wall. You get a cut scene of a door opening in the other room at the bottom of the stairs. Notice the floor grate and the closed white door when you exit. Go there and kill a guard (19) on the stairs. Enter the door and pick up two sets of harpoons (25,26). Climb the left wall and pull up to a pushbutton. Press it and go back upstairs to the open white door.
Follow the corridor to a room with a closed door. Pull up to a ledge on the left side and follow a corridor to a switch. Pull the switch and the door opens. Get down and kill a guard (20) who drops MP5 clips (27). Kill another guard (21) who drops Desert Eagle clips (28). Enter the door and it closes behind you. Ahead is a large pool area. Kill the three frogmen (22,23,24) in the water. Get your harpoon ready and dive into the center of the underwater building. Kill a frogman (25) and look for a tunnel in a corner. Swim into a large empty room and swim forward into another tunnel with two branches. The left branch is just a loop. Follow the right branch to a room where you can surface. Jump the columns in the water and get to a hard to see brown block in the corner. Pull up into an alcove with a switch. Pull it and the room you just left fills completely with water. Get back and swim to the opposite side and pull up into a tunnel. Follow to another underwater room and kill a frogman (26). Swim into a hole in the floor grates. Find a crawl space in the corner and swim into it. Follow some twisting tunnels to enter a cave area with a large underwater building. Kill two frogmen (27,28) if you have enough air. Notice a closed white door at the cave bottom. Enter the building and follow the tunnel to pull up into a room. Kill two guards (29,30) and pick up a small Medi pack (29) and a large Medi pack (30). There is a closed door in the corner.
Press the pushbutton on the block near the fire and get a cut scene of the underwater door opening. Swim back and into the door. Pull up the other side and kill a guard (31). Press a push button on the back of the column there and get a cut scene of the door in the other room opening. Go there and enter a large cave. The door closes behind you. Follow the cave to a large room. There are many doors and a structure in the middle of the room. On the side if the structure is a switch. Pull it to open the doors behind you. Go inside and climb a ledge on the left. A few jumps to platforms to either side and you are on a bridge over the room. Follow the bridge and look for an upper opening. Get there and keep climbing up until you reach a room with a down ramp. Follow the ramp to a grate floor overlooking the room. Run to the end to pull a switch and get a cut scene of double doors opening at the floor level. Get back to the ground floor. Enter the double doors and the level ends.
End of the level.
Pickups: 30
Kills: 31
Secrets: 0
TR3 - LARA CROFT RETURNS 12: ANCIENT HALLS by BORIS SAMOILENKO
Walkthrough by Harry Laudie
Start in a dark corridor and go forward. Turn right to see three pedestals with fires on them. Drop into a triangular hole behind the last pedestal. Pull the switch and climb back up. The fire is out on the last pedestal. Use it to jump and grab a ledge above you. Get onto the sloped side and look up to find an opening and pull up to another ledge. Turn and pull up to another area and go to the back to pull a switch located on a snake statue. You get a cut scene of a door opening below you. Get back down to the sloped section and go to the back of the room to find the open door. Enter the room and kill two SAS guards (1,2). Go into the center area of the structure on either side to climb the back wall. Pull up to the top ledge and turn around to get a small medipack (1) from the back ledge. Go back and jump to the ledges with columns. Turn left and run down the stairs and the camera view changes. At the end fall into deep pit filled with water. Dive to the bottom to pick up two flares (2,3). Light a flare and swim to a corner to look for a light-blue block at the surface. Pull up and climb the green wall up to a tunnel.
Press the button there and the door opens. Go straight and avoid the fire pit beside the right wall. You face blue platforms over a lava pit. The squares with white globes are safe. The others are deadly. Use the safe platforms to get to a ledge with a closed door. As you face the back wall, go left to the wall and pull a well-hidden switch. The door in the left corner opens. Jump the two safe platforms and go up the steps into the doorway. Go right and find some stairs. Follow the stairs and pass two closed doors. Go to the end and climb the green wall on the left wall. Follow down a corridor as wall torches light up. At the end climb a block and pull up to the right. Go forward and climb a block and note the design on it. Continue to drop in a hole. Turn and pull back a block with the same design noted before. Climb the green wall and get back to find a button that was behind the block. Press the button and a trap door drops behind you. Drop into the hole and the door opens as you approach it.
Go up the ramp and emerge onto a ledge overlooking a large room. Jump off the ledge and into the water. Swim forward into a tunnel. At the other end, pull up and go to the back wall. Press a button and get a cut scene of a trap door opening. Swim back to the first room and kill the poisonous creature (3) if you did not kill it from the ledge. As you face the back of the room, go onto the structure at the left wall. From a small platform in the far left corner you can jump up to grab a climbable wall with a picture on it. When you pull up, kill the poisonous creature (4). Go the middle of the back wall and climb the green wall through the open trap door. At the top shimmy to the left to drop and do not back flip. At the top, go left to pull a switch on a snake statue. Notice a closed door to the left. Go back down through the trapdoor and return to the ledge where you entered this area. Climb the block and monkey swing to the far left opposite corner where a door has been opened. Go inside and down the ramp down to a room with moving columns of light. Jump across the lava to the far right corner and pick up a MP5. Return and jump to the far left corner. Press a button that you cannot really see because of the light. Jump back, exit and loop to the right to an open door. Pick up shotgun shells (4) and pull the switch to get a cut scene of the door opening in the room with the white globes.
Exit this room and turn right and drop into an open trapped door. Go the end with the green wall and climb down. Go back to the globes and jump the platforms to the ledge. Pull the switch and get a cut scene of a door opening near a green wall. Go back over the platforms back to the steps. Enter and go up stairs and into the open door near the green wall. Enter a large room with a decorated floor and the door closes behind you. There are a few invisible walls here in some places, but they do not affect the game. Ahead of you is a closed door. In the opening to the left are some stairs and another closed door. Go into the opening in the right wall and follow the ramp. At the end, jump to a ledge before you fall into the water. Go to the center, press a button and get a cut scene of a platform rising in the room you left. Go back there and the platform is in front of you. Approach it from the right side and pull up. Pull up again into a room with columns. Go to the right and see a yellow patch of wall. This is a crawl space. Get in and crawl into a cave. As you approach a temple, the steps catch fire and two mummies (5,6) attack you. Actually, one was stuck in the far right corner.
Jump the fires on the steps and be careful of the fire coming from the walls. On the other side, two mummies (7,8) attack from their holes. Go forward and kill two mummies (9,10). Look into the dark area in front of you for a hole. Get in for Uzi ammo and MP5 ammo (5). Pull up and continue down the corridor to kill two mummies (11,12). Against the left wall is a dark area hiding another hole. Hop in for a large medipack (6). Exit and go forward and watch four mummies (13-16) drop out the ceiling. [Great idea.] Go forward into the water and swim to the other side. There you have to kill two poison creatures (17,18) and four SAS guards (19-22) that attack you at the same time. Pick up two large medipack (7,8), MP5 ammo (9), Uzi ammo (10) and Desert Eagle ammo (11) from the dead bodies. Go to the side for a green wall. Climb it to the top and turn to jump to a central ledge. Pull the switch on the snake statue and get a cut scene of a door opening on a ledge. Jump to the next ledge and enter the open door in the far left corner. Run down the tunnel, turn, slide down and safety drop into another corridor. At the end of the corridor pick up a large medipack (12) and turn right through some doors. Get ready for a firefight. Enter the room and kill two SAS guards (23,24). Go into the opening to the right and up some stairs. The doors are open so pull up onto a ledge. Go to the right and kill a SAS guard (25). Kill the SAS guard (26) on the floor as well. Go back to where you climbed the wall with the picture. Climb the middle green wall to the ledge with the snake switch. Go left and into the newly open door.
Jump to the left ledge and go to the corner. Press the button and get a cut scene of a door opening near a monkey swing. Go back down to where you use the monkey swing before. This time, it is short trip to the open door in the right wall. Slide down backwards so you can grab and safety drop at the end. Light flares and go down a dark tunnel. Be careful at the end or you take a deadly fall. Jump across the gap into a doorway. Enter a room and a door closes behind you. Go to the corner and press a button and the large door opens beside you. Look up to the ceiling and notice you are underneath a room you were in before. Slide down and the door closes behind you. Look at the ceiling and see a monkey swing. Cross the room and watch out for fires that start. Pick up two small medipacks (13,14) and go to the light column. Press a button on the wall behind it and get a cut scene of four poisonous creatures (27-30). The door in the corner of the room has also opened. Kill the creatures since they will chase you. Go through the door and you are back at a place that you have been before. Go to the left and remember the green wall up the stairs. This time go through the newly open door and run up the ramp. You are over the room you just left. Jump to a ledge and grab a monkey swing. Go to the other ledge and release. Jump into the opening in the wall and go up the ramp. As you near the top of the ramp, you get a cut scene of the Amulet of Horus rotating above a floor. Enter a room and run to the amulet and the level ends.
End of the level.
Pickups: 14
Kills: 30
Secrets: 0
TR3 - LARA CROFT RETURNS 13: NORTHERN TOWN by BORIS SAMOILENKO
Walkthrough by Harry Laudie
You start facing in the direction of brick walls with fences, so go there first. Go behind the fenced section to see a lock, a door and a pushbutton. Press the pushbutton and get a cut scene of a door opening in a room. Exit and go to the left to run pass a motorcycle behind a fence. Continue forward to the wall to pick up flares (1) and Uzi clips (2). Go towards to where you see a red car in a shipping cage. Notice a closed door to the left. Go to the wall behind the car and the door opens automatically as you approach it. Enter and go up the stairs to the door that you opened.
Enter a small room and turn right. Approach the next door and it opens for you. Ignore the man sitting at the desk. He has a red cut on his neck. There are closed gates in the far left corner of the room. Hop onto the bookcase near the stairs for shotgun shells (3). Go up the stairs and pull the switch that is cleverly hidden by the left side curtain. Walk out onto the ledge overlooking the starting area. Look towards the left and see a key on the roof of a building. Turn right and run pass a lock on the wall. Jump off the edge onto a lower building roof. Go to the wall and grab a crevice to shimmy to the left and drop onto another building roof. Turn and jump the three ledges to get grenade shells (4) on the last ledge. Then jump to the roof and pick up the key (5).
Safety drop back to the ground. Go back to the lock behind the fence and use the key. You get a cut scene of the gate near the car opening. Go there and enter the gate and see a box and a ladder to your right side. There are also some interesting posters on the wall but I cannot read the language. First, go under the archway and go to the far corner for MP5 clips (6). If you run down the other street, you see a dead-end with a closed gate. The camera shows a view from the roof. Go back to the box and climb the ladder to the roof. Notice a closed door in front of you. Turn around and jump to a column. Pull the switch on the fence and get a cut scene of the door opening near the first lock you used. You will go there later so remember where it you saw it.
Jump back to the roof and turn left and follow the roof. Jump around the steam vent and continue. When you start to slide down, grab the edge and shimmy to the left to the guardrail where you can pull up. Jump the guardrail onto the walkway. One end is blocked by a closed gate. Enter the open doorway and just follow the corridor to a gate. Pull up to the left and enter a room with boxes and steam pipes. Enter and see a closed door to your right. Go to the back wall and fall into a hole to pick up Uzi clips (7). Then go to the far left corner and press the pushbutton. Get back over the boxes and enter the newly open door.
Go up a ramp and turn right to drop into a short tunnel. Pull the wall switch and exit. Continue up the ramp and enter a room. Go left into another room and press the pushbutton on the wall. Exit the room and fall into a trap door into a room below. On one side of the room is an aquarium. Go to the door and it opens for you. Exit and turn around to see that you were in room #1. Go forward and the door to room #2 opens for you. I do not understand the signs on the walls. Enter the room and pick up flares (8). There is a women standing in the corner moving her hands.
Exit and go down the corridor to see a man at a desk and another women. The door in the alcove to your right does not open. Go left and the woman goes to the door and paces in circles. The door to room #3 is does not open. Go down the corridor and the door to room #4 opens for you. Enter and there is Winston and two women. Go to the back wall and press the pushbutton. You get a cut scene of the red car from the shipping cage speeding through a gate and down the street.
Exit and go up the ramp and see the open door to room #5. Go around the end of the railing and go to the left to see a pool with a closed underwater door. Return to enter the room #5 and press a pushbutton on the corner wall. Go back to the pool and the door is open. Dive into the water and follow the underwater tunnel. Pull up to a ledge and use the wall switch. You get a cut scene of the door that you saw on the roof and it is open. Exit and go back down the ramp. The closed door, where the woman was pacing, is now open. You exit back onto the street.
Climb the box and ladder back onto the roof and enter the open door. You are on a glass floor over the pool. At the far wall are a ladder and a closed trap door. Enter the tunnel in the far right corner. Jump over the gap and pick up something that does show in the inventory. Continue forward for Uzi clips (9), key (10), and a large medipack (11). Press the pushbutton on the back wall and hear something open. Go back and drop into the hole. Follow the tunnel down past a steam vent and then up into a room where you have been before. Go straight into the next room and up the stairs onto the ledge. Use the key in the lock on the wall and get a cut scene of the large gate opening back in the room you just left.
Go back there and enter a large room with many desks. Go left and look in a corner for a book sticking out a shelf. Use the book as a switch and get a cut scene of the tap door opening at the ladder. Exit this room, and go back through the steam tunnel back to that ladder. Climb the ladder and shimmy to drop onto a ledge. Go left to the wall and jump up to grab a crevice. Shimmy to the left to pull up into an alcove. Press the pushbutton and get a cut scene of the gate opening back on the walkway on the roof.
Safety drop down and exit to the right to get back to the roof. Go towards the steam again and shimmy to get back to the walkway. Jump to the walkway, enter the gate, and go up the ramp. In the first room you can pick up Uzi clips (12). In the second room are flares (13), MP5 clips (14) and a small medipack (15). In the last room you find grenade shells (16) on the floor and a pushbutton on the far wall opposite a window. Press the pushbutton and get a cut scene of the gate opening in the dead-end street. Exit back to the walkway and safety drop to the street.
Go to the dead-end street and enter the open door. You see a second closed gate. Pick up Uzi clips (17) from a box in the corner. Go to the opposite wall and start to jump the slopes. In a flat area, there is an alcove containing shotgun shells (18). But eventually you are stuck and cannot go up the slope. Now return to where you first started this level. Go behind the fence and now the door is open. Enter the room and turn to the right to press a pushbutton to open the door at the back wall.
Enter the room and get on the motorcycle. Drive back to the dead-end street and enter the doorway. Drive over the boxes and up the slopes. ALT is reverse just in case you get stuck in a corner. At the end, jump over the street and land in an opening. Drive down a tunnel onto another roof. Turn left and jump a gap to drive onto a ledge around the back walls. Drive to the right and stop. Dismount the motorcycle and go to the left corner for a rocket (19). Get back onto the motorcycle and continue driving until you are forced to stop by boxes. Dismount and jump the boxes. Then jump over a deep pit to get to the far wall. Press the pushbutton and get a cut scene of a gate opening.
Jump back over the pit and run back to the ledges. Slide down the brown roof and safety drop to a lower building roof. Then safety drop to the ground level. You should see a large building with boxes at the corner. Go to the opposite corner and up some stairs. Press a pushbutton on the wall of the building. This opens the second closed gate in the dead-end street. Go to opposite corner of the building and you see a room. Enter there and see that the second door is open. Climb the box in the corner and jump to a ledge above the entrance. Pull up to get Desert Eagle clips (20) and shotgun shells (21).
Get down and go into the remaining corner of the area and see another motorcycle. To the left is the starting area behind the closed gate. Go to the right and enter the gate you opened to pick up a small medipack (22). Continue down the tunnel and the door opens before you. Enter and it closes behind you. Run down the large tunnel and pick up large medipack (23), flares (24), shotgun shells (25), small medipack (26), and more shotgun shells (27) before you reach the end of the tunnel. Turn left and climb up into opening. Keep sliding down the slopes until you reach a deep pit.
You also see a black rope across the pit. Face the rope and jump to grab it as if it was a crevice. Shimmy to the right and drop onto a ledge. Drop down a few ledges and pick up Desert Eagle clips (28). Go to the edge and jump to grab the railway tracks. Pull up and jump into the tunnel at the back wall. Climb down the blocks to the water and get Desert Eagle clips (29). Climb back up to the tunnel. Enter the tunnel and slide down the slope and the level ends.
End of the level.
Pickups: 29
Kills: 0
Secrets: 0
TR3 - LARA CROFT RETURNS 14: EXCAVATION SITE by BORIS SAMOILENKO
Walkthrough by Harry Laudie
Run forward and go over a big danger sign. Enter the doorway under the "SOFIA & NATLA CORP" sign and follow the short tunnel to a large railway tunnel. One end is blocked by a fence so run down the long tunnel to the opposite end. At the train, go to the right side and onto a platform. The moving green bar is safe. Jump over the bar and go to the corner where you can pull up onto the blue structure. Go to the back wall and pull down the wall switch. Get back down and enter the open door to kill two guards (1,2). Enter the tunnel and go to the right. You overlook a deep pit. Jump over the pit to grab a crevice. Shimmy to the left and continue shimming over the white pole. Eventually you get to a place where you can pull up and stand.
Jump to a ledge on a column in the middle of the room and go around the blue structure to another ledge. Jump with a right curve to the sloped ledge ahead of you. Land and slide down the slope. Grab the edge and shimmy to the left and pull up onto a flat ledge. Jump between the next two slopes and curve to land on a flat blue ledge. Jump to a brown box and then to a wire mesh ledge against the far wall. Turn and go to the end of the ledge and jump up to grab the ceiling. Monkey swing to the ledge in the corner and notice a trap door above you. Face the room and monkey swing again to the ledges with the gray boxes. Crawl under the boxes to a wooden ledge. Jump to the ledge against the back wall and go to the wall switch in the corner.
Pull down the wall switch and get a cut scene of a trap door opening on the ledge. Monkey swing back there and pull up into a tunnel. Follow the tunnel and crawl under a steam pipe. Turn and climb the wall down to the ground floor. Kill three guards (3,4,5) that seem to alternate between visible and invisible. Pull up onto the ledge to the right of your entrance for a small medipack (1). Cross a bridge and follow the ledge and pull down a wall switch. Notice a closed gate and some items to your left but the door you opened is behind you. Drop to the floor and kill two guards (6,7). Enter the open door and cross two railway tracks. Turn to the right and go into the railway tunnel.
Go down the tunnel and look to the left for a large medipack (2). Enter a large area and be careful of the drop near the side ledges. Kill two guards (8,)9 on the left side ledge. Search the dead bodies for MP5 clips (3) and flares (4). Kill two guards (10,11) on the right side ledge. They leave nothing but there are two small medipacks (5,6) to pick up on the ledge. Go up the ramp at the right side wall to get onto the higher ledges. Kill two guards (12,13) on the ledge and pick up two small medipacks (7,8). Kill a guard (14) on the ledge on the far wall. Jump to the two side wall ledges for two Uzi clips (9,10).
On the top ledges, go to the ledges above the train. Hop down to a ledge at the back wall for a large medipack (11). Pull down the wall switch and get a cut scene showing a closed door. Return to the central ledge and follow the ledge towards the tunnel side. Climb the block to the left and drop to the other side. Pull down a wall switch and you may or may not get a cut scene showing the same closed door. Now hop back to the ledge and hop the block on the right side. You see a tunnel with the closed door. Nothing else to do here so return to the ground floor with the railway tracks. Go towards the train and kill another guard (15). At the train, go to the left ledge to kill two guards (16,17) and pick up a small medipack (12). Then go to the right ledge to kill a guard (18). At the end, turn to the left and see a ladder to climb down into the pit. Kill two guards (19,20) and pick up a small medipack (13).
Go to the end of the pit and pull up into a crawl space. Drop on the other side to kill two guards (21,22). Pick up a small medipack (14) and shotgun shells (15). Notice a closed door at the side wall. Remember where this gate is located, as you have to return here. Go to the back of the pit and pull down the wall switch behind a column. You may or may not get a cut scene showing the same closed door. Return to the crawl space and back into the first pit. Climb the ladder and drop into the pit on the other side. Kill two guards (23,24) and pick up a small medipack (16) and Uzi clips (17). Climb out of the pit and return to the track and kill two guards (25,26). Return to the upper ledges to where you saw the closed door in the tunnel.
The door is open so kill a guard (27) at the door and enter a large room. Kill another guard (28) running around the room. Go to the far wall and enter a hard-to-see tunnel. At the end, pull down the wall switch and get a cut scene of a closed door that you saw before. Exit the room and get down to the tracks again. Go back through the railway tunnel and kill two guards (29,30). Enter the large room again to kill five guards (31-35) and go through the entrance door. Turn left and go to the open door. Pick up a rocket (18) and MP5 clips (19) and enter the door. The door closes behind you and you face a ramp. In the back corners of the room are Desert Eagle clips (20) and Uzi clips (21).
Go down the ramp and through a corridor of closed doors. When the corridor splits, go to the left to kill a guard (36) and see the closed door through a window. Take any corridor as they all go to the same place. You find a cross corridor with closed doors at both ends and a gap in the middle. Enter the gap and emerge into a room. Behind a green light is a wall ladder. Climb the wall ladder and pull up into a small room. Go forward and two large doors open for you. Follow the corridor to a large room. There is a large "SERVERS" sign at the back wall. There is a closed gate in the far left corner. Go to the right side of the room and look at the last blue console on the left. Press the pushbutton on that console and get a cut scene of the door opening in the pit that you should remember. The gate in the far corner also opens. Enter the gate and you get a shortcut back to the tracks just behind the train. Get into the pit through the crawl space again and enter the tunnel in the now open door. Pick up the LAB SECTIONS OPENING CARD (22).
Get out of the pit and take the shortcut back to the servers room. Follow up the ramps and enter a doorway in the upper right corner of the room. There are three closed gates at the back walls. You see a puzzle on the floor that looks like:
W 5 S 9 d D
s g X B 1 E
N A r a * R
L C R 1 o 6
A* O Z M f 7
? T 2 4 P Y
Q z H c D* q
The LAB SECTIONS OPENING CARD has on it the gate numbers and lines pointing to letter combinations. The key is g=s5. Basically where the letters intersect is the letter to use and the tile to step onto to open the gates.
Gate #1 has (s9, Ld, ?S) corresponding to (B, o, 2)
Fate #2 has (N5, N9) corresponding to (A, a)
Gate #3 has (s9, N9, A*S) corresponding to (B, a, Z)
Step on these number combinations, and no others, and the three gates will open.
Enter gate #1 and see black wires across the next doorway. Go to the right through a broken piece of wall. Enter the next room and press the pushbutton on the far side of the console. This opens a gate on your right. Enter the room there and pick up the Hand of Rathmore (23) from a console. You get a cut scene of a closed door. Exit the same way back to the puzzle room. Go to the unmarked gate #3 that is in the corner. Pull down the switch and get a cut scene of the gate opening. Now enter gate #2 and follow the rooms to the open gate. If you go to the left over the hills, you will just see a deep pit and a bridge.
Pick up grenade clips (24) and enter the gate that closes behind you. Follow the corridor and cross the bridge. Enter another large room and at the end, hop onto the boxes in the corner. Press the pushbutton in the corner and a gate opens in a hole beside you. Enter the gate and get a cut scene of a purple depression in the floor of a room somewhere. Continue down the corridor and see that room behind the glass wall to your left. Go to the end and turn left to enter that room. Pick up a rocket (25) from the floor. Circle the room and pick up a rocket (26) and two MP5 clips (27,28) from the corners. Jump into the middle of the purple floor. The surrounding floor tiles are deadly. Pick up the Twin Scion (29) and back flip to the safe floor. Run back to the entrance and kill the six mutant spiders (37-42) that attack you. They can only attack one at a time as they go through the doorway into the corridor.
Return and go into the back room area and pick up shotgun shells (30), two Desert Eagle clips (31,32), and two Uzi clips (33,34). Notice a closed gate in the back right corner. Enter the two rooms that the spiders came from and pull down the two wall switches. Return to the corner and see that the gate is open. Enter the gate and side down into a cave. Follow the caves and kill another mutant spider (43). Follow the cave to a control room and kill two guards (44,45). Press a pushbutton on the far side of the blue box in the middle of the room. The gates open at the back wall. Enter the gates and the level ends.
End of the level.
Pickups: 34
Kills: 45
Secrets: 0
TR3 - LARA CROFT RETURNS 15: TEMPLE OF THE FIVE ARTEFACTS by BORIS SAMOILENKO
Walkthrough by Harry Laudie
You have lost everything except the Dagger of Xian and the Twin Scion. You have no weapons and only one small medipack.
You start in a large building with a colorful ceiling painting. Go forward as far as possible and jump over a slope into a hole to pick up a large medipack (1). Jump back and back flip off that slope to grab a higher ledge and pull up. Jump some smaller ledges to get to the end and pull up to a large ledge. Turn to the right and grab the crevice on the wall. Shimmy to the right as far as possible. Drop onto a ledge and turn to the right and enter an opening. Slide into a room with red and blue tiles. Jump over the deadly red tiles and dive into the water at the blue tiles.
Swim forward around a hill. I found the left triangular opening was the easiest. Pull up into a room next to a ramp. Run down the room and the camera view changes. When you see a trap door drop above the ramp, stop and turn around. If you run forward the trap door closes. But if you stand jump forward twice, you jump over the closing triggers and the trap door stays open. Pull up through the hole and run down a tunnel. You enter a large room with four different colored sections. You enter in the yellow section. The other colors are blue, green, and red. You can see a central pillar and four higher bridges.
Turn left and run to the wall to pull out a movable block. Move the block to the central pillar so that you can pull up to the bridges. One bridge will have a red receptacle. At the end of that bridge is a movable block. Move the block to underneath the red receptacle. Place the Dagger of Xain in the receptacle and get a cut scene of a closed door. Jump to the bridge on the opposite side of the central pillar. It has a blue receptacle. At the end of that bridge is a movable block. Move the block to underneath the blue receptacle. Place the Blue Wheel in the receptacle and get a cut scene of a door opening.
That door is in the wall of the red section of the room. Go there and find the door and enter the open door. Run up the stairs and run across the blue floor tiles. As you approach the door at the end of the corridor, the level ends.
End of the level.
Pickups: 1
Kills: 0
Secrets: 0
TR3 - LARA CROFT RETURNS 16: ALTAR ISIS by BORIS SAMOILENKO
Walkthrough by Harry Laudie
You have your pistols back but Sofia (1) is shooting fire at you from a high wall in front of you. Notice the cold breath of arctic air. If you fall off the platform into the water below, you die from the cold. Should you fall in, swim under the platform and you see a crystal floating in the water. Immediately pick up the large medipack (1) and small medipack (2) at your feet. Turn around and hop on a block in the corner of the platform. Jump to the ledge at the back wall and then left to another ledge. Climb a block and turn around to jump to a higher block. Jump to a platform and pull up onto the higher bridges. Sofia can also climb and continues shooting at you from the other side of the room. As you face Sofia, go to the left of the bridge for a small medipack (3). Then go to the right end of the bridge for a small medipack (4). Climb the green wall there to get to a higher ledge.
Go to the middle of this ledge and grab the ceiling of the bridge above. Monkey swing to drop onto a bridge in the center of the room. Start with full health or you will never make it. Run to either end to climb the green wall. Back flip to a higher bridge and run to the center for a large medipack (5). Turn and run to the back wall. Climb the blocks and run and jump to higher blocks towards the right wall. There is a small medipack (6) in a gap but then you have to jump back to the bridge and go around again. On the last ledge, pick up a large medipack (7). Then use the green ceiling to monkey swing to a ledge on the opposite side of the room. Of course, Sofia is still shooting at you.
Pull up onto the top of the monkey swing and run to the right end to pick up a small medipack (8). There seems to be an invisible wall in that area so that you cannot jump over to the next bridge. Return to the middle of the ledge and then jump to the middle bridge. Pull up and run to the left. Jump to a small bridge to the right and then jump onto the upper ledge at the left corner. You are on Sofia's side of the room. By now, she is above you on the blocks. There are medipacks on the blocks if you want to go down to get them. I just ignored them because you have to climb all the way back up. Turn around and climb to the next block against the wall. Jump over a slope and climb another block to face a closed door. Turn and jump to a ledge behind you. Climb up onto a block next to a button. Press the button and the door opens. Run and jump to the door and then into a block in the corner. Turn to the left and run and jump to more ledges. At the end, drop down to a ledge and climb a green wall. At the top shimmy to the right and drop onto a ledge.
Run down the ledge and get a cut scene of several Sofias. All of then are shooting at you. Follow the ledge around the wall and pick up a large medipack (9). Follow the ledge and climb some blocks near a white column. Pick up a small medipack (10) on the first block. Jump up behind the white light and pull down a wall switch. The room is immediately flooded and all the Sofias die. Turn around and swim away from the white column towards the opposite wall and keep near the ceiling. You should find a hole and pull up into a small room. You get a cut scene of the underwater area under the platform but the crystal is missing. You may need a few medipacks to make it to the hole.
Go through an open door and enter a large room. You get a cut scene of a white light traveling across the room. Enter the room and pick up a crystal (11). The door opens in the corner. Enter the open door and run down the tunnel to a crawl space. On the other side, you stand up in a very dark room. Run forward and bump your nose on a wall. Turn to the left and run until you bump your nose again. Turn to the left and you should see a bright tunnel. Follow the tunnel to another dark crawl space. Stand up and run forward to where you see another small patch of light. Go through another dark crawl space into a bright tunnel.
Follow the tunnel to a crawl space. Then another bright tunnel, dark crawl space, bright tunnel and enter a very dark tunnel. Shoot your pistols to get some light and follow the dark tunnel to a wide tunnel with a green structure at the end. Go behind the green structure to step into an outdoor area into the snow. You get a cut scene of a helicopter waiting for you. Go to the opposite corner of the snow hill and find a place to pull up onto the top of the hill. Run towards the helicopter and the level ends.
Watch all the closing credit pictures and quit the game.
End of the level.
Pickups: 11
Kills: 0
Secrets: 0
Total of the levels.
Pickups: 292
Kills: 205
Secrets: 8
Az oldalon közölt képek, a szöveges tartalom, illetve minden sajátkészítésû anyag, a © TR Editor.hu tulajdonát képezi. Azokat semmilyen formában nem lehet reprodukálni, másolni, terjeszteni, csak a szerkesztõség engedélyével.