
Tarragona
Author: Josep Borrut
Download: Here: 1-2level 3.level. 4.level. 5.level. 6.level. 7.level. 8-9. level.
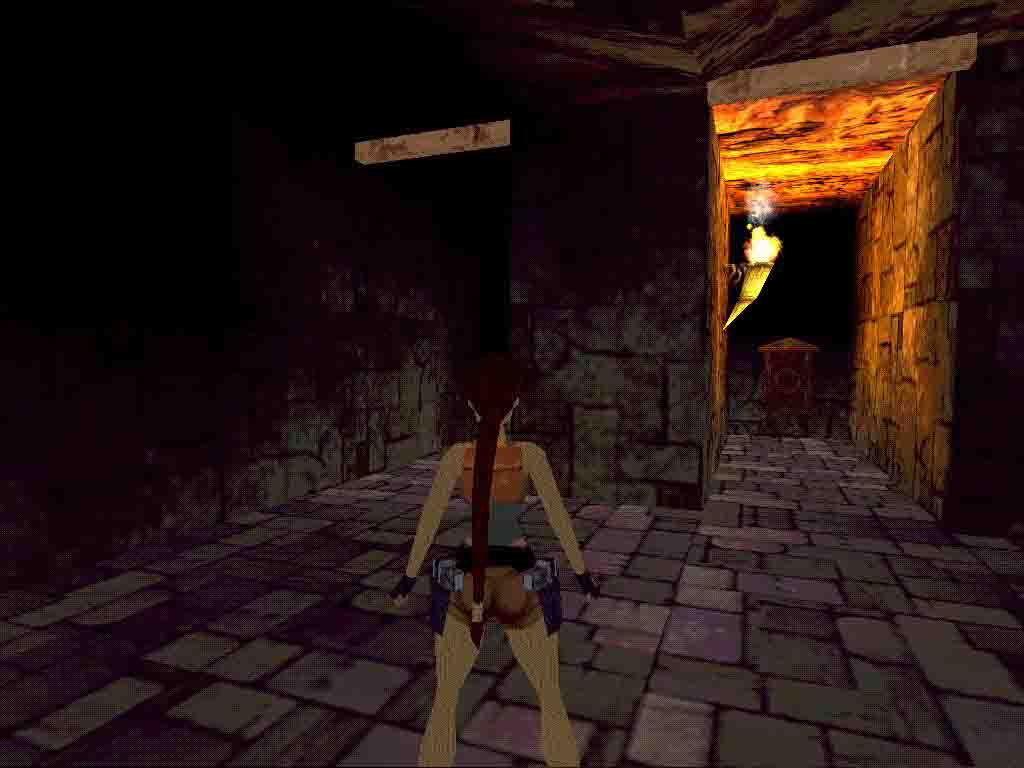
Level 1-Escipions Tower. (Later to be named as Tower)
Story:
The source of inspiration fro these 9 levels was the town Tarragona, a Catalonian city. The UNESCO declared the city in 2000 to "World heritage".
Walkthrough:
You have to use the revised Catacombs wad.
We wont mention all the level changes or the walk will become too messy (youll see for yourself when you go from one level back to the other).
From the read me: After the earthquake a lot of things changed. I would
suggest that you to visit back to the places you already visited. You will
find surprises. There are 7 points were you will be jumping back and forward
between both levels.
Slide down and watch the cutscene of an alcove with some Flares, go to the bottom of the pit with the Tower and to the NW corner, get the Flares and turn around, duck and climb backwards into the CS. Push the button there and see a door open up W of the Tower. Light a Flare and face E, walk up to the E wall on the R hand side and grab up to a crack, shimmy L to a CS in the N wall. Climb into the Caves.
Level 2-Escipions Caves. (Later to be named as Caves)
Keep going till you stand on a grey Tile overlooking a huge cave, you can see some Flares and a Star up on a rock pillar. Drop/hang from the edge, shimmy L to the end of the crack and drop/grab the crack below, shimmy L to the end of the crack and drop/grab again, go L once more and drop to a sloped surface, slide and grab the edge of the climbable pillar. Go down a bit and just backflip/roll into the unknown, land on a rock ledge, roll and go straight N, till you come to a pillar, drop/hang from the E side and shimmy L around the corner, just around the corner Lara will put her feet up again, backflip/roll and grab the opposite ledge, pull up and go to the walltorches.
Go over the ledge to the E and do a runjump/grab to that CS in the E wall, get in and go R (S), follow the sloped passage up to where the tunnel gets wider and look to the R there to find the Flares. Then go up S again and go over another blue Tile, drop down S into the lower cave all the way and you are in a dry river bed, this place will be flooded later.
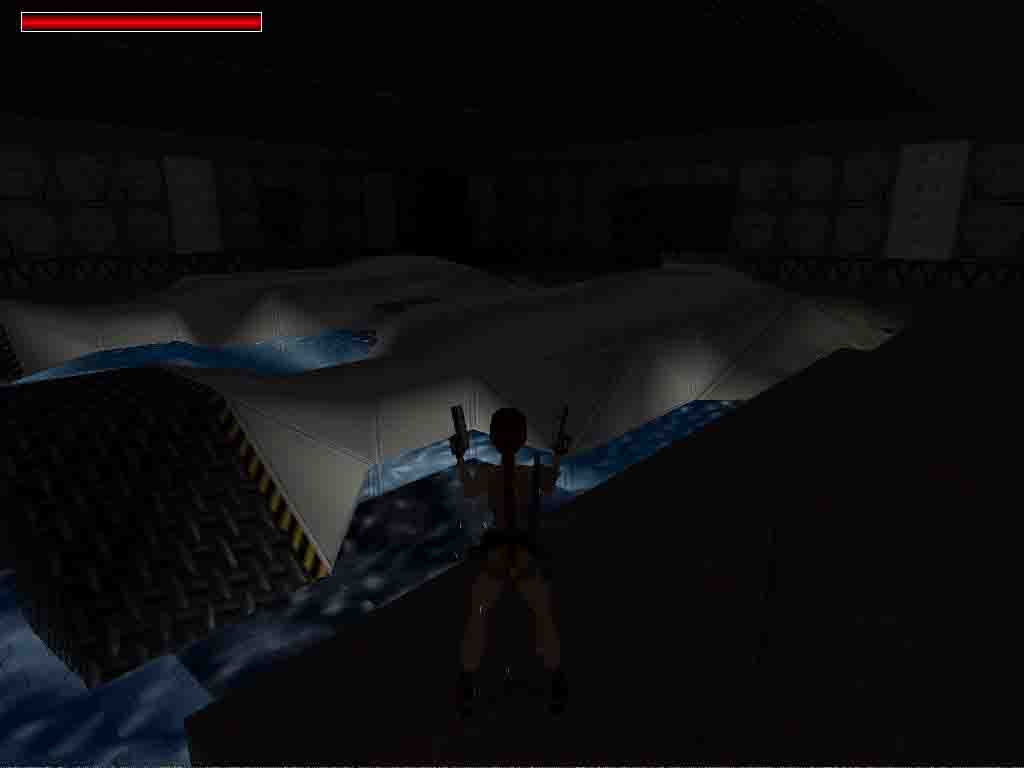
Dry River Bed.
Go E and through the low tunnel to the L and find Secret#1, Ammo, MP and Flares. Go back and go W and then L (S) to follow to the building at the end of the river bed, go in and to the Tower.
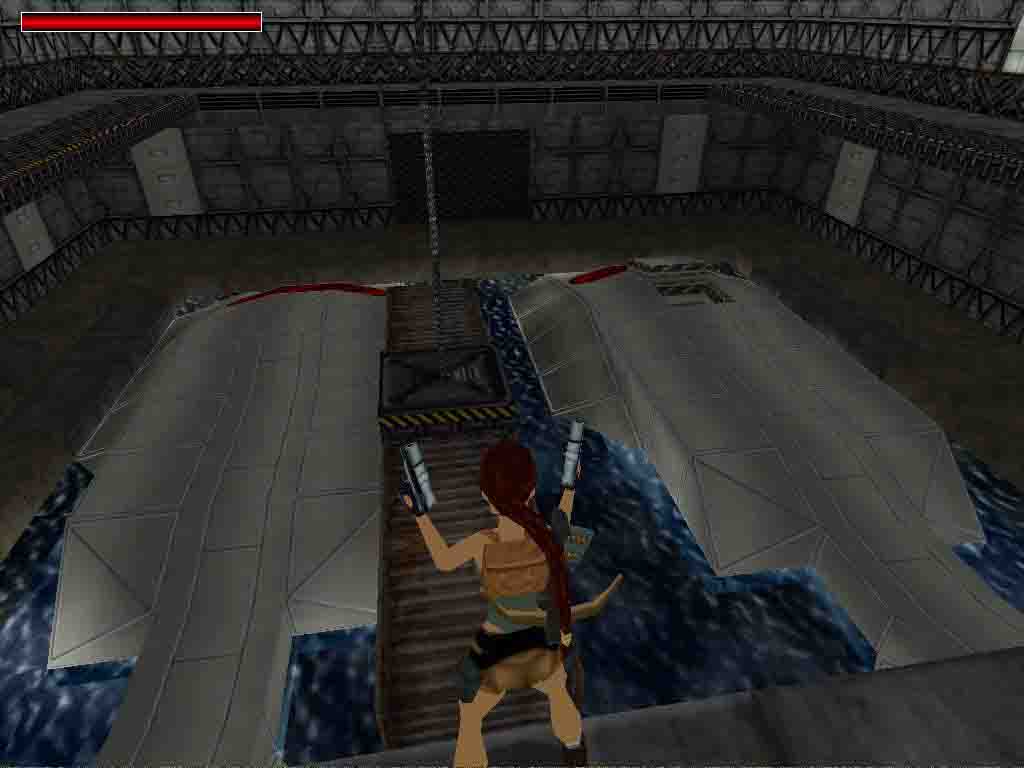
Climb the ledges to were youll find more Ammo, a MP and Flares. Face N and climb up again and come to Secret#2, the Revolver. Go to the top of the Tower and do a safety drop down, go to the S side of the tower to get some more Ammo and then head to that door you opened before in the W rock face.
3 Door Room.
The room has 3 closed doors and a passage in the back L, get some Flares to the L as you come in and head into that spider webbed passage. Light a flare and where the passage gets wider youll find a MP and Flares to the L, go on and finally go up the steps, be careful where you hear the danger sound, theres a nasty sloped pit, runjump over the pit and go on to the next pit.
Secret#3 Expert (Macho) route: (mind you, some people didnt manage this, but its a great challenge) This 2nd pit you can stand on the first part, go in and stand R at the start of the steep part. Look down with the Binoculars and see the opening in the ceiling of the tunnel, a bit down the slope, thats the one to go for and better dont use a flare as I found Lara wouldnt grab the edges well, slide and jump/grab up in the opening, grab the edge and pull up after saving. Backflip and jump backflip and jump/grab the edge of a pointy rock, dont pull up yet, but save first.
Then pull up and slide a bit, immediately jump to grab the next pointy rock over the sloped pit ahead, save again and pull up, immediately jump/roll and hold grab as you land on the sloped surface, grab the edge and drop/grab to the lower edge. Crawl in and follow the tunnel to a wider part after another crawl and a slide. Look in the NE corner for the CS and go up, follow over some bumps to a gate overlooking the Tower area and climb up to Secret#3, the Shotgun. Turn around facing S and jump up to grab the opening above, crawl through to the top of a cave where the stairs with the pits end up too.
Secret#3 Easy (Sissy) route: Just jump over all the pits till you come to
the top of a cave, go down a bit and R. look up R and find the CS up in the
wall, climb the opposite block and standjump with a bit of a R curve to grab
the edge, pull up in and drop down into a caged off alcove where Secret#3,
the Shotgun is. Go back out the way you came in.
Proceeding through the Caves.
Expert route:
From the lower ledge under the CS you just dropped from you can see a ledge NE, mind the lower ceiling and runjump with a grab in the end to land on that ledge (or runjump straight N to a slanted block and jump from that to land on the same ledge), turn around (S) and grab up to the ledge you just bumped your head on. Grab the MS and head out to the W around some corners and at the end where you go L, turn R facing W and drop onto a slanted block, grab the edge and pull up to backflip/roll jump and grab the crack in the wall, shimmy R around the corner till you are over a slanted block where Lara gets her feet up. (here the 2 routes come together)
Easy Route (shortcut):
From coming
out of the CS, turn R (W) and walk to the end of that part of the floor, to
the R is a block you can climb, turn around facing the stairs and crawl backwards
out of the crack, grab the edge and shimmy R around the corner till you are
on a ladder over a slanted block where Lara gets her feet up (if Lara wont
get on the ladder, shortly release Ctrl a few times, like you do when you
have to get into a CS from a ladder).
(here the 2 routes come together)
The Ornate Handle.
Hanging on that wall, do a backflip/roll and grab the crack in the pillar, go R around the corner and to the other flank of this pillar, drop to a ledge below and head into the opening W, a cutscene of the Ornate Handle. Dont go in yet, but turn around (facing E) and grab up to the ledge above, shimmy to the R and pull up on the ledge behind the block, go into the tunnel to the R and follow all the way to the Ornate Handle.
The Escipions Tear.
Go back to the Cave the same way and shimmy back to the L so you can drop on the lower ledge where you got the cutscene of the Ornate Handle before. Follow the W tunnel in to a small cave and find the Escipions Tear (Blue Gem) in the back (NW), you probably saw the CS up in the wall already? Turn around from the Gem and go L in that NE corner is the CS from the cutscene, climb in and drop onto a ledge with Ammo, turn E and do a runjump/grab to the next ledge, then go up to a pointy block, hop back once and turn around, backflip over the block and slide/grab the edge, pull up and backflip/roll/grab the next ledge E, go on with another runjump/grab and past an opening in the R hand wall (back inside the cave) to a corner (if you happen to fall somewhere along the line, you can always get back up by jumping into the lake, climb out in the SW corner and jump/grab back up to the ledge where the Ammo was, from the blue block in that corner). Just around the corner is Secret#4, the Crossbow.
The Hathor Effigy.
Go back around the corner and drop into the first gap between the ledges. Take a nice swan dive into the lake and swim down into that SE corner to get the Flares, then go over to the middle of N wall and get a MP from the alcove. Head for the centre of the pool and see an opening down in the bottom. Line up facing W and save as youre going in for a long swim (Advise: Try to stay clear of the walls and floor as you will get stuck at the sloped parts if youre not in the centre of the tunnel).
Swim down the sloping tunnel, past an opening to the R (later) and down in the end, turning around and go on down the tunnel in the opposite direction (E) swimming up again and in the end is a vertical shaft down, go R (S) at the horizontal tunnel and down again in the end. Go down and immediately L follow that tunnel to where you see some Flares. Ignore them for now as the air is running out, go L and straight up. Climb out and get the Hathor Effigy (cutscene of a door in the 3 Door room).
Raking up Goodies.
Dive back in, swim down and L around the corner to get those Flares, back and into the opening W in the shaft and youre under the Tower, get some Flares NE and a MP in the centre, swim back out SE and up for air and Save again.
Optional: (takes a lot of swimming) There are more MP and Flare pickups in these tunnels, but youll have to come back here for air and they are tight swims. Swim down and R (W) where you got the Flares, follow to the next shaft, go down and L (S) and go straight to the other end, down and get the MP, roll and swim back quick up in the shaft and R (E) and follow back to the L for air where you got the Hathor Effigy.
Optional: (takes a lot of swimming) For the Flares: Swim down and R (W) where you got the Flares, follow to the next shaft, go up and R (N) and follow straight to the end, down and get the Flares at the bottom of that shaft. Go up again and back S, down in the shaft a bit and L, back to the E end and L for air.
You can take these Flares are also while swimming to your next destination, but thats expert stuff and very, very tight. Just follow the part below and ignore the **blue** part if you dont want to get the Flares or maybe you have them already.
From the air pocket, dive down and R (W), follow to the next shaft, go up and R (N) and **straight to the end, down and get the Flares at the bottom of that shaft. Go up again and back S** up in the hole where the ceiling is low, follow that tunnel back W to the turn up to the E and now go into that L up sloped and nasty tunnel to an air pocket (taking a MP, I think). Well that was a hard part to explain, I hope you understood what we were talking about.
Turn around after climbing out and jump over the water, up to a ledge, follow to a CS and get into the tunnel to the E, follow straight past a R hand tunnel to an alcove where you can put the Escipions Tear in its receptacle, now that door opens in the 3 Door room, go back and now into that tunnel L and come out to the Tower area. Make your way down and go to the 3 Door room (W of the Tower). Go into the open door L and combine the Handle and Effigy to place the Portal Guardian on the stand (cutscene of 2 door opening up and the way through the dark tunnels). As the R hand door needs a Star (you saw up in that huge cave before), go into the L hand door as shown.
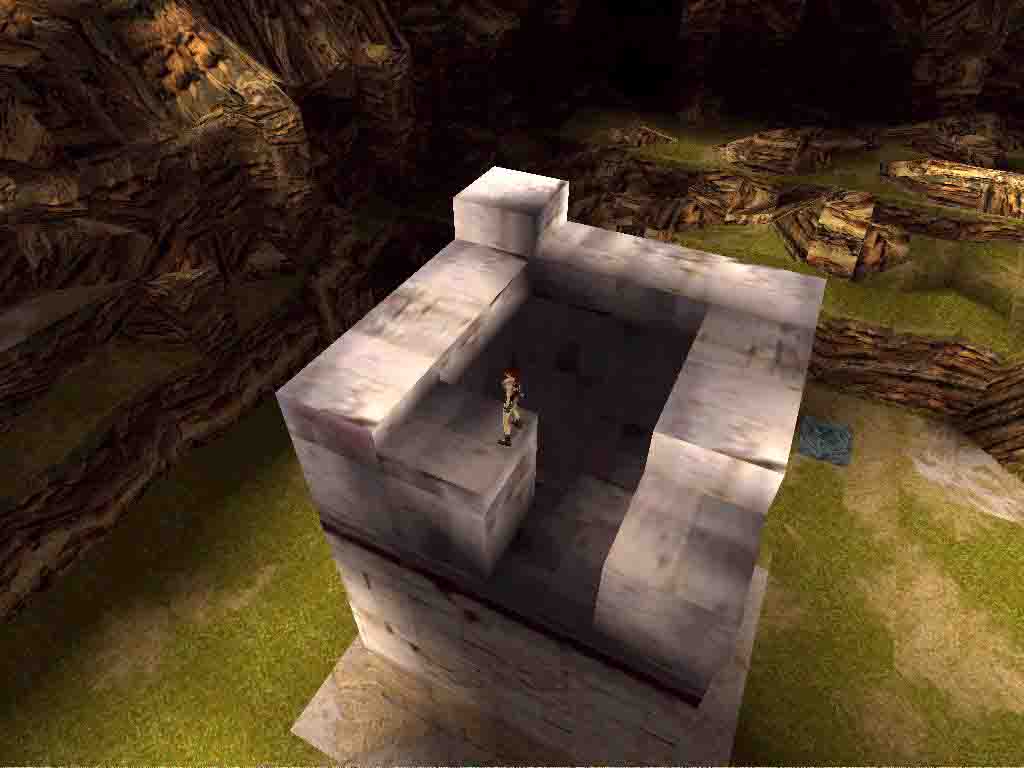
The Huge Cave, Crowbar.
Follow to where the level changes and then be careful, jump over the hole in the floor and drop/hang backwards, drop/grab and shimmy L to the end, drop/grab and go R, drop/grab and go L, in the end you are at a sloped ledge. Pull up and simply backflip to a ledge behind, go climb off the E side twice and find the Crowbar SW, now face N and runjump/grab to the ledge there, drop/hang from the E side and climb the wall to the R, drop into the passage and go just around the corner to grab up to a MS. Go over to where youll hear the Secret sound and drop to get Secret#5, Ammo.
The Golden Star.
Use the MS to get back and climb the W wall, up to the ledge in the pit and go into the CS to the N, go follow climbing the yellow walls (ladders) to the top and come to a brick passage, go N and turn R (E) into the top of the cave where you can see the star in the distance, go over the blue Tile and L runjump to a ledge N and turn R on that ledge, a runjump around the L hand rock to some Flares L of the star and standjump to the Star, pry the Golden Star from the rock and go back the way you came and go W through the cave to that brick passage just follow straight till you slide own into the passage where it all started, jump S over the pit and follow back to the 3 Door room. L and place the Star in the receptacle, an earthquake rocks the place, go out of the alcove and it will stop, to the L is a ½ MP.
Well heres the point Joseph was talking about: After the earthquake a lot of things changed. I would suggest that you to visit back to the places you already visited. You will find surprises.
The easiest route to go and collect the 6 Escipions tears (hes talking about) is by going through the Lake, but you are always free to get them any other way
Go out to the Tower area and see the whole ground level dropped one meter or so, to the S of the Tower you can now climb up the blue block. From the block a standjump/grab up S and go W to the lake, jump in and swim down the tunnel. In the lower part the current will take you down to that room under the Tower. The tower raised itself and you can now get up for air.
Escipions Legate and 1st Escipions Tear.
Swim N and climb up the ledge L at the exit of the room, walk up W and look under the raised ceiling for a crack, jump/grab S to that crack and go S, to the R to a CS and drop/grab. Get in and follow to the Escipions Legate (cutscene of a door). Go back and get the Flares just before you climb back out, drop into the water and swim to the N again. Climb out L on the same block and follow the ledges to a block, climb up and look L to spot the 1st Escipions Tear, runjump to that lower ledge and get it.
Then runjump NE and follow the N side ledges to a higher block E, then look S and from the highest part of the block a runjump/grab over to the S side (falling in the river means death). Go E again and standjump onto the high block, look E and jump/grab the crack in the pillar, shimmy L around the corners and drop from the other side. Look NE to spot a flatter ledge under an opening you came out of when you visited the Dry River here before. Climb up E and follow the passage over the grey Tile, and past the spot where you got the flares before. You will also pass the CS to the L, in the end is a climbwall to the L, go up and slide down the next slope, go out onto that ledge at the wall torches. Look L and down to see an opening in the wall near the water level, thats where we go later with all the Tears.
2nd Escipions Tear.
Dive SW and down into the pool below, swim out SW into another cave, in the S you will see a tunnel in the wall, swim up R (W) and climb out on the ledge, go to the S end and look SE, do a runjump into that crevice over the S tunnel and go E, jump onto a ledge a bit L and look NE to spot the next Tear. Climb the ledge N and jump to a ledge NE, then turn NW and hop into the alcove with the 2nd Escipions Tear. Go slide out backwards and youll land exactly in front of an opening in the wall, go in and get a MP and Flares. Swim out and R (W), R again to the middle of the pool and find the Flares on the bottom, turn S and swim through the UW tunnel S.
3rd Escipions Tear.
The current will take you down a waterfall into another cave, swim straight over to the W side and climb out, go in to the back (W) and get the 3rd Escipions Tear. Dive back in the water and swim N, climb out and follow climbing blocks, the last and highest one you have to slide and jump to the ledge in front and you are back in the Huge Cave.
4th Escipions Tear.
From standing on the grey Tile, go R and follow into the alcove in the end, get the 4th Escipions Tear and head back to the water.
Up to the 5th Escipions Tear.
Dive back in the water and swim back into the SE narrow passage, in the end you can climb up L near the waterfall, look E and see the wall is climbable. Standjump/grab the wall E and go up, hop over that pointy rock L and go N, light a flare to spot the gap with the waterfall you have to jump over and when you reach the pillar L, you can drop/hang from the L (W) side and shimmy L around the corner (you did this before) Let Lara get her feet up and backflip/roll/grab the ledge at the wall torches.
Just on the slanted part of the ledge, look L (W) and do a runjump (no grab) to the ledge under the opening. Climb up in and follow to where you have to climb out backwards, shimmy L along the crack and pull up again, follow that passage climbing rocks again and when you reach the upper passage youll come to a pointy rock, pull up and slide jump over the pit (you will fall back in the lake below) and follow to an opening overlooking the Huge Cave.
Drop out backwards and grab the edge, go L and pull up, runjump to the next W, go stand on the NW corner of the ledge and face S, look down SW and see a ledge below, now you have to run off this ledge to the S and you should land on a sloped surface below, jump with a sharp R curve and hit Crtl in the end to soften the landing. Standjump around the SW corner and here you can go up in the Rock Pillar. But first look SW and spot the crevice in the wall, runjump into that crevice and get Secret#6, Ammo.
Runjump back to the same ledge and drop down from the W side, get backwards into the CS there and follow to an outside ledge on the pillar, go r and from the sloped end around the corner, you can drop down once more. Go into the opening and climb down a long ladder, follow to where you have to climb up L and you are in a small cave, go into the S side and hop on a sloped block, climb up E and get the 5th Escipions Tear from an alcove in the other end. Go back S to the hole where you came up from.
Up the Rock Pillar.
Drop back down and go out the passage SW and down the blocks, up the ladder to the R in the end and come back out on the ledge at the water, face W and grab up to the ledge, go L and back into the pillar to follow back up to the ledge where you jumped to the Secret.
Now face NW and hop into the opening up in the pillar, go up the ladder to the first opening L drop into that opening and standjump out to the L (SE), get the Flares and go E over this ledge, hop over a nasty gap and go into a cave E, get the 6th and last Escipions Tear, go N from that pickup and find a nice stash of Goodies, a ½ MP, Flares and Ammo.
Now youre done here, go back to the rock ledge W and at the entrance of the pillar, just run off from the SW corner to land all the way down into the water, swim E and L, then follow the wall on the R and go straight to the opening in the wall with the wall torches. Pick up the Lasersight from the grey Tile and go up the steps, (the Flare bug kicked in here) place all the Tears on the central block and a door opens in the wall SE, go there and hop in, push the button on the wall and the door NE opens, go out and dodge the Skellies to jump in there and place the Escipions Legate (Pharos pillar), youll see a door open up and that door is all the way back up the Rock Pillar. So go back to the opening and look down to spot a whole army of Skellies.
You can take them out with the Crossbow or just ignore them and sprint straight past them to the exit. Swim SW and turn L where possible, follow the L wall till you are in the SE alcove with the waterfall. Climb the N ledge and standjump/grab the E wall and go up, hop over that pointy rock L and go N, light a flare to spot the gap with the waterfall you have to jump over and when you reach the pillar L, you can drop/hang from the L (W) side and shimmy L around the corner (you did this before). Let Lara get her feet up and backflip/roll/grab the ledge at the wall torches.
Just on the slanted part of the ledge, look L (W) and do a runjump (no grab) to the ledge under the opening. Climb up in and follow to where you have to climb out backwards, shimmy L along the crack and pull up again, follow that passage climbing rocks again and when you reach the upper passage youll come to a pointy rock, pull up and slide jump over the pit (you will fall back in the lake below) and follow to an opening overlooking the Huge Cave.
Drop out backwards and grab the edge, go L and pull up, runjump to the next W, go stand on the SW corner of the ledge and face S, look down SW and see a ledge below, now you have to run off this ledge to the SW and you should land on a sloped surface below, jump with a sharp R curve and hit Crtl in the end to soften the landing. Standjump around the SW corner and here you can go up in the Rock Pillar. Jump into the opening and go up the ladder to the top, heres that open door. Go through and follow out to a nice temple Yard, nothing much to do here, just have a look around and look out the gates overlooking the Tower area and head N, down into the sloped tunnel and the level ends.
Unauthorized Walkthrough by G&D Productions.
Level 3: Devil's Bridge.
Story:
The "Devil's Bridge" is inspired in the Tarragona's roman aqueduct. The legend tells that a shepherd requested to the Devil to build a bridge between two mountains, this will make his live easier because he will save time moving the sheeps. The Devil built it in one night! The next morning the Devil request the price to the shepherd: the soul of the first who cross the bridge! But he told him to take the correct soul. He was not the first one to cross it! The first one was a sheep.
Walkthrough:
Because of the effect of a long bridge the camera will be fixed in most parts of this level and that can be quite a handicap while doing some of the jumps.
Something messed up the Script, so some item names are maybe incorrect.
If you came
here from level 1 and 2, you can skip this first part where you have to get
the Crowbar and start at this paragraph:
The Bridge, 1st and 2nd Golden Star.
Lara will slide towards a pool of water, just slide in and go up to turn facing S then Save and swim down, to the end of the Cave and L around a pillar, up to the ceiling there to find an UW ceiling lever. Pull the lever and see a trapdoor open up, swim down and go L around the pillar, then R to the N and just R and up from the pointy rock on the bottom is the hole up for air. Save again and face SW, swim straight into an opening in the wall and L a bit till you see that open trapdoor above.
Golden Star Room, the Crowbar.
Climb out and youre in the Star Room, where 4 Golden Stars will have to be placed. Hop on the block with the receptacles and get the Crowbar. Go back out of the room through the trapdoor and swim E, up at that pointy rock and climb out of the water at the Bridge.
The Bridge, 1st and 2nd Golden Star.
Go N and just after passing under the bridge to the L, face the Bridge pillar and climb the vegetation, to the first arches and climb L around the corner, drop and youll see the Grenade-gun Turn S and Runjump to a ledge with some Ammo, walk to the NE and spot the Golden Star on the next arch of the Bridge, do a Runjump onto that ledge and go get the 1st Golden Star. Now Runjump back to that rock ledge where you got the Ammo and walk to the W, have a look in the next arch of the bridge and spot the next Golden Star. Line up and Runjump to the ledge to get the 2nd Golden Star. Jump back to the S rock ledge and go R to the most W side, look W with the Binocs and spot some Ammo on a next ledge you can jump to, then just slide down and go W. To the SW corner of the bridge and you can get more Ammo, located on the last lower ledge of the bridge with a runjump from the SW corner of the rocks. The route up is hard to explain, but if you can get all the way up on the SW rocks, you can find more Flares and some Ammo. Going up that corner and when you come close to the Bridge there youll hear a Danger sound, face NW to the gap between rock and fence of the bridge and Save (screenshot), do a standjump up through the gap and get some Ammo near the gate W and then go all the way over the Bridge to the E side, where more Ammo awaits in front of the gate.
For the 3rd Star.
Now turn NW from the spot where you picked up the Ammo and standjump through the gap between rocks and fence and slide down a bit. Stay on this path and walk NW to some more Ammo. From picking up that Ammo, look down NW and see an opening in the N rock wall a standjump will get you inside.
Follow through to an outside area with a pool, some rocks have to be moved through the pool, so you can get to the 3rd Golden Star off the E wall and then move a last rock NE to get the Uzis from under it. Then go to the W side and pick up a MP from the niche there. Theres a gate in the N that will open later, so well be back here
Return to the Bridge area through the tunnel S and when you come back to the end of the passage, youll see Lara again from the side of the Bridge, just hop out and slide down, from where you land you can do a Runjump onto the closest ledge of the bridge and collect the Ammo.
Now a short detour for a Secret.
From picking up the Ammo, just runjump SE from the ledge and youll land on a path to the S, go to the S end of it and standjump up the S side, turn L and standjump up to the grassy area above, walk S and turn SW, walk up as far as possible and do a L curved standjump to land in front of a small tunnel in the S rock wall. Climb in backwards and go down into a lower tunnel with a barrier, on the floor just in front of the Barrier is Secret#1 of this level, the Silver Skull.
That Barrier can be shot and will bring you to level 4, it looks like you have to do that first, as you will come back to level 3 after you finished level 4 and after finishing level 3 you will go to level 5. So just play it now and do the rest of level 3 after playing level 4. (bit complicated like this)
To the>> Walk for level 4.
Continue level 3 here.
After picking up the Secret Skull, get out of the tunnel by climbing up on the L side of the opening and hold Crawl while pulling up, other wise Lara will drop back into the tunnel. Once outside, just slide the slopes down to the W.
Follow the path W and head L to the waterhole where the level started.
Continue level 3 here after playing level 4:
Dive in swim down SW and into the opening in the wall, go L a bit inside and up through the trapdoor, jump onto the receptacle block (Crowbar on it) and runjump/grab to the S wall, pull up into the opening and go get the 4th and last Golden Star. Climb back out and go place all Stars in the block (the gate at the small pool opens).
Swim back to the pointy rock and go up in the hole, go NE and up to the tunnel like you did earlier, from the pinkish ground with the vegetation you can runjump onto the arch of the bridge and from the NE corner of the ledge a runjump straight N. Climb up the rock and turn E to do that sharp L curved runjump into the tunnel to the small pool. Go straight through the small pool and through the open gate to come to the Canyon.
The Canyon.
A Flyby shows you the route, drop/hang backwards from the edge and shimmy L till you are over the ledge with the MP. Grab that MP and stand on the NE corner, look SE and see the pointy block around the corner, standjump around the corner onto the block and slide/jump/grab the crack in the pillar ahead, climb L around the corner and drop to a ledge with some Ammo. From this ledge a runjump/midair roll to a ledge in the NE corner and jump R to grab a higher pillar S.
Pull up and backflip/roll/grab a pointy pillar N, hand one step from the R hand side and pull up, slide and jump with a sharp R curve to land inside a crevice. Follow the crevice in to a cave and collect the Ammo, go on and come to an old Mine tunnel N and follow over the tracks to where you come out at the canyon again, standjump W and the a runjump/grab into the opening. Stand R and standjump/grab forward to grab on to the ceiling MS, go around the R hand corner and drop to a ledge in the end, 2 standjumps over the next ledges and then a runjump/grab to a higher pillar W, look SW and spot the lower pillar with some Ammo (at the base of that same pillar are Flares well get later), do a runjump with a grab in the end to land on that pillar and get the Ammo, jump/grab up to the ledge W and go in L. then R and follow the track to a grate, shoot it and crawl through backwards. Turn around and go S.
The Barrage.
There are UN Soldiers (Blue helmets) guarding the place, dont shoot them. After the flyby you can head E and find the Bike at a closed gate next to the building. Mount the Bike and drive it back to the W and R into that concrete tunnel. Go L and up the sloped tunnel. Follow all the way to where you come back to the Barrage area, drive the Bike to the R off the edge and hit the brakes upon landing on the roof of the building. Turn to the SW corner and here you have to run the Bike slowly off the roof onto that ledge touching the roof there and keep going L to land over that fence and onto a ledge leading into a Mine tunnel (have a look first screenshot). If you happen to ride off the ledge, no problem, go around that central rock and along the E fence to go up to that same Mine entrance. (you can leave the Bike in the dry river for a moment and climb the central pillar, runjump to a block S and from there a jump/grab up to a CS in the S wall, inside are 2 Ammo pickups, but I couldnt get out again, Lara ended up in again every time I tried to drop out.)
Follow the sloped Mine tunnel up and go L, and at the end of that tunnel you have to get off the Bike to get Secret#2, the Jade Skull. Now you have to ride the Bike out of this passage and back onto the roof, go off the S side of the roof to land in a back alley. Leave the Bike near a Mine entrance W and go to the S side of the building, shoot the grate up in the wall and climb in, shoot the second grate and drop into the building, push the button on S wall and the barrage will be opened, so the river will flood and also the door N opens up, so you can leave the building, go to the W and up a rock W of the concrete tunnel.
The Nitrous Oxide Feeder.
Jump to a grated walkway on the Barrage and get the Ammo. Now just run down into the water and swim into the alcove W under the waterfall, get the MP and swim to a small gap in the SW corner, the current will take you through the Bridge (aqueduct as it seems), a lake and youll drop down a waterfall into the now flooded Canyon below. Climb out under that waterfall and go L, in the dark corner is the Nitrous Oxide Feeder (flyby of a risky Bikejump). Dive back into the lake.
The Flooded Canyon Floor.
Follow the Canyon through the middle and swimming around some corners, find some Ammo, proceed through a small gap on the R hand side and dont get tempted to swim to that grated opening R after that as the current will keep you as a prisoner. In the end, close to a high pillar youve found Ammo on before are some Flares, then swim into the W crevice. Go up in a hole and face W, pull up and backflip.
Back to the Bike.
Face S and jump onto the sloped block in front, backflip and jump/grab S, pull up there and hop into the E alcove, turn W and jump/grab up, climb up L twice and youll slide back to the Mine entrance youve visited before. Go in and R, down to the concrete tunnel and out S, to the building and inside, through the window to the Bike and fit the Nitro feeder on the Bike, then drive it into the E Mine entrance. Immediately hit the sprint key to give the Bike its Nitro boost and jump across the canyon into the opposite Mine shaft. Go down the sloped end and leave the Bike there.
The Campsite and the Key.
Go out the green covered N passage and have it out with a bunch of Thugs in a Campsite (careful, a UN soldier might show up and you dont want to shoot him he will help you), go round up the Ammo dropped by those Thugs. In the NE corner is a tent, go to the E side of it and open the brown corroded trapdoor, go in and shoot a crate blocking the way into the tent and get the Key. Go out and find the green covered passage S again, go past the Bike and look for an alcove up L, use the key to open the gate and go out to where you can see the big pillar on the campsite, runjump/grab and pull up to get Secret#3, the Golden Skull. Quickly runjump back into the tunnel S and let the UN soldier take care of newly arrived Thugs. Go to the Campsite once more and go into a tent E, shoot the boxes for a MP, then head W and find a Landrover under a tent. Pull the Jeep out and go in, open the trapdoor and more Thugs will show up, just go down in the hole and your new friend will take care of them. Climb down the ladder and the level will end.
07-10-2005.
Walkthrough by Dutchy
Level 4. Devil's Lair.
Story:
Devil's Lair" is a bonus level for the previous one. Does the Devil still live near the bridge? May be Lara will find him at home! Enjoy this 167 room level and see how is the hell! If the previous level do not had too many enemies (I do not like the free violence), in this one there are some, do not hesitate to shot them: They are not longer human, they are Wraiths! If you see them do some strange things like walk over lava, some time they do it, do not worry, it is not a "Bug", they are not humans and they can do things that Lara can't do it. If you do not help them (with the weapons) to leave their actual existence, there system can slow down and additionally you will not find some pieces that they give you before disappear!
Walkthrough:
If you came here from the Secret tunnel in level 3, just safety drop down the shaft after shooting the barrier at that Secret Skull and slide into level 4. After the flyby of this surreal world, you can get the flares to the R and get a cutscene of the house below. There are many cutscenes in this level and they will sometimes show you where certain Items can be found or used.
From picking up the Flares, go to the other (W) side of the ledge (remember the following route as you will go up more that once) and standjump/grab to that open staircase SW with the Ammo, go on up and find the Ammo near the wall, go stand on the middle of the last flat ledge, with your back to the black and white sloped block and backflip to it, jump and grab the MS ceiling, climb along some bends and curves and come to the end of this MS. Drop and fall on a sloped block, immediately jump/grab again to catch on to the lower MS under the green floor, follow almost to the end (middle of last square) and just let go to slide onto a ledge with some Ammo right at your feet. Now go stand on the SE corner of this ledge and against the black pillar, turn facing W and take a step or two forward, now just a hop back and youll land on a sloped block, the moment you touch the next slope, jump hard R and land inside an alcove with Secret #1, a Grenade-gun.
1st Capital Sin.
Hop S over the ridge to slide down the slope and almost at the end, jump/grab another MS under that ledge above. Maybe Lara wont move forward on the MS, turn sideways and hold Shift then push the L arrow key and she will climb sideways down to the flat part, now turn back facing the opened gate and drop on a sloped block. Get the Ammo where you land. Pull out some heavy gun and follow in to meet the 2 Black Ninjas, shoot them and go collect the 2 Wraith Souls (Golden Vraeus), place one of them where you entered and one on top of the sloped passage, to open the door up N at the end of the passage, go to the edge and runjump out to the R, go over that roof to the SE corner and get some Ammo before you drop/hang from the edge of the roof. Climb down and to the R into an alcove with the 1st Capital Sin (Hand of Sirius) and youll get a screenshot of the inside of the Temple of Doom.
Drop/hang out of the alcove and shimmy L to get back on the ladder to the roof and go to the N side, onto the lower part and run off onto a dark green ledge below, standjumps will get you around to the last ledge at that big green pillar on N wall, grab the Ammo on that ledge and standjump/grab into the alcove in the pillar to get the Uzis there. Stand on the L side of the S wall and grab up to the crack, shimmy L around into another alcove, grab up N and then climb the black grated E wall, go L around the corner and to the top, collect MP and Ammo and slide off the NW slope. Jump/grab the overhead MS and go W till you can drop back to the ledge where it all started. Now you have to take the same route up over the stairs and MS to that ledge where youll slide onto after the second MS, face the R hand side of the S pillar and grab up (if Lara wont grab up, try run into that wall while only holding Ctrl).
Fausts Contract.
Better Save while hanging a bit L of the middle there and pull up, slide and jump 3 times over sloped blocks and the 4th jump (going W) with a roll, so youll slide backwards to the wall, grab the edge and drop/grab to a crack below, shimmy L around one corner and drop/grab to another crack below, shimmy L till you can pull up under the low ledge. Go L (E) to where you can stand again and go up some steps to a ledge on S wall to get some Ammo. Go one step down to the N and stand on the middle of that ledge, face SE and backflip onto a sloped surface, jump/grab the edge of the slope in front and shimmy R to the end, once there, Save and pull up, backflip and jump sharp R and you should slide to a ledge with Fausts Contract (Scroll) and a cutscene will show you the receptacle for it.
Run off the
ledge to the NW and youll land on a sloped surface, grab the edge and drop/grab
back to the CS under the ledges, go in and L a bit to get some Ammo and then
crawl E again, all the way up the steps and now pull up N onto the sloped
ledge you just shimmied along. Jump N and just keep slide/jumping 8 times
till you land on a flatter ledge you can stand on. Runjump/grab to
a dark ledge N, grab the Ammo and go R to the end to standjump/grab
to that green hanging block S. On that block is a ½ MP, then turn NE
and do a curved standjump/grab up to a transparent
green ledge. Standjump/grab to the next S and then
a Runjump/grab to the one near that
The
Now you can
first go around the R (N) hand side of the
The Gate Key.
Go jump back to the entrance and go L to the NE corner, drop down onto that safe ledge and look W. there are 2 long slopes down Runjump to the L (SW) one and just slide down, grab the edge and drop into the path leading to the Gate Key, just follow to the S and go into the structure L and pick up the Gate Key from the floor, hop onto the sloped block in front E and slidejump (maybe grab) the green walkway, go L and runjump NE past that pointy block and onto the ledge in front of the house. Open the Gate and go in, shoot the 2 Ninjas and place the Scroll on the receptacle SW. Collect a ½ MP and a Revolver from the windows and then pick up the 2 Wraith Souls, place those to re-open the gate.
Back to the
Go out and jump over those green ledges to the NE corner. Then to that big green pillar and go up like you did before, slide NW and jump/grab the MS to go back to the start ledge. Now you have to take the same route up over the stairs and MS to that ledge where youll slide onto after the second MS, face the R hand side of the S pillar and grab up (if Lara wont grab up, try run into that wall while only holding Ctrl).
Better Save while hanging a bit L of the middle there and pull up, slide and jump 3 times over sloped blocks and the 4th jump (going W) with a roll, so youll slide backwards to the wall, grab the edge and drop/grab to a crack below, shimmy L around one corner and drop/grab to another crack below, shimmy L till you can pull up under the low ledge. Go L (E) to where you can stand again and go up some steps to a ledge on S wall to grab that sloped ledge N again and do those 8 jumps over the sloped blocks to the flat one, Runjump/grab N and go up that hanging block SE, go jump over those transparent green ledges to the Temple entrance. Remember the safe Tiles, go jump them again to get to the open gate W and climb in.
In the next dark green room youll find the Crossbow in the NW corner, then go to the water in the middle of the room.
UW Labyrinth, a couple of Capital Sins.
Save and dive in, the strong current will take you through the tunnels and youll end up in a crossing near a closed gate E, facing the gate go R and L up in the sloped tunnel, where you can get air in a room where you have to go later. Swim back to the gate and go past the tunnel you came from, straight down to the N, then into the 1st wide tunnel L and go to the end of that tunnel. Turn L (S) and follow straight down to where the 2nd Capital Sin (Hand of Orion) is located, pick it up and swim back. 1st R (E) and the current will take you back to the gate, you know, R a bit and then up L to climb out and find the receptacle for the Capital Sin behind the pillar. Well its not this gate thats going to open, Save and dive back in the water, go R/R into that E gate which opened into a complicated room with many corners and openings, just go sharp around the R hand corners into a short tunnel to the 3rd Capital Sin (). Roll and swim out the short tunnel go L and then down to the E side. Up into a crevice E and down into the hole there, just follow to a wider room and go up in the SW corner into another room with receptacle and gate, this time the gate (to the 1st receptacle room) actually opens and youll also see another UW gate open up. So go through the gate, Save and dive into the water, swim R/R again and into that complicated room, go sharp L around the corner and through the opened gate.
The current will now take you to a room with many holes in the walls. Take the one down L in the E wall (darker floor) and go straight, down and around the L corner. Up and then R follow to some openings R, just swim along the R side and up all the way to a room where you can finally get some air. Pick up some Flares behind a wall W and some Ammo on the central island and go up into a passage SE, follow to where you get a flyby of Hell.
Hell.
Drop/hang from the entrance and shimmy L to the end, then climb up into the Connection room, grab the Crossbow and have a look in the adjoining room N, push a button and the gate back to the pool room opens, shoot a Ninja there and return to the Connection room where another Ninja appeared, shoot him to get his Wraith Soul (Golden Vraeus) and place it in the receptacle in the Connection room. The gate in the S wall opens up, so climb up and go over into the next opening S, from standing at the edge of Hell, a runjump to the ledge up and to the R, turn around and standjump/grab up E to the top of the structure, go N and get Secret #2, Ammo. Have a look over the W side and take a note of that Labyrinth with the Capital Sin (or just have a look at mine later). Now its time to go down again, go back to the S side and stand on that sloped ledge, run off to the W holding grab and land back on the lower ledge, turn and run off to the NE, climb back into the opening N and down into the narrow passage with the green floor, drop down the hole E and fall into an UW Labyrinth.
Swim N and go L at the crossing, follow to the L to find a ½ MP, return to the crossing, go straight N around a R hand corner to an airpocket in the ceiling. Continue and pass a closed gate, then go L/L at the next crossings and up in the end to climb up at the lower part of Hell (there are some Flares down here too, but its a long swim, turn S and swim straight, follow all the way and at the dead end ahead go L and follow to the Flares, roll quick and go R at that dead end, just follow back straight and up for air, it could cost you that ½ MP you found before). Get out of the water and climb the wall to the R of the entrance, just before stepping on the first yellow ledge and jump to the ledge with the pillar SE, climb up N and then runjump to the ledge ON the pillar and grab up to the ledge to the R and up, pull up on the ledge, drop/hang from the W side and shimmy R to the end, drop onto a ledge.
Stand about on the middle of the W side and face SW. look down and see the opening in the wall, standjump (grab in the end) down into that opening and drop/hang from the edge, shimmy R around the corner and pill up, go jump to the SE to get into a passage along the E wall and follow to some steps going up. Get Ammo from the grated floor to the R, then follow the steps all the way up and come to a room with pillars, get the Ammo and shoot the Ninja. Then go to the second opening L (W) and grab up to the bridge spanning the room.
Another Capital Sin.
Go N a bit and to the E side, look for a block SE at the E wall and runjump onto that block. Go jump into an opening S and follow to some Ammo, shoot a Ninja and go on W to that wall with the crack, follow to a drop off N and climb back onto the bridge W at the same spot as before. Go L now and at the end face SE, spot the wider part of the crack there and Runjump into that wider crack, standjump to the ledge SW and get some Flares at the entrance to the stairs, follow all the way to a wall around a muddy pool (L) get in and look at the ceiling, theres a kind of cross. At the top of the cross is a hole in the ceiling, stand under the hole (middle of the pool, 2nd square from the W side) and get the 4th Capital Sin.
The Aquarium Labyrinth. 
Climb back on the wall N and look in the yellow wall NW for an opening, jump in there and get into the water, surface and Save facing E. See that opening in front E and down a bit? Swim into that opening and then down into the next shaft. To the front (glass) and then to the back and into the opening E, up and to the glass and all the way up along the glass, to get the 5th Capital Sin. Swim back down, to the back and into the hole, to the W and up, to the back and then through that opening W (you cant see from there) to the entrance for air if you like. Swim down all the way in this W shaft and then head E to go up in a hole in the back L.
Coming back from the pickup, you can also just swim on down when you reach the W shaft and then head E, follow along the glass to the E where youll see air up in a hole in the back L, climb out and you are at the exit.
Safety drop down to a yellow ledge below and make your way over to the green building S (the one from the cutscene) and place one of the Sins, then runjump to a ledge W for a ½ MP, jump back and place the 2nd Sin to open the gate, go in and Save in front of the lever.
Timed Run.
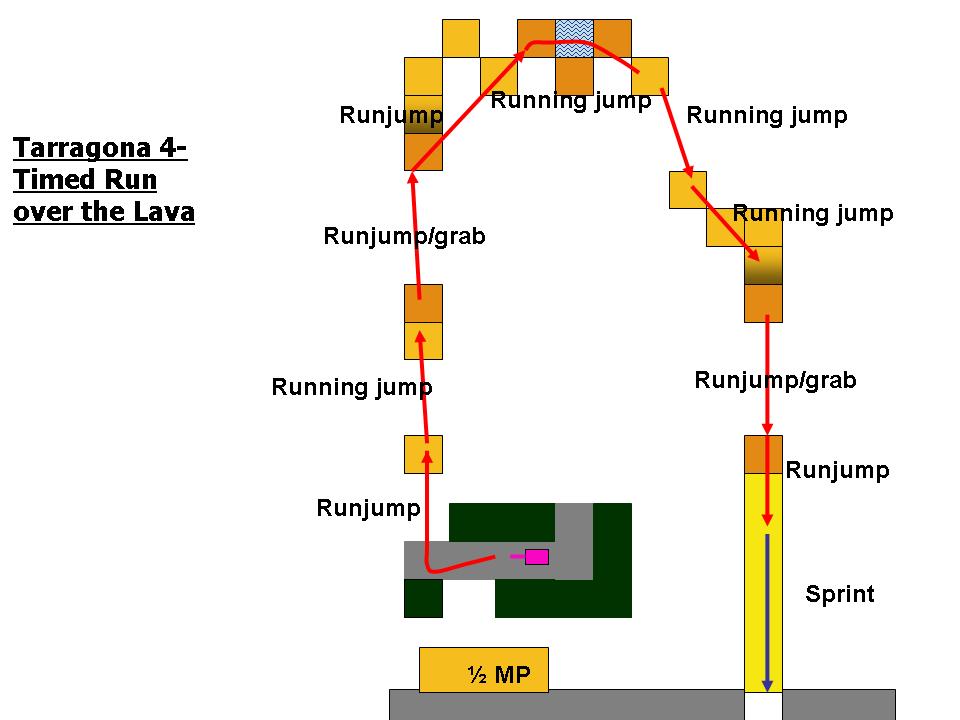
Throw the lever to kill the flames on the ledges you have to go over now, they are Timed. So you have to be fast (dont forget, you CAN save while Lara pulls up to a block or while shes in the middle of a jump, this will not cost any time when you reload later).
After the flyby, roll and run with a R curve to jump back to the first yellow ledge N, a running jump to the one in front of the high ledge and climb up fast, Runjump/grab over to the next, grabbing the L side of it. Pull up and run with a R curve to jump from the far R corner to the corner of the block next to the water hole, running jump curved R to get to the lower ledge E, landing on the L side, again and R curved running jump to get to the first of the S group of ledges, runjump to the sloped one and runjump/grab over the top to the one at the now extinguished long ledge into the S wall.
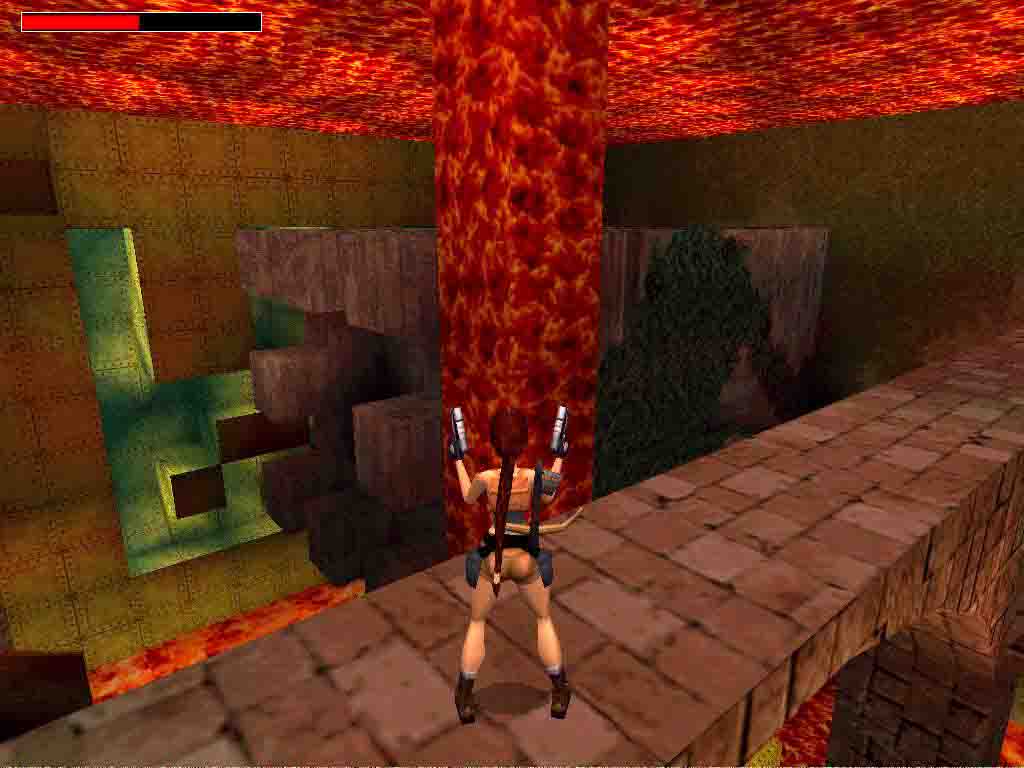
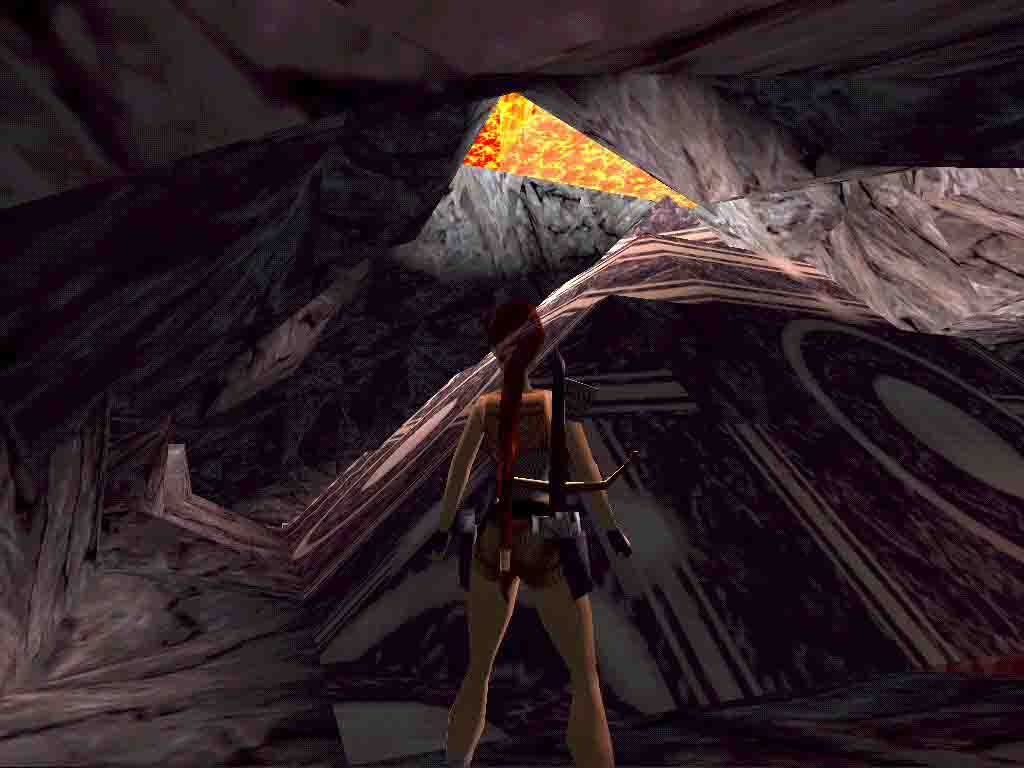
Dont forget to save and go in R, follow to the water in the end and dive in to get the 6th Capital Sin. Climb out and go back to the crossing, R and past a Golden gate to where you have to use the Capital Sin. That gate opens, so go in after you shot the Ninjas and jump over the Lava, go slide down the slope into a cave and slide jump across the lava, go in and run down to the NE, slide down some more and standjump/grab onto a ledge in the middle of the cave, then jump/grab into the L side of an opening N and enter the Black Pyramid room.
The Black Pyramid Room.
Go L from the hall and youll get a flyby of the Black Pyramid room, go onto the steps down to those blue doors and go to those blue doors to open them with the button on the R hand side (no need to go in yet). Climb up the side of the bridge close to the button. Look down and see a sloped surface down into a lower part of the room with a Burning pedestal, just slide down and go into the passage in the NW corner of the room, follow to another part of the room with a Burning pedestal. Go into the SW passage and shoot the 2 Ninjas. Then follow this passage to the end to find another room with a Burning pedestal. Go into the SE passage and follow to a dead end where the First Piece of the Big Brother (Eye Piece) lies on the floor.
Now head back and go through 3 rooms with Burning pedestals, going intro the passages in the opposite corner and come to the room with a Burning pedestal with a big rock to the L, look in that E wall for an alcove with a ladder, climb up and go NW to find the Second Piece of the Big Brother. Go L around the pillar to your L and grab up into the hole above, shimmy L a bit and pull up, go N a bit and turn L along the ledge next to the Pyramid, in the end a jump to the corner of the Pyramid and then jump N with a R curve to land on and slide off the roof, grab the edge of the roof. Safety drop down in front of a blue door, again open it without going in.
Turn around and head into the W room, shoot 2 Ninjas coming up some stairs and get the Ammo at the L hand stairs, go down these L stairs and collect the Capital Sin, go back up and to the N side stairs, pick up the Ammo on top and go down for more Ammo below, return upstairs and go to the bridge to the Pyramid, stand on the higher L (N) side and turn facing the W entrance you just left, now backflip (tricky, so better save first) so youll land on the sloped surface and jump/grab to catch the edge of a rock ledge above, shimmy R around the corners till you can pull up in a CS, follow to a dark room where more Ninjas attack. One of them leaves another Wraith Soul (Vraeus) Look for some Ammo in the back and then head into the NW passage. Follow the long passage to a walkway around a lava pit. Walk to the L and in the corner, drop/hang from the N side walkway and drop/grab to a pillar below, shimmy R and drop on a ledge, crawl in N and use the Wraith Soul there to change lava into water as the flyby shows, an UW tunnel system is now accessible.
Yellow Tunnels.
Swim into the hole in the bottom of the lake and just follow the tunnels (in the first corner is a hole up for a bit later) to the end, climb out and go into the W opening R side for Flares and in the enytrance of the L side is a MP. Go to the S side of the pool and place the Capital Sin in the receptacle, an UW gate opens behind you. Swim in there to get Secret#3, Ammo in a small dark room. Swim back and through the yellow tunnel to the crossing, up in the hole there that will bring you to some winding steps up to the room with the 4 doors in the heart of the Pyramid.
3 Doors should now be open, hop to the E side doors and go onto the bridge where it all started. Climb up L and look in the wall NE, a crack leading to an opening, jump/grab to the crack and shimmy L to pull up in the opening. Go into a cave with a small lava pit. to the L of it is the receptacle for the Combined parts of the Big Brother. The door opens, step in and get a screenshot of the S door in the Pyramid, open and all. Go back out and climb up to the opening in the wall, no way to get back to the bridge from here, so Runjump to the SW and slide down to the room with the Burning pedestal, go into the SE passage and follow to the room with the rock ladder L of the Burning pedestal. Go up and W to that pillar where you can climb up one more level, go straight to the E side ledge at the Pyramid and from there a safety drop onto the E bridge, go in and Runjump to the now open S doors. Follow through to the end and find a lever to the L, roll and go into the opposite passage. Throw the next lever and the room is flooded, swim up through the hole and then up the hole in the top of the UW cave, the level ends.
Level 3: Devils Bridge. (part 2)
Save as soon as you got control back and swim on, out of an opened gate and into the UW cave of level 3. Find that pointy rock (SW) on the bottom with the air pocket over it and surface. Now you can finish the last part of level 3.
Level 5: The Underground Empire
Story:
Lara has discovered something hidden near the Devil's Bridge. It's a kind of secret base. Before finding the exit, she must walk through the maintenance tunnels, warehouses, moles, unused corridors and a garden.
Walkthrough:
This level starts at the end of level 3.
Youve come down the ladder from the Camp site and are now in a Sewer System.
The Sewer System.
Go on to the waters edge and a flyby will show you around the Sewer System with a bunch of Gates and Keyholes. Dive into the water and climb out on the opposite side, go into a passage NW and shoot the croc, then go in to get the Ammo, return to the large room and go up the N wall for the Flares at the gate. Now go into the passage E and hop over the sloped part to a room and dive into the water, swim under the ledge E and then L into the small tunnel N, go L and follow to a room where you can climb onto a ledge and get some Flares, shoot a grate in the E wall and Runjump/grab over to that CS, pull up in and follow to the room with the door in the L corner, standjump sharp L around the corner and get the Ammo before pushing the button to open the door, go to the room with the dam.
Some Keys.
Look up in the E wall for an opening and Runjump in there, follow L to come to a ½ MP where you look out over the room with the dam, a MS ceiling in front of you, so standjump/grab out and follow the MS into the far R hand corner, drop/grab into the passage and follow picking up some Flares along the way and over a pit to another room, drop into the water and go up the ledge in the corner, shoot a Croc and stand SW to runjump over the pool to the ledge there, follow to some Ammo (flyby) and drop/hang out of this passage. Climb R and up the ladder a bit so youll see a ledge behind, backflip and grab the Shotgun from the ledge. Then runjump out to a ledge NW and get some Ammo inside, dive into the water and swim through the narrow tunnel to another room, climb out and get a ½ MP there. Proceed into the W passage, go past the closed gate into a sewer canal and go L over the walkway. Around the corner L at the gate overlooking the first room, youll find the Key. Head back to the gate and open it, go into the first room and R to another gate that opened up there, inside is another Key, use it in the lock in that alcove and a gate opens up.
The Crowbar. (you could skip this if you already got it from a previous level.)
Go back through the last gate N and L/R into the newly opened gate, hop over the 2 first pits and check the health before you safety drop into the 3rd pit from the lower side. Turn n and hop over the water to follow the passage to where youll find the Crowbar. Return and drop into the water, swim S and go up in the SE. climb the ladder back to the passage and go N, over the pits and shoot the grate up in the wall at the end, crawl into the Base.
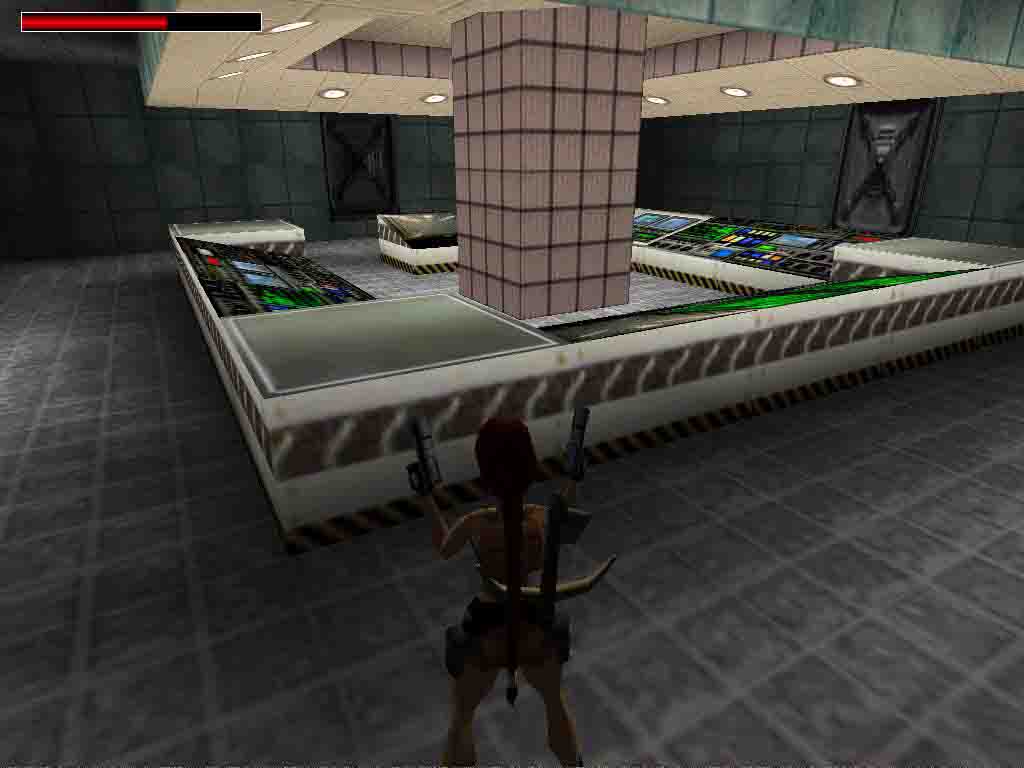
The Base.
Follow the passage E to the Main Control room, shoot the Guard and pick up his Lasersight. Then push the button on the N side of the pillar and the E door opens. Follow in to a huge hangar, go to a door NE and open it with the button, go in and shoot the next Guard to get his Revolver. Go on to a corridor and head L to a big Storehouse with a big pile of crates, the one you will walk into, the light coloured wooden one, can be opened with the Crowbar, get the Key and open the next panel, pick up the MP and spot that pushblock with the sign on it, push it all the way and go in around, climb up the brown crate, then the yellow one and drop behind that to get Secret #1, a Silver Skull. Go back and out of the stack, go to the W wall and stand close to the box hanging from the Portal Crane, shoot it and go close up to the Demigod that appeared, duck and shoot him from that position.
He will leave some Ammo. Equip the Revolver with the Lasersight and shoot the grate up in the W wall, grab the Crane cable and climb up facing the opening in the wall and as soon as Laras armpits are on the same level as the edge, turn around and backflip in (position is rather exact). Use the Key there to open the door below and safety drop out, go into the Control room to get MP and Flares and then push the button near the door to open a gate up at the Portal Crane. Go out to the SW corner of the crate pile and climb up there, go to the NW corner and down for a ½ MP, then climb up again and to the middle of the stack where some Ammo is to be found on a lower crate, then go to the E side of the Pile and up the blue Crane beam, go into the open gate and down the ladder and climb up E crawl into the duct R of the grate and drop into a short duct, overlooking the lower entrance passage. On the ceiling is a MS, so stand R, turn slightly L and standjump/grab the MS after checking your health. Once on the other side you can turn and shoot the fool (its possible to take a MP by hitting 0 for a ½ and 9 for a whole MP while climbing), crawl into the CS and follow to a climb up to a room with a button over a trapdoor, youll fall into the Submarine dock.
Submarine Docks.
Explore the inside of the Sub docked in the W, climb up the sub and go down the hatch in the front, get the Flares on the control panel and some Ammo in the back, go back up the ladder and run off the W side, dive down and in the dark metal W wall is a gap you can swim through to the next dock. Swim to the NW corner and pull up on the tail of the Sub, backflip to the walkway and go Runjump onto the Sub, go down the hatch and in the back part of the Sub is Secret #2, the Jade Skull. Go back up and dive into the water, go below the other sub and up through the open air lock, go to the cockpit and get the Ammo, go back again and dive into the water. Swim back through that gap to the Central dock, to the NE corner there and pull up on the tail of the Sub, backflip to the walkway and go to a door E, open it with the button and go to the E dock.
The E dock.
Dive in and explore the 2 Subs for the Goodies and get onto one of the walkways by backflipping from the tail of the Sub, go over to the Contained hanging from the crane and climb up, go to the N side and standjump/grab up to the Storehouse above.
On the W wall, next to the pile of crates is a button, open the overhead door with it, go in and shoot a grate on the L side, enter and come to a ladder on the R hand side, go climb up to the top, then down a bit till you see the floor behind you, backflip in and get the Ammo, jump back over the ladder and shoot the grates, come to the next Storehouse on top of the Portal Crane. Go S and when you come to the Crane beam, standjump grab to the beam and shimmy R till youre over the Container, drop and find the Uzis on the S end, turn L (E) and shoot a grate up over the beam. Then grab up to the Crane beam on this side of the Container and climb R to where you can pull up to the open grate.
Go all the way down the ladder inside. Get the ½ MP and climb up to the first opening R, follow to the N end and climb up R there. Find the Ammo and climb back out, go back S and into the E side passage near the ladder, hop backwards onto the trapdoor, holding grab and safety drop into a Control room. One of the 2 buttons opens a gate in the Storehouse, the other opens the exit, so go out and L/L into the W corridor and L to the passage with the ladder.
(Detour for more Ammo and a MP if you want: go all the way up the ladder again and out to the portal crane, go R and drop down onto the stack of containers, go over the top to the lower grey one and get the Ammo, drop from the side, go to the W side of the Storehouse and open the overhead door with the button, its the way back to the first Storehouse, dont go in but shoot the Guard that shows up, he will leave a MP behind. Now you can go back to the corridor E and up the ladder to the first opening behind you.)
Go up to the first opening in the wall behind you and backflip in, shoot the grates and have a look NE, runjump L to that lower crates and climb the orange one around the corner and down on a lower grey crate, go down the E side. Climb up R and follow out to some Ammo, return to the grey crate inside and drop from the W side, follow to the E and make your way up the stack of crates. On the N side and down some crates are Flares to be found, then go over to the NW corner and jump to the blue Crane support, get the Ammo in the NW corner and jump back, go all the way over to a single wooden crate SE, face SE and standjump/grab up to the MS under the Crane support. Go to the grated walkway S and drop onto it, then jump into the open gate in the E wall, drop into a space between 2 pushblocks, push the S all the way S and then pull the N one once, go through the E bypass to the other side of that block and move it into the S passage too, now roll and pull another N block towards the bypass and go around it to get Secret #3, the Golden Skull in the alcove to the R (dont go down that slope in the end of the N passage, only leads back to the start of this part of the level). Go pull/push all the blocks back to the N side and enter the S side passage. Youll find a Jeep there.
The Jeep.
Go down the E ramp and into the passage R. climb the crate just R f the entrance and turn around, to see another stack of crates, the R hand one has the Jeep Keys on top, so runjump on and get them. Go back up the ramp to the Jeep and start her up, drive her down the ramp and R into that huge Storage area. Go up a ramp and run over the 2 Guards there, stop and get out of the jeep. Go to that Control room on the plateau and get a MP, then some Ammo dropped by the other Guard and continue driving with the Jeep through the corridors, go down the next ramp and park the jeep on the Guard, this one leaves no Ammo, but theres something else you need. Go up the lower part of the ramp on foot and jump/grab to the lower crate S, step out to the other side and get the Key there.
Get back to the ramp (on the N side of it is a single grenade you cant pick up) and go on with the Jeep. Pick up speed going up the next ramp and jump over the lower passage, run over 2 Guards there and pick up Ammo and ½ MP, again proceed and come to some dark cave tunnels (for some reason the lights on the Jeep didnt work). Just go slow and when you see another Guard (Ammo), go L at the pit and speed up, because of the jump over the next pit, stay L in that passage (small pit to the R) and go on till you come to a wider crossing like cave, keep L and just follow. You have to manoeuvre up a broken ramp and then down to some fences, drive through and R, over the Guard (Ammo) and to a closed overhead door, get out of the Jeep. Shoot the grates in the S wall and go in, shoot more grates and reach the Underground Gardens.
The Underground Gardens.
The flyby shows a Guard up on a bridge near a Control room, jump out of the passage to the R hand rocks and shoot a Guard, from the rocks there, you can shoot the guard on the bridge, thats probably firing at you (jump up and shoot). Pick up the Ammo left by the Guard on the rock and go N up the rocks and shoot a hidden grate, crawl in and follow climbing up to a small control room, push the button to open a gate in the garden, go back through the CS and head over the bridge to the W. From the grey road there a runjump/grab to a rock NW, get the Ammo and return onto the grey road, follow down to the S and get up the ledge in the SW corner, to your L is that gate you opened.
Climb up L and grab the vegetation on the ceiling to go R around the corner and to the vegetation on the side of the upper bridge, drop/grab and climb to the R hand alcove, get the MP and grab up to the E wall again, now climb L and up to the bridge. Turn to the SW corner and jump on the rock ledge S, then to the W and follow to the N, a couple of jumps over sloped rocks and shoot that grate in the corner, follow in and in the Control room you can make use of the last Key, a door opens N on the bridge, Return outside and go L (E), runjump to the pointy rock between the ledge youre on and the bridge and slide/jump onto the bridge, get the ½ MP dropped by the dead Guard and exit through the open door to the next level .
13-10-2005
Walkthrough by D&G Productions.
Level 6: Algernons Lab
Story:
This level is related with the previous episodes of the ?Tarragona: World Heritage (TWH)?. Before finding the exit, she must walk through the laboratories, maintenance tunnels and office sections of the secret base.
Walkthrough:
Main Control Room.
Open the door with the button and enter the Lab, a Flyby shows you the main Control room and the Offices on the first floor of the Lab. Go check on top of the E side main frames for Ammo and a Shotgun and the drop in the NE corner where a button is located on the N wall to open a door in the SE corner of the Control room. Follow the passage past a closed door to a slope passage that will bring you down to the Research area.
Research Area.
You have to go S and through one of the red Security lasers. The light will go on and a Guard is alarmed. Go to the S end of this strange Glass area and find an open door, but theres one more closed door in that passage, so go into the Glass Labyrinth opposite the S passage.
Glass Labyrinth.
The route is simple, just walk towards the camera every time the camera angle changes at crossings. In the end youll find a Crowbar in the central room (most important is, that picking up the Crowbar will open the second door in the S passage, but also a Bull will be released). When you go out of the labyrinth, you will have to walk away from the cameras, whenever you reach a crossing. Have a look at this Map to give you some directions.
Coming back out, the Bull is waiting for you, run away first and the sprint back to the S entrance. In the room is a button next to a block, push the button to open a door and go up the block to enter. Get a MP and in the next corner is a hole up N. so climb up and push the button, runjump to the top of the labyrinth and go to the middle to get the Revolver. Go to the S side and drop near the entrance to the S room, roll and quickly get onto that block again, follow the passage to the end and shoot the grate L of the door, crawl in and go down the ladder to the Sewers.
The Sewers.
In the room to the L is an opening in the wall on the second ledge to the L, go in and straight to the end for the ½ MP, then turn around and go in the first L, follow to the button and push it to open an UW gate in the Sewers, return to the first room, dive into the water and swim into the small opening N, follow to a room with 3 tunnels in the walls, take the E tunnel and go up to a room with a ledge E, on the ledge is a Key. Take it and swim back to the first room (nothing in the other tunnels), climb up on the S ledge straight of where you come out. crawl to a passage where the Kay can be used, go through the passage and hop over the hole with the ladder, in the end is a slide. Save here and slide down to a room with falling pillars, as soon as you can you have to get into the passage L of where you end up after the slide, but theres a Secret if you want, you have to sprint straight to the back of the room, pick up Secret #1, the Silver Skull.
Roll and turn R a bit before you sprint back to the R and up to that passage. Follow the passage to the end. climb into the CS up L and drop backwards into the water. Swim to the NE and get a MP on the ledge there, grab up to a crack in the N wall in front and shimmy R to the opening. Follow the route up a ladder, a wall another ladder and get the Uzis on top of that second ladder, turn and jump/grab up E, shoot the grate and drop out into the Office level.
The Office level.
Go S and then R and L into a room with boxes, shoot what you can and get some Ammo. then push a shelf in the E wall all till you can enter the room. push the shelf back in the wall and go shoot more boxes to get the E shelf out of the wall and push it L, go in and shoot more boxes, so you can shoot the grate that covers a CS in the SE corner. The door opens and a Guard will come in, take him out and then go out the open door to the corridor, go N and L into a conference room, hop on the table and get the Security Card. The see through mirror can be shot, so you can take out the Guards that appeared in the S room. Pick up the left-overs (Ammo and MP) and head into the passage SE, open a door. Shoot a Guard for a ½ MP, go L and come back into the Main Control Area. Follow to the and go into the 2nd passage L, going up to a wide corridor, go R and pass some doors, when you come to a big white overhead door to the L, the closest one of the grey doors will open up, shoot the Guard and go in. To the L is a passage to an area with a nice room, to the R you can see a Skull behind the glass, go L and come to the entrance of the room with the moving pillars.
Moving Pillars.
Not too hard really. Just grab up to the MS ceiling and go R past the 2nd pillar before turning L and go straight to the other side of the room. Look for the single ledge a bit to the R, without a pillar on it and better Save before you drop onto that ledge (in case you miss the ledge). Shoot the grate behind the moving pillar NW and the pillar stops moving, jump to the ledge and follow the CS, go out through another grate and go straight into the next passage for a nice surprise, a Ninja abseiling from the ceiling, another one behind, in the control room to the R is some Ammo, then follow the passage and in the end youll find Secret #2, the Golden Skull.
Boulder Alley.
Open the door and go back W to the wide corridor and head L (S) open the white overhead doors and Save. I ran in, went R up the slope on the other side of the corridor and sprinted back with a curve over the slope to the entrance, so all the Boulders were triggered and then go to that gap the Boulders fell in, see a pit below, jump onto the side slope, slide onto the one going down once more and jump over the water hole to a passage, go R at the crossing and follow to a glass covered passage where Secret #3, the Emerald Skull is located. That glass is pretty strong, considering what happens next.
Go to the W end of the passage and L into a passage down to a hole, safety drop down into the pool with the Boulders and a bunch of Crocs, shoot them if you like, but stay on the ledge and go into the NW corner to climb the endlessly boring ladder. Follow the passage and shoot the grate to climb out backwards, youre on top of Boulder Alley.
UW Labyrinth.
On the N side is another hole in the floor, slide down from the corner and fall into the water, surface and Save. Swim down and to the glass in front, go r there and along the glass, over a block and stay on the same height, go R into the opening away from the glass and in the end, to the E through the next opening, youll come to another glass wall, go R (L for the viewers) and then through the hole to the second compartment, up and to the glass to go up in the hole NE, then through the hole N back to the first compartment and L, then down and R, L and up in that room for air, climb out and go down the long staircase to a dark basement, go up the staircase in the opposite corner and follow all the way up to the big white overhead door you can open with the button, youre back on familiar territory.
Go R into the corridor and L into the second door that now opened, go get the Flares at the window and go behind the Main-frame, push the button (opens a gate) and shoot one of the grates, to climb in the duct. Follow to where you can stand up and climb up S, go through the long passage to that gate you opened, Use the Crowbar lever on the floor and shoot the grate (if you didnt already, because it will bring you back to the store rooms at the Office level. Go out and L through the corridor, all the way to the end and L, follow out to the top of the main Control room, walk out onto the walkway and in the middle of the room is a hole up in the ceiling, grab up and climb to the room above, follow the passages to a hole in the end, drop down and shoot a grate.
Test Lab.
Safety drop out into a Lab with a Tank in the middle. Go to the Control panel N, stand on it and grab up to the bottom side of the walkway, monkeyswing L to the E side of the room and go into the room between the 2 pillars, go to the R around the corner and in that alcove is a Jumpswitch, drop/grab (to open a door in the Tank) and climb back up to the Test lab, In the N side of the Tank a door opened, go in and through a blue tunnel with blue rays shooting out of the walls, follow to the end where youll come out of a blue block and enter a dark cave, just walk on and leave the level .
14-10-2005.
Walkthrough by D&G Productions.
Level 7: Civilizations Crossroad

Story:
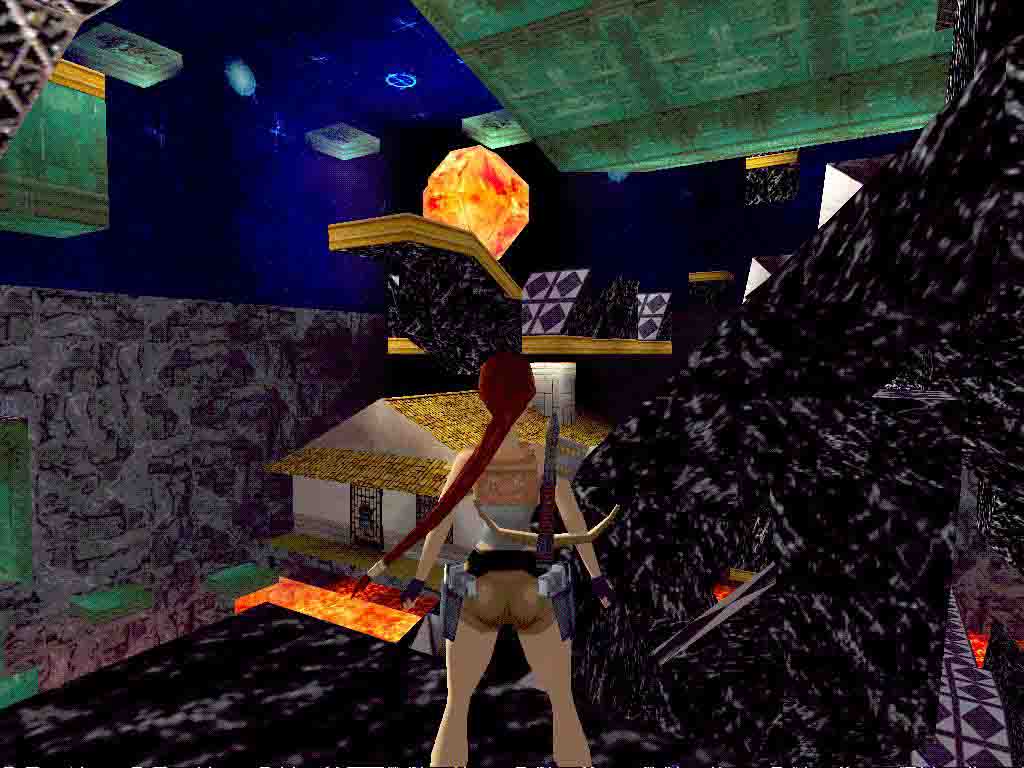
At the end of TWH6 Lara was teleported by the "blue cube" very far from the Earth. Where is she now? She is now in a Crossroad Civilisations.
The Caves.
Go N from the blue block you came out of and enter a high cave, in the NW corner of this cave is a hole in the floor, in the hole youll find a Lasersight (cutscene of a grate). Then go into the SW corner and crawl into the small hole, climb up S and head E (L), crawl into the next section where the Revolver lies close to the glass wall (cutscene of the same grate). Go crawl back into the SW tunnel and go past the hole you came up from before and into the NW tunnel to come to the ledge next to the walkway, look on the S side of that cave and see a sloped rock ledge, one point is somewhat higher that the rest, aim for that rock and runjump/roll in midair and jump/grab from the rock to grab the top of the walkway. Shimmy to the R to where you can pull up, get the MP there and turn facing S, just L of the tunnel is a rock with a crack, standjump/grab the crack and shimmy L till you can pull up (hold crawl while pulling up).
The Pyramidal Key for Secret #1.
Go to the W side and standjump over to a ledge in the SW corner and from there a standjump/grab into an alcove S, drop/hang backwards from the edge and shimmy L, to pull up at the Pyramidal Key (Guardian Key) Shimmy back to the R hand alcove and runjump/grab to the N, drop/hang from the edge and shimmy R to where you can drop/grab down to the top of the walkway again. Shimmy R to where the MP was and pull up again. Stand on the middle of the E panel and on the edge of the walkway, look down SW and spot a triangular ledge, do a standjump/roll in midair and land on that sloped surface, immediately jump again and you should land in a crevice in the SE pillar. Go in and place the Pyramidal Key to open the door, go in to get Secret #1, the Silver Skull.
Go back and down to the floor of the cave and to the NW corner where you found the Lasersight, shoot the grate up in the N wall (to be used later) and head to the E side of the cave, to the next areas with the white wall and turn L, go to those rocks on the L and you have to go to that pillar like rock N. Do this by hopping into the lower part behind the rocks, then standjump into the NW corner, hop onto a ledge in the W side rocks and turn to runjump to a ledge NE, climb the rocks to that pillar and do a runjump/grab to the top of the glass walkway E, hoist yourself up and head all the way S for a MP. You will have to shimmy from that E side walkway to the MP and then get back to the N end of the walkway, drop/hang from the W side and shimmy R till you are opposite that side walkway.
Drop down into a shaft, light a flare and grab up W, crawl out to a ledge in the 1st cave, loose the flare and face SW, standjump/grab to the MS ceiling under the walkway and swing all the way W to that grate you shot, face the wall and drop/grab to hoist yourself in. Crawl to where you can stand, turn around and climb up into the CS above, go to the end and shoot the grate (cutscene of an Alien), drop out of the CS and turn L (S), then turn L at the walkway, over the walkway to the door you can open by pressing the button, go through the next walkway and come to a passage with automatic doors.
The Esciptions Tear, the Pyramidal Key.
Take the last door R and go into a Control room, find a button SW next to the stairs and push it to open the near by doors, go get the Esciptions Tear in the short S walkway. Go back N into the passage with the automatic doors and follow to the walkway going S, to the L, in that side walkway which is open now, youll find the Pyramidal Key. Drop from the end of the walkway and youre on top of the white building. Go to the NE corner and drop down to a hallway below, use the Tear next to the E door and go in, to the L is an open passage, follow that to a room with a big Tower like structure in the middle.
Tower Room.
Go to the W side of the room and find a block in the wall with blue markings on it. Pull it out and L of you a blue light will appear, push the block to the Tile and another block will lower in the passage you got the block from, so go in and push the button inside to raise the blue block. Go out and to the N side of the room, go up the ramp, over a ledge W and runjump to the S ledge, go down in the SW corner and pull the block once, another block next to you lowers and gives access to a button, so climb up and push the button to get the block up one more level, now go pull/push it into the Tower and see it will be raised to the next level, runjump/grab back into the ramp and go to the S ledge again. Climb onto the one remaining block S and runjump/grab to the ledge in the Tower.
1st Ruby Amulet.
Turn around and runjump to the pillar SE. jump to the E ledge and then a runjump to the walkway into the Tower pull the block out once and jump to the NE ledge, get the 1st Ruby Amulet there and jump to the N ledge, from there back into the Tower and push the block all the way into an alcove E, see a block lower in the SE corner, go over the ledges to the SE. climb up and make use of the Pyramidal Key to open up the Whole N wall, revealing a pedestal with a Skull. Make your way over to the N and go get Secret #2, the Golden Skull.
Well youre done here, go down to the ground floor (fast way is to grab the climbable wall on the Tower, just over the openings and do drop/grabs all the way down) and into the NW corner. L there to push a button and see a door open up in the other passage, go up and through the door to the connection room. Push a button in the NW alcove and the SE door opens up. slide down the 2 slopes and come to the Lava Room.
The Lava Room.
Standjump to a ledge NW and turn to runjump/grab into an alcove in the E wall, push the button to raise some ledges in the Lava room, runjump/grab back to the same ledge and jump to the lower N wall and go jump over the ledges to an alcove in the W wall. push the button there too (more blocks go up). Jump back over the same ledges to the raised one NE and from there a runjump/grab S and then jump/grab the climbable SE pillar, go to the top and stand on the NW corner, face SW and standjump/grab to the climbable wall going W, dont let Lara pull the feet up (she will go faster then) and just shimmy all the way to the R, around a couple of corners in the end and finally you can go all the way down on a hanging pillar, then shimmy L around the corner and safety drop to a ledge below, runjump to the ledge W and get the Shotgun.
2nd Ruby Amulet.
Jump/grab the pillar NE of the ledge and go up, turn N and jump/grab the hanging pillar, go R around 2 corners and from the bottom of the pillar a backflip/roll/grab to the one behind, again go R around 2 corners and 3 steps from the top of the pillar a backflip/roll/grab to the one behind, now go all the way around R to the N wall and backflip/roll/grab once more, go R around the pillar and into an opening in the wall, push the button there to raise another pillar. Go get the 2nd Ruby Amulet in the NW corner and the look for the Ammo on the lower Tile NE, standing on that lower Tile, look S with the Revolver/Lasersight and through the central structure you can just spot a Red object in the far S wall. Shoot that to lower a pillar against the central structure, runjump over to that pillar and jump/grab to the opening in the structure, crawl in and climb up in the SW corner, into a passage and get Secret #3, the Emerald Skull there, follow the passage down a slope back to where you got the Ammo, jump/grab back onto the pillar near the button and go straight up this side. Climb off L and jump over to a room with glass walls.
In the SW corner is a passage, you have to be fast here. When Lara goes in, an Alien will appear, you have to shoot it before it closes a door ahead and you will be trapped and ready to drown because of activated Sprinklers. Go E and into the hopefully still open door, come into a control room and go up an E passage and follow to the connection room, go into the white SE passage and up to the passage with the automatic doors. Go L and then into the R hand door, now go up those stairs and in the room on top an Alien will appear, shoot him for his MP and head into the N room and place the 2 Ruby Amulets to open the N wall, go through and youre back in the Tower Room. go L and push the button to lower a complete wall. go L and follow that new path to a dark passage to come to another room with doors, go into the R hand open passage and follow to a walkway where a flyby will show some Scorps running about, the flyby ends with a screen of a Snake lever.
Snake Levers and twice ½ a Ruby Amulet.
Follow the walkway to the L (W) and go down the steps near the Alien that seems to be quite friendly. Head into the room E and find your first Snake lever. Throw the lever and go out of the door to a cave. Theres another lever and that will open a door to the 3rd lever (behind the glass behind you), go back inside and use the lever there to re-open the exit, go W past the stairs and L into a passage to the S and follow to the 3rd lever. Throw it and see a Scorp butchering an Alien, wait for the Scorp(s) to retreat in their room and close the door. Then go back to the 1st lever and use it again to go into the cave and look for the ½ Ruby Amulet where the Alien perished.
Go back out, use the 1st lever for the last time and go W, now to the R at the crossing and down the passage to another cave with walkways. Go to a place where you can grab up to the MS under the walkway going N and follow that over a lava pit, drop on the other side and go to the SE corner where youll fin a small cave in the S wall, go in for a MP and then go out and walk to the W, next to the support pillar under the walkway is a Grenade-gun, but as you take it, pesky Beetles will come to eat you alive, so run back up the slope E and grab up to the walkway fast, follow to the S, shimmying past the low rock and around the next corner, near the glass wall youll find the second part of the Ruby Amulet.
Go down from the walkway and out through the S passage, Follow back to the crossing and go L, then up the stairs and to the white passage E, turn L and follow down the ramps to an area with glass walls. Behind the glass is a big vehicle on caterpillar tracks. In the wall to the L is a grate, shoot it and climb down past a trapdoor that will open for you, go through the next passage and beware, the floor will give way, so be sure to run in to the L and grab the edge of the sloped ledge below, shimmy R to a save place where you can drop into a Lava cave.
The Lava Cave.
Go along the bank to the S and in the end you can do a runjump to a ledge E in the lava, runjump to the S rocks where a Trident is waiting for you. Jump back to the ledge and go back N to where you came down, runjump over to the E and go to that statue N, place the Trident and a trapdoor will open on the pillar close to the ledge where the Trident was. Now go W from the statue and L a bit to go jump over the islands to a ledge on the W wall where the combined Ruby Amulet parts can be placed in a receptacle (a door will open up). Go N over the ledge and jump to the one N, then over to the NE and hop onto a flatter piece of rock L. Now a runjump/roll NE and slide/jump/grab the ladder to go up to the top of the cave, backflip to a black rock and head to the N end, slowly walk up to the edge and hop back to runjump/grab into an alcove with a pole. Climb the pole and turn to backflip into an upper room, go get the Esciptions Tear there and go back down the pole.
Stand on the L side facing into the cave and runjump out to the corner of the rock ledge, hop to the top and go E, on a corner there you can standjump/grab a rope and swing into the E side of the cave. Youre back at that big trapdoor, you can close it with a Snake lever in the cave E of the trapdoor and go out of the cave. Up that long ladder in the dark passage and up in the CS, back at the vehicle go L and to another grate, this one in the R hand wall. Shoot it and crawl to another grate, take care of that too and climb down into a room with a pushblock, go into the NE passage and push a button to open a door, go up some steps to where that big vehicle is, in the SW corner are some more steps and they will lead you to a platform where some Ammo is to be found, from that point you can runjump over the railing to the front of the vehicle and climb up L to the top, go around over the lower part to a walkway N, next to the vehicle and drop down to get the Esciptions Tear there.
Go back the way you came and follow back to the N side and into that passage to the small room with the CS. In the SW corner is a pushblock, push it all the way in and a platform will take you up to a Store room with several more blocks. This is the loading area for the vehicle.
Store Room.
Get some Ammo in the SE, then pull/push the NE block to the S side, get the NW block and move it to the far E side, then get the block on the higher floor NW and move it E too, turn around and pull the blue block once, go around the R hand side and into a CS. Follow through and grab up to the higher floor, youre now inside the vehicle, go E and into the Cockpit.
Go into the NW corner and shoot a dark panel near the floor, climb down and follow in to Secret #4, Ammo, climb back up and in the SW corner of the Cockpit is a button that will lower the Red/yellow pillars in the back of the vehicle, shoot the Demigod (go up real close and duck while shooting). Now go into the back to take care of some more Demigods. Pick up the two MPs (SE+NW) and fight another Demigod (careful, dont shoot that Alien that might have showed up, he will assist you. But if you do shoot him another MP will appear, so the choice is up to you). Now head into the N room and go out the NW passage, L up the stairs there and to the N wall, where you can shoot a panel down in that wall, go in to get Secret #5, Ammo. On the E wall are buttons, just push them all and go back down the W stairs, L and if you want the last Secret, open that door with the Button and go back into the first CS to the L, down to the small room and go into the place where the pushblock was (SW), find Secret#6, the Sunglasses. Go back up the CS and R into the passage. Go L to a door in the end that can be opened with one of the Esciptions Tears. Go in and follow the walkway through a familiar cave to another door that can be opened with the last Esciptions Tear, Go R and follow to where you get a flyby of an Alien and the level ends .
17-10-2005.
Walkthrough by D&G Productions.
Level 8: The Final Countdown.
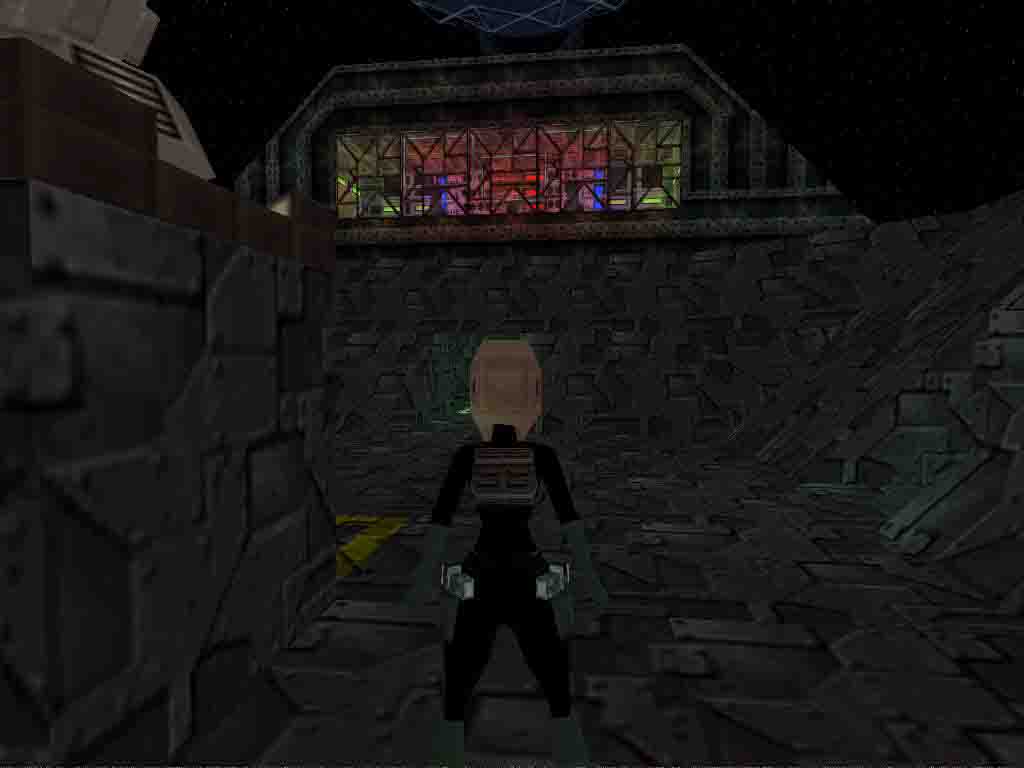
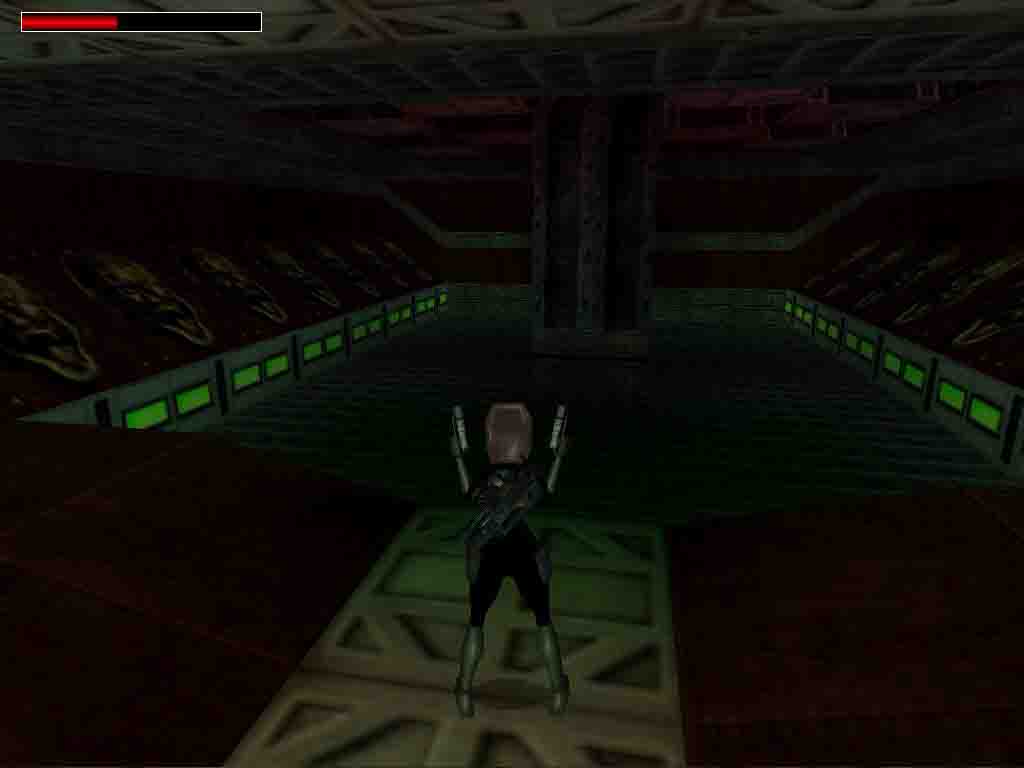
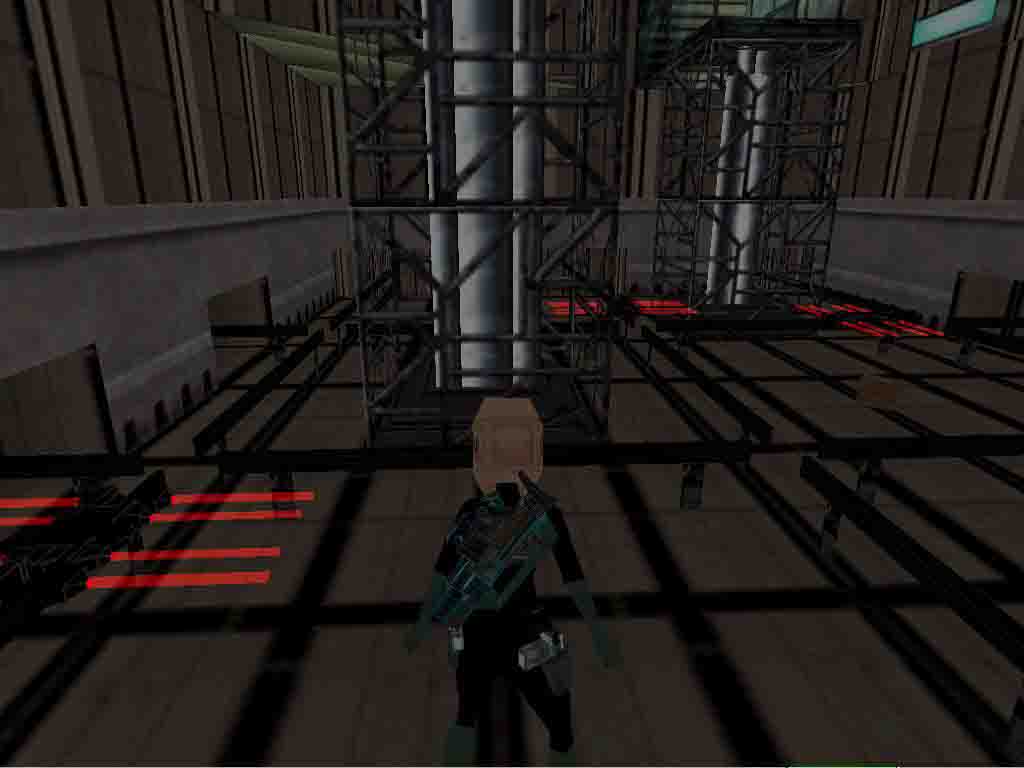
Story:
These two levels are the final of the saga. Lara now is boarding a space shuttle and she is trying to find the way back to the earth.
I couldnt get here directly from level 7. The level jump didnt work for me, so I had to start the level from scratch.
The Green Level Card.
After taking off in a Space ship, Lara now has a Space suit on. In the NE corner is a button, push it and another Space suit comes out of the closet, a Green Level Card drops from the suit, pick that up and leave through the automatic doors N. Turn L in the passage and follow to a Connection room, go R and past the passage to the Cockpit (later) to a door with a blue light above, you can go in and collect Revolver and Lasersight or leave that for later, the door at the end is closed for now, so head back out and go to the S side of the Connection room. As you step into the passage (Trigger Tile ) a door is shown, opening up.
The Labyrinth, the Starship Level Map and Yellow Level Card.
Heres
a sort of labyrinth and it seems you have to stay on the right track or the
door will close again, so better follow the route I describe here and dont
wander around, or you have to get back to the beginning to open that door
again on that Trigger Tile. Go straight through 2 doors and turn L after the
second. Then go in front of the door with the green light and it will open
for you as you have the Green Level Card. Shoot the grate up in the W wall
and crawl into the duct, go R/L and shoot the grate, go down into one of the
Personnel Quarters and get the Starship Level Map. Climb back into
the CS ands go R and into the second L, shoot the grate and go down into another
bedroom, turn L from coming out of the CS and walk against the bed (dont
climb on), standing next to the bed and at the pillow, you can now grab the
Yellow Level Card from under the pillow. Go out of the door that will
open for you and go L/L, heading back to the Trigger Tile, look at the Starship
Level Map and follow the directions. The blocks representing crossings
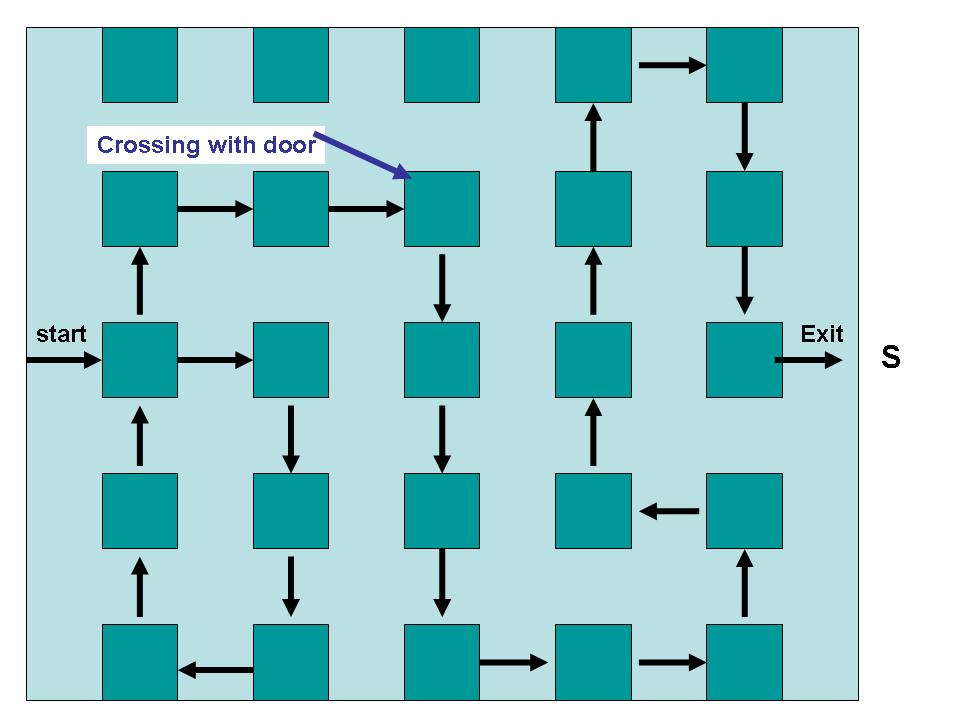 so go S and second crossing R (before you go through the door), then
R at the second crossing (at the Skylight) and so on. Finally you will
come to that door S and it will stay open.
so go S and second crossing R (before you go through the door), then
R at the second crossing (at the Skylight) and so on. Finally you will
come to that door S and it will stay open.
The Navigation Room CD
Climb the Main-Frame Computer terminal E and get the Navigation Room CD, go back into the passage N and just follow straight back to the Connection room.
Go L and back into the blue passage, follow to the 5th ceiling panel from the closed door and shoot it. grab up the N side and crawl in, shoot the grate to the L and climb down to the lower duct, crawl in and shoot another grate, go R into the lower part of the blue passage and light a flare, go on till you see a light coloured panel to the R, shoot it and get Secret#1, the Silver Skull there. Go out and to the N, follow around the corner and to the L will be a grate, shoot it and go in to where you can stand, climb up to the R and shoot a grate to drop into the blue passage, but on the other side of that door, head W and push the button to open the door, go S a bit and climb up through that ceiling panel you shot before. Grab up to the N side again and follow around the corner to a grate in the end L, go in there and shoot another grate to drop into a passage.
The Shuttle Bays.
Go N and L/R follow the passage to a trapdoor in the L corner, shoot the Fire extinguisher (pistols will do) and the trapdoor will be opened. Go climb down and crawl through a duct to a grate, shoot it. climb down into the corridor to the Shuttle bay, go into the S passage first and to a door L (Blue light) that will open for you. Go follow that passage up to a door and go R there to where you look out over the Shuttle bay, go to the end of the walkway and open the duct to the L, crawl to where you can climb down to Secret#2, the Emerald Skull.
The Red Level Card.
Youll have to go back the way you came as the exit here is blocked by a switch cover. So down the sloped passage and out the door with the blue light, turn R and R again into the Shuttle Bay. Go under the Shuttle and climb up the open hatch, in the Cockpit, on the control panel is the Red Level Card. Return to the corridor W and up in the duct N, crawl back and climb up at the ladder, head S through the passages and come back in that passage with the doors, open the white door to the R with the button next to it and follow the blue passage to the Connection room. Go L and into the door NW (Red Zone).
The Navigation Room
Go to the S wall and insert the CD in the terminal, a glass tunnel opens up with a load of buttons inside, on the walls are a whole series of planetary maps and signs, seems you have to set the course.
Pick the Red planet (4th button) on W wall, the Spiral galaxy (3rd button) on N wall and finally the Orange Star (2nd button) on E wall.
The Cockpit.
Go out and out to the Connection room, R into the passage to the Cockpit and when you stand in front of the steel door to the R is has to open for you. Inside is the Crowbar, go out of the room and straight into the W steel door, then to the Cockpit and an Alien is on the controls, from the window you can see hes indeed on his way to that red planet . Go to the empty seat E and move it away from the window, a panel opens up E, go in for Secret#3, the Golden Skull. Now pull the other empty seat to the S once and find a crowbar lever, use that from facing s and a trapdoor opens where the E seat was, go climb down the ladder and see the ship is attacked by other Aliens.
The Alien Attack.
Time the runjump through the Fires that started and in the next passage is another grate and CS, follow through and shoot the next grate to drop into a nice passage, that seems impossible to conquer, but just stand on one of the sides and look in the back of the passage to see a red lamp over a Fuse box. Shoot the lamp and see what happens. Now go on and come to a vertical duct where the fire didnt go out, climb up and time the flames to get past them and into the passage. go on to drop down in a passage leading to the Lab, push the button NE and go through the door, you can hop over those red pipes and crawl L to a dead Alien, pull him away by his head and get the Lab CD, hop back over the red pipes and return to the previous room, go up the steps and place the CD in the Terminal L of the window, the lab is activated, go back in there and a block goes down step on the block and youll be taken to the outside for a Space walk. Great Flyby .
Level 9: Caves of Steel.
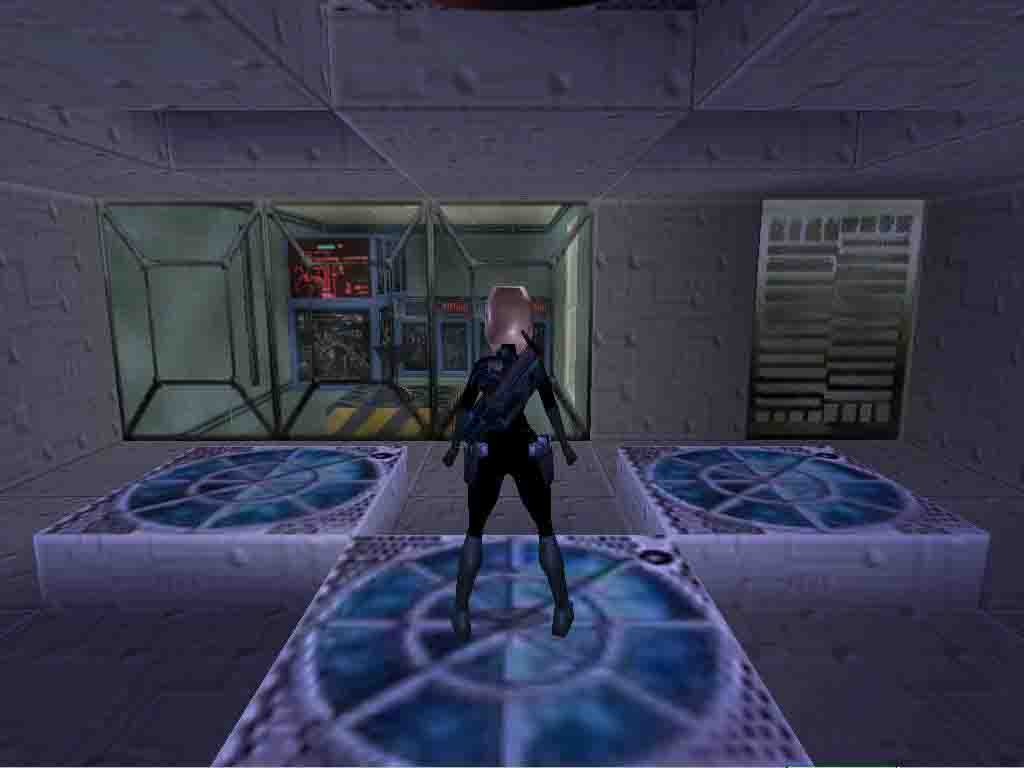
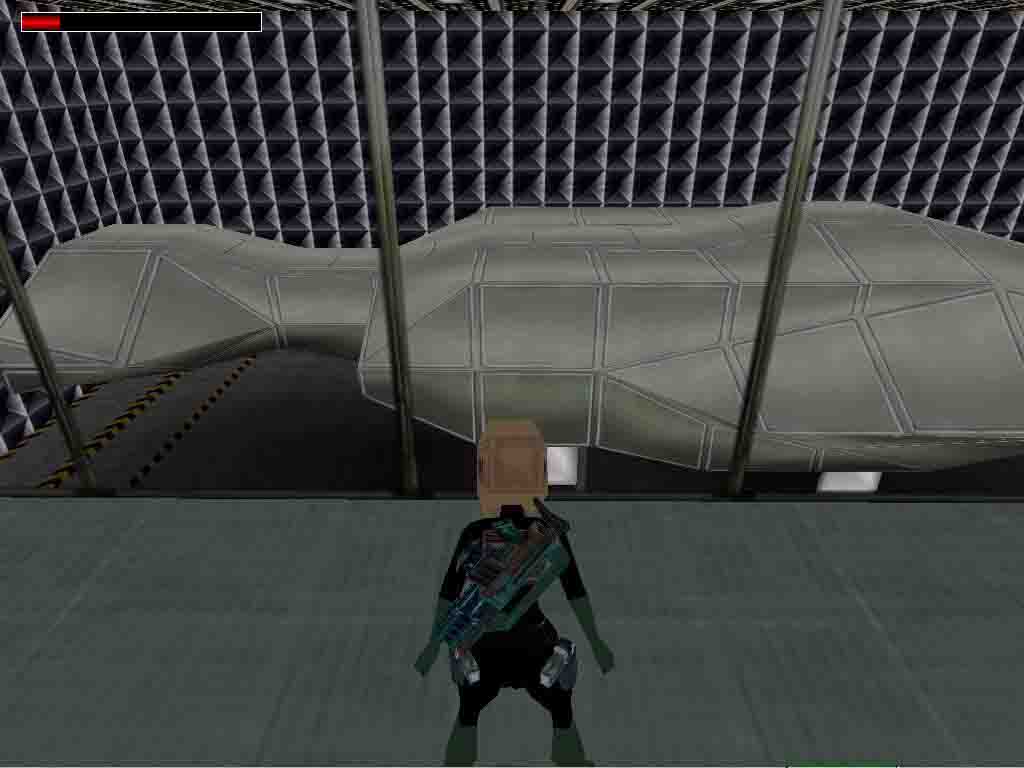
Go around the block behind you and push the button to lower parts of the walls around you. Now you have to do some things that will wake up Wraiths and Spirits, disguised as Flying robots, its possible to take a few shots at them and they will go underground, but if they dont you have to run and be fast doing the following.
Take the MP in the SE opening. Light a flare and run in to the R, follow to the end where you can pick up the Mother Symbol. Run back and go out L, on the square you can shoot the robot till it doesnt come after you any more, then go into the SW opening and do the same to get the Father Symbol, run out again and shoot the robot. Now go get a ½ MP in the NE opening and shoot the robot, go in and place the Mother in the end, head back out and to the NW opening, the hardest, as heres a Fire Wraith, just go in fast and place the Father to open the cage L of you, run in fast and go L inside, sprint along the purple fence to the N and go R, a screenshot shows the opening of a gate. Run back and youll see the fence opened up to a deadly pool, the robots are all circling a Snake Statue on a ledge in that pool. Runjump over to that ledge and push the Statue to the N, it will fall into the water and most of the robots are immediately gone, now stand close to the statue in the pool which is now safe and wait fir the last one to disappear on the Statue.
Dive down into one of the holes next to the ledge and go to the N side of the UW room to pull the UW ceiling lever to open a door to a Secret. Climb back up and go to the SE corner, out of the purple fence and find an opening in the SE corner, collect Secret#1, the Silver Skull and go back in the pool. Go through the opening in the purple fence S and to the SW corner, inside the alcove there, youll find a switch, throw it and that cage lowers where you found the Symbols before. Retrace your steps S to the square and go into the new passage S.
Caves of Steel, 1st Pyramidal Key.
Take the second R or L, whichever you prefer and push a Skull on the wall over a trapdoor and you will fall in and slide down, go on down the S sloped passage and a Flyby kicks in when you try to pick up the 1st Pyramidal Key. After the Flyby you can pick it up and go L or R again, all the same and be careful with those lasers that will pass by every now and then. Go down to the end where you have to crawl in and go either L or R to reach the central room. In the middle of the room is a strange receptacle. Go over to the S side and hop up into the W corner, time the Laser and crawl in, crawl into the 2nd tunnel R (so past the glass panel) and go as far as possible, turn quickly and backflip/jump/grab to go climb up the ladder, climb off to the L and drop in a dark passage, go up the next ladder to a red light running along the ceiling. Follow that passage to Secret#2, the Emerald Skull. Return the way you came and when you drop at the Laser, go straight into the opposite passage (R hand side of the glass) and up the slope, hop to the higher part and go to the top, where youll find a ladder on the S wall.
Climb the ladder to the top and go L (E) along the wall and drop in the end, go up the passage and crawl into the next part (Laser). As soon as you can stand up. youll find another climbable wall. go all the way L and then down a dark shaft. Dont go to the end, but into the first passage R, follow around the corner and shoot an Alien to grab his nice Shotgun. Go into the passage R where he came out of and grab the wall S, climb around the corner and up in the shaft, off to the R and just to the L is the blue receptacle for the Pyramidal Key. Put it in and go N to the end of that passage at a slope.
2nd Pyramidal Key.
Stand one step from the L wall and slide, jump/grab the ledge in front and go up that passage and at the crossing R, down a winding passage and R in the end, push the green button and the cage at the 2nd Pyramidal Key will lower, get that and go back in E, go into the NE passage with the blue lights and go get some Ammo in the end, then return and go back up the winding sloped passage to that crossing on the green light ledge, go L and stand at the edge near the Laser, time it and runjump to a ledge SW, place the Pyramidal Key there and do a long runjump (no grab) back NE into the same passage and go up to the crossing.
3rd Pyramidal Key.
Turn L this time and R at the next crossing, follow down some slopes and find a ladder to the R, climb up into the CS and crawl to a passage leading to an opening with a Laser, you have to get into the same level across the gap and the easiest way is to take 2 steps back from the edge, hop back once and runjump/grab over, pull up fast and go into the passage leading down L, find another green button in the corner and push to lower the cage at the 3rd Pyramidal Key. Go back up the same passage and at the laser you now have to go up one level. So stand at the edge and jump/grab forward, pull up, turn around and do that runjump/grab trick again to get in the same level N side. In there youll find the receptacle for the Pyramidal Key.
4th Pyramidal Key.
Go back to the Laser and standjump/grab S, pull up and go to the end of the passage, drop down the hole and turn l to go into the passage W, follow to the green button in the corner and push to lower the cage at the 4th Pyramidal Key. After taking it, go out E and turn L (N) down the slope and up the next, go L into the passage and up the ramp, out at the laser you have to get to the level N above the Pyramidal Key receptacle, so do two standjump/grabs (one S and one back N) to get there and in the N end is a ladder, grab up and go up on the R hand side to a point under the top of the ladder (about 2 steps down) where you can just see the top of Laras head, Save and backflip, turn L and hop back to grab the edge of the ledge, shimmy R around the corner to the end and wait for the laser to pass, pull up and turn R, aim for the tip of the ledge SE and standjump (no grab) onto the corner of that ledge.
Go all the way S over this ledge (crawling here and there) and on the S end you can drop/hang from the S side. Look for the ledge with the MP and drop onto that ledge, get the MP and go N along the L side, at the end, you can see that glass passage where the Secret was, down L. Run off the corner to land on the ledge, get the Ammo and jump back up to the ledge you came down from. Go to the SW corner and look for a ledge there on the W wall, wait for the laser to go by and jump there, crawl into the L side and go down to the end, climb out E and down a ladder, place the Pyramidal Key there and go back up the ladder, same passage back and wait for the Laser again, standjump/grab back into the brick ledge and go over to the E side of the room.
5th Pyramidal Key.
Go into a dark passage there and follow to a pit, drop/hang in backwards and safety drop onto a slope, grab the edge of it and safety drop down, turn around and find the green button in the corner and push to lower the cage at the 5th and last Pyramidal Key. Go back into the passage and stand between the sloped sides in the S, facing E. Grab up to the E slope and pull up, backflip to the W slope and jump/grab the higher E slope, shimmy L to just around the corner and Save, then pull up to that blue slope and backflip to a slope S, jump with a sharp R curve from that one and land on the tip of a sloped ledge N. now you have to jump all the way up that N slope over those sloped blocks, better try to save in mid air by hitting F5 every now and then, so you dont have to do it all again if you miss a jump. (If you go down the slope by mistake, just keep jumping and line up to go up again.) Once jumping on the 2nd sloped block level over that blue slope, you will have to do a roll in mid air to go further up the slopes (or Lara will hit her head) and on to youll come to the receptacle for the last Pyramidal Key, youll get a screenshot of a Zip-line where a handle now appeared.
Take a step back from the receptacle and turn facing NW, wait for the laser to go by and jump up to go after it, crawl straight ahead into the opening L of the glass. Stand up quick. Turn R and hop back grabbing the edge, wait for the Laser and pull up, turn around and jump/grab the crack in the wall. Shimmy R to the CS and go through to hang on the other side, shimmy R and pull up again, go L to the SE corner and drop/hang from the S edge. Drop to a slope below and slide to the end, go L (E) down onto a lower ledge and get the Ammo, climb back up and stand with your back to the N slope, then backflip/jump/grab from the sloped ledge up to a ledge above, go over to the W side and grab up to a MS ceiling. Follow N and into a glass cage to get the 1st Artefact Piece, return to the W ledge with the MS and go to the S end of that W ledge (at the end of the MS), turn L there and grab up into an opening above.
Walk up to a hole in the floor, look up L and spot a higher passage there, the floor of that passage is sloped, you can either jump/roll up or backflip into that higher passage and slide backwards, grab the edge and safety drop down in the cage with the 2nd Artefact Piece. Check your health before taking it, because the bottom of the cage will give way and youll drop down to the ground floor. Go to that stand in the middle of the floor and place the combined Artefact Pieces= Alien Artefact. Behind you a part of the floor will lower go down into that lower part and crawl into the CS E, drop down into a dark passage and go into the next room, turn R around the corner and push the Skull on the wall (a screenshot of a room with holes), and go back out as theres nothing more to do around here right now. Climb back up to the Steel Cave and go into the NW corner.
Time the hop into the glass walls and duck to go up the inner S side (2nd L). go up the slope and get into the passage W where you got a Key before, follow up and go R to the Laser. Make your way up two levels and to the S side passage, in the W wall is a passage with a brown floor, go in and follow going W. shoot the 2 Aliens to get a Shotgun and a MP, then step into a passage W and follow up to that room you saw earlier in the screenshot, careful you dont run into the holes. The one you saw before is the hole just in front of the entrance, with the flashing lights. Slide down backwards from that slope and grab the edge to drop safely into the next room, look for the next safe slope NW and do the same. Then the one NE of the central pillar and this is the last slide. Drop and shoot an Alien for a ½ MP, then throw a switch on W wall (the Exit door opens up in the Cave) and go to a door E you can open by turning the wheel on it. Go out and youre back in familiar territory. Go E and climb back up in the CS to the Steel caves.
Up Again.
You have to go up to the top ledges again, so jump into that NW corner and take the 2nd L up to that Pyramidal Key passage, follow up to the Laser, jump/grab up S and then N to that passage above the Key receptacle, the one with the ladder in the N. Go up the ladder, R hand side (remember?) and just with Laras head visible a backflip to the ledge behind turn L and hop back to grab the edge of the ledge, shimmy R to the end and Save. Pull up and turn R to standjump back onto the corner of that ledge SE, follow over the W ledge to the S and drop/hang from the S end to drop back onto the ledge where you got the MP before, go onto the SW corner ledge and face N, to grab up to the opening at the end of the MS to get on top of the MS grating. Follow N and hop over a hole in the corner, go down the end into a glass cage and grab the Zip-line and ride it to the opened door S.
Go down
the passage and safety drop down onto a trapdoor that will break your fall
into a passage, follow W and around the corner you have to be careful, theres
a Laser in the end (saving here caused a strange
bug, at least I encountered it. When I arrived at the CS with the Lasers,
there was a Laser coming from the L (E) and the one in the R (W) hand CS didnt
enter the CS, so you could get in, but after I saved there, the one coming
from the R (W) came all the way to where I was and it was almost impossible
to get in safely). 
What I did was stand facing W against the W wall, and sidejump L as soon as the Laser went into the W CS, duck and crawl in, go sharp L inside the room and stand up fast, jump/grab curved to the climbable steel tower and climb R around the corner, now backflip off and land on top of a MP. Grab it and runjump to the MP SW. Save and aim for the L side of R hand CS in W wall. Jump and crawl in fast, go L and take a MP, because you will certainly be hit by a Laser (although it's possible without getting hurt). In the space between the 2 CSes is a green button. Save then push it and the lasers will stop. If they happen to block the CS, push the button again while the Lasers are in a better spot. Now you can go back to the room and into the R side of the R hand CS in E wall. Follow the passage up to a well deserved MP and get a Flyby of the Towers, pay attention as the Flyby reveals the route to the lever.
Going Up ??.
Step into the Tower and the platform will take you up, turn R and wait till you are at the walkway, then run in the walkway when the platform is on the same level (if you run in too soon this platform will be under the floor level and also the platform in the next Tower will be lower so you will take more damage on your drop down. So the higher this first platform is, the safer the next drop). But if you miss the walkway, you will be taken up into the Spike-trap on top. Go to the second Tower and check your health before you do a safety drop down into the Tower taking heavy health loss, turn to the S and stand against the glass, hold Ctrl and forward arrow to grab up to the opening above as soon as you can so the platform (and the one in the third Tower) will stop. Run over the S walkway and now you can drop down and quickly get into the walkway N to the lever. Throwing the lever will retract the Spikes in Tower 1, run back into Tower 3, go up and turn N to run into the walkway to Tower 2. drop in and turn E, run back to Tower 1 and the platform will take you up to the top.
Follow to a passage with a closed door L ( a MP behind it), go on till you come to a deadly room with a green laser floor, get the MP and Shotgun and grab up to a MS ceiling, go forward to the lower part of the MS and drop, get out a gun and shoot the 4 Aliens doing target practice on you. Grab the Ammo on the ledge and grab up to the MS again to go to the S end. Push the button and see that door at the MP open up. Grab back up to the MS and head back to the N side, follow the passage back to that open door and grab the MP, go on to come to the Power Core.
The Power Core.
Go in and L over the brown ledge and go R at that closed door in the L wall. follow to a green laser tunnel and crawl underneath to the other side, follow the brown ledge again and go down into a passage N to come to a crossing, go L (N) again and down to a room with green lights. Go sharp L and into an alcove L, there are several Terminals, push the green S screen and see what happens, a door opens at the Core, lasers start and the floor in the MS room turns safe. Go have a look N from here in the Main control centre, shoot the Alien Commander and have a look around, great room!!.
Now go back in the passage S and at the end (at the 3 way crossing) go L and follow to the E side of the Core. Climb up the low block and walk to the SW. do a standjump/grab to the top of the green walkway and shimmy to the R, you can pull up under a red ceiling. Turn to the N and grab that ceiling MS and go all the way around to the W side walkway, drop on top of that walkway and crawl in W, stand up in the end and turn to grab up to a CS, follow to the end and drop in a hole to get Secret#3, the Golden Skull. Crawl back and back over the top of the walkway to the MS, drop/hang from the S side there and shimmy L a bit till youre over the brown floor, drop and turn to go to the S entrance, to the R of the entrance is the door that opened up.
Go in and push the green button, the 3 walkways will be drained and the water flows around the Core thats now accessible. Now leave the Power Core through the S passage and head back to that room with the MS, the floor is safe now, so head into the NE room and push the green button in the opening L, go into the door that opens and to the R, find an old green sarcophagus and open it to get the Mine. Go back to the Power Core as the other rooms hold nothing.
Back at the Core you can go straight down the ramp into the Power Core, climb up N and get into the walkway. In the N end is the right place to put the Mine (screenshot of the Main Control Centre), so head back and drop down in the hole of the Core, go up the ramp S and into that short passage R of the entrance to push the button again, the Core will be fired up again and the doors to the Control Centre will open again. So follow the brown path along the W side, under the walkway to the N, and down to the Control Centre, L and into that alcove with the terminals. Now comes a Timed part, but there are a few parts in the flyby where you can move, so be ready to move every time.
A Narrow Escape.
Save and push the green screen again and immediately roll after you pushed it. Watch the Flyby and run L run out of the alcove as soon as you can, the Mine will heat up and explode, and as soon as you can you have to run around the front of the Control panels and R to the opened door NE, run in and into the Teleporter Beam (If youre too late you will go down with the ship and be lost in space forever.)
The Teleporter will get you back to the previous level .
The Final Countdown, part 2.
Go out of the automatic door and get the severed Aliens Hand from the ledge with the Joystick, then leave N to the Door Labyrinth (Personnel Quarters). Go L in the first passage and halfway down the outer passage a bunch of Aliens attack from another ship that connected with yours, shoot them and proceed to the N, in the end around the R hand corner and another Alien attacks, shoot him too and go on till you are at the passage to the Connection room N. Go S there and when you come to the Fires, stand L and take a step back from the first fire, hop back and do a runjump with a L curve to land in the L passage, stand on the N side facing W and again take a step back fro the fire, hop back and runjump into the W passage, where you can get Secret#4, Ammo. Go back by runjumping with a L curve into the S passage where the fire has gone out. Follow the passage N into the wrecked Connection room, go L and around the corner is one remaining friendly Alien, to the R and up in the wall next to him is a CS, grab up and climb down the other side to get Secret#5, a Shotgun.
Return out to the Connection room and go into the CS N, into the blue passage NW. well at least the lights are still working, follow around the corner to that second door you opened before and turn L, then at the end L again and R to that open trapdoor in the L corner, remember? Go down and go to that CS in the SE corner, follow through to the corridor at the Shuttle Bay. Go to the Shuttle and climb up the open hatch, into the Cockpit and turn R, in the corner is a Fingerprint reader, hold that Alien hand in front of the reader and the hatch to the top of the shuttle opens, climb up and go to the tail, jump to the walkway and go to the R. Standing on the NW end you can shoot the nearby window of the control room, runjump with a L curve to get into the Control room and step on the ledge with the joy stick, the cover on the Fingerprint reader opens SW. Use the Aliens Hand again and the S door opens.
Back Home.
Go out and you are back in the passages. Go R/R and then L into another Control room, get the Shuttle CD from the ledge with the Joystick and go to the window in the NW corner, shoot the window and drop out backwards to fall onto a blue block, go down to the floor, under the Shuttle is a hatch, go up into the Shuttle and to the Cockpit, go r and push the button to close the hatch and use the Shuttle CD in the reader on the other side of the Cockpit, the Shuttle will take off and heads towards Mother Earth, when the Flyby is over you can open up the hatch again with the button and find you landed right in the back yard of the mansion. Run to the gate and the Butler will come out to bring you a nice cup of tea . Well Butler Aaaaaahhhh!!!.
Nice levels.
19-10-2005.
Walkthrough by:
Az oldalon közölt képek, a szöveges tartalom, illetve minden sajátkészítésû anyag, a © TR Editor.hu tulajdonát képezi. Azokat semmilyen formában nem lehet reprodukálni, másolni, terjeszteni, csak a szerkesztõség engedélyével.