
Legend of Ancient 4/6
Author: Adrian Stachowiak (Ader)
Download: Here
Story:
YOU DON'T NEED SAVEGAME FROM PREVIOUS LEVELS!
During the last adventure in secret city of Julius Caesar (levels 1-3) Lara has found mysterious scroll. It tells about Magical stone which belonged to Caesar. He belived that it gives him power to rule over the whole Rome, and he covered it in the hidden city which Lara explored, but when he has meet Cleopatra, queen of Egypt, he has fallen in love with her and given her the Magical Stone as a symbol of his fellings. Soon after that Julius Caesar has been murdered. Cleopatra has hidden the stone deep in underground sanctuary. Scroll tells also about powerfull guardians which can be created by using that artifact. Lara has decided to find sanctuary and get the stone.
Walkthrough
[Notes]
1. There are some timed runs and jumps that I found impossible to do. The author left in DOZY so I used the cheat for those timed runs and jumps. I will note them when I used them. If DOZY was not available, I would have just scraped the level. It is not worth the frustration. These levels are supposed to be fun.
2. The compass directions are reversed from reality. I use the red pointer to give directions.
3. Use the tomb4.exe from Ancient Legends 1 and start with the author's included savegame. See the author's notes about this.
4. The lighting in these levels is a little better than pitch black, but not by much. You have a few flares but you need thousands of flares to see anything. Turning off any background lights in your room may help. But it still hard on your eyes.
[End notes]
Level 1: Unknown Underground
Use the savegame from the old level. Run north into the corridor towards the closed door and the level changes.
Level 2: Hidden City
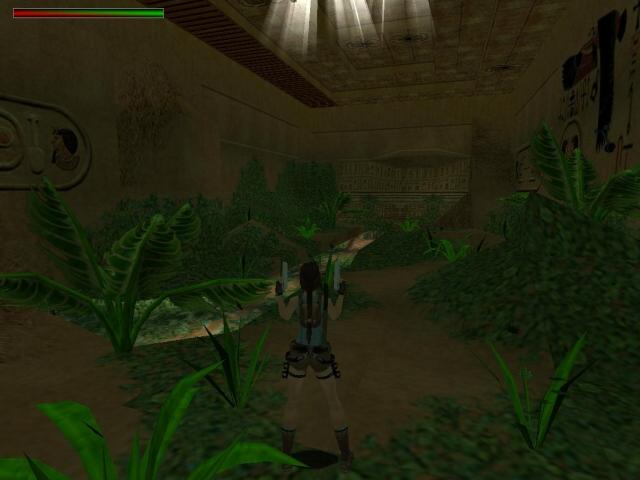
You start in a corridor. Go north to the entrance of a large dark room and go north-east to the right of a box. Pull down a jump switch on a dark north wall. Go east and shoot the box for flares. Continue east and ignore the floor lever. Go to the east wall and shoot the box for red shotgun shells. Go left of that box and enter the open door under the omega sign. Follow the tunnel to the end and save the game. Run two tiles south and three tiles east. The floor break but you drop onto a safe tile away from the spikes. Enter the alcove and pull down the wall switch. You get a cut scene of spikes at the floor lever that you passed. Some spikes have also retracted in the pit. Pull back up into the tunnel and return to that floor lever.
Use the floor lever and the large doors open in the north corridor. Go north and enter the large dark room. You get a long flyby that ends at a floor lever on a high ledge. To the north is a pedestal guarded by spikes. Go to the south-east corner and use the floor lever hidden in a bush. The door opens behind you. Turn around and shoot a knight. Enter the door and go down the corridor. There are six doors and two wall switches. Number the doors clockwise from #1 to #6. Door #3 is already open.
Enter door #3. Notice a fancy tile at the back wall. Return to the corridor. Pull down the west wall switch. Door #1 and door #6 open.
Enter room #1. Shoot a box for a red shotgun shells. Enter the crawl space at the back wall corner behind a bush. Follow the crawl space and enter room #2. There is nothing is the boxes or vases. Push a moveable block to the doorway in the north wall. You cannot push it out as the door is still closed. Exit back to the corridor.
Enter room #6. Shoot a box for a small medipack. Enter the crawl space at the back wall. Pull down a wall switch. Exit back to the corridor. Door #3 is now closed. Door #2 is open. Enter door #2 and pull out the moveable block into the corridor. Push it east to door #3.
This was a tricky problem. If you opened door #2 first and tried to push the block out from room #2, then door #2 closes and the block disappears.
Enter room #6 again. Enter the crawl space at the back wall. Reset the wall switch. Exit back to the corridor. Door #2 is now closed. Door #3 is open.
Push the moveable block into room #3 and onto the fancy tile at the back wall. Exit back into the corridor. Door #4 is open.
Enter room #4. Shoot the box at the back wall corner and pick up Zeus Star #1. Exit back into the corridor.
Pull down the east wall switch. Doors #5 opens.
Enter room #5. Enter the crawl space in the back wall and a grate closes behind you.
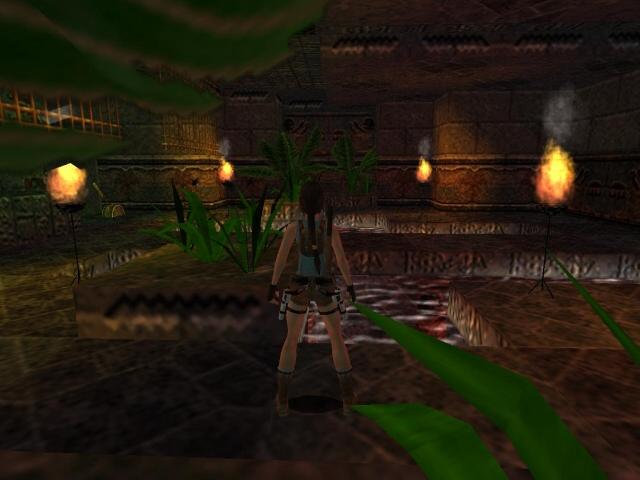
You enter a room with fences and some parts of the floor are deadly. Follow the fence to a T-junction. Do not go to the east, as the floor is deadly. Look east with the light from the binoculars and see a wall slit. Use the pistols and shoot through that slit and break a vase to lower a block near the crawl space entrance. Go north-west and pull down the wall switch. Notice a wall switch with a fire emitter to your left. Go south and notice an omega sign on the floor. Continue and pull down the wall switch in the south-west corner. Avoid the deadly area and go around to the crawl space entrance. Follow the new path to a junction and some new sections. Go into north-east section and pick up the Golden Key from the floor. Go into the south-east section and pull down the wall switch. Go to the north-west section and pull down the switch. This wall switch raised a block blocking off a section. Return to the crawl space entrance and follow the fence again. Go north and into the new section. The fire is off so pull down the wall switch. Now go west towards the omega sign. The block has dropped so you can go through a tunnel.
Enter the room and shoot a knight. This is the east side of the large dark room from where you left. On the other side of the pool is the pedestal protected by spikes. Go south and return through the large open doors to the starting room. Go to the north-east corner and use the Golden Key in the key lock. The door opens beside you. Enter the small dark room and pick up Gem #1 from the platform. Exit through the tunnel in the south-east corner. At the first two side rooms go south to find red shotgun shells. Continue east to a second set of side rooms. Go south and shoot a vase for flares. In the north room is an upper crawl space for later. Continue east into a third set of side rooms. The camera view changes to annoying. Go north and pick up a small medipack. Wait and shoot two skeletons into the hole in the corner. Go into the east wall alcove and pull down the wall switch. Ignore the crawl space you saw and exit these rooms.
Go west straight across the starting room and enter the open door. Go down the steps and enter a dark room. A column rises in the north ledge corner as you enter the lower room. Shoot a knight and pick up the Ancient Note and a laser sight from the pedestal in the middle of the room. The Ancient Note states:
"Clear block in center.
First block in north-east corner.
Second block in north-west corner.
Third block in south-west corner."
This is used in the next level. Ignore it for now.
Go to the west wall and pull down a jump switch. You hear spikes. Return to the south entrance floor. Step on a center tile and the block in the north ledge descends. The first tile at the east wall in the lower floor is safe. Run and jump south to the safe tile below the wall torch. Run and jump north-west to the safe tile to the left of the omega sign. Make a very difficult run and jump to the east using a right curve to land on the ledge while the block is still down. I could not get a simple stand jump with curve to work, but I think that it should have to get onto the ledge. Go to the middle of the ledge and pull down the wall switch. You get a cut scene of a door opening. Jump down from the ledge. Go south and up the steps to return to the starting room.
Go north back to the room with the pool and pedestal spikes. Turn to the right and go into the south-west corner to find the open door. Follow the corridor to the end. You are on a ledge over a pit. On the floor, the hammer-god is running around. Use binoculars and you can see a closed trap door on the floor. Get down to the floor. Run to the north-east corner and pull down a wall switch on the east wall. This stops a fire at a floor lever. Run south to pick up a large medipack. Now run to the south wall and use a floor lever. Now drop into the trap door. Follow the tunnel to a small room and use the floor lever. Return to the pit and go to the east wall to reset the wall switch. This starts the fire at the floor lever again.
Go to the south-east corner and climb the east wall back onto the entrance ledge. Follow the ledge to the north end and see a gray ledge. Step on the ledge and get a cut scene of the timed gate opening in the trap door room. It is very tight timed run. Run off the ledge onto the floor of the pit. Sprint to the trap door and run in. Sprint down the tunnel and turn to the right. Sprint into the open gate. Only the right side gate is open. Shoot a big insect and pick up Zeus Star #2 in the corner. Pick up a small medipack near the gate before you leave. Exit back to the pit.
Go the west wall and place a Zeus Star. Push a moveable block to the south away to reveal a receptacle. Place a Zeus Star. Climb the block and pull up onto the upper ledge. A column has risen. Pull up onto the column to the north. Get on the block to the north of the column and stand jump to grab the column. Pull up and pull down the wall switch. You hear spikes. Use binoculars and look into the pit. The hammer-god will walk into the spikes and die. Reset the wall switch to stop the spikes. Get down and pick up Golden Key near the hammer-god's body.
Now run to the north-west to pull up onto the raised column. Near the ledge is a tile with three torches. Pick up any torch. Drop to the ground and light the torch on the fire at the floor lever. I did not see a use for the torch in the pit. Maybe to search the floor if you have no flares. You can pick up crossbow normal ammo in the north-west corner. The torches are required later.
Go to the south-east corner and climb the east wall back onto the entrance ledge. Follow the ledge to the door and find an upper closed door. Use the Golden Key to open the door. Pull up and step inside the room and loop around to the right. Pull down a jump switch to the left of the door. The door in the north wall opens. Enter the room and see a deadly pool of water. Move the block from the east corner of the entrance ledge into the west corner. Hop onto the block and grab the ceiling. Carefully monkey swing across the deadly pool with the fire emitters. Go east to pick up the Handle. Stand on a small slope and grab the ceiling again. Monkey swing back to the entrance ledge. Exit the room and go south to exit this area.
Follow the tunnel to the east to get back to the room with the pool and pedestal spikes. Go south into the starting room. Go to the south-east corner and enter the open door. Follow the tunnel to that upper north crawl space that you ignored earlier. Go to the end, stand up and pull up onto a ledge over a deadly floor. The procedure is as follows. Drop and grab the edge. Shimmy to the left and pull up onto a column. Grab the ceiling and monkey swing to another column. Then run and jump to a north-west column. Stand jump with grab to glide into an open gate. In reality, the gate is timed and I could not make it. The author left DOZY so I used the cheat to get into the open gate. It is too frustrating to do honestly. I did this now in the hope that something may have turn off the deadly floor. No luck.
Climb the wall and pull up onto a triangular ledge. Run and jump onto a ledge at the east wall. Run and jump north to grab a ledge. Pull up and go west to jump onto a bridge. Watch out for wall darts and shoot two big insects. Run and jump to the south ledge. Search the area for red shotgun shells and crossbow normal ammo. Use the floor lever and get a cut scene of the pedestal and the spikes have stopped. Jump back to the bridge. Look north and see a climbable section on the next bridge to the north. Crawl under the wall dart and onto an extended piece of the bridge. Run and jump to grab that climbable wall by your fingernails at the bottom. Climb up and pull up. Slide down and jump with a right curve onto a slope. Grab the edge and shimmy to the left. Go around the corner and pull up onto a flat section. Run and jump to grab the north ledge.
Pull up onto the north ledge. Shoot the box and pick up crossbow normal ammo. Pull down the wall switch on the west wall. You get a cut scene of the ceiling. Use binoculars and look up to the ceiling above you. Look towards the south and you can see a hanging ball. Run and jump back to the flat section. Just dive into the water pool below. Get out on the south edge. Go to the pedestal on the steps to pick up the Silver Key. You may also notice a rock in the ceiling above the pool. I never got the rock to fall, so I do not know if it was supposed to fall into the pool.
Go to the south-west corner and use the Silver Key in the key lock to open the door. Save the game before entering. Crawl under the wall darts to go west. Shoot the box and pick up the crossbow. Enter the next room and go east. Pull down the wall lever and run back to avoid the moving spike wall. Just take the damage from the wall darts. When you exit the area, use a medipack to stop the poison.
Go to the north-west corner and enter the open door. Shoot the knight. You enter a corridor with two closed doors and a wall switch. Do not go too far west, as there is a spike trap in the middle of the room. Pull down the wall switch and the two doors open.
Enter the north room and shoot a box for Uzi ammo. Continue north into a tunnel. Pull back a moveable block into the room. Return back into the north tunnel and see two new tunnels revealed. Stand jump over the deadly gray tile and pull down the wall switch. You get a cut scene of a closed gate. Push a moveable block to the north. Go east and see an upper crawl space between tunnels. Go east and turn the corner to pull down a wall switch. You get the same cut scene of a closed gate. Turn around and push a moveable block to the east.
Go through the crawl space and drop on the other side. Pull back a moveable block from the south wall. Pull up into the crawl space, crawl to the left, and drop in another tunnel. Push a moveable block to the east. Go south and pick up blue shotgun shells. Go west and pull down the wall switch. You get a cut scene of an opening gate. Go east and north to climb onto a block. Pull up into an upper south tunnel. Go to the end and pull down the wall switch. Go back through the crawl space. Push a block to south and follow the tunnel to a junction.
Do not exit the tunnel yet. Enter the side tunnel and climb a pole. Face east and back flip into a room. Shoot a big insect. Shoot the box for Zeus Star #1. Shoot a red vase for red shotgun shells. Push a moveable block into the north wall. Enter the alcove and pull down a wall switch. You get a cut scene of a gate opening and a knife blade. Exit the room and slide down the pole. Exit the tunnel and go south into the corridor.
Enter the south room and shoot a box for Uzi ammo. Enter the south tunnel and you easily get around the knife blade by staying near the inside corner. Go to the end and pull down a wall switch. You get a cut scene of spikes in the corridor. Exit the room and return to the corridor. Go east to exit the corridor back into the large room. Continue east and see a moveable block near a gold statue. Push the moveable block back into the west corridor to the very far end near the unlit wall torch.
Exit the corridor back into the large room. Go to the south-west corner and enter the south wall tunnel. Return to the room with the hammer-god. Run around the ledge to the north-west corner and pick up a torch. Run and jump south with a left curve to get back onto the ledge. Follow the ledge around and exit the room.
Go to the north-west corner and enter the corridor again. Go to the end and drop the torch in the south room where you can find it again. Pull the moveable block in to the south room. Stand jump onto the block and light the torch on the fire above the door. Get down and push the block out into the corridor. Position the block under the unlit wall torch in the south-west corner. Take the lit torch and stand jump onto the block. Light the wall torch and the door opens in the north wall. Enter the room and shoot the box at the back wall. Pick up Zeus Star #2 and exit this area.
Pick up the torch and go east back into the large room. Go to the north-east corner and stand jump into the tunnel in the east wall. Follow the tunnel to a room with a small stepped pyramid. Drop the torch someplace safe. Hop onto the first level. Run around the pyramid counter-clockwise. You should find a small medipack. Also place the two Zeus Stars in the two receptacles on that ledge. The spikes stop on the second ledge. Pick up the torch and stand jump the ledges. Use the torch to light the brazier that was protected by spikes. You hear a trap door drop open.
Get down and go to the back of the pyramid. Follow the west trench to find the open trap door. Climb down the wall ladder in a tunnel. Run to the end and pick up Gem #2 from a pedestal. Climb the ladder to exit the tunnel. Go west and exit back into the large room. Go to the closed door in the north wall. Use the crossbow and laser sight and shoot the hanging ball on the ceiling to the south. Go south to the water pool and see that the underwater gate is open in the west wall.
Swim into the tunnel and down a vertical shaft. Swim in a crawl space and enter a large flooded room. Swim into the bottom north-west corner and pick up a large medipack. Swim to the north-east corner and into an underwater tunnel. Follow the tunnel to a junction. Swim east and pull up into a room with six platforms. Step on the left and right platforms in the first row. Step on the left and middle platforms in the second row. Each step creates a cut scene of a gate opening. If you step on the other platforms, you get a cut scene of a gate closing. As you exit, there are red shotgun shells to the right of the water hole. Swim back to the junction and take the north branch. Pull up into a tunnel. Go to the end and use the floor lever. Swim back to the junction and take the west branch. Pull up into a dark room. Go west and pick up Gem #3 off the pedestal. Get back into the water and swim back into the flooded room.
Swim into the south-east corner and swim into the underwater tunnel in the south wall. Pull up into a large dark room. Go to the south-west corner of the room and shoot a green creature. Pull a moveable block twice to the north. Use the block to get onto a higher ledge. Pull down the wall switch and safety drop to the floor. Push the moveable block, eight tiles north, two tiles east, and one tile north. Use the block to get onto a higher ledge. Pull the tall west block one tile to the east. Push the small half block from the east end to the tall block at the west end. Climb the blocks and grab the ceiling. Monkey swing south to drop on a high ledge. Go east and pull down the wall switch.
Jump to a south ledge and pick up Uzi ammo. Jump back and monkey swing back to the ledge with the blocks. Safety drop to the floor. Go to the east wall and follow the wall south to find an open door. Go to the end of the tunnel and pick up Gem #4. Go north to the water hole. Swim back through the flooded room and back to water pool in the large room. Pull up on the south edge. Go to the closed door in the north wall. Place the four gems in the receptacles on the east and west walls. The north door opens.
Enter the room and go west to pick up crossbow normal ammo. Go north past a wall and go west to pick up the Goddess Effigy off a pedestal. Go north to shoot two knights. Enter the tunnel in the north wall behind the gold statue. Run to the end and the level changes.
Level 3: Palace of Guardian
[Note] Use the tomb4.exe from Ancient Legends 2&3. See the author's notes. [End note]
[Note] I used the DOZY cheat in this level. Some things were just too hard and too frustrating. One time was a timed run. A second time was where I was stuck behind rolling rocks and could not exit a tunnel. [End note]
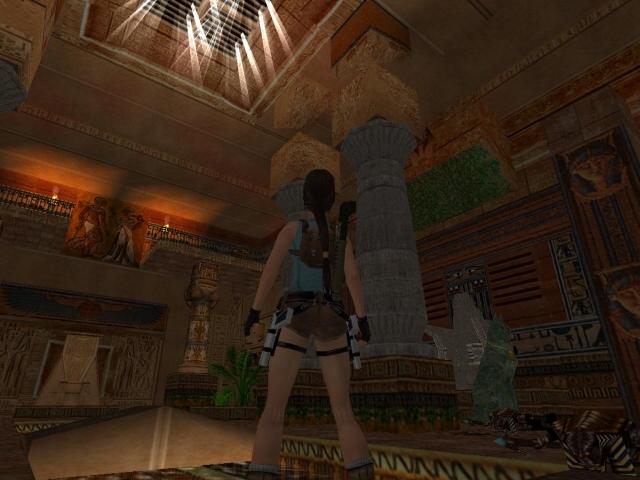
The level starts with a flyby of a large room with a deadly floor. Go forward and to the left to pick up flares. You can see a ledge and a breakable tile to the east. There is a closed door to the west. Run and jump north to a ledge. Wait and shoot the skeleton that comes from the north ledges. Run and jump to the west ledge. Pick up red shotgun shells and notice a ladder on the column. This is used to get to the lower ledges. Jump back and jump to the east ledge. Run and jump to grab the ledge at the east wall. Pull down the wall switch. A door has opened on the far west ledge. You can see it with the binoculars.
Now here is a place where I used the DOZY cheat. Run and jump south to a breakable tile. Run south into the corner and onto a tile with an omega sign. The timed door in the west wall opens. Run and jump to the north-west ledge to the left of the column. Do not use grab and land on the ledge. Jump to the ledge to the right and run and jump to the ledge where you found the ammo. Run and jump to the west wall ledge and run inside the door. Run into the room because the door will close and you can get stuck in the opening. I just found this timed run too hard. The jumps are very difficult to do even without the timed constraints. Step on the omega sign tile to open the door and DOZY into the open door.
Run to the left and use the floor lever. Run through the spikes and drop into a hole in the floor. You take a lot of damage from the spikes and the moving wall. You land in a tunnel. You can climb the west wall and shimmy to the right over the spikes. Go to the south wall and pick up a small medipack. Shimmy back over the spikes and drop into the tunnel again. To the south is a dead-end. Go north and go through a triangular crawl space. Then climb the west wall and shimmy to the right. You are in the room behind the spikes. Go east through the open door and onto a ledge. Pull down a wall switch and get a cut scene of a door opening. Run and jump over the fence and land on the top ledge to the east.
You can jump onto the central platform and see a receptacle if you want. Go south and grab the ladder. Shimmy to the left and climb down. Climb pass the middle ledge and continue to the bottom of the ladder. Shimmy to the right and drop onto the bottom ledge. Jump to the south-west small island and pick up a small medipack. Jump back and run and jump to the ledge at the south wall. Go south to enter the open door from the cut scene. Go up the south steps and use the wall switch. You get a cut scene of a closed gate. Exit the room and go back onto the bottom ledges. Climb the ladder and shimmy around to drop onto the middle ledge.
Step onto a small east ledge. Run and jump to grab the ledge to the east. Pull up and go onto the small ledge to the right. Run and jump onto the slope at the east wall. Slide down and jump forward to grab another ledge. Shimmy to the right and pull up. Run at a small angle to the right of the sloped block in front of you. Jump over the water and use a left curve. You can grab the ledge to the far north. The sloped ledges are not used. Do not grab any sloped ledge. Pull up onto the ledge and go north to pull down a jump switch. A block rises behind you. Get onto the block and run and jump to the west. You land on a balcony with round columns.
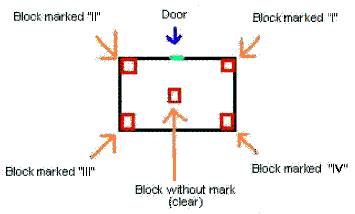
Enter the open doorway and shoot a knight. Go down the steps into a room and save the game for a hard block puzzle. You see five moveable blocks and two wall switches. The blocks have Roman numerals on them. They are I, II, III, and IV. One block has no numbers. The start positions are:
No numbers block at the north wall to the right of a closed door
Number I block at the south wall
Number II block at the west wall
Number III block at the north wall to the left of a closed door
Number IV block at the east wall
There are wall switches in the south-east and south-west corners of the room. These wall switches raise blocks in the holes in the floor.
This is the block puzzle from the Ancient Note. The problem is that the note is incorrect. If you use real compass directions, they are correct. But if you use the displayed compass directions they are wrong. This caused such a problem that the author provided a map in the TRLE forums. Below is a modified copy of that map. Pull down the wall switches to raise blocks in the holes in the floor. Then move the five moveable blocks as follows:
And the door in the north wall should open. Enter the room and pull down the wall switch. You get a cut scene of a gate opening. You will have to move one of the blocks to exit the room. Return to the balcony with the round columns. You can jump back east to the column with the raised block. Stand of the west side back corner of the raised block. Run and jump south-east to the sloped ledges. Hold down the jump key and no grab to land just after the sloped ledge and on the left side of a flat ledge behind it. Then run and jump with no grab to the south-west. You should land on the corner of a ledge. It is a hard jump. Work your way around the ledges until you get back to the ladder.
Climb the ladder to the top ledge. Follow the ledges to the north and jump to a north ledge and enter the open gate. Go forward and stop before teeth doors. When safe, stand jump through the doors and make three more stand jumps to land at the pedestal. This avoids spike pits and three rolling rocks. Pick up Gem from the pedestal and spikes drop from the ceiling. Get pass the rocks if you can. They stop at the bottom and block your way. In the middle slope go east and turn around. There is an upper crawl space for secret#1, small medipack, and red shotgun shells. But you cannot get there with cheating. The wall is not climbable. Use DOZY to exit the tunnel as the rocks block your way. There should have been an alternate exit or a way to get rid of the rocks or spikes. But there was none that I found.
Go back to the ledges and jump to the central platform. Place the gem in the receptacle. You get a cut scene of a gate rising. Jump onto the ledge and climb down the ladder to the bottom ledge. Jump around the bottom ledges and go north to find the open gate. Go down the steps and run through the next room. Stop at a closed gate and shoot two knights that attack from the side corridors.
Go into the west corridor. Continue to a room with a pool. Go into a smaller room to the south and shoot a vase for a large medipack. Dive into a water hole and swim down a tunnel. You swim into a flooded room and a gate closes behind you. Swim behind the east column and pull down an underwater lever. Swim into the open gate in the west wall. Enter another flooded room and loop around to the left. Pull down an underwear lever on the wall. Swim to the opposite wall and pull down a second underwater lever. Swim north and see a trap door in the ceiling. Pull two underwater levers on the east and west walls. Swim up through the open trap door for air.
Pull up into a dark room. Jump into the north wall alcove and pull down a wall switch. Jump into the south wall alcove and pull down a wall switch. You get a cut scene of the closed gate in the corridor. Get into the water and swim back. The underwater gate is open so you can return to the room. Go north and east to the closed gate.
Go into the east corridor. Continue to a room with a pool. Go into a smaller room to the south. Save the game and drop into the hole in the floor on the west side. Slide down a slope and slide off the bottom edge. Do not jump. You land on a slope. Now jump and grab a column. Shimmy to the right and pull up in the corner to avoid the fire. Turn to the right and stand jump to grab the top of a slope. Pull up, slide down, and jump with a right curve to grab a column. Shimmy to the right and pull up in the corner to avoid the fire. Stand jump to grab a slope. Pull up, slide down and jump to a safe column.
Stand jump to the north to grab a climbable column you see in the hole in the ceiling. Climb up and back flip onto a ledge when the fire emitter is off. Go west on the ledge and into a tunnel. Pull down a wall switch and get a cut scene of the gate opening. Follow the north tunnel to a climbable wall. Climb up and shimmy to the right before you release. Follow the tunnel and safety drop into a hole. Run north to the open gate.
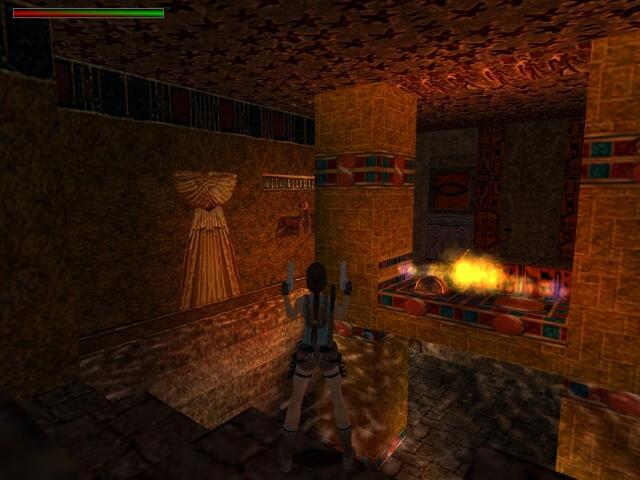
Follow the corridor and slide down a slope into a large room. Run north and shoot four knights. Avoid the blue fire from two large knights. The large knights can be killed with the shotgun. Shoot until a large knight starts to topple backwards and then run back. He may fall over and never get up. If you continue to shoot him, he seems to recover. Run up the steps of the stepped structure at the back and pick up the Uzi's. Go down and run down the east corridor. You should find crossbow explosive ammo. There is a lot of ammo on the floor. I left most of it. Go to the corner and go south. You will pass a closed gate. Continue and go west. You should pick up a small medipack and see a wall switch protected with a flame. You should save and reload. This way the dead bodies disappear. Run around and pick up two Gems from two dead small knights somewhere on the floor. Return to middle of the room to the wall switch on the stepped structure.
Save the game in front of the timed wall switch. Pull down the wall switch and sprint to the wall switch in the south-west corner. Pull down the timed wall switch and run north to pick up a Zeus Star before the fire emitter starts again. You may have to shoot another three knights. Run between the first and second set of columns from the entrance slope. Look north and you should see the two receptacles for the gems on two columns. Place the two gems and run east. Enter the open gates in the east wall. The large knights can follow you here and up the steps if you have not killed them. You may have to lure them far away and sprint to the gate.
Run up the steps and enter another large room. You can see a receptacle post on a platform. Run west and see spikes near a receptacle. Enter the tunnel in the south-west corner. Follow the tunnel to shoot a knight and pick up Uzi ammo off a pedestal. Then follow a south tunnel to a corridor. Go east and you are on a bridge above the room with the large knights. Pick up a Mysterious Scroll from a pedestal in the middle of the area. Go east and pick up a large medipack. Go south and find Uzi ammo. Return by the corridor and tunnel back to the room with the receptacle post.
The spikes are gone. Place the Zeus Star in the receptacle on the west wall. The fire has stopped at the receptacle post. Go there and make the Mystical Guardian and place it on the post. Two blocks drop in the north wall. Enter either door and hop onto a block in the back corner. Climb a ladder and pull up into a cave. Follow the cave to climb a ledge and then get into a crawl space. Stand up and run down a tunnel. As you approach a bright light on a wall tile, the level ends.
[Note] I am disappointed because I used the DOZY cheat. Having to use the cheats really just ruins the game. However, this walkthrough should point out the location of everything. Good luck to the people who want to do it honestly. The author wrote to keep the last savegame for his Ancient Legends 4. I have already decided to give it a miss. [End note]
01-jun-2008
Walkthrough by Harry Laudie
Az oldalon közölt képek, a szöveges tartalom, illetve minden sajátkészítésû anyag, a © TR Editor.hu tulajdonát képezi. Azokat semmilyen formában nem lehet reprodukálni, másolni, terjeszteni, csak a szerkesztõség engedélyével.