
Lara at the Movies
Authors: Michael Prager, Elvis Tupcijenko (eTux), Debbie Overstreet, Todd Shurtz (Raider X), Josep Borrut, Michael Allan (The Cowboy), Antonio Tarantello (Psiko), Thierry Maynard (Thierry Stoorne), Szymon Cupryn (Emoo), Scott Ginn (EssGee), Titia Drenth (Titak), George Maciver, Kerstin Schlott (Codo)
Download: Here
Macintosh download: Here
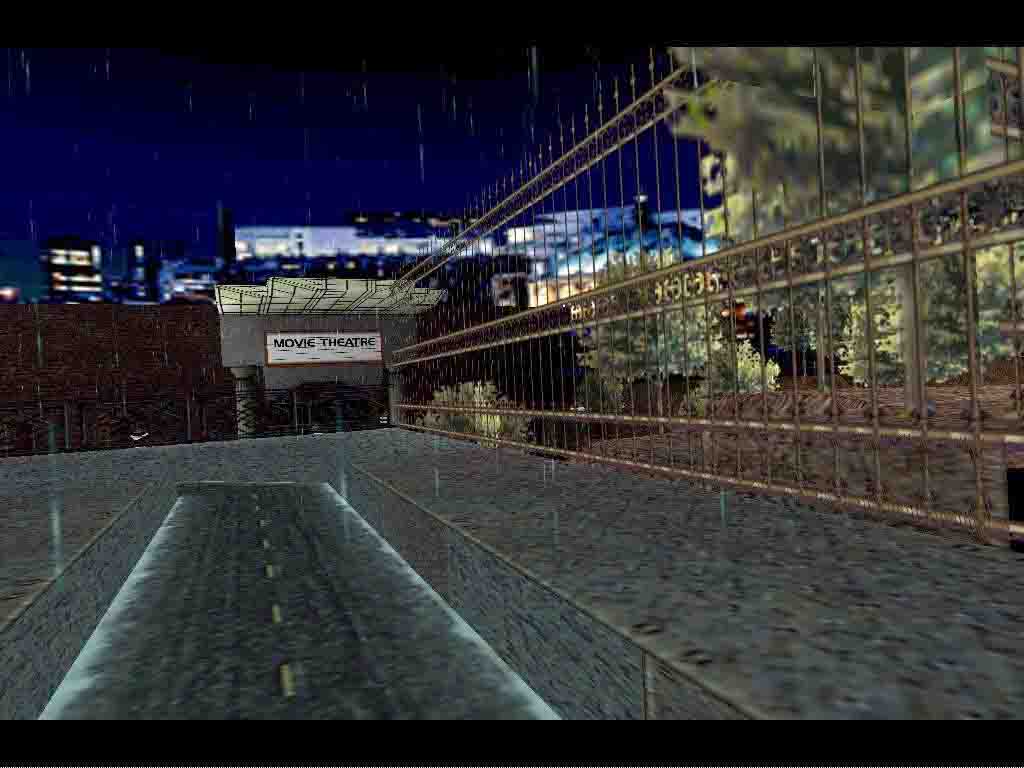
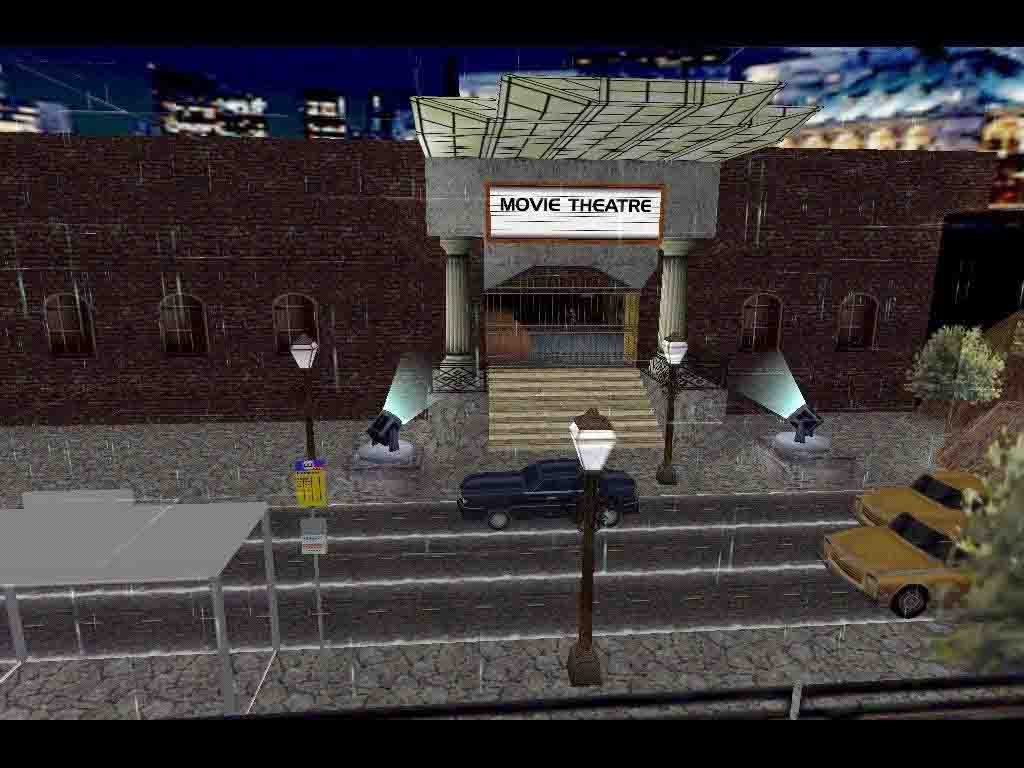
1. The Movie Theatre director: Michael Prager, Germany

 Secret:
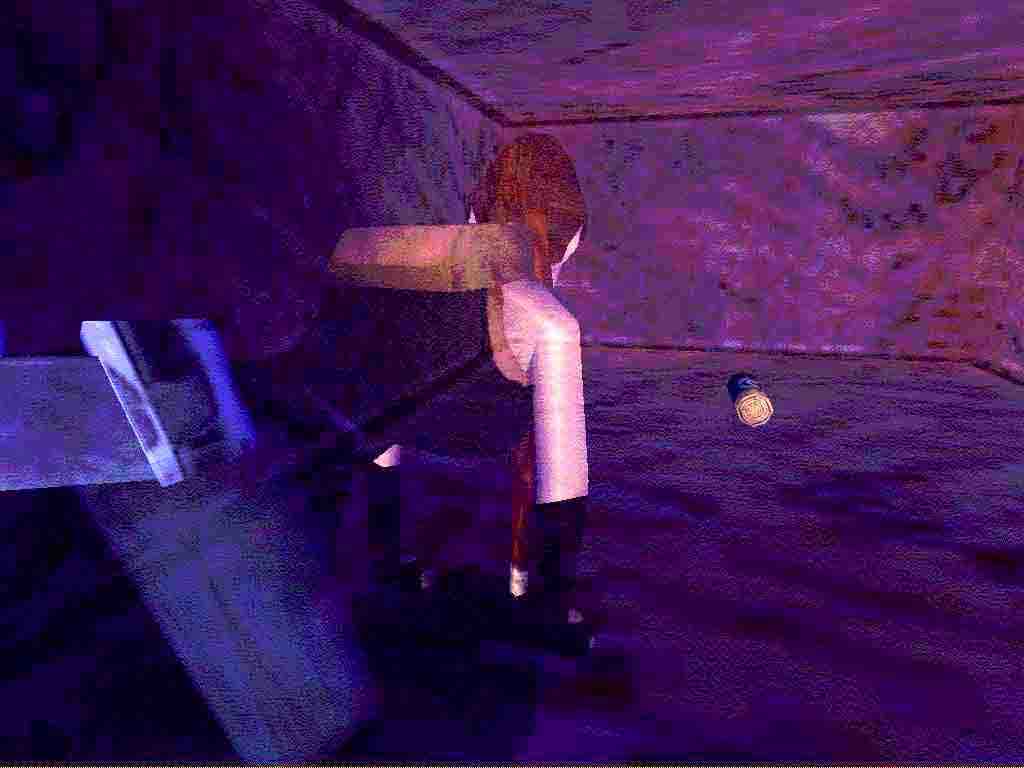
CS=crawlspace, MS= monkeyswing, MP= med-pack.
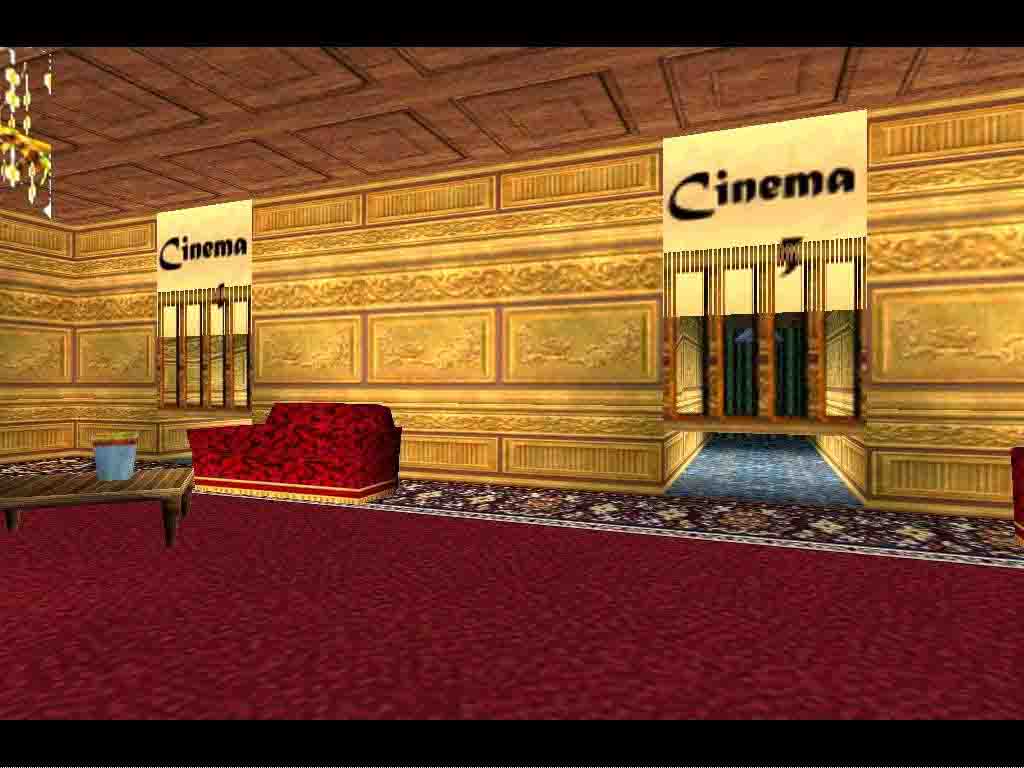
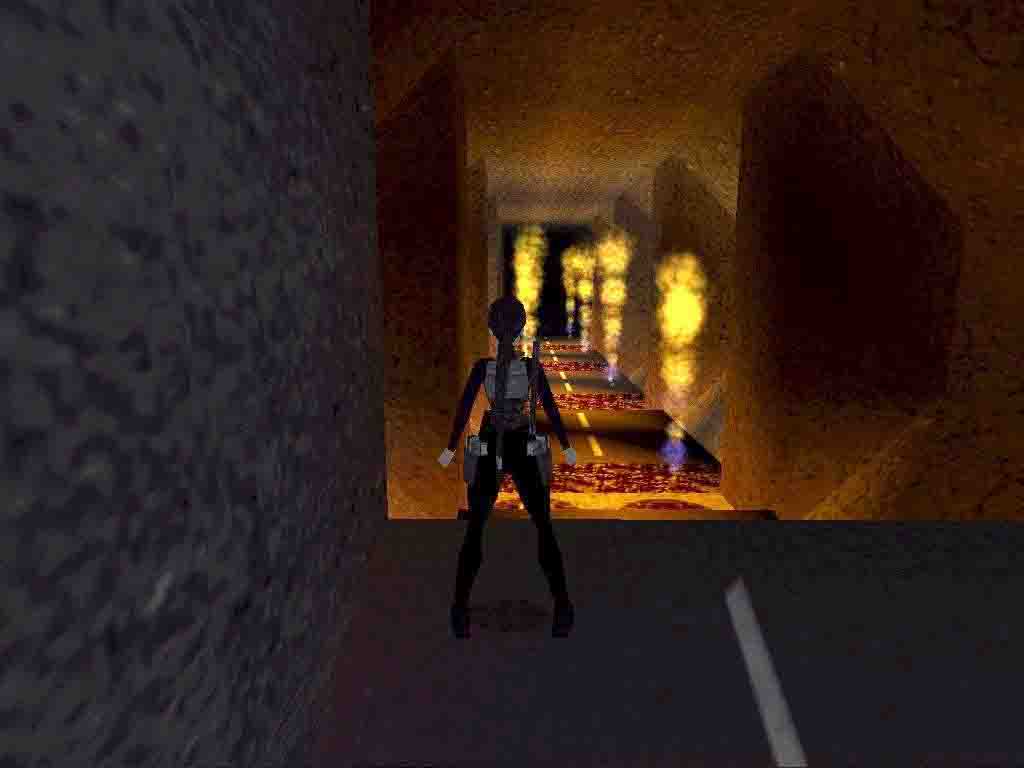
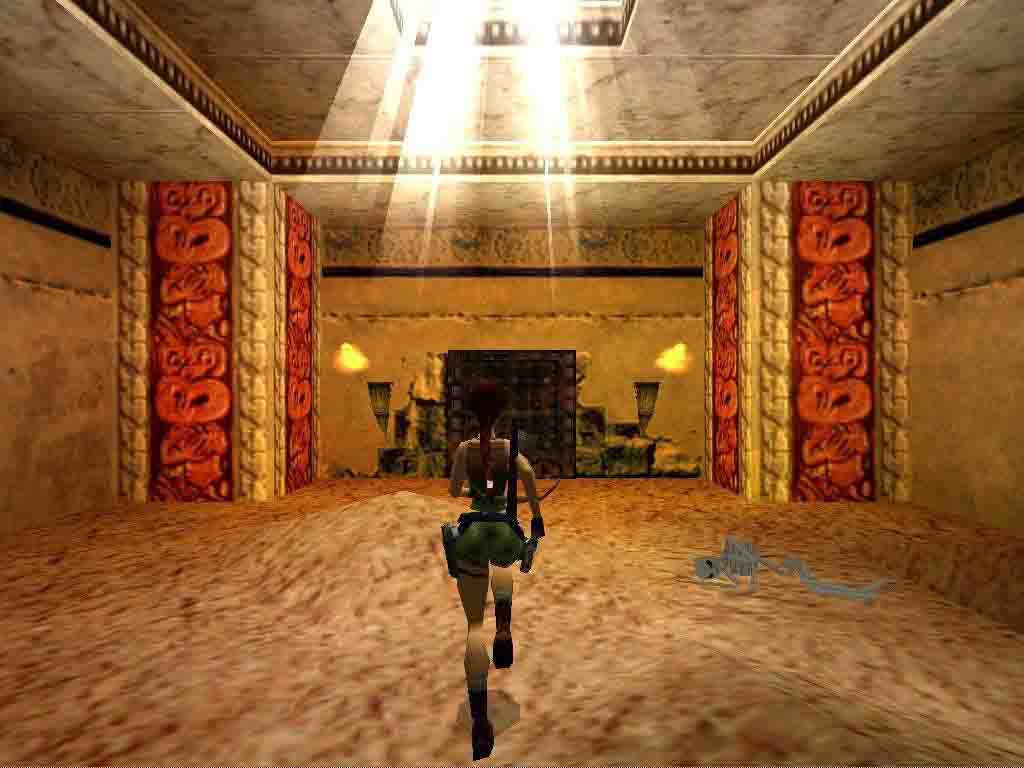
After a nice flyby where youll see the bosses car in front of the cinema, youll find yourself in the Wardrobe.
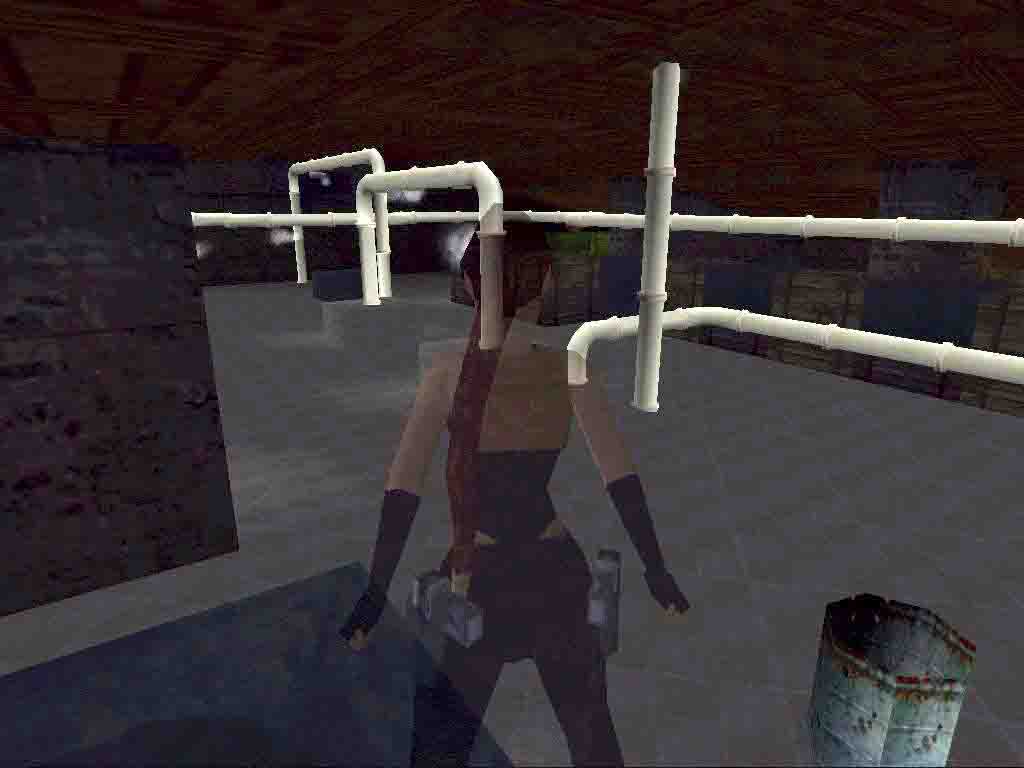
Take the Crowbar from the counter in front and notice the keyhole and a curtain behind you, go out R to the 1st Hall, where youll find the first entrances to the Cinemas, go to the Blue display in the center of W wall and pull it out, go into the passage behind it, which leads up to the 2nd Hall. Just past the lamp is a hole in the ceiling, up to a Store room, get up there and go to the NE corner and hop on some crates there, stand on the gray part, SE corner and look SE, do a standjump/grab forward to hold on to the ceiling, MS L and along the wall to just past the white pipe R, here you can go R to the higher part of the ceiling, go R again and past the Steam blowers to the N wall.
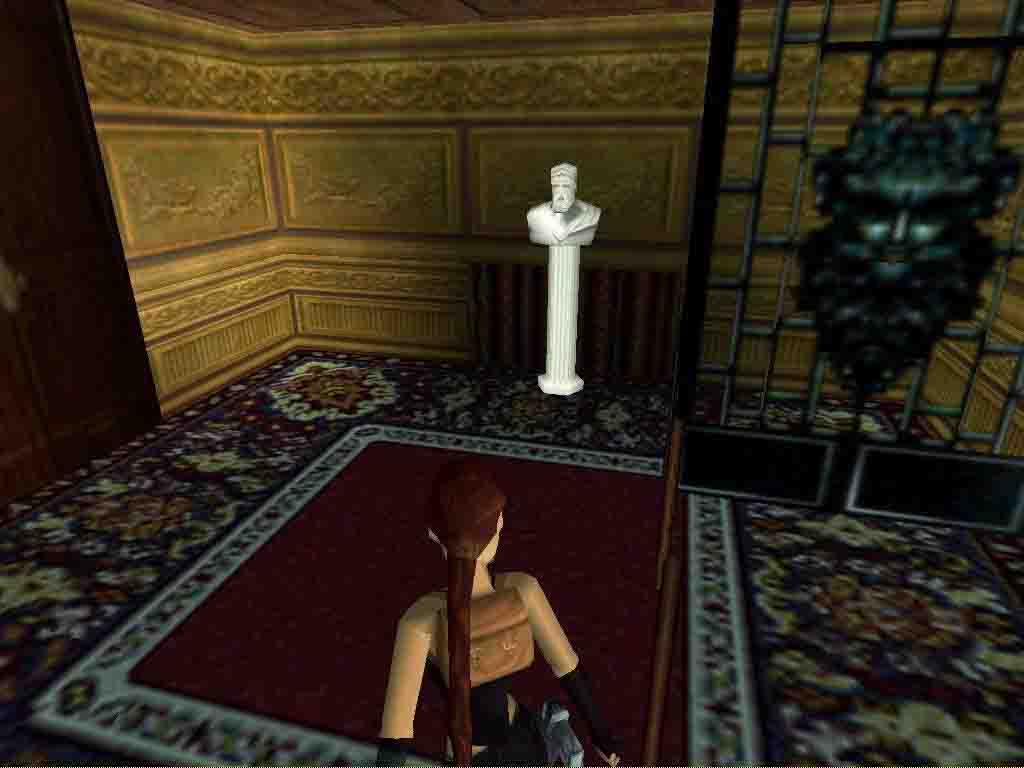
Theres a Door Key on the pillar, get it and go back to the 1st Hall. Go L when you enter and use the Key in the corner, a gate behind the curtain R of you opens and 2 Dogs come out, enter the room behind the curtain and get the Flares and another Door Key, the Compass is just for show. The Key fits the lock in the other end of the Hall, it opens the gate behind the curtain L of you, kill the Dog and enter. Get the ½ MP and go into the CS behind the statue to get the Door Key. This one goes in the lock at the Wardrobe where you started the level.
Get the Door Key from behind the curtain and a gate opens, go out, shoot a Dog and go to the centre curtain in the 1st Hall, inside you can use the Key and a gate in the Store room opens, get the ½ MP and go back into the passage to the 2nd Hall, up to the Store room, R and hop on the crates L of you. Go to the far SE corner and face SW, standjump/grab straight up and grab the ceiling, go to the S wall and hang on the L side of the CS with the Steam blower, drop/grab and go in for a Secret, a mere ½ MP. (Thank you Michael). Drop out and go L, where that open gate awaits you. Pull the shelf from the Door Key and go back to the passage to the 2nd Hall where a door opened in the W wall, the centre one. Go in and use the Key to open the Cinemas.
Well that was the 1st part of this level. Its up to you which cinema you want to enter first. There are 6. I started like a brave boy at number one.
Secret count 1.
Walkthrough by Dutchy
Cinema 1 - Mystic Thrillers
2. The Blair Witch Project (1999, Eduardo Sanchez/Daniel Myrick) - director: Elvis Tupcijenko


Secret:
CS=crawlspace, MS= monkeyswing, MP= med-pack.
Seems we dont have a Compass here, Bummer.
The Torch.
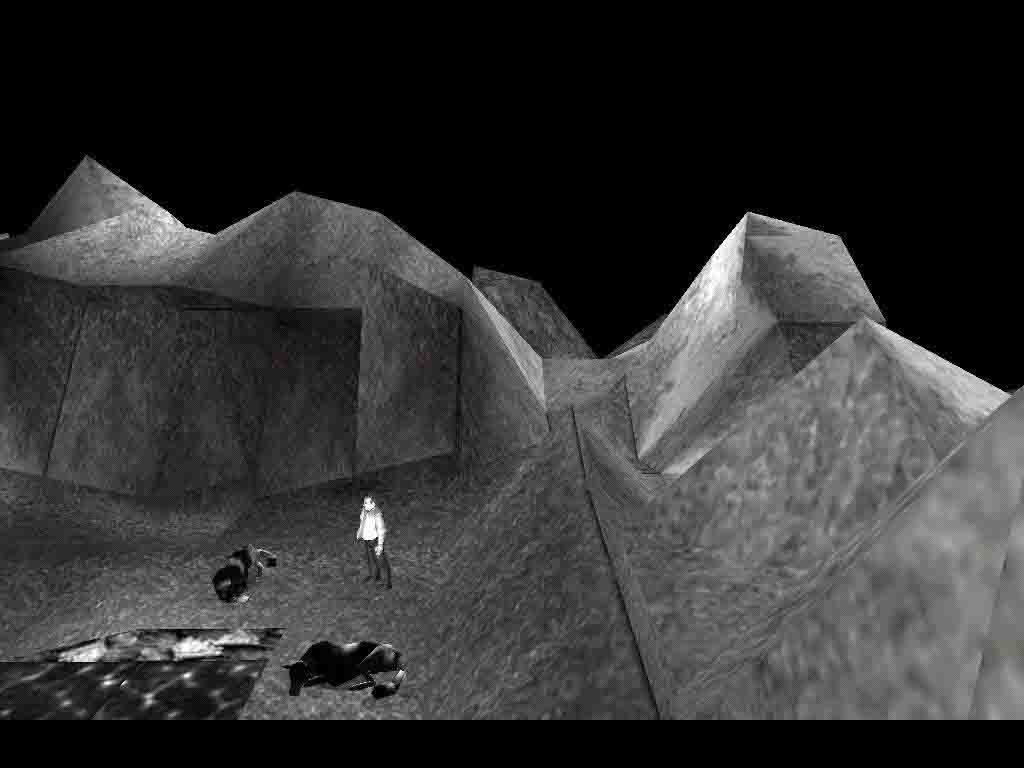
Climb out of the dripping cave with the dark grey block of you L, go forward to the dark wall with a hole in it. First walk R into the very corner of the slopes, as far as possible and turn, face the big tree at the hole in the ground and backflip onto the slope behind, then jump with a sharp L turn to land on the hill side at the plant, follow the path to where you have to jump around a small bush and get the Secret ½ MP, (screenshot) go down the hill and now into that hole in the wall, into a dark place, go along the L side and see the wooden gate L, from the gate look R and see a fallen and broken Cart, between the rubble fallen out of the cart is a Torch (different shape, a broken twig) Pick it up and return out to the Hole you came up from, go past it and follow the canyon to and old dead tree, leave the torch here and go on a bit, past a big tree and down a slope to get the ½ MP, go back to the Torch and jump up the L side slopes to enter another hole in the wall, inside this area is a dead tree, struck by lightning, light the torch on it and go back to the 1st room with the wooden gate, light the wall torch L of it, to open the gate and go into the dark caves, follow taking the Torch with you and keep to the L side, you go around a pillar and theres a green rock in the L corner, go into the triangular hole in that corner and follow the long tunnel down to the floor of a Canyon, shoot the Wolves and get the Secret MPs, go back to the triangular hole and straight up the ridges in front, till you reach an area with big trees.
The 3 Hearts of the Unfortunate.
Notice the Swamp in the Cave L, go straight till you reach a small tree on a yellow hill, drop down into the hole L of it, with the Torch and light the roots of a dead tree. Jump up under them. Go back up and look for the hole in the wall. Inside you have to dig a hole later. Take the Torch with you (you dont need it anymore, but it will give some light in the darkness) when you go back to the Swamp in the Cave. Runjump along the R hand wall, using the little dry spot to runjump along and go R past the pillar in the end to reach the next area. Leave the Torch and go R to the cave in the end.
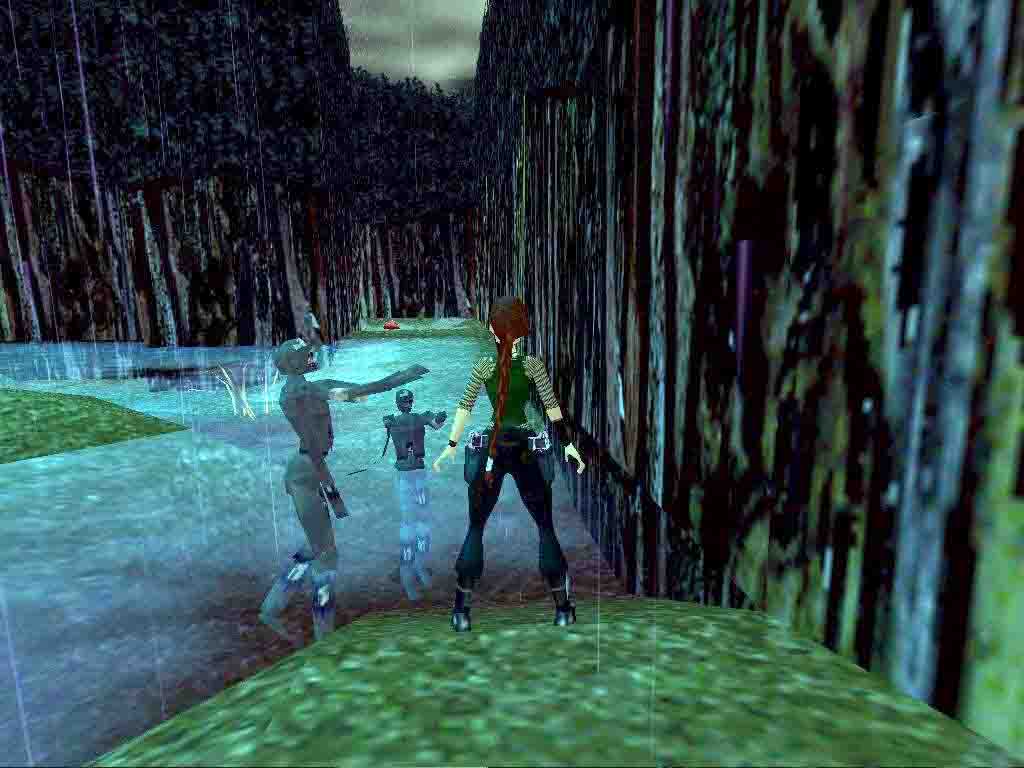
The Graveyard Cave - 1st Heart.
Through the Graveyard cave with The Undead walking around, go into the far R corner and L, onto a grey block next to a tree, face the hill R and shoot the Wolf on it. Stand on the highest point of the block and face the tree, jump/grab up to grab the leaves and shimmy R to the corner, drop to the hill and go to the pillar, theres a reach-in switch. When you use it the 1st Heart appears at your feet, take one step back to pick it up, climb the switch-block and turn L, jump/grab the dark alcove and go into a Secret room, get the Goodies, get back out and return to the area with the Swamp cave, straight into a hole in the wall.
The Tight Rope.
Walk the rope to the corner ledge and then R to the small mushroom. In the hole behind it is the 2nd Reach-in switch, climb out and safety drop to the lower cave, into the open gate and reach the Mirror Swamp.
The Mirror Swamp - 2nd Heart.
Runjump to the sandy corner R at the mirror, stand L and turn so you can spot the Secret Shotgun on this ledge. Jump back to the entrance and runjump to the ledge you can see in the mirror, along L wall (looking into the room) and at the lower part of the ceiling. Sidestep R and forward and standjump to the next one, turn R and runjump to the plant in the centre of the swamp, then a runjump to the ledge at the mirror and next to the pillar, a standjump to the one in front of the pillar, a runjump across to the other side of the room and a standjump in the direction of the Skull ledge, turn R and a runjump across to the other side of the room and from this ledge you can reach the Skull ledge with a standjump. Pull the corpse away and standjump straight over it, grab the 2nd Heart under your feet. From this ledge you can do a runjump to the ledge in the direction of the exit, saves you a couple of jumps. Make your way back out and into the cave under the 1st rope.
The Shovel and the 3rd Heart.
Climb up the block in the end L and youll come out near the Graveyard Cave, go in the direction of the ropes again and find a spot to jump up the R hand hill and follow it to the other end, where you can make your way down to an area with the Blair Witch Sign and receptacles for the Hearts. One is still missing, find a hole in the ground in the L corner coming from the hill and get the Old Shovel. Return up the hill and go straight, through the Swamp cave and L to the hole in the wall where you burnt that old tree, go dig a hole in the blood stained earth and you will drop onto a slope, slide down to the Skull cave.
The Skull Cave.
Look L to spot the CS where you have to exit later, for now just follow the cave to an opening overlooking a cave with a centre rock and a deadly pool below. From the opening, you can do a runjump straight forward to a ledge halfway down the centre rock, follow it around the R side to where you can runjump to the corner ledge with the pink plant. Go through the tunnel to the next cave, dont stand too close to the edge looking around. Runjump/grab to a plant covered rope spanning the cave and swing around to jump off to a ledge in front and below.
Rope swings.
Walk up to the white Skull wall and do a standjump up and forward, Lara has to land just on the slope behind it, slide and jump/grabbing to the next rope, you will be launched to a ledge below. Climb the wall and go around the L corner as the flame goes down, go L and up to the blue Skulls. Backflip/roll/grab the wall behind and go L around the corner, drop to the grey floor and walk around the R corner, climb the wall there and go L again, from halfway up the 2nd wall part, backflip/roll/grab the wall behind and climb up R to the top. Jump to the top of the rock, spot the blue pyramid with the burner and reach-in switch. When looking in the direction of the entrance to the Skull cave, youll see a MP on a ledge with a pink plant, from the lower part of the floor you can do a runjump onto that ledge and get it.
The 3rd Heart.
Jump back and climb the block, wait for the burner to go off and runjump onto the L side of the blue pyramid, stand L of the burner, against the wall and dont move till the burner is off, sidestep and use it quick, sidejump of the pyramid before you burn and go to the side where you jumped to the MP, look down to spot a ledge on the wall, drop onto it and go into the heart of the rock, down to a block with the 3rd Heart. Walk out to the pool which is quite safe now and go to the climb wall under the cave entrance.
Go up and to the CS you spotted before, climb up the waterfalls to end up in the Swamp cave, go R and just straight, up the hill and down the other side to the Witch Sign area.
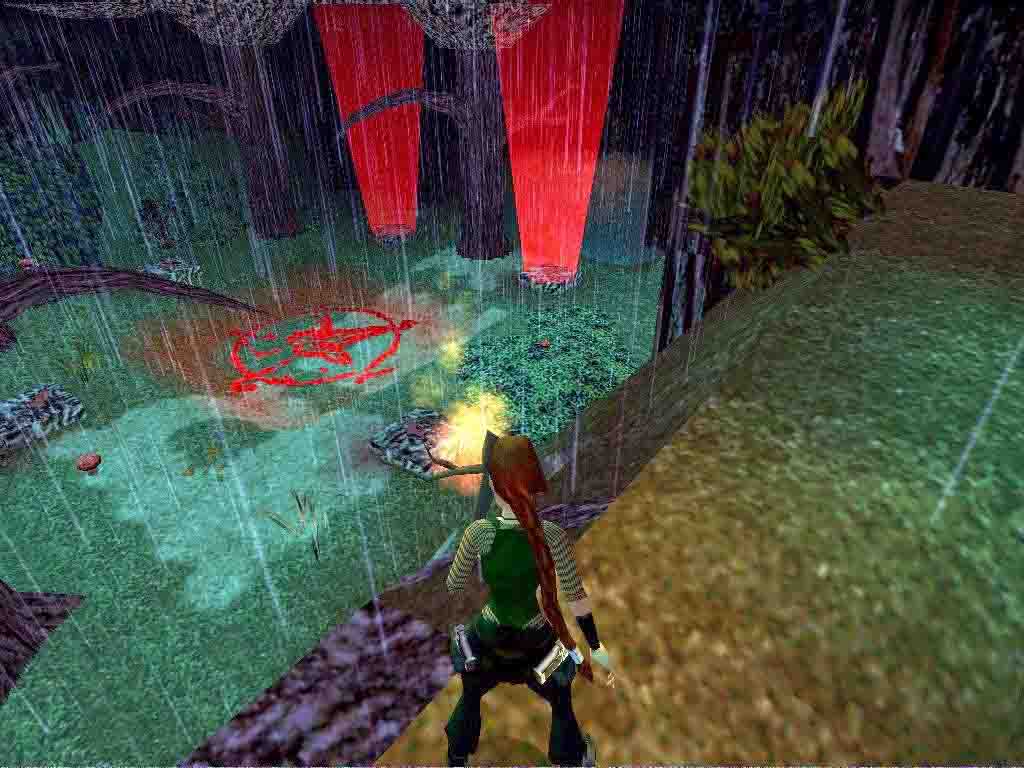
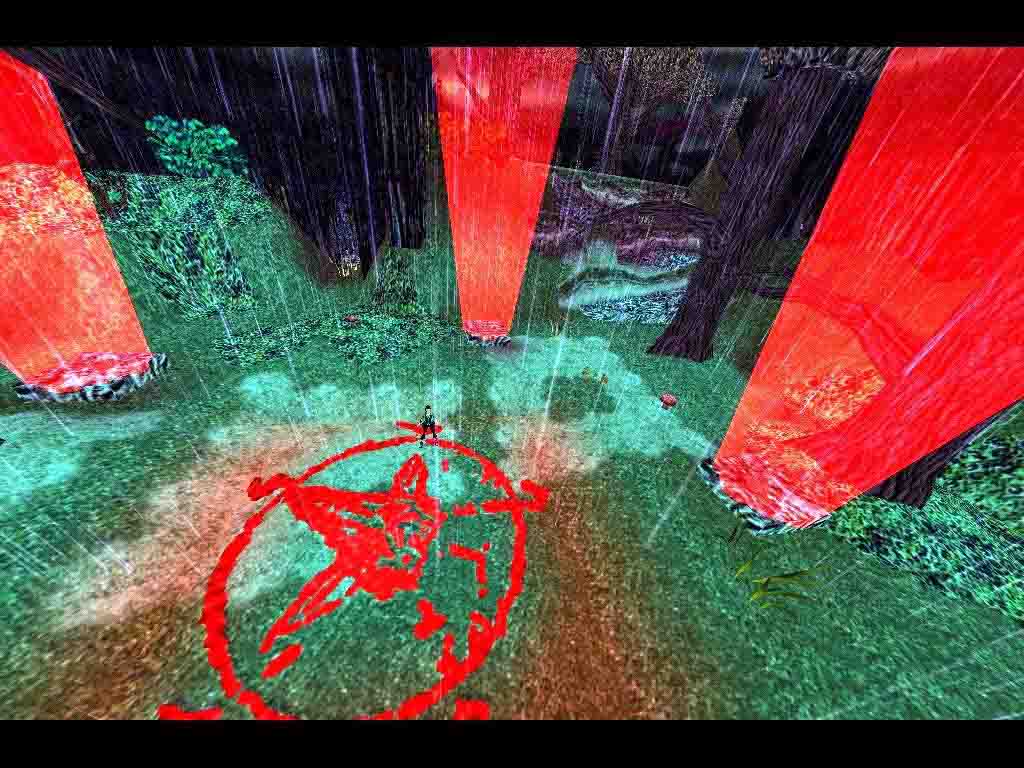
There are 2 Beams of light already activated, go over to them and look around to spot a wooden gate R of them, this will be very important later. Be sure to find it in an instant. I personally threw the Torch in front of it. Place the 2 Hearts closest to them and then the last one opposite the 2 that were already activated, step off the ledge to the R facing the sign and stand between the ledge and the small mushroom, walk down to the sign and youll end up just R of the red curl when a cutscene takes over, the Sign is activated and youll drop into the hole, hold Ctrl while falling and you should grab the edge of a pit, so you can do a safety drop into the nerve wrecking cave below.
The Wraith Cave.
In this cave is the biggest Wraith I ever saw and the task at hand is not simple, theres a Boulder in one of the corners that has to be released in order to break a trapdoor which will be the way out of here. In front of the Boulder is a dark plant covered block on the ceiling, youll have to grab up to the MS on that block and at the exact spot, so you will not be killed by the Boulder.
Heres what I did:
Run into the corner L of the Boulder and roll, runjump out aiming for the centre of the room and do a running jump/grab to the most far L side of the MS. Find out what spot will work for you, it will take a few tries. As soon as you did it, SAVE!, and run into the trapdoor opened by that Boulder. (Sometimes you have to turn back a bit or wait a second to get the wraith out of the way a bit.) Drop down and take the R hand passage, run to the end where you will have to climb the blocks, no jumping here, better save after each one and when you reach the Sign area find that open gate and sprint in, dive into the water and swim into the tunnel in the lower UW room. Climb out and walk up to the body in the wall (the one with the ripped out heart and youll see a block where there used to be a slope. Go back up to the Sign area and R out of the gate, climb up to the new area and the level ends
(added by eTux: The position to get onto that MS at the Boulder: (screenshot) it is different from my method, but hes the author, so who am I to question this?)
Secret count 5.
On we go to Alfred Hitchcocks Double Feature (in Black and White)
Walkthrough by Dutchy
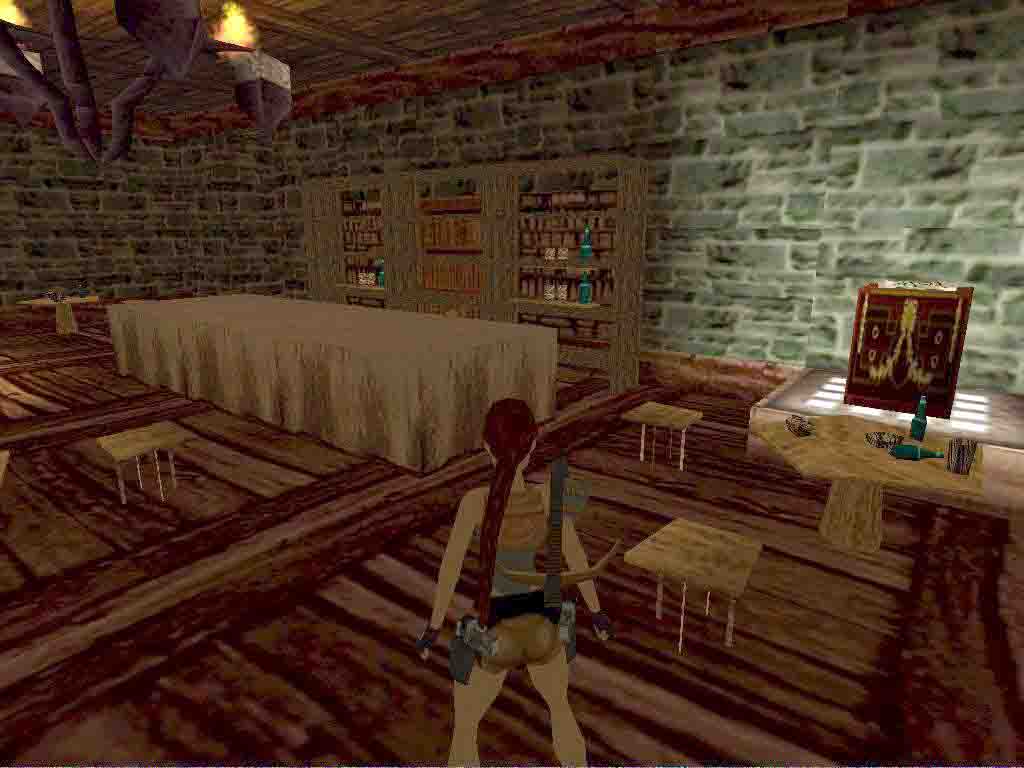
3. Alfred Hitchcock Double Feature - Rebecca (1940) director: Debbie Overstreet

Secret: 
(I like the little Derringer pistols Lara has in this level)
The Hall.
Go through the Hall to the stairs and to the R of you is a Fire place, hop over the logs and push in the block, pull it aside and enter the passage behind it, into a puzzle room with a Skeleton waking up.
The Puzzle Room.
Run to the pillar opposite the entrance and use the Jumpswitch, sidejump L to the door that opened, runjump/grab over to the pedestal with the Lasersight. Runjump back and run straight to the entrance passage, jump/grab the Jumpswitch over it and go into the entrance passage, turn around to see the door R of the 1st Jumpswitch opened. Now for me something happened thats not supposed too I think, but I tried and it happened twice. Wait in the entrance a bit and the Skeleton can run into the deadly water in the new passage, if so youre lucky. If not, just run in and jump/grab to a breakable platform, hang and shimmy L to the wall, pull up and turn L, jump/grab up to a crack in the wall and go to the other end, drop on the far side of the next platform and sidejump R.
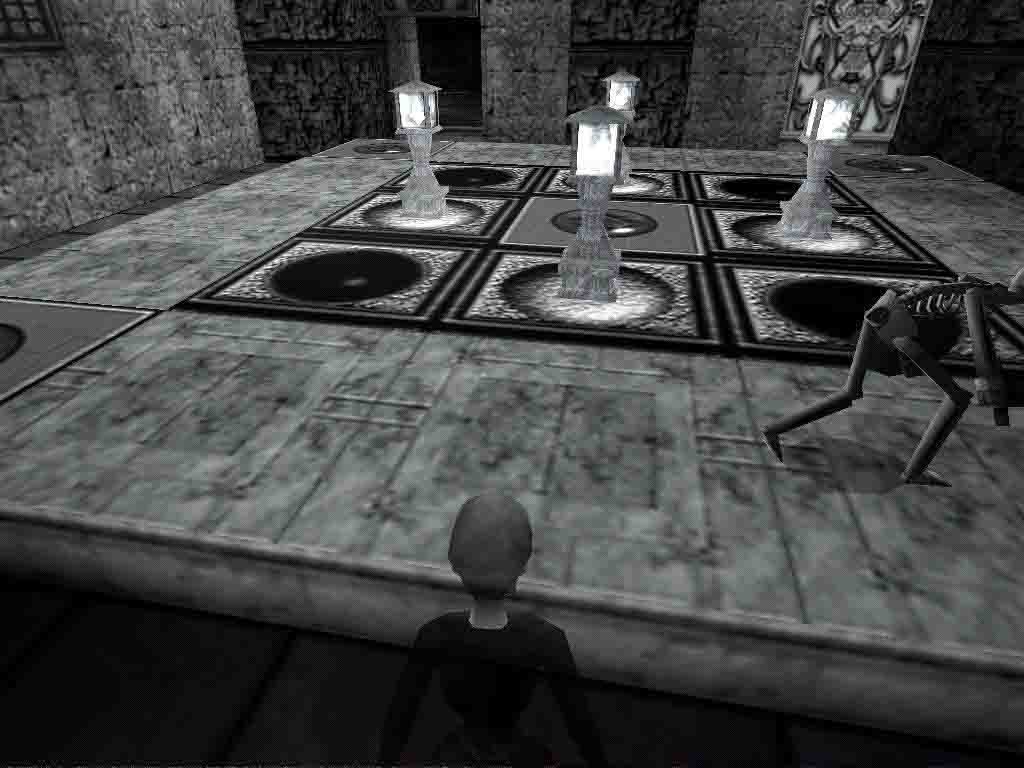
Get the Revolver and use the Jumpswitch behind the pedestal to open the exit. Jump up to the passage R and follow back through the burner-traps to the start of the deadly water room, if the Skeleton happens to still be here, run to the entrance passage and shoot him in the head from there. Pull/push the Lanterns on the light coloured circles and the SE gate opens, go up to a MP and the nice Blade-trap behind it, turn L from the MP and stand to the wall, close to the higher floor part, sidejump R over the 1st Blade, jump onto the block next to the railing and runjump to the NW corner where you can get another MP. Now here are 2 ways to do the next part, the easy one and the harder one.
Easy: Dont use the switch, just go up into the opening above and runjump from this passage over the 1st Blade, hop on the block again, runjump/grab to the CS in the wall, get in and use the switch there to raise a block back in the Hall. I just dropped from the bottom of the ladder to the Puzzle room and went back upstairs and onto the block, stand far back from the burner on the next block, on the R hand side, standjump/grab the edge of the burner block, go around the R hand corner and pull up in the next, turn SW and standjump to the lower corner ledge, pull up to the window ledge above for some Goodies and drop back down, jump into the alcove in S wall and get a ½ MP, pull the switch to open a door in the Hall. Jump around the corner to the R hand corner ledge and climb up for some Ammo, get down and drop to the floor below.
Hard route: Use the switch to raise a block at the Blades, go up in the higher passage to shoot the Crystal ball, which will retract Spikes on a sloped ledge in the room, runjump out to that raised block and grab the MS above, go to the burner, but dont get fried, drop to the slope where the Spikes retracted and slide/jump into the alcove in front, pull the switch to open a door in the Hall. Jump around the corner to the R hand corner ledge and climb up for some Ammo, jump to the other corner ledge to pull up to the window ledge above for some Goodies and drop back down and to the Puzzle floor below.
Ms Danvers Key.
Shoot the 2 lamps in the alcoves L and R of the entrance passage and the last gate opens in this room, get Ms Danvers Key from inside and go out to the Hall.
Go R and notice the raised block under the closed gate, go on to the opened door on the L side, nothing much to do here except for the Secret, a ½ MP in the CS up in the back wall behind the plant. Go back to the Hall and climb the block at the closed gate, look around for the nearby lamp behind you, shoot it and the gate will open. Crawl past the steam blowers and drop to the Fountain room, shoot the Guard dog (pick up the Ammo it leaves behind) and go up the steps, look over to the fountain to spot the dark Crystal ball on L side of the fountain, shoot it with the pistols from here and an UW gate in the pool opens, Swim in and go 2nd R/L down past a closed gate and up to a hallway, climb out and go on to a deep pit.
1st Rebeccas Gem.
Run off to the lower ledge on E wall, get the MP on it and jump to the S and N passages to pick up the Ammo, from the N passage down to the lower ledge and on to the breakledge in front of the W passage, run in fast and get Rebeccas Gem from the pedestal, jump over the pit behind it and climb up to a tunnel R, great place for some Boulders. Jump onto a flatter part on the sloped W side and walk up to the tunnel entrance, the Boulders crash by, go up the slope and jump the deep pit to get the Goodies, drop down into the pit and swim to an UW lever, pull and swim on, out of the now opened gate L and back to the Fountain Room, go back to the Hall. R up the stairs and there is Ms Danver watching your every move, go R into a passage and use the Gem in the receptacle.
Go into the passage with the Knights swinging their swords. Easiest way is to just sprint through and take a MP afterwards, get a MP in the end and place Ms Danvers Key. A block lowers on opposite side of the landing, first turn L from the key and climb the wall, go L and get a Secret in the passage up there. Sprint back and enter the new rooms, theres a lamp in the middle of the passage, the block R of it is pushable, throw a lever inside to open a gate in the end of the passage. Go out and into a room to the R where you can get some Goodies on top of the stairs. Now enter the room behind the opened gate, Spikes pop up from the floor, stand one step from the gate in the R hand corner and back to the wall, look up above the spikes to spot a vase in a hole in the ceiling.
Maxs Money Clip and 2nd Rebeccas Gem.
Shoot it and the gate opens, pull the switch to raise a block at the entrance, get up and grab the MS, go over the Spikes and to the side a bit at the hole, drop just before you are hit by the Hammer and turn around, slide backwards off the slope and grab the edge, go to the ladder where you can drop/grab a Jumpswitch, be sure to have enough health, because it is a long way down. Grab Maxs Money Clip and climb the ladder to backflip on the pillar, push in the block and get a Secret MP from a CS, Throw the lever to open the gate at the ladder, jump in and turn around in the new passage, take 4 hops back and run back to the pit, just run in, so youll fall down, as the Boulder will go over the gap. Now go up where it came from and climb the R hand ladder to get another Rebeccas Gem. Now jump over the pit in the passage and up in a CS to the R, throw the switch to open a trapdoor in the passage to the Spike room, which will be your exit, backflip from the top and go to the opposite passage at the landing, place Maxs Money Clip to open the door.
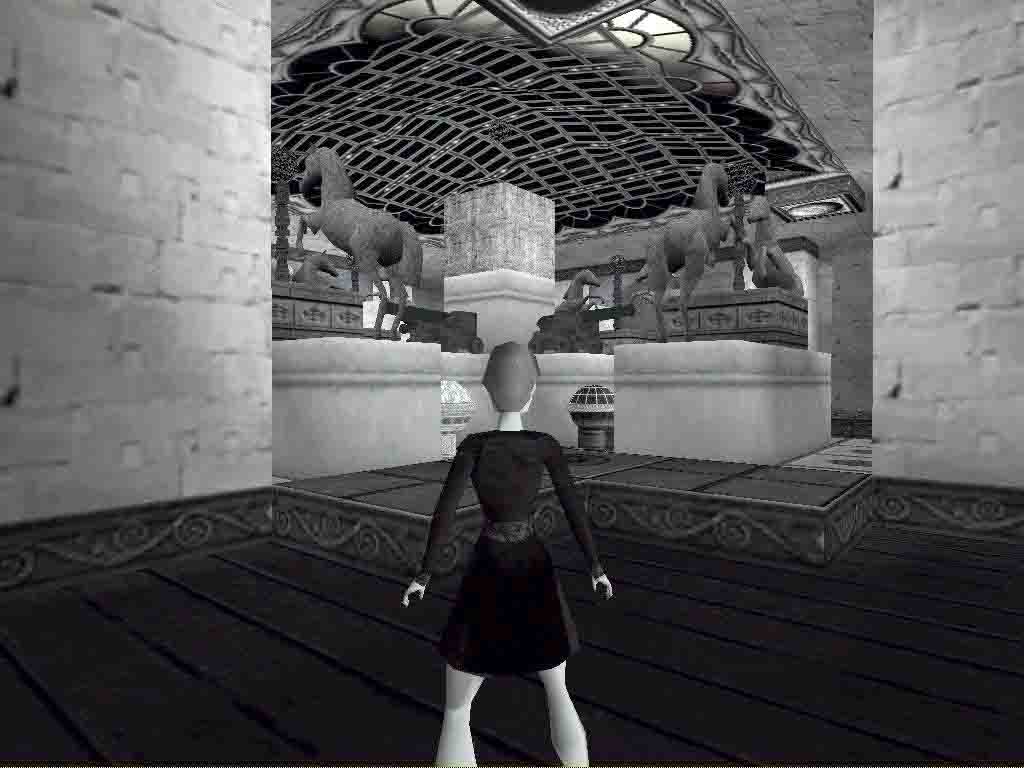
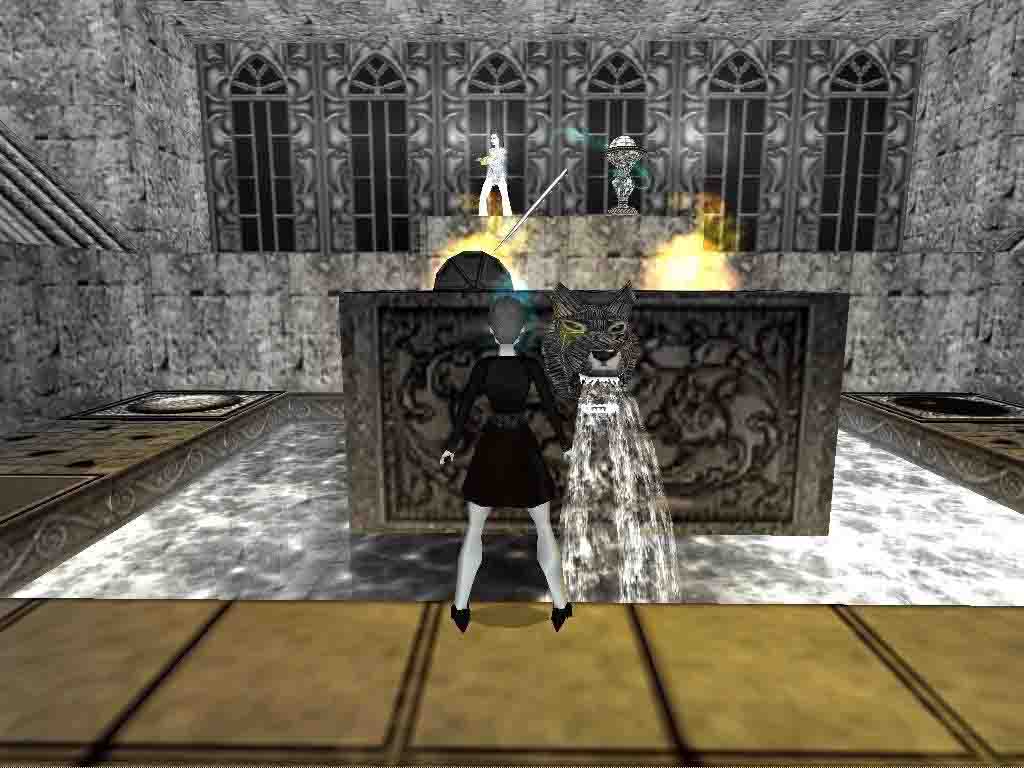
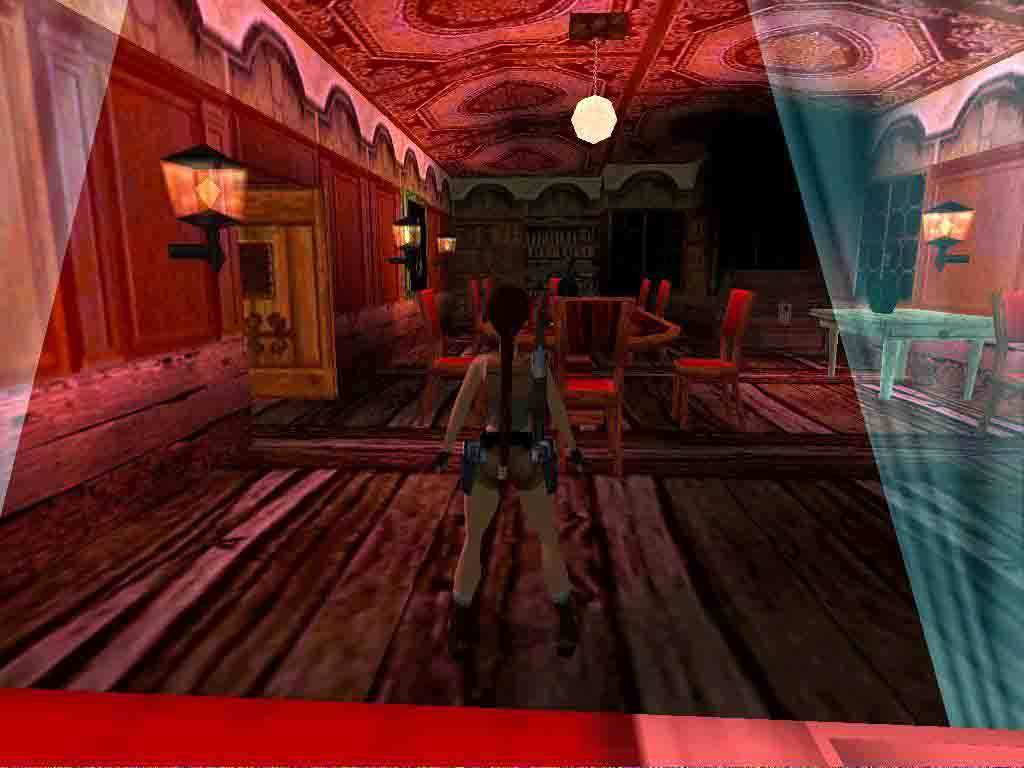
Go up the stairs and place Rebeccas Gem next to the gate. Enter a Bedroom, a Dog attacks from the R, go through the curtains to the bed and stand between the bed and the Crystal ball, shoot it and watch the wall go down. Go in to a room with Horse statues.
The Horse Room.
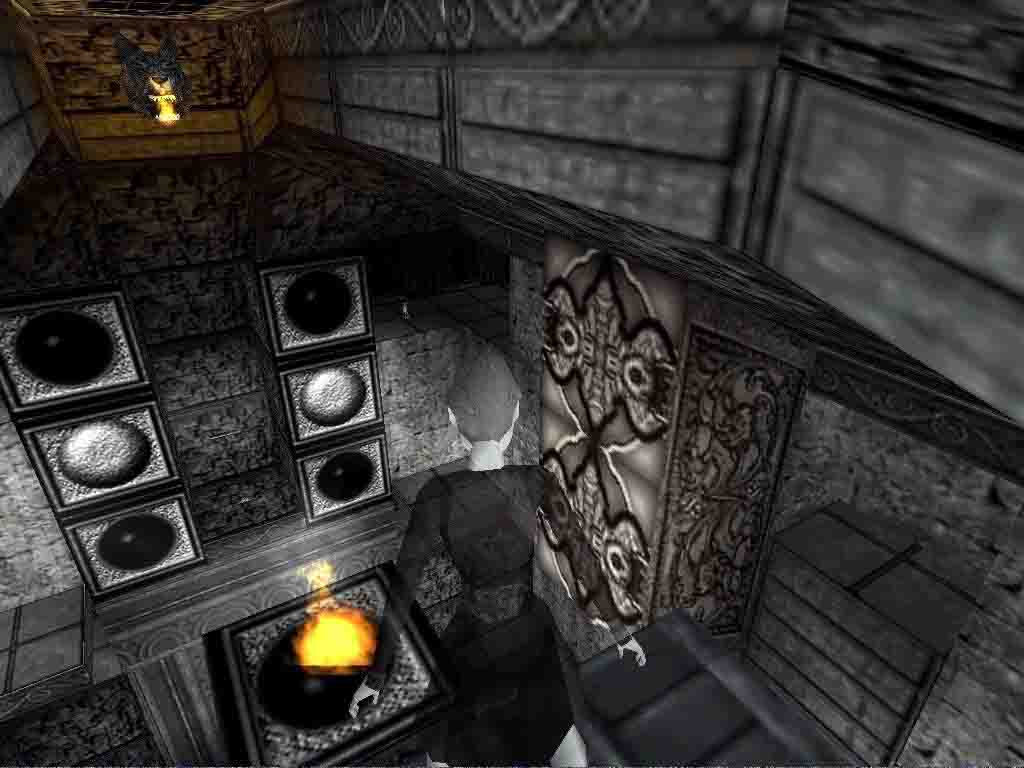
There are Hors statues around the centre pillar each 2 horses are looking at a Crystal ball and one more is in the centre of the room, push the Globes around the centre pillar to the according Tiles, White to white, Black to you guessed! A block raises near the entrance of the room, get up and standjump/grab around to the break able platform, pull up and runjump to the alcove with the Globe in W wall. Push it to the Tile and go down, go around the room, shooting all the lamps and pick up some Ammo in the W pool and more from a gate in the E wall, then go to the entrance and hop on the lower block, shoot the last Crystal ball and a pillar goes up under the Timed switch L of you, it will open the big S Gates. Run off the pillar and sprint into the next room, where Max is sitting at his desk.
Push in the block in W wall and go L into the passage to a water filled basement, wade straight to the opposite opening and through the next (the Wraith will only slightly harm you and hes very territorial) push a Globe to a Tile and go out, L and L in the end, to push the 2nd, a block lowers in the Horse room and reveals Maxs Money Clip. Go back to the room with the wraith and L to the end, climb out of the water and pull the L switch to lower a wall in the Hall, climb the ladder and grab the Crossbow in the next room. Turn and slide down the sloped passage to the Horse room, get the Money Clip and arm with the Crossbow (explosive) when returning through the Bedroom and down the stairs, team up the Skeletons and blast them with one arrow. Go L past Ms Danver, down the stairs to the Hall and into the room opposite the Fireplace.
Go up the long staircases and when you go into the big gates that will open up for you, Rebecca will be waiting for you, shoot her with the pistols (why spill the Ammo) and side jumping L and R. She will drop Rebeccas Manuscript, go get it and push the 2 Globes over the Spike Tiles in one continues move or the Spikes will get you. The fire at the lever goes off pull it to open the final gate. Go back to the Hall and see that your actions had effect, the whole place is ablaze. It seems you did a poor job re Rebecca, shoot her up good this time and go to the NE corner of the Hall where that open gate is, place Rebeccas Manuscript and the gate opens, run into the blue rays and you will be transported to the next level.
Secret count 8.
Walkthrough by Dutchy
4. Alfred Hitchcock Double Feature - Psycho (1960) director: Debbie Overstreet


Secret: 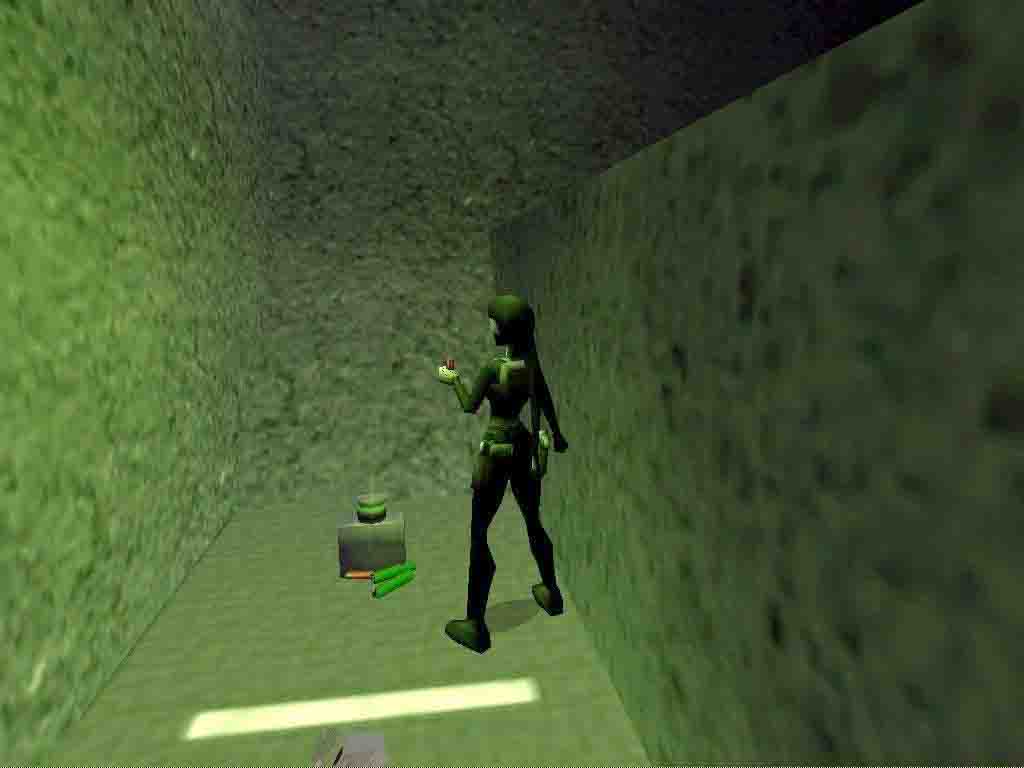
(Turn off your Volumetric FX in the TR4 set up.)
The Garage.
Go to the door to the Garage R and shoot the padlock, inside is some Ammo to the R, nothing to do here for now, as all doors are closed and the Bike is not starting up.
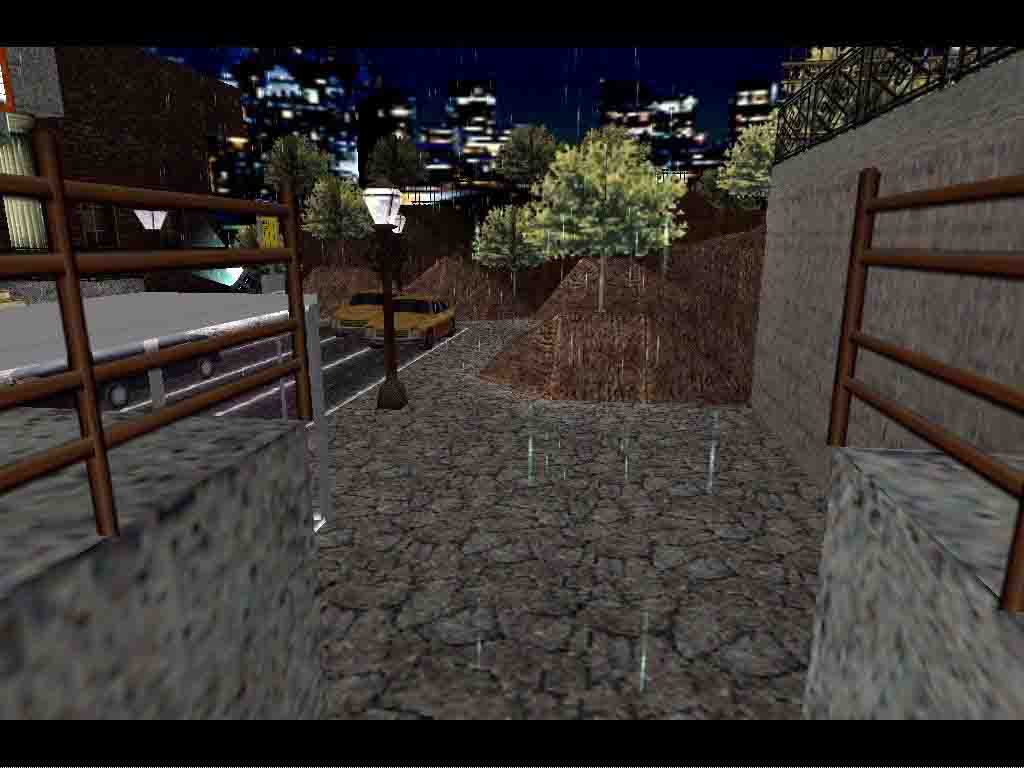
The Ravine.
Go out and down the hill, shoot the fences L and jump/grab the sloped pillar L when looking into the ravine, go R and down to the end of the ladder, where you can backflip to a platform, go jump/grab around the platforms to pick up all the Goodies on them and jump/grab back to the ladder, go down all the way this time, collect some more Goodies on the ground and pull out a crate under the ladder, push it aside and enter.
The Caves.
Shoot some Bats and at the pit you can runjump/grab the pole. Go up and backflip into the R hand alcove, pick up the first pack of Ammo and throw a flare to the back of the alcove, run into one of the corners and turn around to shoot the Spider that came down, when you are back in the corner it cant harm you, pick up the other Ammo and go down the pole to a platform you can backflip to, throw the lever to open a door below, go further down the pole and the ladder besides the next platform, drop at the alcove and get the Goodies inside, then follow the passage to the and runjump onto the ledge at the open door. Turn and shoot the Spider now if you like, but dont get off the ledge, cause the water in the next room is deadly. Look for the ledges you can jump to get to the lever in the back of the room, which will open the door in the Garage. Go back to the ladder, climb to the pole and backflip to the wooden platform at the lever, runjump/grab past the pole to the passage to the ravine, use the platforms where you collected the Goodies to go back up to the last one, climb the sloped pillar L, slide and jump back to where the fences were.
The Bike Ride.
Go to the Garage and go into the door in the back, there is another Bike there in an elevator, this one isnt broken, take it out to the street and R when you reach the Ravine. The Bumpy road will take you to over a hill, the next slope has to be taken with some speed, theres a pit behind it, next a break wall/into the tunnel/2 fences/R up the slope/2 fences/break wall with a breakledge behind it, to be taken with speed/then the road goes up steep, on top you can drive into a R hand cave, through the wall and go behind a ridge to get a Secret, a Pile of Goodies. Back on the Bike and over the top of the steep hill, through the next set of fences and with some speed through the L side of the next break wall keep steering L and this will break the fall onto the lower road. Go on, up L and over a couple of hills, over a straight part of road (over a water filled pit, theres an UW door in the pool) and a jump over a pillar to finally arrive at Bates Motel.
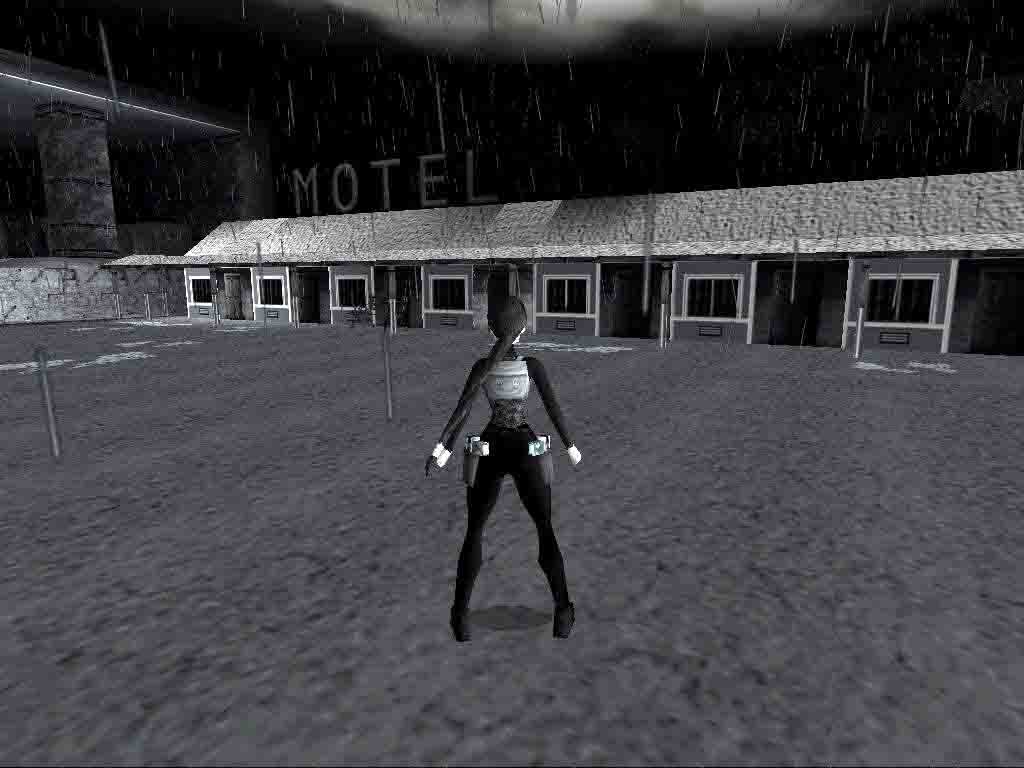
Bates Motel.
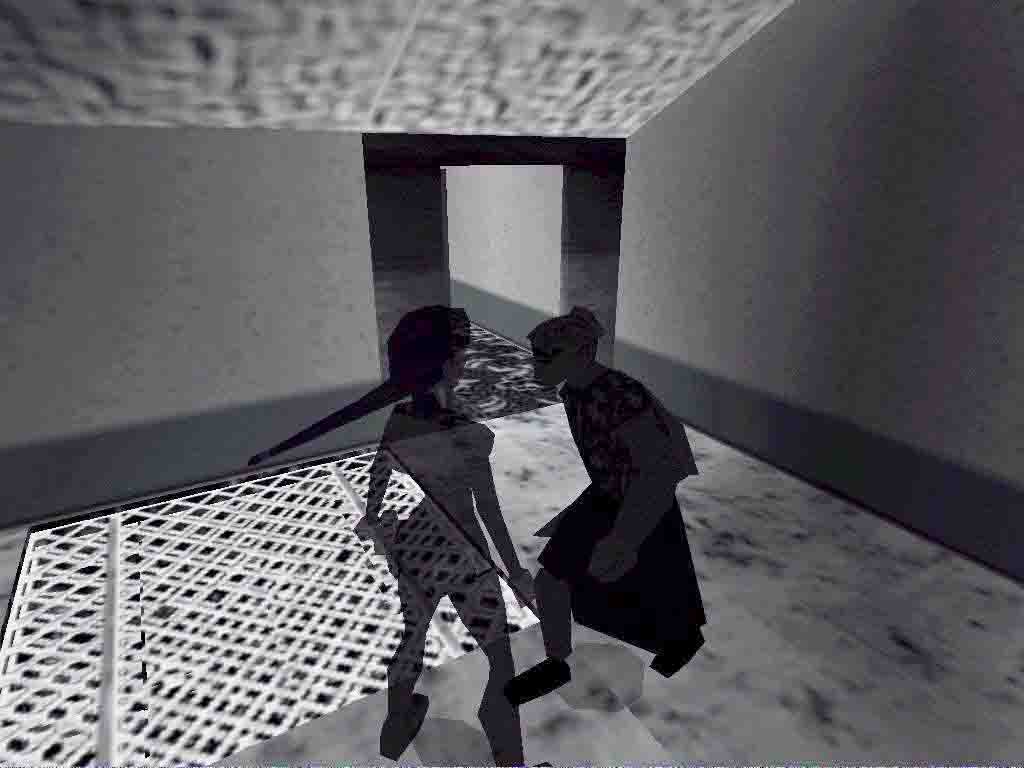
Park the Bike and open the L most door, inside R is a crate to pull out, throw the lever behind it and the centre room of the Motel opens. Go into the room and open the door to the bathroom, remember the curtain scene? Go into the shower and Norman Bates shows up with the Bread knife. Stand outside of the room and shoot him. Notice the trapdoor in the room and get a ½ MP from the shower. Head out and R, past the Motel to a storage area, theres a MP on one of the top crates. Go to the N side of the room and find the 4 crates you can move onto the Tiled floor, do the one on the dark spot last or the rest will not move anymore. The crates raised 2 block in the back S room, go up to use the Jumpswitch, which will open an UW door.
The Blade Piece.
Head over to the back of the Motel and dive into the famous lake there where the car rest on the bottom, more victims lying around here, swim into the open door N and follow the cave, down into the bottom hole and up a bit further, chased by Spirits. When you reach the hole up, pull the UW lever (the trapdoor opens in the bathroom) and go up into a basement, haunted by Spirits, at one try I hade several, at an other go at it I didnt see one. Get rid of them in the water and head into the R passage of 3, R again and follow to a room where you have to shoot a white vase in an alcove. This will put out the flames under the Blade Piece you have to pick up in another room. Go through the W passage and in the next room you can get a ½ MP in the alcove, Dont shoot the vase, go back to the water hole and take the centre passage to come to the room with the Blade Piece. Climb the alcoves behind it for Flares and MP and swim back to the lake.
Go to the Motel and into the bathroom, drop into the trapdoor and get a ½ MP, go on and be sure to drop near the corner when you go down the next part, stand back in the corner and shoot the Spider that cannot harm you this way. Follow the tunnel to a slide, go off backwards and grab, shimmy R and backflip over the pit, hop back into the corner one more time to kill a Spider, Look up here to use a Jumpswitch (which will open the Bates House) and follow to the water, swim through the tunnel to an UW lever at a trapdoor, climb out near the House.
The Bates House.
Go around the L side to the back alley and push/pull 2 crates onto the Tiled squares in the corners of the alley. Blocks will raise on the veranda. Go into the house at the front and notice the trapdoor to the basement in the floor to the L, the stairs with a door on the 1st landing, go on into the room and on the L wall is a broken/flashing lamp, use the switch in it to open the door to the veranda, (Dont shoot the vase on the table) go up the blocks and use the MS to grab the Jumpswitch in the end. The door on the landing opens, go into that bedroom. Another flashing lamp with a hidden Jumpswitch, Norman Bates storms in again, hop back in front of him and take him out. Theres some Ammo in the vase here. Go to the top of the stairs, where a block raised, first open the ceiling hatch next to it and runjump/grab from the block into the opening to the roof, go R and shoot a vase for a MP.
Go to the rope hanging from a tree and swing in the direction of the Jumpswitch on the other tree, grab the ladder and go drop/grab the switch, runjump back to the roof where a door opened. Enter Mothers Bedroom, the imprint of the body still on the bed, open the door to the outside veranda and go straight, jump over the fence, go onto the first branches L and to some Ammo there, return and go L, shoot some Bats and get the Flares, turn L and standjump onto the sloped trunk, slide and grab the edge, drop on the Jumpswitch, which will open that trapdoor to the basement L of the house entrance.
The Basement/ Head Piece.
So go back inside and climb down, find the other hole down and go down the first set of stairs, look R at the 1st landing and do a runjump/grab over the railing to the alcove with the lever. Drop out and follow the stairs down to the open door, run straight into the R hand corner at the door and turn to shoot one more of those lovely Spiders, go in and pull the L hand lantern onto the centre tile to open the next door, go in and push in the R hand crate, but not to the end, go in for a Secret, ½ MP and Ammo. Now run over the moulded floor to the ledge with the corpse, shoot the Skeleton into the pool and open the R hand Timed door with the switch in the lamp. Runjump /grab into the room and grab the Head Piece quick, (never mind the MP it is trapped) roll and jump back. Now do the same on the other side and grab the Murder Weapon, theres another trapped MP, just pull the lamp switch and roll, runjump back runjump to the 1st raised pillar in the deadly pool and standjump to the next, take a step back and runjump/grab into the exit.
The Way Out.
Go back up to the roof of the house and into the bedroom, L this time and around to the front of the house, when the music starts, Norman will show up again, shoot him and combine Blade- and Head Piece to place them on the stand, Gates open and 5 Crows take off, turn L and look around L corner, on a small balcony is a Secret, a ½ MP. You can reach it by doing a runjump sharp around the corner, probably the Crows will attack now, stand in a corner and shoot them with the pistols. Jump grab up to the roof over the window here and lure them all to you so they wont bother you anymore. Grab the edge of the high roof, go L as far as possible, pull up/backflip/roll and steer R in mid-air, to land exactly at the stand on the veranda. Head back to the Motel.
Final Bike Rides.
Time for your last Secret, take the Bike and drive back where you came from, park it on the side at the pit and dive in on W side, theres an UW lever on the pillar, it will open an UW door E, get some air and swim in, no need to look around, the MP is just in sight a bit further on you way down the tunnel. Throw the UW lever in the end to open the trapdoor which will lead you back to the Garage area. Get some Ammo near the hole and follow the passage, shoot the Padlock and go to the passage where you got the first Bike, L is another door open where the 2nd Bike is waiting for you. Take it to the Motel and up the ramp to the Store room, L into the open gates and follow the route through a gate, fences, break-wall and floor and stop there, as you will have to go through the Flames one by one, time the run and follow the tunnel, you will encounter Norman the lest time, so enjoy, run over the Spiders too and at the dead end is a Jumpswitch R to raise the block under the CS, go through and into the blue rays, pry the Walk of Fame Star from the wall and the door opens.
Secret count 12.
Walkthrough by Dutchy and CC
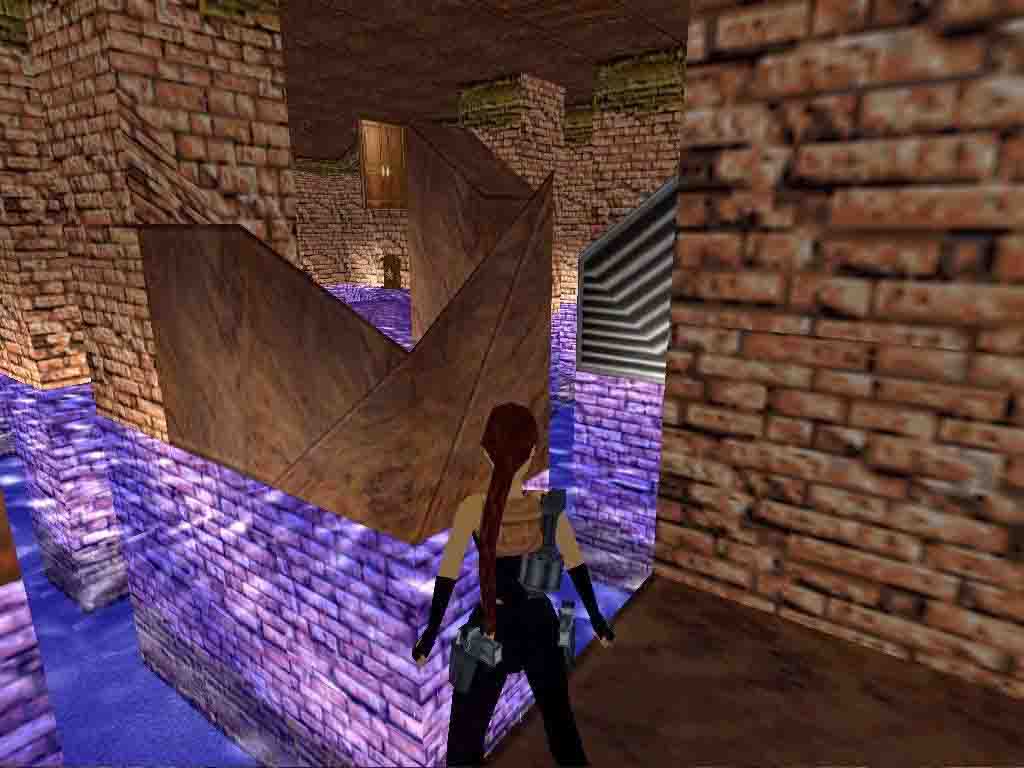
5. The Movie Theatre Part 2 director: Michael Prager, Germany
 Secret:
The Block Puzzle.
Enter a basement with push blocks, go L and pull the block past the L hand
stairs out once, go to the SE corner of the basement and push the block there
as far as possible, turn L and pull that block once, turn R and pull that
one out again to where you found it and turn L, go into the R hand passage,
pull the block in the passage there out all the way and go to the W side,
(opposite the entrance) push the block there in once and go L, pull the block
in the NW corner out 4 times and you are in a passage where you can pick up
Movie Star 1. Notice the small triangular CS L of the Star, turn around
and go to the block in the end of this passage, push it in and enter the triangular
hole L to place the Star. (which will open the door on top of the stairs)
Go back to where you found the Star and follow the CS, go into the NW passage
and get the Secret ½ MP just in front of the L block, push that block
past the R hand stairs and go up to the room with the Compass, shoot the Dogs
and go into 1st Hall, pick out another movie and enter. 
secret count 13
Walkthrough by Dutchy
Cinema 2 Temples and Pyramids
6. Indiana Jones and the Temple of Doom (1984, Steven Spielberg)- director: Todd Shurtz (Raider X)

Secret: 

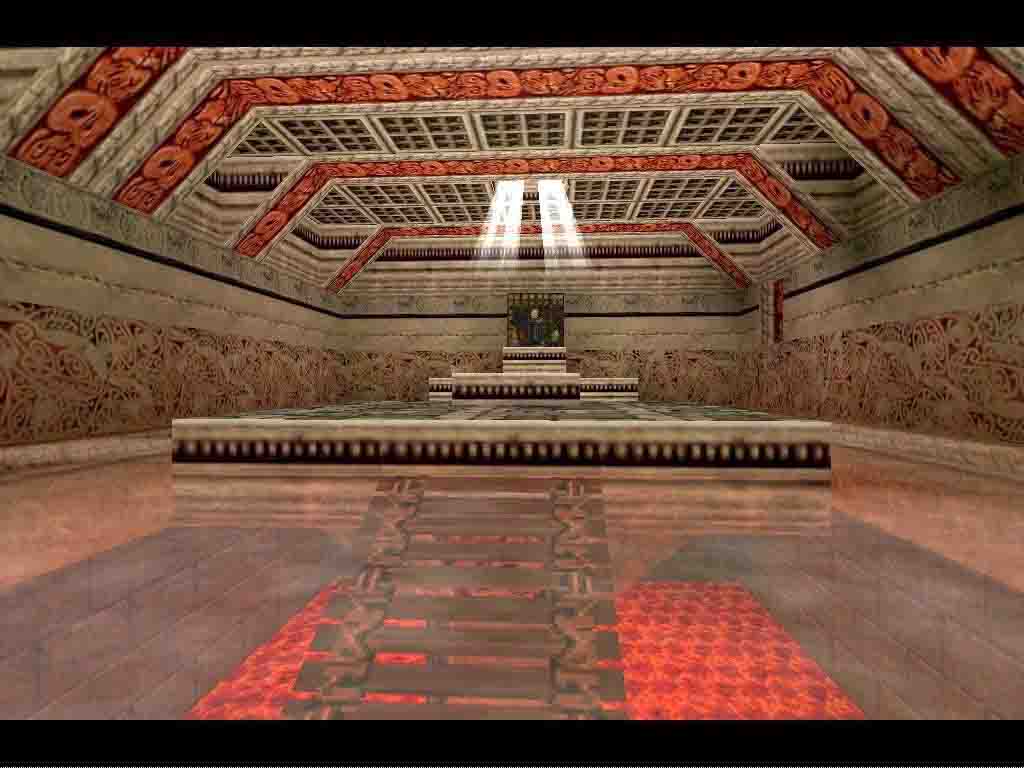
Lara
slides onto a Tinnos/catacomb-style room. Find the bronze trapdoor beside
the shotgun in the W. Drop down and push the block all the way in. The screen
shakes, something has happened. Go back out and a landslide has covered the
skeleton.
Back up onto the landslide and run forward quickly as two boulders come
down. Back up the landslide, turn around, climb the ladder and you are out
on walkways. Shoot the skeleton with the shotgun, and find the switch. See
a flyby of where to go. Go there.
Do runjumps over the breakable tiles so you leave the 2nd one intact
on every pit. Shoot two vases and pick up the scroll and torch. We'll call
this the Water Room. Bring it back to the first room and leave on the floor.
Find the moveable block (near where you slide down at the start). Pull it
out and to the spot where one of the boulders is, theres a different textured
floor tile, go into the alcove the block came out of and pull the switch to
raise a pillar under the block, go up to the walkway at the boulder-trap and
pull the block on the grated floor Tile. The other door NW opens, go there.
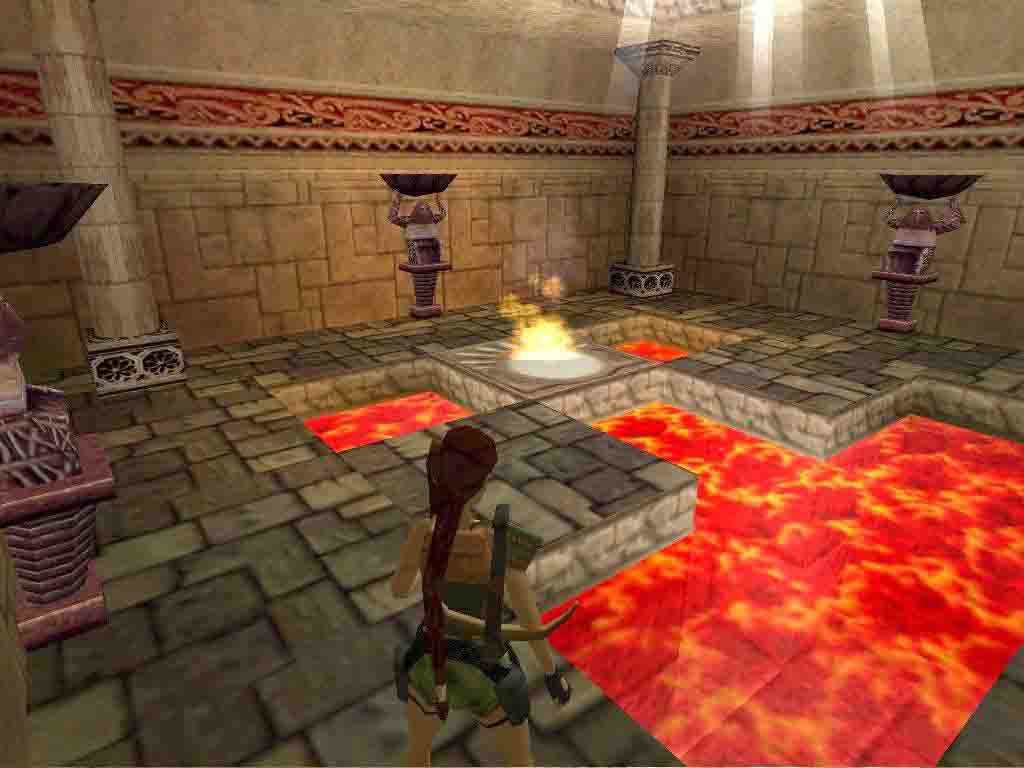
The
Fire Room.
As you run across the tile a skeleton appears. You come into what we'll call
the Fire Room. Shoot the skeleton into the lava on the floor. See that white
sun tile, remember this. There are three statues with fire on them. If you
go near them fire wraiths will chase you, and you you'll have to go back to
the Water Room to extinguish them.
Go back up on the walkway and pull that switch again up there (this is the
first of the 'double-action' switches you come across). This opens a gate
in the lava pit before the Fire Room. Grab the torch and go back over what's
left of the breakable tiles to the Fire Room and leave the torch there, drop
back into the pit from the entrance of the Fire room and grab the ladder,
drop/grab down to an opening with a switch. Pull the switch and see that tile
in the Fire Room burning (that's where you'll light the torch).
To get out again, jump and grab the breakable tile.
Pull up, roll and do a running jump back to grab the ladder above the switch,
and climb back up. Get the torch and light it on the burning tile. Go back
to the first room and light a similar looking white sun tile in the SW. Go
over to the switch that raised the block and a hole has opened up, get the
Secret pickups.
Part of the floor drops near the central structure near the water room. Throw
down the torch and follow it down. Throw the torch again in the crawlspace
is it hasn't gone far enough. Bring the torch with you (pick it up while crawling
and throw it again-D.) straight ahead into the green corridor, to the end,
and into the left. Stand on the breakable tile facing the gate you just passed
and fall down to a room with swinging spike bags and lava. Turn R and walk
up to the pit, throw the torch into the passage beyond the pit, jumpgrab over
and use the torch again on that sun tile, jump back across to the other side
into the passage with the switch. Leave the torch at the end of the corridor
and use the switch. This lowers the block beside you, throw the torch onto
the block and pull the switch again. This raises the block with the torch
on it so you can retrieve above later on.
Before climbing back up the ladder find the movable
green wall block behind the swinging spike bag near the sun tile. Use the
pull down-switch, this raises a block for later.
Back to the ladder and climb up. Backflip/roll from the top of the ladder.
Push the green block forward as far as it will go. No go into the right, see
skeletons on the floor and in the alcove is your torch on the raised block.
Go get it, jump back out and collect the pickups.
Go back out through the green corridor, back to where you came down through
the crawlspace and continue on to the R. See the spiked skeleton on the ground,
that's what remains of Indiana Jones, poor guy. Pick up his Shankara stone.
You could blast that skeleton in the corner if you like too while it's inactive.
Go through the entrance beside India and continue straight on. Do not go into
the left yet, or you'll be in big trouble. You are in a large room with two
giant heads either side. This is where you place your stones.
Use the torch find the movable block in the wall, it's
on the left as you ran into this room, but before you reach the big head on
the left. Push it in as far as it will go. Bring the torch down below the
block and light the two sconces. The gate rises. Go in and see a Pyramid key
on fire, you can't get it. Use the pull-down switch. Go back out and up to
the block. The floor has risen beside it. Use this new piece of floor to pull
the block aside and push it all the way through the corridor onto a similar
tile to the one it's standing on. Go back down again and the fire is out,
get the pyramid key. Pull the block back out of the corridor and get out.
Go back to where you fell through the breakable tile and see the gate on the
opposite side is open. Go through there and keep going until you come to a
slope where you see lava below. Save before this. Slide down onto a breakable
tile. All the tiles in here are breakable and I wasn't able to do a continuous
run. The only way I could do it was to try and grab each tile. It won't break
until Lara climbs up on it. This makes life easier, but takes a long time
to do. The last part is a particularly awkward jump to a tile and immediately
a running jump around the corner to the left.
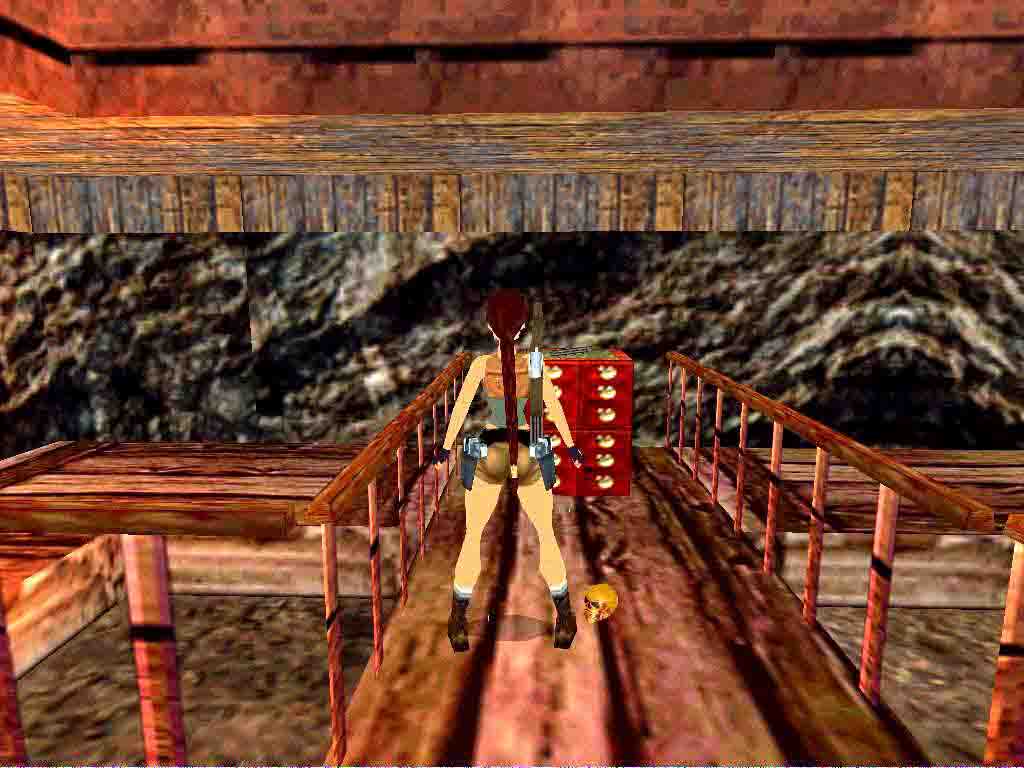
This brings you to a room with a bridge. Go up and have a look. There's another
stone on fire and to the right of this is an entrance you'll use later on.
(I played this area a lot and it was only at the last minute I found the moveable
block in the swinging spike bag room. Because you've done it now you can see
the yellow floor raised in that entrance, if you hadn't the floor would be
down). Go back down to the bridge and down to the ledge below. Use the ladder
on the column and jumps to get to the switch on the far side. This turns off
the first and raises the gate behind the stone. Get onto the bridge again
and collect the Shankara Gem. (shortcut: Just run with a R or L turn from
the big centre platform, near the bridge to the Stone to the lowest ledge
in the lava, then jump to the switch. Up is the long way-D.)
From the pedestal where you got the Shankara Gem, turn R and and jump across
into the passage, notice the grated Tile inside and go L, pull the block in,
it has to go onto the Tile, so work your way around till you get a screenshot
of an open gate. Use this now open corridor to get back to the dip in the
floor. Turn left and stop when you reach the slope you slid down earlier.
On the right is another green block in the wall, pull it all the way to the
Shankara Gem pedestal. Jump across again and get into the corridor. Go to
the top of the slope again and run in there, and push the R hand block as
far as it will go. Come back out to the dip in the floor again and push the
block as it will go onto the grated Tile near the crawlspace. You've seen
the gates rise in the room I told you not to go into up to now.
Well you have to now. Bring the torch with you and leave
it just outside before you run in. As you do run in two fire wraith appear.
Save! The only way I could get rid of these was to go all the way back to
the water room, crawl through the crawlspace and climb the ladder, into the
water room and douse the wraiths. This, you can believe, took a lot of reloading.
Funnily enough they didn't attack dangerously in the crawlspace, but when
I got to the top of the ladder and backflipped, they did attack immediately.
So if this happens to you, jump in any direction after backflipping to give
yourself another second and escape. (Backflip from the ladder, sidejump R
and roll and youre straight in front of the passage to the water room-D.)
Running over the broken floor to the water room too was hard as sometimes
you've got to stop and hop back before doing a running jump. (Or do diagonal
jumps and runs over the ledges, jump from the L to the R, run diagonal to
the L and jump to the R side of the next ledge, this way you can do running
jumps-D.) When you've finally put them out go back to the room they appeared
in first.
Pull the switch on the wall, this raised a block in
front of the diamond receptacle opposite, place your pyramid key there. Now
use the torch to light the sconces and the last gate should rise. Go in a
get the next Shakara Gem.
Put these Shankara gems into the big heads. Before going through the newly
opened gate, go back to where the movable block is (where you got the pyramid
key) and that gate is now open to get the Secret beside the block.
Now go through the new gate.
There's a hole in the floor and if you look down you'll see lava, that ledge
is breakable so we have to come up with a cunning plan. Torch in hand, face
the gates you just come through, step back to the break tiles edge and hop
back, fall back down onto the breakable tile and jump forward into the entrance
there. This is a Secret room. Get all the pickups.
Go have a look outside again, there's another breakable tile below. You have
to jump into an opening to the R, stand L facing the pit, at the edge of the
floor, turn R, back to the wall, take 2 sidesteps R and sidejump L onto the
breaktile, standjump forward into the opening. At the entrance, drop the torch,
you'll see a flyby of a door opening and a native coming out. Weapons ready
to go in and tackle him. Go back and get the torch.
Run down to the ground level and behind the tall column and find the wall
switch. Come back out and get the torch. You have to do a couple of those
awkward running around those big heads on the side ledges, either side is
the same, and get into the room underneath a high-pull down switch. Light
the torches in here and see a block rising outside. Go back there with the
torch, but drop it near the gate in the lower part of the room.(Youll come
back for it later through the gate-D).
This is a very difficult rope swing, it took me an awful lot of goes to get
it. (You really have to swing about 3-4 times, before you jump when her legs
are at the highest point-D.) Eventually, and it seemed like pure luck when
it happened, she will grab the switch and pull it down.
You don't need your torch this time so leave it here. Go back out to the lava
room and jump across to the now open gate. Straight ahead is where you'll
come later, but this time turn right and drop down the ladder. Weapons ready
for bat(s) and a native in a long cave type room. Go forward and find you
come to a huge room. Kill the 2 Natives first before looking around. This
room is full of stuff to do so have a good look.
Climb the ladder in the NW corner and go onto the bridge, the camera changes,
towards the switch. It's possible to kill the skeleton on the far structure
if you want from here with the crossbow or possibly the grenade gun. But as
you've probably got more shotgun ammo wait a minute. Pull the switch and get
to the ground again. Go to the SE corner and see a large green door (remember
this) and climb the back of the structure here. At the top wait for the skellie
to jump over to you and then shoot it with the shotgun.
Continue
around to the right and find the big cog wheel. This is a tight timed run.
I don't know if it's possible to do this any other way than the way I did
it. So here goes:
Pull it at least 67 times, backflip to the ground behind you, turn L quickly
and do running jump around to the left corner to that green door you saw earlier.
When you get to the green door turn R and drop backwards onto the slope and
grab the edge. (Like I said it may be possible to do this running straight
forward but I couldn't). Save here.
Pull up and jumptwist to grab a breakable tile behind you. Wait and save here.
Watch 'til the fire go out, then pull up and jump to grab the next tile. (sometimes
after you reload the fire is out, so pull up as soon as the game reloads,
doesnt work all the time, be patient-D.) Save.
Watch for the fires again, then pull and jump to the solid structure ahead.
On the left is a key. Before picking it up make sure you have the shotgun
ready. When you pick it up a skeleton appears very near you, and it takes
a bit of manoeuvring to shoot it into the lava.
Now go to the side opposite the pedestal and look towards the next lot of
breakable tiles. I was not able to just slide and jump to the tile across
the room. I had to position Lara in such a way that she did a single jump
onto the tile below and jump to grab the side of the tile ahead. (Stand at
the corner of the L pillar, at the edge of the slope and take two steps back,
standjump and standjumpgrab to the 2nd Tile, go Around R and pull
up, runjumpgrab to the opening-D.) Again, it may be possible to jump to this
second tile and keep running but I wasn't able to do it. Once you've grabbed
this tile, shimmy around so Lara is facing the entrance. Pull up, a running
jump, and into the entrance. Climb the ladder and the gate before you rises.
Jump over the sloped block and youre back at the switch on the bridge, pull
the switch there one more time to change the function of the cog wheel so
you can open the other green door with it.
Get back to the cog wheel again. Pull it about 6 times
again, and this time the gate straight ahead of you opens. (I've never seen
this before, where a switchcog changed to do a different task). Jump over
the wheel, run of the structure and run through this door.
Jump to the brown block thing ahead and climb onto the top. Use the blocks
to go to the right side, mind the fires, and get into the alcoves and pull
two switches. Get back to the ledge with the ladder and head for the next
switch on the far L side (leave the switch on the ladder side until last).
To add insult to injury there are some bat(s) flying around here too. When
you've pull the last switch, turn to face the peculiar shaped block almost
beside the ledge with the ladder. Save before doing this. Do an angled running
jump to hit the side of that block, twist in the jump and grab a crawlspace.
Pull up into the crawlspace and crawl to the left so Lara can stand up. It's
easy this time to jump to the same block and jump to the ladder.
I've no idea the purpose of the first landing. See if you can do anything
there. Backflip onto the second ladder, turn immediately and get the shotgun
ready. Wait until the skeleton comes near you to shoot it off the ledge, otherwise
you'll waste ammo. Change to pistols quickly and shoot a bat. Face the rope
and swing across to the ledge with two vases. Have the shotgun ready again
and go in a deal with another skeleton. Back to the vases and shoot them.
Into the tunnel again and to the end. Jump to the blue ladder on the left
and down to the ground. (I found nothing else to with this ladder).
Go to the structure where the cog wheel is and find the high ladder on the
wall beside it. Opposite this ladder the gate has opened under the structure,
but leave it for now. Climb this tall ladder to the top. At the top get the
shotgun ready. A skeleton rises. Get behind him and shoot him off this floor
over the edge.
Pull the switch and go through to the room you saw before and get your torch.
Throw it down to the ground. Climb back down the tall ladder. Pick up the
torch and thrown it into that hole opposite the ladder. Go down and light
the sconce. That's about all you can do with the torch. Climb back up and
get back up to the cog wheel again.
You do the same as last time and run through the door ahead, back into the
lava room. This time just go straight ahead and backflip at the top where
you encountered the skeleton before. This time the gate is open, so through
and get the key on the pedestal.
Turn around and climb the ladder over the pedestal for a Secret. Jump
to the ledge either side and shoot vases for pickups. You can shoot the vases
on the other side of the room, but there's nothing else there. Go back down
to the pedestal, use the ropeswing again, and the blue ladder and back down
to the ground.
Climb that tall ladder again and get back to the room where you just got the
torch from and go R, jump back across the lava pit.
This time go straight ahead. Use your keys and go through the door.
Secret count 17
Walkthrough by Dutchy, notes by CC
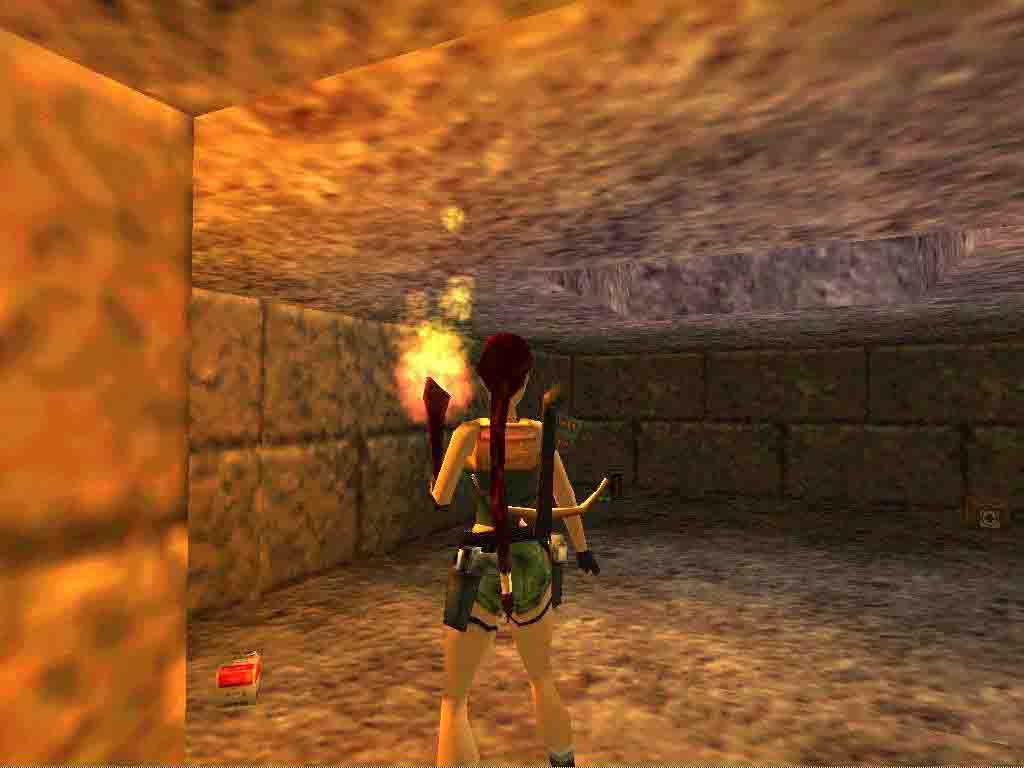
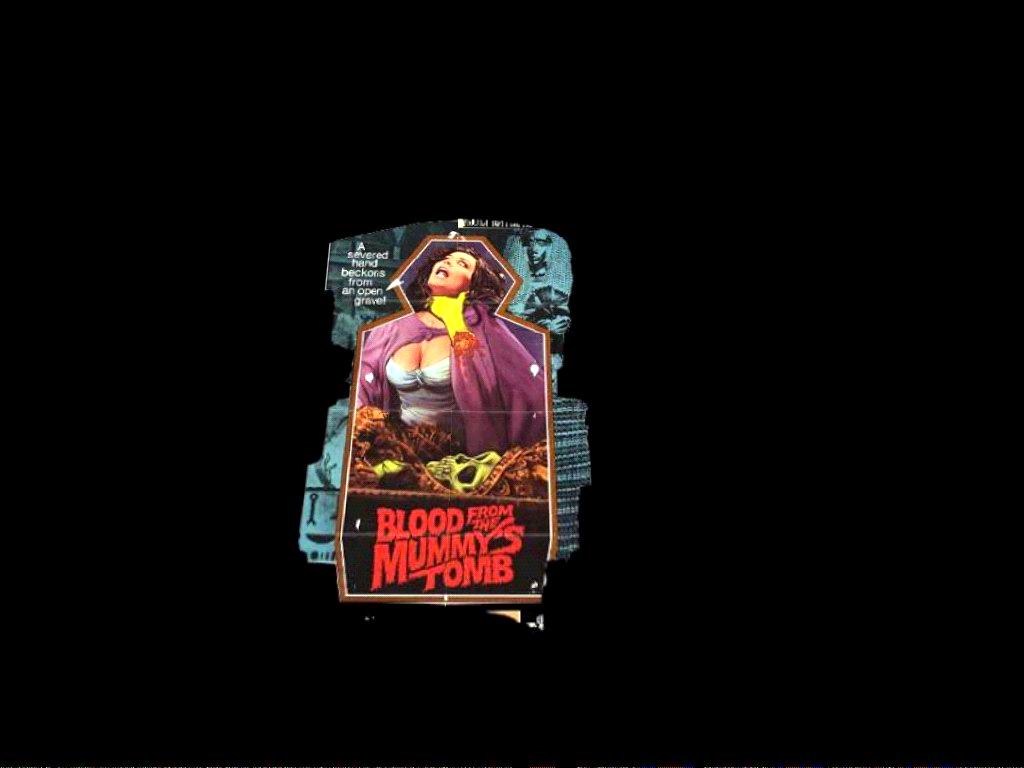
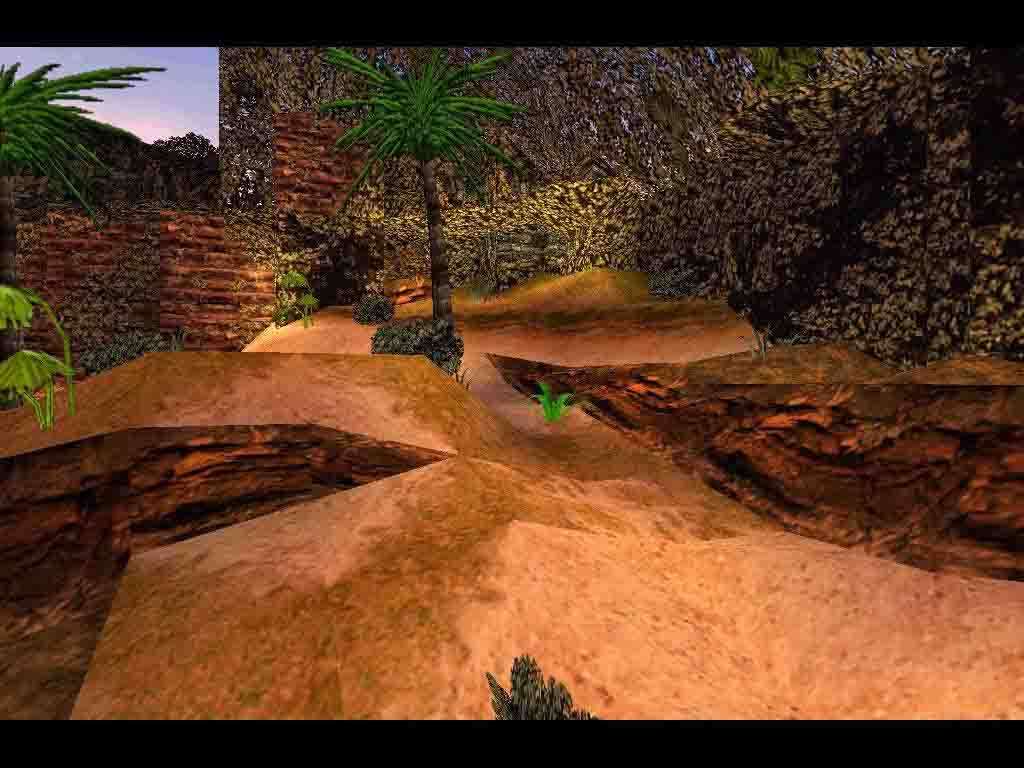
7. Blood from the Mummy's Tomb (1971, Seth Holt) - director: Josep Borrut

 Secret:

CS=crawlspace, MS= monkeyswing, MP= med-pack, Jump= jump.
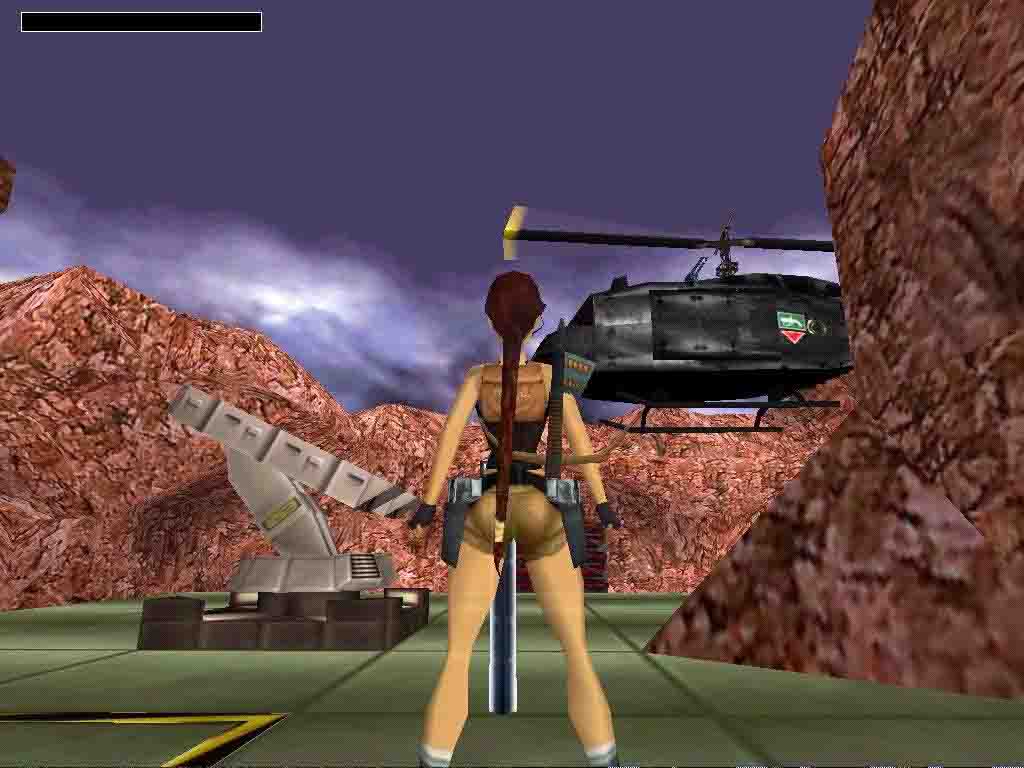
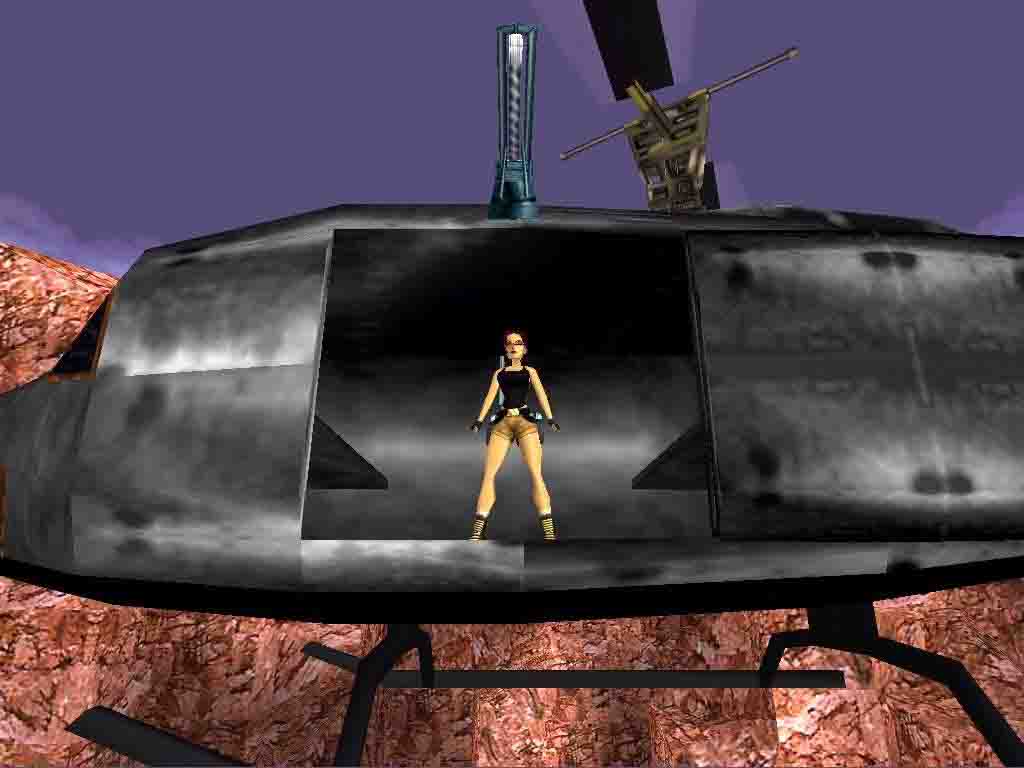
The Canyon.
Excellent opening
flyby. Drop/grab the helicopters landing bars, shimmy R and drop from the
end, take a MP to recover. (great Chopper pilot, couldnt he have gone down
a bit?)
Go into the W canyon and where the passage gets narrow, face E and hop back against the W pillar, jump forward on the sloped block in front and keep jumping L till you can jumpgrab to a ridge from the highest W pillar, go find the spot (a bit L) where you can stand, look W to spot the CS for later and turn S, standjump to a ledge at the end of the ridge, standjump over the slope far S end of the wall and slide to a flatter part, jump around the corner to the N and then down to a lower ledge NE, shimmy along the ridge to a CS and get the Secret, a Shotgun. Drop to the canyon floor and go up to that ridge again and jump to the CS (its possible to jump to a sloped ledge N and do a backflip/roll/grab to the opening you will reach through the CS) and follow to an opening from where you can jump the Canyon. Watch out for that hanging L rock, stay R of it and follow the tunnel grabbing a MP to reach a wide Canyon.
Runjump/grab the crack in the protruding rock E and go around L, drop to a sloped block below and find the hole in the wall E of where you just landed, pill the rock away from the CS behind it and get in, follow the crooked passage up to where you slide behind the Lasers near the Jeep. Look for the CS at the R side of the fence, follow through to an area with a big gate and a watch tower, go down a cave to a loading area, where youll find a big truck, inside the truck you have to pull out the L hand crate and go behind the other to get the Crowbar.
Go further down the cave (notice the black steel construction L) and come to a work area, theres a red Generator with a Crowbarlever next to it, start up the Generator with it. Go back in the direction of the truck and now climb the steel construction to the R of you, (just past a closed gate) push the button in the machine room and a trapdoor opens next to the machine. Drop down onto an elevator, look in N wall for the CS and follow to an alcove with a MS. Dont use it yet, first turn R and sidejump onto the slope floor of the alcove, grab and shimmy all the way L as far as possible, have full health before you drop, climb up R and go R, get a Secret, some Ammo at the window, go back to the other side from where you can climb all the way back up to the MS, get the MP on the way. Climb into the CS at the MP and drop into the passage at the MS. Turn R from the drop, grab the MS and go R into the passage, drop at the ridge and jumpgrab the lower part of the MS, go on to where you get a screenshot of Lara from far below and L into a passage there, follow and up the ladder, save at the top and go over the edge. Immediately jump/roll and grab the edge at the end of the slope. Pull up and backflip/roll to land on a sloped block, jumpgrab to the block in front from where you can get up to the roof of the Ctrl room.
The Jeep Keys.
Push the button to open the trapdoor and drop in and go around to the cafeteria to get a Grenade-gun and the Jeep Keys from the Cola machine. Look through the window and see 3 elevators and some kind of path through the rocks connecting them, there are 3 Ctrl buttons on a walkway in the Ctrl room to get the elevators on the right level so the path is connected, the R most elevator has to be in the upper position. The L one down and the centre one on the level of the path. Open the trapdoor, climb down to the ground and go up to the truck, to the black gates, get the MP there and go through the CS to where the Jeep is. Drive it through the Red fence at the CS and to the big gate (there is one more Gate behind it, well come to later).
Exploring the Route/ Cat Eyes.
Now we go explore the route through the caves you will have to do to get the 4th Secret later and get the 3rd Secret on the way. Drive the Jeep down the cave ahead, breaking the fences and L, over a narrow path with a short jump in the end, go L and park the Jeep in the next wider corner, walk back a bit and you can dive in the water through a gap L, look for an UW opening where you can get the Cat Eyes. Back to the Jeep, you will have to swim around to get to it and take it up a narrow slope, over a path past a waterfall R, cross a higher path youll ride later and through an opening in the rock wall, up to a wider cave, go L and down the slope, follow that cave to the dead-end and go up R, jump the gaps in the path you crossed before and through another small tunnel, now be careful, you have to stay on the higher rock face steering R and make a U-turn around the deeper part to the L over a hill into a deeper part, here youll see a slope up on the L side and one down on the R side, park the Jeep and go stand with your back to the steep Up slope, back up as far as possible and backflip/jump/grab the CS to get the Secret Ammo.
Go back to the Jeep, back it up as far as possible and make speed to get up to the higher slope and youll jump over the 1st Black Gate. Now this is what you have to do in the timed run for the next Secret. (Notice the Watchtower behind the 2nd Black Gate.)
There are 3 possible solutions for the Double gate puzzle but the only following will gave access to the 4th secret.
1- Push the switch next to the first gate and quickly ride the jeep along the path you explored, as fast as possible up that last steep slope and youll make the jump over the first Gate, so you land between the 2 of them. If you have run fast enough through the canyons the 2nd gate will be still opened and the Watchtower door with the Secret, Ammo will open when crossing the 2nd Gate.
2- If not stop the Jeep close to the 2nd gate and push the button in here, the gate you jumped opens, go out fast and just around the R hand corner is the button to open the gate at the jeep, run back in and hop in the Jeep to take it through the Timed gate.
3- Another solution to the Double Gate puzzle is push the 1st switch, use the CS at the R side of the Red fence you opened before with the Jeep, cross the second gate and press the switch that open the first gate, ride the Jeep and cross both open gates.
After this you can drive down to the work area with the elevators, the door just R of the steel ladder you climbed should be open. Drive the Jeep in and bump it against the yellow button, the elevator goes up, drive through the tunnel, through the centre elevator and into the 3rd after the slope, bump into the yellow button and it goes down, drive out and into a wider room, R and to a closed gate. Leave the Jeep and walk back a bit, look for the CS up in R hand wall, go through and follow the next passage to a sloped one with a Boulder up L, shoot the Boulder with the Grenade-gun and head back to the Jeep and just tip the gate, it will break, back up and get out of the Jeep, go through the gate and onto a break floor (only with the Jeep, that is.) Get the Secret, some Ammo in the R hand alcove and go get the Jeep, break through the floor leave it here. Go to the alcove SW and get the 2nd Pair of Cat Eyes.
Drop out and get up in the NW passage.
The Pyramid and the Cat Temple.
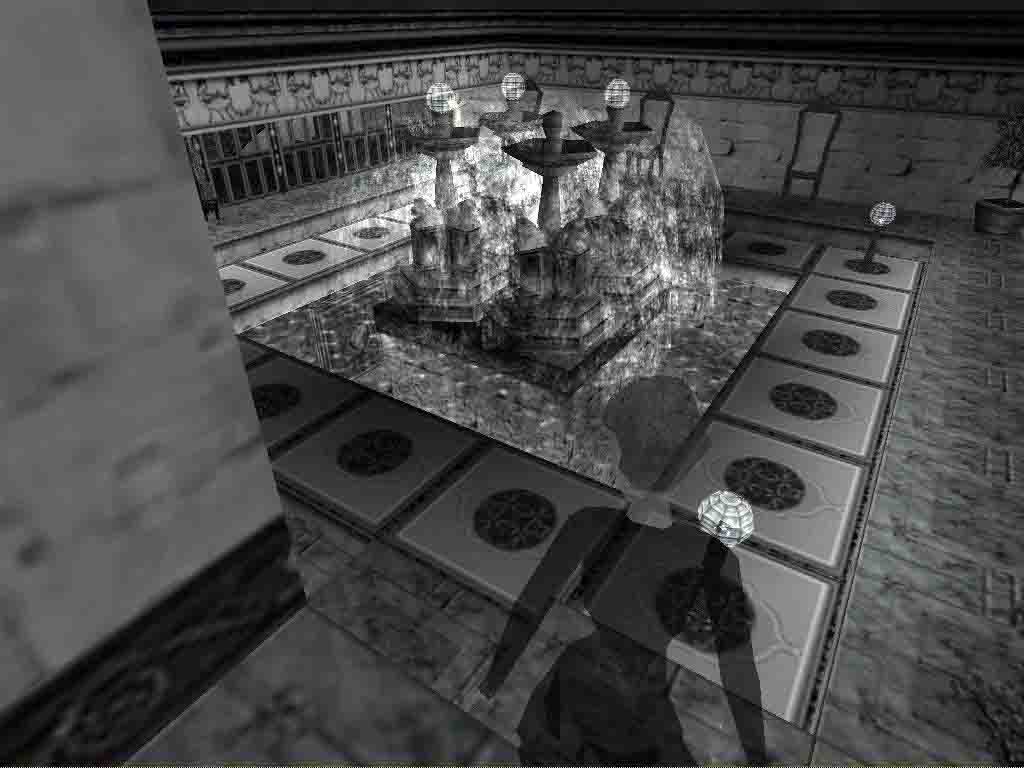
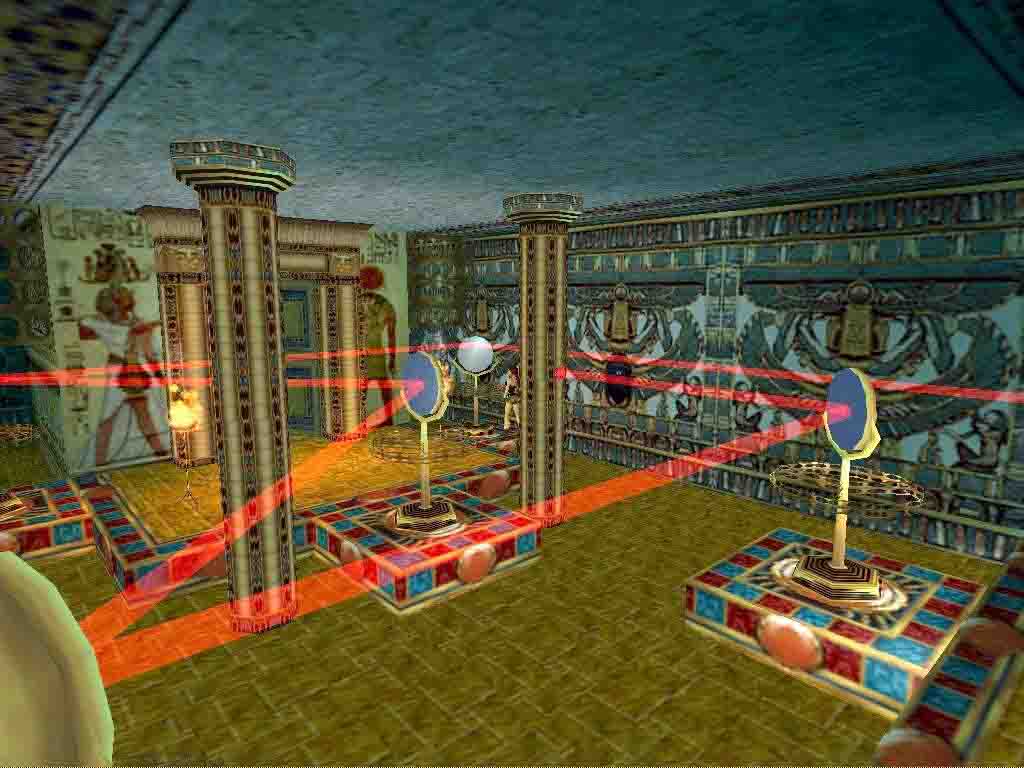
Push the button and a block lowers in the Pyramid. Great action, the folding ladder. Go up and over, slide and jump over the Spikes popping up out of a folding ledge, get some Flares behind the big obelisk and look E, on the roof of the veranda is some Ammo, stand on the veranda in the NE corner of this square and backflip onto the pyramid, to land just next to the roof, jump back with a sharp L curve to land on the roof, get the Secret, Ammo and go N. drop into the next square with a Cat temple. Go into the SE passage besides the temple first to get the Grenade-gun. There are 2 Statues in front of the Temple, which you have to unwrap first, shoot the cover to reveal the Gold cats and place the Cat Eyes. The temple opens up. Go in and it looks like a big stone is shielding the entrance down. Go L of it and push in a block L, the Stone lifts and reveals the stairs. Go down and push the Golden doors L open. Enter the Mirror room.
The Mirror room.
The Statue L has the Timeless sands, shoot it to open a door on the opposite side, go in and go past the Mirrors with some jumps, light a flare to find a lever in the passage back there, throw it to flip over some Tiles in the Mirror room and lower the floor so the mirrors can be moved there, now go place the Mirrors on the tile sin a way that they will reflect the laser from the other statue to the red button on the pillar. You cant do much wrong here, if the Tile rises, the Mirror is in the right place when 4 are placed there is another one you need in the back passage, go pull it out and the Laser will open the doors, get Queen Taras Image and hear the Pilot talk to you.
The Escape. (timed run.)
You have to hurry now, run out of the Temple and into the opposite building a bit R, L and hop into the CS, sharp R around the corner and up L where the Boulder was, several cut scenes of Guards coming in to take care of you will make the escape hard, slide into a cave with a Guard, just run past, keep an eye on the health and run down to where the Jeep is, L and to the steel pillars of the Ctrl room. Go L into the ladder to the Ctrl room, up ignoring the Guard below and go hang R on top, backflip/roll and turn R, up to the roof and backflip off, run to the corner at the Chopper on the square under the rope-winch. When you arrived in time, the Chopper will drop a rope, if not the Sam site will take it out. Climb the rope and backflip into the Chopper, Josep himself seems to be the Pilot. Uh-Oh!
Secret count 23.
Walkthrough by Dutchy, notes by CC
8. The Movie Theatre Part 3 director: Michael Prager, Germany
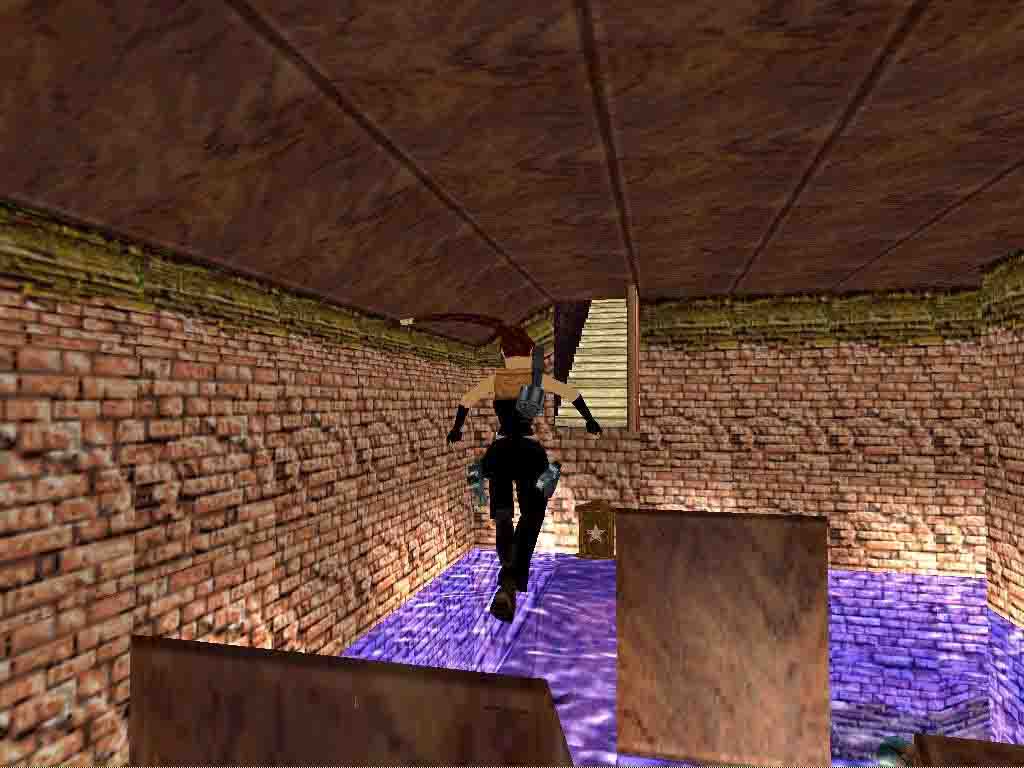
The Timed Jumps.
Well heres another nice one. A timed jump sequence with a MS. Get the Walk of Fame Star of the wall and save in front of the switch, the switch is for the Timed door on the other side of the basement. What I did was pull the switch, hop back with a R turn, so you face the room, backup to the wall and do a runjump with a R curve to land on a sloped (to the R) block, slide and at the last moment a jump/grab with a R curve to the ladder on the sloped pillar, go R around the corner and up, over the edge and slide/jump/roll/jump/grab the MS, go R and drop onto a pillar (in the centre and facing R a bit), you have to slide onto a lower sloped block, from this one a jump/grab to the ladder, get Laras feet on it and go R, around the corner to the end, backflip and immediately (no slide) jump sharp R from the sloped block you land on, grab the floor just next of the ladder you backflipped from and go R to the 2nd Texture square, pull up/backflip/roll with a R curve to land on a sloped block, slide and jump to the one a bit L, this one you really have to slide to the end before you jump with a L curve to land on the UW ledge under the Timed door, get in fast and up the stairs a bit, roll and jump/grab the ladder, go up and quickly get into the CS and get the Secret Flares before the gate closes. Drop back out and place the Star under the Timed door. Go up again and shoot a Dog, get Movie Star 2 and go into the 1st Hall to go to the 3rd Cinema.
Secret count 24.
Walkthrough by Dutchy
Cinema 3-Ocean and Jungle.
9-10: Pirates of the Caribbean (2003, Gore Verbinski) director: Michael Allan (The Cowboy)


Secret: 
9. Pirates of the Caribbean-The Black Island Director: Michael Allan. (The Cowboy)
I
forget where all the pirates and gunmen are and all the pickups, but there
pretty obviously in view as you go along.
(In
the crates are Goodies.)
I
ran along the beach first to the very far right side and found the entrance
with a bush outside (where you go down to a small beach at an inlet-D). Inside
there's a medpack and a fire on the wall (this is where the torch will be
lit). Go back to where you came from and to the L is a big opening in the
rocks to a jungle. There are two different ways into the jungle, over slight
rocky slopes. The one on the right triggers two jaguars, so I suppose that's
the best one to go to first and get rid of the jaguars.
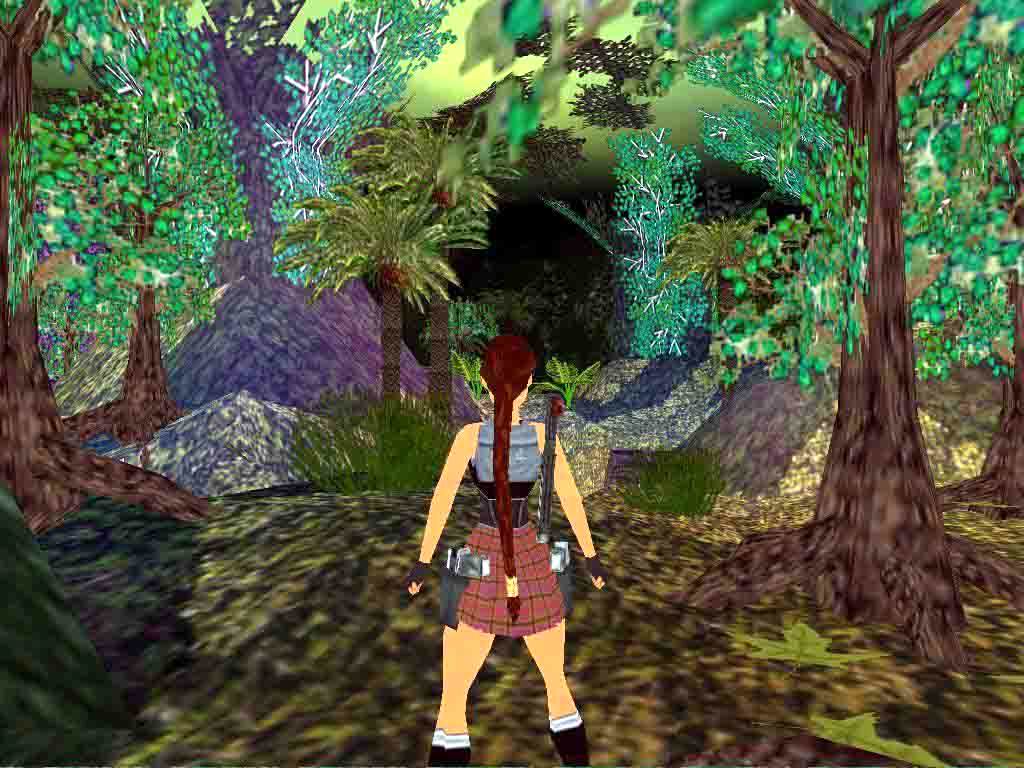
Then go to the one on the left and keep going through the jungle until you
drop down a dip on the left. There's a 'face' tile just there in the wall.
Push it in. Inside are shootable jars and bags. Shoot the jars and bags beside
the door first to get a key, a skull (1st secret), and other pickups.
Shoot the stuff over the crossbow last, a wraith is released. The only water
nearby I know of is the beach so head there to put it out.
Back to where you got the crossbow, and continue through the jungle here until
you see a wonderful bridge crossing a gorge. A beautiful blue macaw flies
in, unfortunately you'll have to kill it. Cross the bridge quickly (take running
jumps to leave some of the tiles in tact if you like) and continue forward
up onto the rocky slopes until you see water. Leave the water pool on the
left for the moment and go to the water pool on the right. Near there is another
hidden greenery entrance.
Inside
are statues on each side and a spiked Skellie ahead. Use the key near the
door and look behind the statute on the far left. Run across the breakable
tiles on either side, that leaves the centre ones in tact so you can run out
again. Collect another skull (2nd secret).
Back outside to the other water pool and swim down. Find the exit and swim
up. Kill a jaguar, shoot everything and collect pickup. Ahead are spikes and
see a switch ahead. Jump into the alcove on the left, stand on the skull tile,
and do a running jump around the corner to the switch. Take the green mask
and pull the switch (this opens the huge gates outside in the jungle). Get
back outside (the centre Spike tile in the pit is harmless-D) and recross
the bridge. Keep going left through two different jungle areas until you come
to the gates you've just opened.
Go inside and trigger a flyby that shows two gunmen on the left. Go there
and kill them. Shoot crates and get pickups.
Get the torch near the gates and go back outside and along the beach to light
the torch. Back to where you found the torch and light five sconces on the
walls. This opens a face tile and inside is a switch. Pull the switch and
run back outside quickly and jump onto the block because a huge snake is after
you. (Great Snake !-D) You're safe on the block to watch it for a while. The
switch has raised a block nearby so you can get up to the next level of this
temple.
Beside the hole you've come through there is a wall of skull textures, climb
this to the next level up. There's a switch on the L wall (almost impossible
to see), push it. (Runjump to a ledge on S wall outside to get some grenades).
Get back down the way you came and go back out to the jungle, almost in a
straight line ahead through the jungle, through the gap between areas, until
you come to a statue behind a bush. Looking up and left of the statue and
see a tree in the corner above. You can get behind that tree. Go through the
gap and through the newly opened door.
Run quickly, beetles about, and through the crawlspace. (the next part even
the beetles find too scary -D) Run quickly again as spikes come out
sideways. Use ropes to get to the other side. In a room with water below jump
across to the wooden ledge which will drop as you grab it and you land on
the ledge below. You can shoot the snake in the water from here. Go into entrance
and see a slope up.
This has two boulders, back up to trigger each and run and jump over the spike
pit at the bottom, the boulders will roll into the spike pit. At the top wait
and look. Two switches on the side. Run quickly to each over breakable tiles
before the corkscrews come down, and run through the open door opposite the
entrance. Down the step and out to another huge room with water below. Shimmy
along the edge ahead and pull the switch.
Drop
into the water, I found nothing where the statues are. Jump back across the
water and climb the skull wall. Pull the switch and the room outside has flooded.
Swim down and get out quickly onto one of the balconys as two snakes are in
the water. Try to kill them from the balconys. Inside the W balcony beetles
will come after you, if you shoot the vase, just get the Ammo under the Darts
and go over to the E balcony. A door has opened in the room of the E
balcony.
Run through towards the outside, mind the spike pit just outside the door.
Run through the jungle and go up the slope to find the exit. The door opens
as you approach and a gunman shoots at you. Get rid of him and you see you
are above the falling wooden ledge you grabbed earlier. Shoot the vase and
get the second green mask. The ledge will stay in place now for you to jump
across, back the way you came. Some gunmen on the way will shoot at you.
All
the way back to the temple area with double door, climb up the skull wall
again, to the top balcony and find the receptacle for the mask. Shoot a gunman
guarding it. Place it, jump across to the other receptacle and place the second
green mask, and the double doors below open. Drop down and run through to
. . .
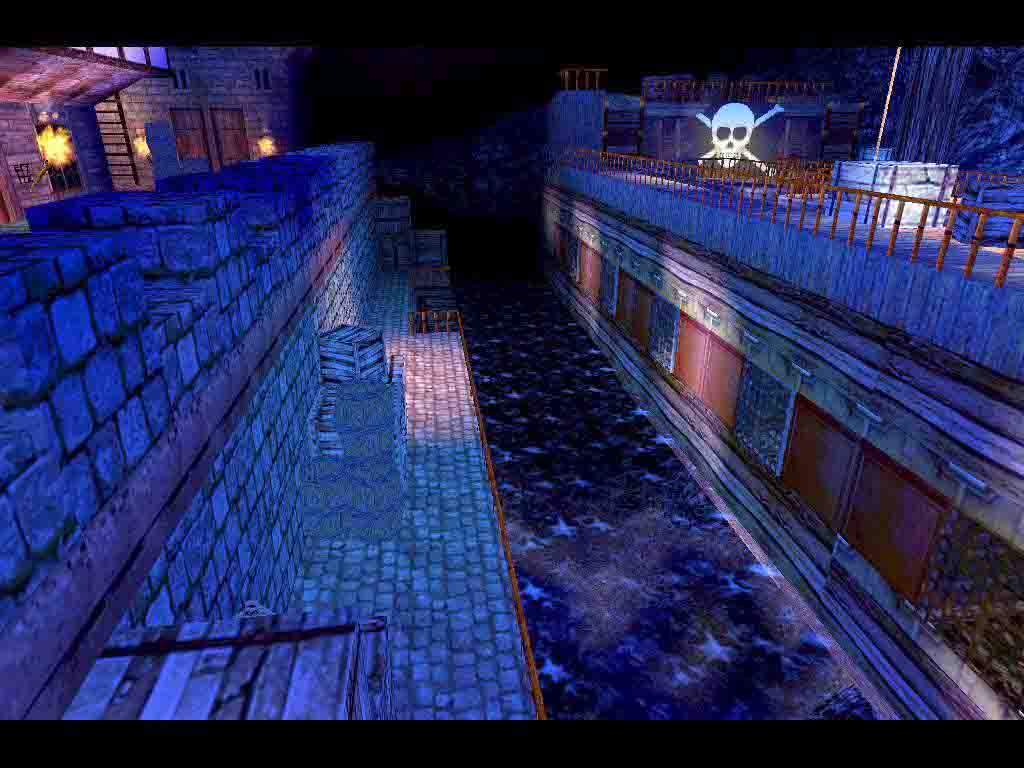
10. Pirates of the Caribbean-The Black Pearl Director: Michael Allan. (The Cowboy)

Secret: 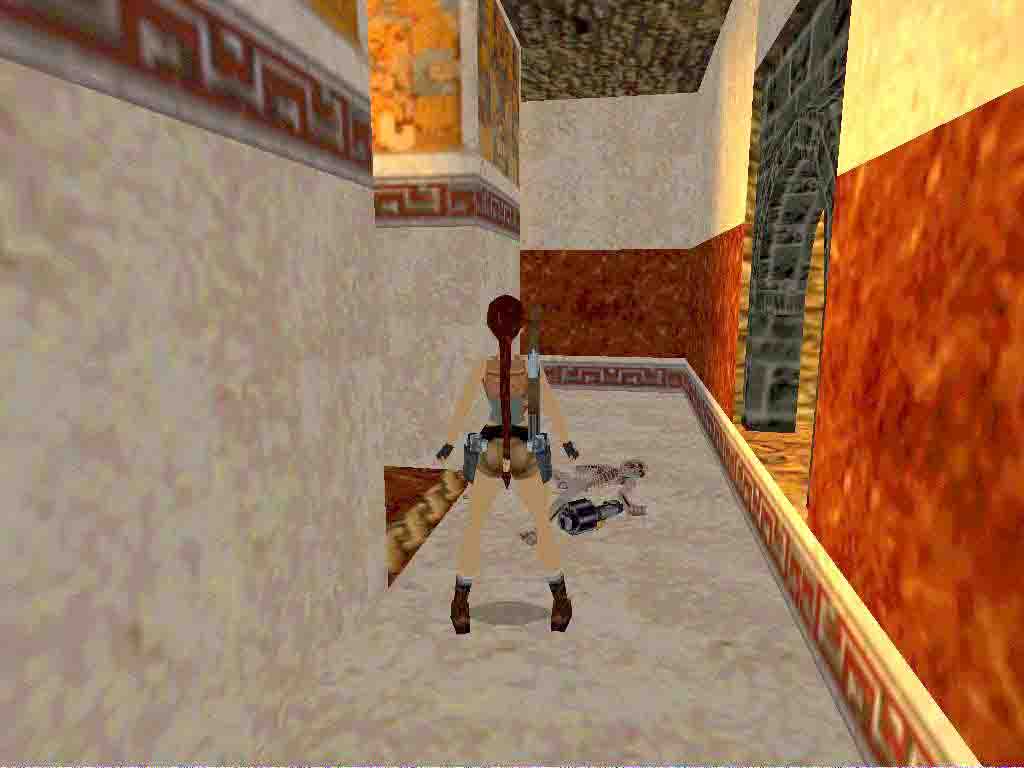
The Black Pearl.
It's very dark here for a while, run forward and see a large cave with water
below, a waterfall and ledges, a ladder and a gate below. Make your way around
the ledges and find the crawlspace with ammo pickup. Back to the side of the
waterfall.
Just underneath the waterfall is a crawlspace. I tried and couldn't jump to
it, or fall from above. The only way to get in is to run off very near the
left side of the waterfall and Lara will grab the crawlspace on the way down.
Crawl in. DO NOT stop when the screen shakes and you hear a boulder, keep
crawling, because a boulder is falling, but it pass Lara harmlessly. You crawl
into a dark room, but as soon as you move around the fire sconces light up
and you can see everything.
Climb the back wall and jump across the beams to the switch.
Pull it and see the gate outside open. Go back that way. When you go across
to the gate two gunmen fire at you from the top of the waterfall, ignore them.
Pick up the medpack inside the gate and don't be scared of the spikes. Jump
up and grab the ledge above the spikes.
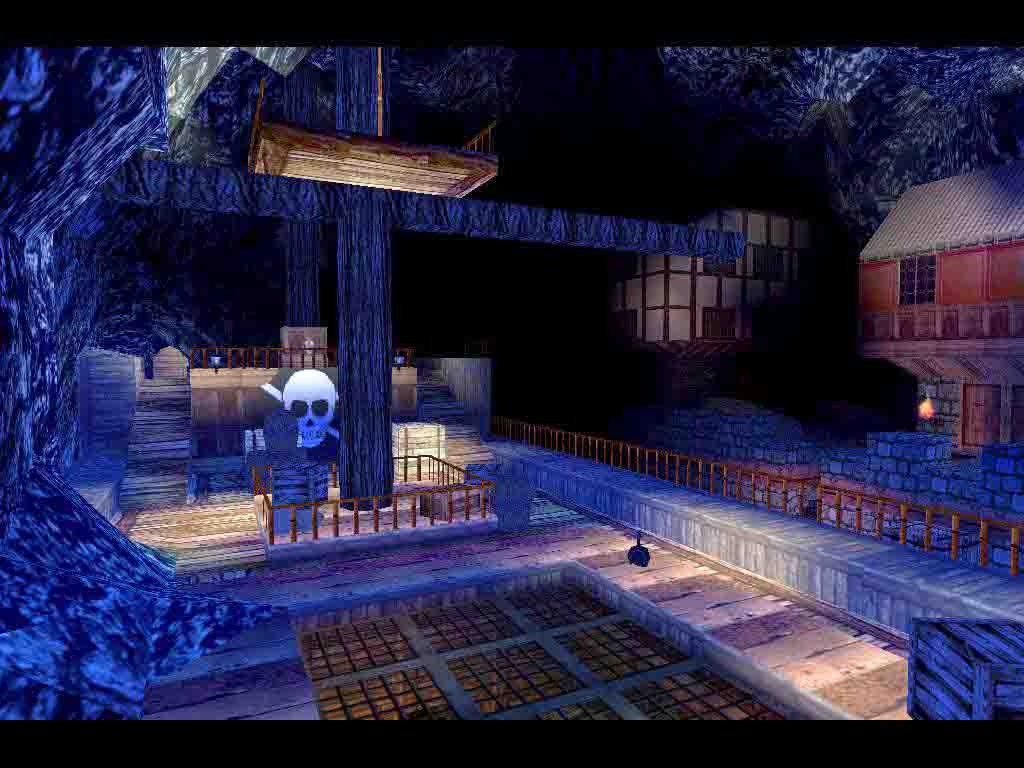
Keep
going forward until you come out to what looks like a tavern in a huge cave,
the Pirate hideout. Run along the steps on the left and get onto the balcony
of the tavern and around to the far side to a crawlspace. Drop from the crawlspace
and run to the left to trigger a well-dressed mummy! Lure him away from the
skeleton and go back to the skeleton to pick up the grenade gun and skull
(3rd secret). Blow him away and his friends on the other side of the
room. Pick up all the goodies. Back outside to the balcony of the tavern.
Go through the large gap in the wall to the other area. Stay on the right,
or trigger the boulder on the left if you like. Keep going around, over a
spike pit and stop when you see slopes to jump to. This is fairly easy, a
single jump to the first one and jump to grab the last ledge. The whole floor
has spikes. Run in a use the switch (this opens the door of the tavern outside).
Come out and deal with the gunman, and go back to the tavern.
Inside
is a ghost and a mummy, deal with them here or run outside and get on a block
for safety.
Inside on the right is a raised piece of floor with a cabinet and treasure
map on top. This is a timed run trigger tile. Run upstairs and see the door
that will open so you know where to go. Back down and start by running over
the tile, sprint on the straights, or running jumps all the way, through the
door.
Climb the ladder for pick ups.
Run along the arched green corridor to a room for a pickup. You could waste
grenade ammo blowing up the chest if you like. Open the nearby door and see
a run across breakable tiles, dont touch them yet. There are no spikes so
it's safe to fall through. Ahead is a keyhole, so where's the key.
Back
where the large chest is there are barrels. Some of them can be pushed, the
key is under one of them. Use it at the door.
In here climb up to the next level and climb onto the beams
(in the back and to the R is a place where the beams are lower, so you can
grab up), and then
through the opening up there. Outside trigger a flyby of a brilliant pirate
ship and docklands. Jump over the battlements to see a closed trapdoor (for
later).
Get down to the ground on the ladder here. Run all along the quays to where
you see another door and keyhole. A Ghost Pirate takes off to the lower quays
N, follow him shooting and crates will break on the way, get the goodies and
go back to that door. Climb the ladder R of there and get a camera shot. Forward
to a mine shaft. Run off the edge to clear the spikes. Get the gem and wait
for the ball with spikes to drop. Go back to the spikes and carefully run
through the spikes and grab the ladder to get out. This is very, very difficult
and you have to be very precise. Even when I did it I was shocked when she
finally grabbed the ladder and climbed up. (Stand just in front of the Spikes
and run as soon as they are up, maybe even try a bit sooner and DONT
use jump, only Ctrl + Up keys. Lara always goes higher with only Ctrl
+ Up. It will not be too hard then. D.)
Go
down to the water's edge and shoot the shark, run along the quays to the S
side, shoot all crates on your way and use the rocks to get onto the ship.
Go all the way forward to the captain and shoot him and his mates. Pull the
switch behind the steering wheel (a camera shot of a trapdoor falling). Go
back to the other end of the ship and down the stairs. Check all the canon
rooms for pickups and go forward to where you see a circular blade trap and
trigger a flyby. Go sidejump through the blade and into the right for pickups.
Back outside and see spikes shooting out. Use the monkeyswing and just keep
moving forward, when you drop run forward and place the gem, quickly jump
R as a ghost is shooting you in the back. You are now in the captain's quarters.
Pick up the Lasersight + Revolver and get another pair of ghosts (very good!).
Shoot the light above the table and a door opens nearby. Go through and use
the switch in next room. Go through the traps S and back on deck.
Kill more ghosts outside. Climb the pole up the forward mast, use the ropes and climb another pole up to the 'crow's nest'. Get the key. This triggers a wraith. Do a running jump and dive into the water below. Swim to an UW gate in the S side of the harbour and open it, get a Key from inside and get back on the quays, to the Mine NW and open that gate with the key, go in for a Skull and a Shotgun (4th Secret). Go out of the Mine and open the door in the building to the R of you.
Go
inside and pull the switch. Immediately roll and run towards the water outside,
you've triggered at least three wraiths.
Climb that ladder again to the battlements. The trapdoor is open and there
are spikes shooting out. Drop back and grab the ladder at the appropriate
time through the spikes and climb to the bottom. Go into the corridor and
trigger a flyby. This is a terrible run across breakable tiles. At one time
at least you can grab (I think the fourth tile!), this gives you time to save
and reload to make it the rest of the way. (Stand at the start, be sure to
have full health and look at the 2nd platform, back up to the wall,
runjump/roll in the air over the corner of the 1st platform to
the 2nd, turn L and sidejump L to the 3rd, hop back
against the wall and runjump/grab the 4th, almost in the centre
of it, pull up, turn R and standjump to the last, one more standjump to the
ledge. - D)
Open the door and go through numerous turns in a mine and shoot everything, (generally going SE) until you come out to another building. The entrance has spikes. A jump through with action gets you in. You trigger ghosts. You could run up the stairs and tackle these guys up on the wide balcony. When done go down and get the gem. Go back up and jump off the balcony and use the gem. The gate opens. Run through and slide down, with boulders behind you to the treasure room, and the level ends.
Secret count 28.
Walkthrough by CC, edited by Dutchy
11. The Treasure Island Director:Antonio Tarantello (Psiko).


 Secrets:
In the Woods.
Shoot a Scorp and get the 2 Ammo pickups, get out through the E hole in the wall and go L, jump to the lower R hand ledge in the pool to get the Ammo, dive in to get a Pickup under the ledge and swim up to the W side of the ledge to get out, shoot the Croc and climb back up to the higher W ridge, from here you can see the ladders in the NW corner, runjump to the lower ledge under the ladder and climb up and R to the pillar with the MS, follow to the pillar with the plant and run off grabbing the crack in the E wall, go R and climb through the crack to the other side, drop and go L to the end, get the MP and hop on the block with the tree at the corner. Climb the sloped wall R of the tree and pull up over, slide to the grassy island, the lever will open an UW gate under the floor where you got the MP. Dive into the pool and get the Ammo under the lever island.
Swim to the next area through the tunnel along E wall and climb out just over the gate, follow the bank to the W and get some Ammo, up the ladder to a crack in the wall, release Ctrl for a moment to hang and shimmy R around the corner to a hole in the wall, overlooking a wooded area. Shoot the Scorp while youre up here and look R to spot the ½ MP below, get that first and explore the woods for Pickups and end up at the hole in the wall N, go through to a canyon with a pool down below, follow the L hand ledges along the canyon to a ladder on a pink pillar, to the L and up is a gate, to the R are 3 Skeletons taking a nap and beyond them a big set of doors. Climb down the pillar and from the ledge there you can shoot yourself some Croc-meat jumpgrab the opening in the centre rock, go in and use the switch to lower a block at a lever. Drop back out of the room and swim to the lever E, this will open the big doors and wake the Skeletons up.
Explore the water for Ammo and Flares and go up in the SW corner, jump up to a higher ledge and from the tree there a runjump to a pointy ledge sticking out of the centre rock, then to the ladder and up to go for those doors R, team the Skellies up together so you can shoot all 3 with one arrow and walk out onto this beautiful beach, out in the water is an island ( with a big tree) with some Ammo on it, L of you behind the dark Rock W is a path with a switch in the end. Dive into the Crystal clear water and swim to the island and approach the V shaped point sticking out to the shore in a straight line, you can climb up that point, (the bottom of the V) get the 1st Secret. (Thanks eTux) Swim back and get into the path behind the rock, the switch opens the gate at the pink ladder.
Return there and go through to the next area, shoot the Scorp, get a ½ MP on your way S, dont run off the cliff, but jump onto the sloped rock going down into the deep, slide forward and jump to a ridge ahead, get the 2nd Secret, a Revolver and proceed down. Go through the passage S, shooting the Pirate and in the next cave go up the SE ladder, backflip to the rock way up and jump to the N rock, then to N wall and go into the deeper part, theres a Boulder alley here, go up to find the exact spot that triggers the Boulder and stand in the centre of the alley, facing down, take a step back to trigger the Boulder and runjump, then one more runjump/grab to get to a rope that appeared over the central (Spiked) pillar, swing over to the S passage with the crowbar and get it, hop back fast and grab the edge, drop to a lower ledge when the Boulder passed and drop to the floor, shoot the Pirate and go to the N wall where a block lowered so you can get the Touch of a Star Quality. A gate opens in the W, go in.
Follow the cave up to a Lagoon, go L and down to a lower beach, inside the rocks here is the receptacle for the star, a gate opens. Go L of the star and R into the water, in the purple rock is a tunnel where you can get Cartouche Part 1, swim out, sharp L and R into the tunnel in the green rock, Part 2 is in there. Out and back up to the rock with the big tree at the entrance to the lagoon, runjump/grab to the open gate W and up the rocks R, to a lever that will open another gate with a Pirate behind it, go back down to the gate and jump around the R to the lower beach, up to the ledge W, next to the gate and follow around to the W, shoot the Scorp and jump up to the open gate there, shoot the Pirate in the passage to the receptacle for the Cartouche, glue both parts back together, place them and the gate to the Treasure Cave opens.
The Treasure Cave.
Go R and be ready to shoot Skeletons, or just ignore them, theres a ladder on the E wall, go up and backflip to the block to open a first gate with he lever, a Pirate storms out, shoot him and the Crocs from the block down from the block, go E and use the switch for the next gate, go N and just opposite the entrance is a pillar with a Jumpswitch, that will open the final gate, shoot the pirate and go in, jump up and turn, jump to the pedestal over the entrance and grab that Golden Star. The level ends.
Secret count 30.
Walkthrough by CC, edited by Dutchy
12. The Movie Theatre (part 4)

 Secret:
The Door Labyrinth.
Get the Star and the door opens, next is a Door puzzle.
Quite
a confusing part here, use the Map below to find the places I describe to
you. Go through doors 1/2/3 and step on trigger 4, go into the passage with
trigger 5 and enter the passage at door 5, go on to trigger 9 and return to
the #9 door, go in there to trigger door 10 (same door as #2), there is trigger
11 inside, from this square, go straight into the passage ahead and a bit
L, turn around when the R hand door opens and go to door 1, which should grant
access to trigger 13 now. Turn around and go back, L/L/R and follow
this passage to where youll find the star receptacle, door #14 opens and
theres Movie Star 3, a door opens back in the Door labyrinth, go a bit further
into this passage and hear a door close by open, thats door 15 in the other
end of the labyrinth. If you want you can go back and find the
Secret Flares,
return to the passage here and down the passage to the Movie Theatre. Pull
out the Blue display again and head up to the 2nd Hall for Cinema 4.
 >provided by Tombraidergirl.)
(The
light blue squares are the triggers to open the door with the same number,
the exit is at number 14 and the Secret
will be in # 15 after you triggered that door to open, you have to go
back there before you leave.)
>provided by Tombraidergirl.)
(The
light blue squares are the triggers to open the door with the same number,
the exit is at number 14 and the Secret
will be in # 15 after you triggered that door to open, you have to go
back there before you leave.)
Secret count 31.
Walkthrough by Dutchy
13. 12 Monkeys. Director: Thierry Maynard (Thierry Stoorne).
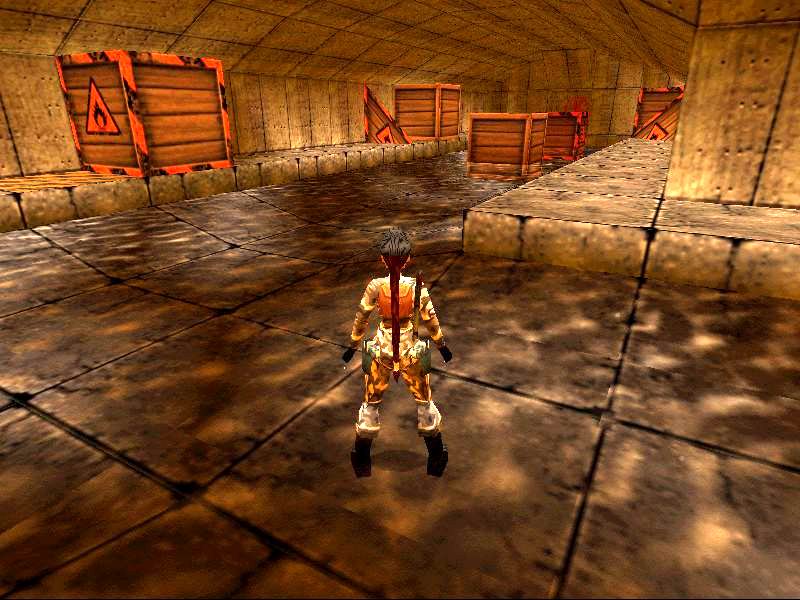
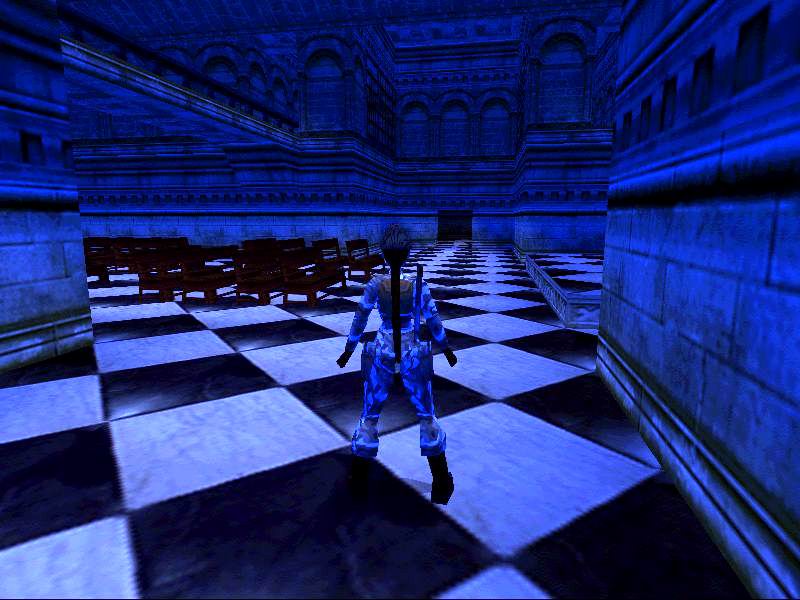
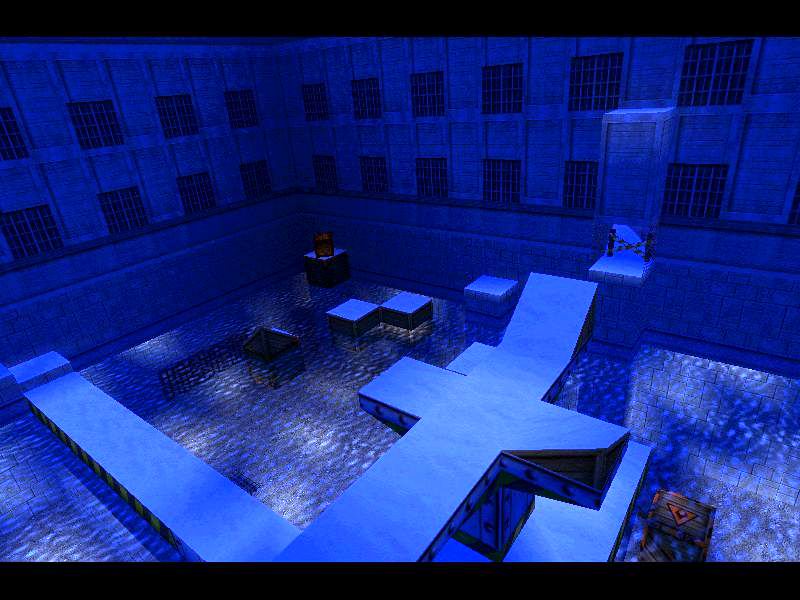


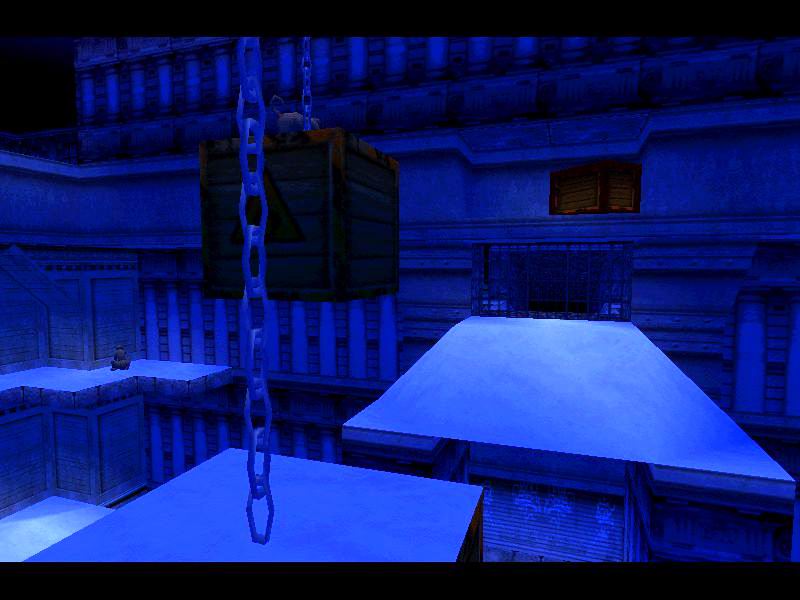

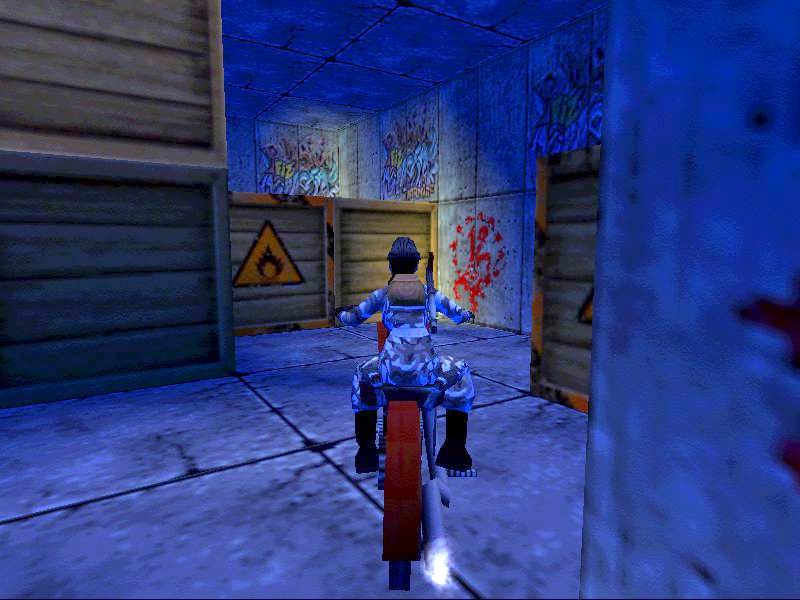 Secrets:
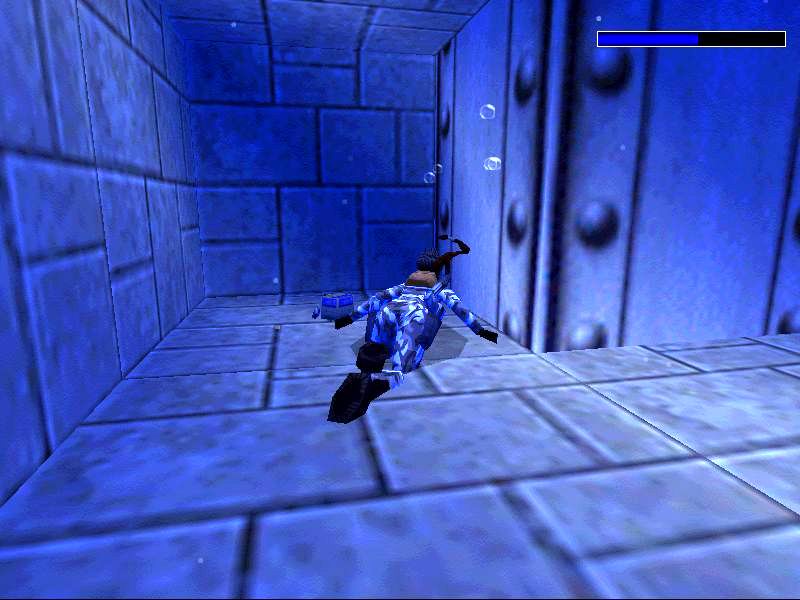
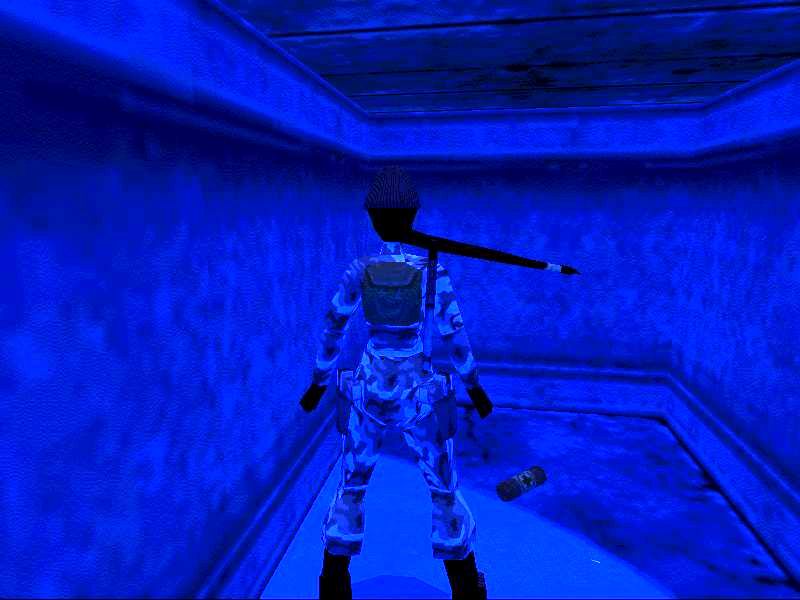
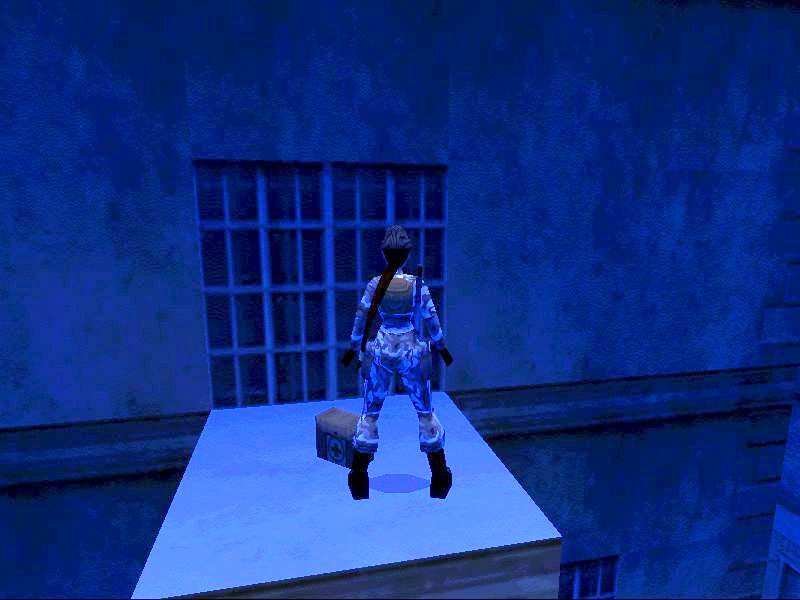
There
is no need to shoot the monkeys.
Level 1:
After
flyby of route through 'sewers' Lara stands in a closed room. Use the slopes
at the gate to get up to the upper walkway. Shoot out the door ahead. Go through
and to the end where there's a hole. Jump over to the other hole, go down
and push floor lever. Climb back up and go down the other hole. Push floor
lever there. Climb back up and a trapdoor has dropped over the trapdoor beside
the hole. Drop down and push the last floor lever.
Get back up into the first room and go through the open door.
Move two crates onto the patterned floor tiles and the trapdoor drops. Go
down and crawl, shoot out the crate and drop into the sewer. Run to the sidewalk
and shoot two crocodiles in the water.
Run along the sewers and to the left. In a corner is a brown crate to push
in, leave that for now. Go to the very end, pull out a reddish crate (there's
a trapdoor behind it), and push it onto the patterned tile. This opens the
gate beside the pushable crate in the corner. Go back there now and pushpull
the crate onto the patterned tile outside. Kill a few bats. This opens the
trapdoor behind the reddish crate.
Drop in and swim until you see a long gate underwater, beside this to the
L is a lever to pull. Swim back a tiny bit and get air (this is a different
air hole to the one you dropped down from). Climb up and up into a room where
you'll see a trapdoor in the ceiling. Pull it down.
Climb up into the vent, crawl along and find a trapdoor. Drop down into another
room. Shoot the crates in the centre and see a hole with water below. Drop
down into the water and find another lever (W and L) to pull. Climb back up
again, and go through the vent again back to the previous room. A block has
moved and you see a ladder, climb it.
You are in a room with a red crate. Get onto the block at the L back side
and shoot out the crate, then pull the other one out.
Go through where the crate was to a huge outdoor area. Now we see monkeys.
Drop down on the street, turn around and run into the street with crates.
The level changes to Level 2.
Run over the crates here and up as far and the fence that spans the street.
The Shotgun is on the left. Sideflip over the fence to the street ahead. Keep
running and shoot four Dogs. The camera changes look in one of the alcoves
on the right, (Laras L) where the camera changes for SECRET # 1,
some shotgun ammo. Run to the next fence (notice the gates L and R
there) and sideflip over it.
Run towards the water and kill two large crows. Jump into the pool and swim
under the brown crate, get the Gate Key, and swim back out. This is
a little awkward.
See a gate in the wall SE of the pool and shoot it. Climb in and climb on
the red crate up to the corridor. The 2nd L corridor has a moveable
red crate. Run to the end of the corridor and see a trapdoor on the floor,
run around to the right and see a floor lever. The idea is to push the crate
onto the trapdoor to get it down to the level below.
So, near the trapdoor shoot out the window and get onto the snow roof. Shoot
out the next L window, get in and push the crate as far as it will go.
Go back out the window and turn left. Shoot out the next window and jump in
that way, or drop down to the ground again and go back in the way you did
before. Climb into the corridor again. Push the crate onto the trapdoor. Pull
the lever and the crate is now down below.
Go back out the window and down to the ground. Shoot out the window in the
NE, and get in there, see the crate ahead of you!
Down here look at the floor. There are three blood stained squares. Pushpull
the crate onto all three blood squares to reveal different camera shots of
2 walls go down and a gate opening up. Go back outside.
A door has opened in the centre of the building. Go in, kill two dogs. Go
around to the back, drop down the hole and get a Yellow Fuse.
Back outside to the pool and a gate has opened underwater, swim in and get
a gem. Swim
back from Gem, to get some air at the air pocket and notice the closed gate
there, turn around to the W and swim to the gate at the pool, look L and swim
into an alcove where a block lowered, pull the UW lever to open the gate to
SECRET #2, Ammo. (Thanks eTux and Kristina)
Now
back to Level 1, side jumping over the fences.
Run to the right side and along the snowy ledge on the side of this big pool.
Do one curved running jump around the pillar onto the next ledge, and another
to the caged off switch. Pull the switch and see the door behind glass open.
Another curved jump around the gate to the ledge ahead. You're on the
far side of the water from where you came into this level. Drop into the water.
Look over to where the Jeep is and see 3 crates
on the bottom at a pillar W, behind the crates is the Revolver. There's
another Yellow Fuse next to the jeep.
Find the sharp pointed snow on a crate on the far W side, climb up on it.
Shoot the red crate in the corner on another crate. Jump over there and get
the Lasersight. Combine lasersight and revolver and shoot the grate
in the water that's under the high crate on the center ledges. (very near
the jeep, you'll have to jump over near the cage and barrier to see this).
Swim in there and pull the underwater lever. This opens the trapdoor under
the pointy crate on the floor of the water area here. Swim through it and
use another underwater lever to open the next one. But don't go back there
yet. Swim back to that crate you got up on before. Turn to face the barrier
between the two water areas. Do a running jump (another curved one) and grab
the barrier.(If you cannot do this, swim to the 1st pool and go
out on the center ledge, jump to the entrance of the area and go around the
other side, where you went before, from the last high ledge, where you got
into the water, do a runjumpgrab to the pillar on the barrier and one more
around the L side of high pillar W of it.) Climb onto the ledge next to the
crane and walk up to the tallest sharp triangular piece of snow, facing the
tall part of the crane ahead, with a cage. You're aiming for that cage with
a running jump. Place the Yellow Fuse and a rope has dropped. Turn around.
Use the rope to swing over to the floor switch, not the above ledge. Push
the floor switch and see gates opening. Drop into the water and get back up
to the rope again, this time head for the top, over the floor lever. This
is a tough swing, and a little manipulating is caused for Lara to grab that
ledge. ( Swing a couple of times and release the swing button, wait for the
moment Lara puts her feet back on the rope and hit swing, jump of and grab
the edge at the first swing. Thanks for the tip Magnus. D )Turn around and
do a running jump to the top of the crane. Keep jumping over the projections
of the building on the left and get the next blue key.
Drop down to the snow ledge below and run into
the left and along the 'road' to the now open gates. This brings you up to
the room you saw earlier through the window. Shoot the crate and get the Blue
Fuse. Back outside this room is a dip in the floor. Place the Yellow Fuse
and the trapdoor drops. Drop into the water and keep swimming until you find
a Blue Gem.
Now go back to Level 2.
Jump back over the fence again and go to the door of the building on the left.
Use your Gate Key and go in. Jump up onto the crates and walkway above. Behind
the crates at the top is a SECRET # 3, a medipack. Get back onto the
walkway and use the Blue Fuses at the sliding gates.
Push the crate in the left corridor all the way forward, pull the crate on
the right once or twice. Now go back to the walkway and go through the right
door, out to another big outdoor area. Stand on the red crate and do a running
jump down to the hanging crate. Jump to the next hanging crate with a monkey
on it, and a final jump to the alcove in the wall with the shootable crate.
There's a crow flying about at this stage, be careful not to shoot the monkeys
by accident. Shoot the crate and get the key. Drop down to the ground and
use the crate to get up onto the ledge, jump to the next ledge, and jump to
the ledge with the wire stairs. Go back the way you came, across the walkway,
and use your Key in the sliding door ahead.
Go in to a room, shoot out the window and get out on the ledge. Ignore the
stuff on the other side for now and run along on the right side, all the way
around and find one ledge with a SECRET # 4, a medipack on it. Go back
the way you came, back to the ledge with the Flares on it, pick them
up, and shoot out the windows beside it. Go in there and shoot out another
window. Jump from there to the snow roof of the church. Go to the right and
find the crate. Pull the crate and push it to the side. Open the trapdoor.
Drop down into the church.
Three or four bats will come at you in different places here. Go to the back
of the seats L and use the two pull-down switches. Go back to the altar, and
jump up into the left alcove. Run around 'til you come out on a walkway. Jump
over to the checkered platform and use another pull-down switch. This opens
the doors above the altar. Go there and pick up 2 Blue Gems.
Behind the altar is another pull-down switch on ground level; this opens the
gate at the end of the walkway above, to another pull-down switch. This switch
opens the gate above the altar on the right for a SECRET # 5,
a small medipack.
Leave the church the way you came! And go back to the building opposite the
church, back to where the key was after the hanging crates.
This time get up to the snow-covered roof underneath where the key was. Grab
the edge and shimmy R or L, pull up in a corner. Shoot out the windows. Jump
up the sloped roof and run forward into a large room, run up any of the stairs
and find four receptacles for the gems. Place these and go back to near where
you shot out the windows. Turn left and down more stairs to a newly opened
gate. Go in and shoot a dog.
Find the floor lever behind some crates. This opens another corridor behind
the crates on the opposite side; pick up the Nitrous Oxide Feeder just
before you go into this corridor. There's a ladder at the end. Climb up into
a crawlspace and drop into a control room. Pick up the Bike Room Key off the
floor. There are two receptacles for two more Fuses on the wall.
Now unfortunately we have to go aaaaaall the way to Level 1 again.
Use the key to get the bike (the door under the stairs facing the first crane).
Drive the bike up and over the ramps of the cranes and through the barrier.
Into a room with crates.
Move two of the crates up on top to reveal a trapdoor in the ceiling. If you
go through the trapdoor now you'll come to a room that's impossible to see
what needs to be done. So before getting up into the trapdoor, drive the bike
around to the tile behind the crate with the yellow stripes, this shows a
column lowering in the next room. Climb up through the trapdoor and crawl
to the next room.
Climb up to the next vent and crawl along straight ahead. You drop into a
room with huge pipes. You can see the room where you have to place the 2 Blue
Fuses later, from here, why no shortcut? Shoot the crate and get the
Uzi SECRET # 6. Get back into the vent and take the first left. You
drop into another control room. Shoot the crate and get the two Blue Fuses.
And now, guess what? Yep, you've guessed it, we go aaaaall the way back to
Level 2 again, go back through the vents, drop into the water where the cranes
are. Swim through the trapdoors to the other side. Get out of the water and
back to Level 2.
Back to where you placed the four gems, and go down to where you got the Nitrous
Oxide Feeder and back into the room with the two Fuse Key receptacles. Place
them. The middle door opens, go through to another room with pink glass and
pipes. Find the pull-down switch and see the door open beside you. Go around
and through the pink glass tunnel and end up in Hounds of the Baskersville.
Secret count 37.
Walkthrough by CC
14.Hound of the Baskervilles. Director: Szymon Cupryn (Emoo).
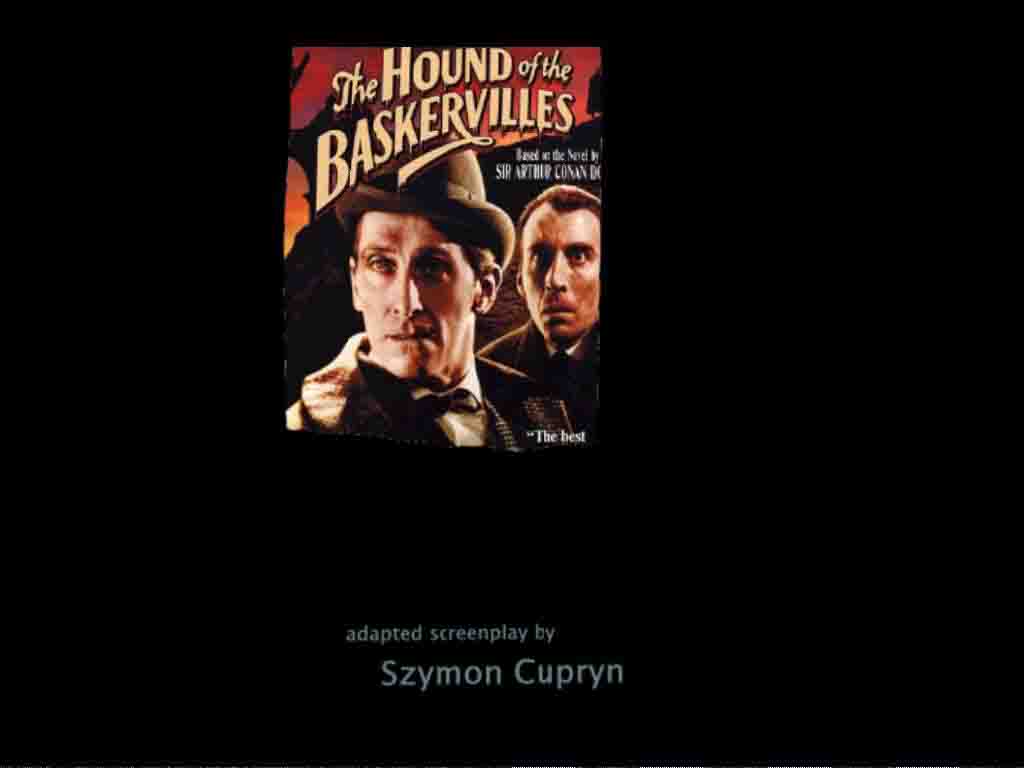
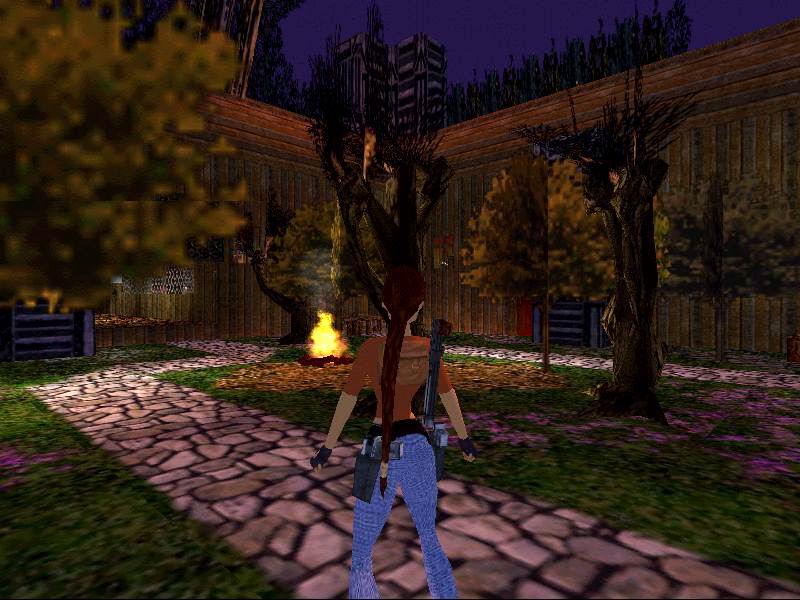
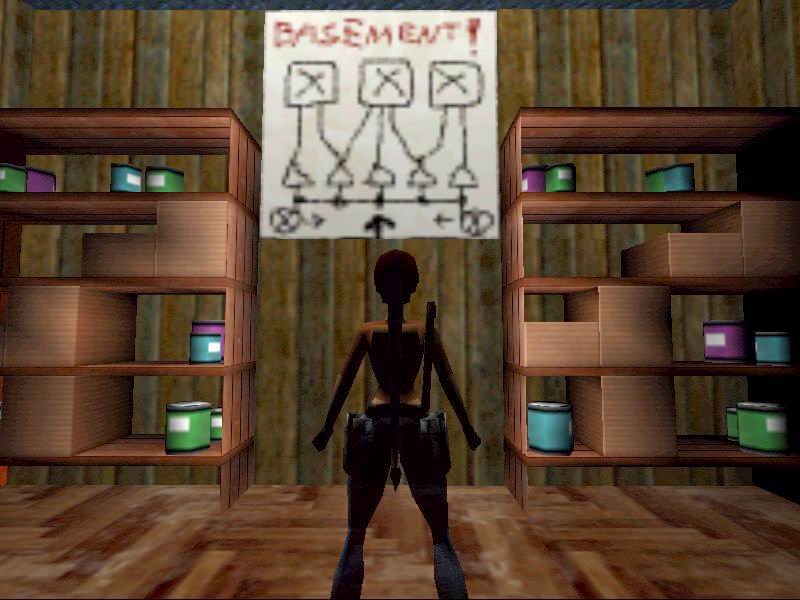


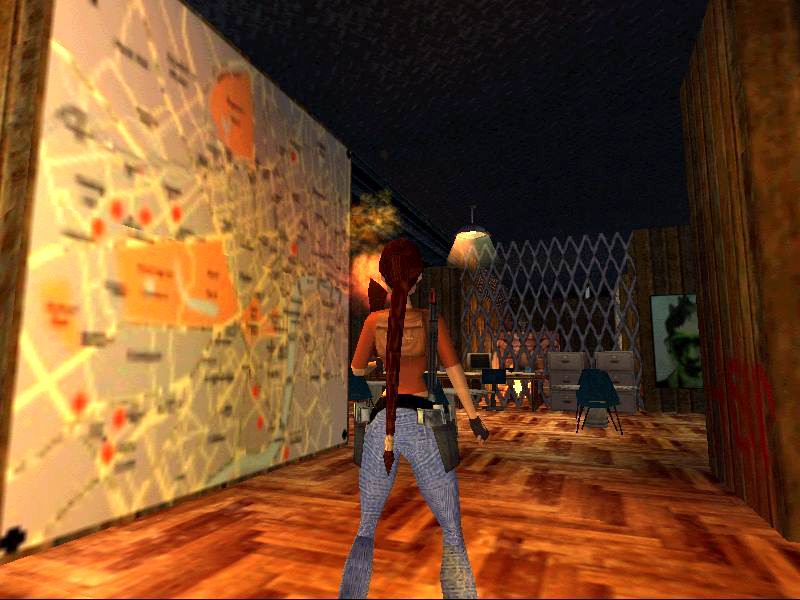
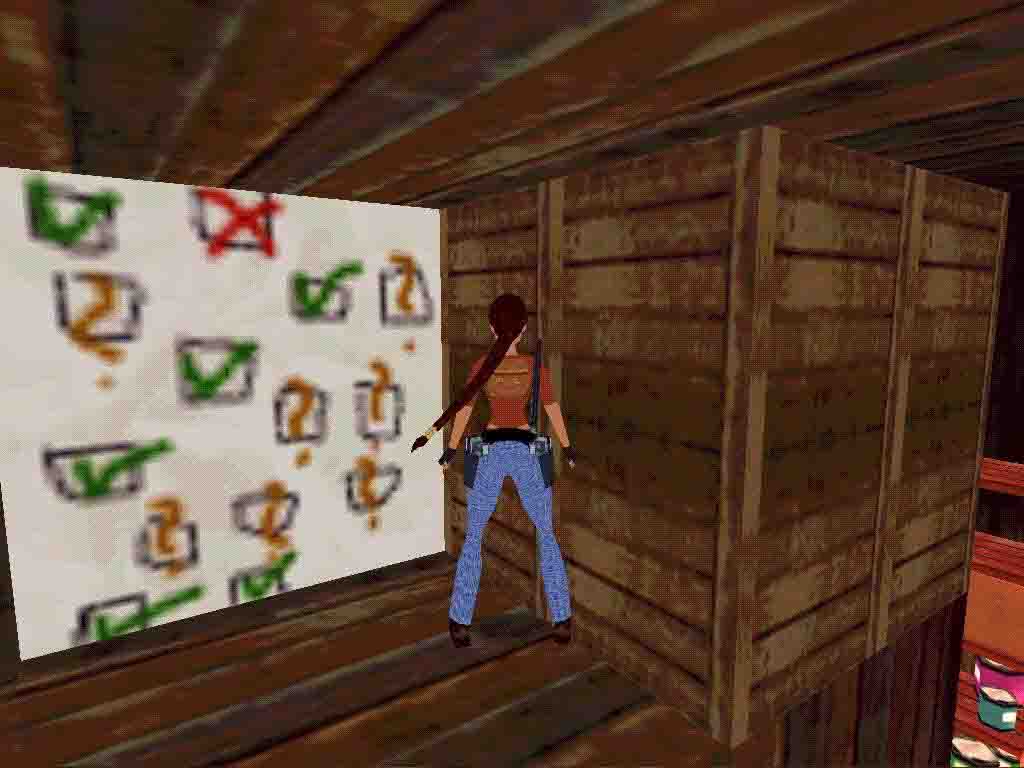
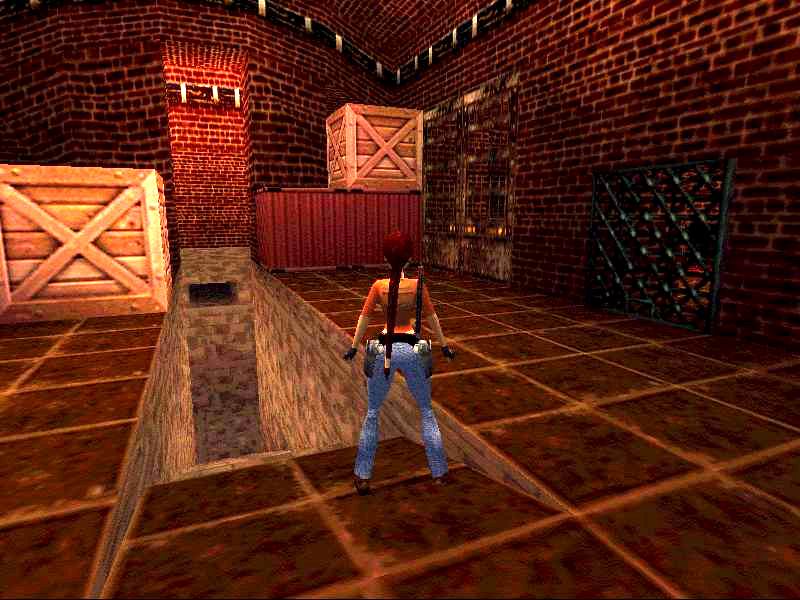
 Secrets:
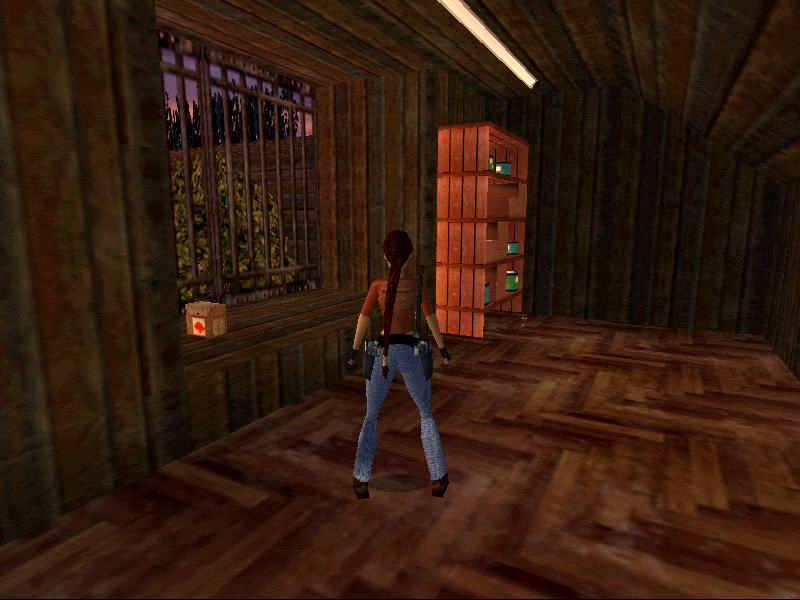
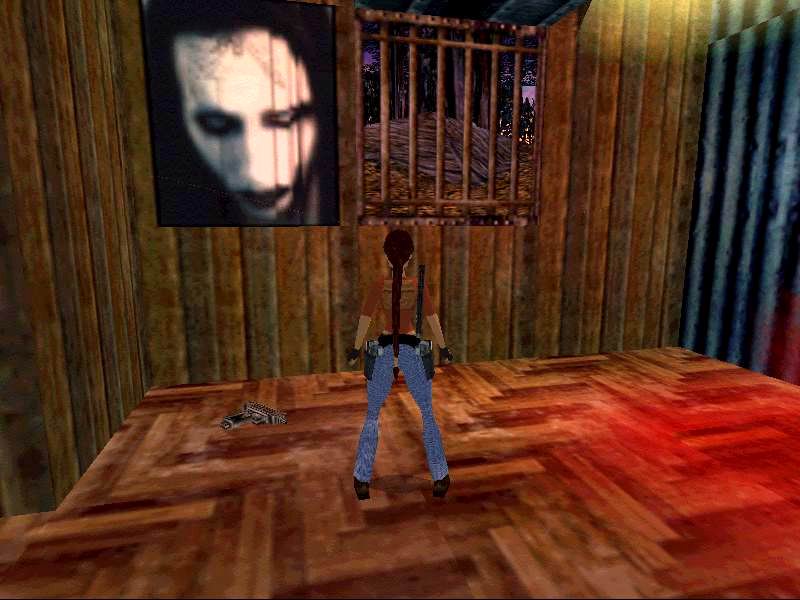
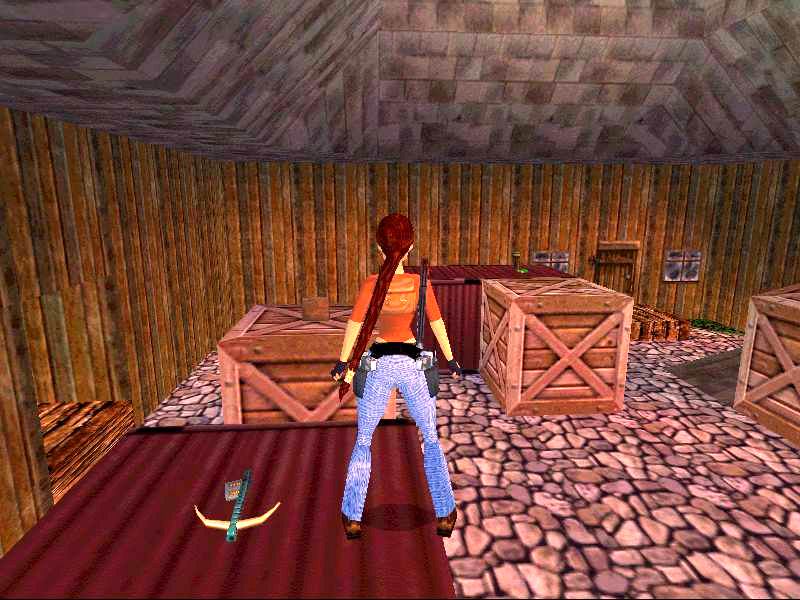
Turn around and use your laser sight to shoot the box high up on E wall of this square. (This opens a door you won't see yet). Turn right and before you open the door there, look West, there is an opening in the floor there. Open the coffin for some Flares and get out fast to avoid the 'beetles'. Run around a bit to shake off the ones following you out of the hole.
Open
the door in the SE corner, but have weapons ready, as you go in two hounds
attack. Have a look at these guys, they're gone beyond the starvation stage!
Get the Flares in the SW corner and your first Door Key (small key)
off the desk. As you can see there are more keys needed for this room alone,
but you can flip the switch there as that will turn on the light.
Go outside again and straight across (N) to the other door to open. Turn right
and go up the stairs. At the top use your First Door Key and roll immediately
to shoot another dog coming up the stairs. Go into this office and get the
pickups SECRET # 1, Medipack, Revolver ammo, and another Key (also pretty
small).
Back down the stairs, you can run ahead into another office and get rid of
another hound, you have to turn on the lights, the switch will also open a
trapdoor in a room for later. There is nothing there to do, yet. The other
door in that small hallway is still closed, that is the way to the kitchen.
Back outside and use the Second Door Key to open the R hand door on the West
wall. Immediately turn or backflip and kill another hound.
Go in and around to the left is another light switch. On the West wall to
the right is a door right under an opening in the ceiling. Push the switch
on the wall and the door opens. In the small room downstairs is the Revolver
and use that light switch down there.(screenshot of a crawlspace) Now go back
up the stairs and into that opening in the ceiling. Standing to the wall North
jump up. There isnt anything to the right so go straight (E) and around the
corner there is an electric switch, the camera shows the room where you picked
up the Revolver Roll and walk East again and you will find the Shotgun
there. Go back to the opening in the floor and now go North and left. Next
you'll see a switch to turn the light on, around the corner from this kill
a hound. At the end is another electric switch but that closes the trapdoor,
you need to use it as it also opens a gate with a Key behind it. So back to
the hole in the floor and on the West is indeed the Key (small golden key).
Pick it up and now go back to that electric switch to open the trapdoor again.
So go North, flip that switch way back and return here again and drop to the
floor.
Use Key in the NE corner, near a door. On the right behind the shelves find some Shotgun ammo, the switch there will open a door nearby. On the left is a shower room. Have weapons ready, run in and turn right to kill another hound. Find the Door key (blue coloured) in the shower, and a second Door key (reddish coloured) in the crawlspace.
Go outside again and over to the office (S) where you killed the two hounds and use the key in the first keyhole on the left. Go into this room and find Uzi, SECRET # 2 and find the almost impossible to see Door key (also reddish coloured) on the floor opposite the Uzi. Go outside again and over to the West. Use the key on the black column beside the long gate in the wall. Go inside and use the switch on the left (see the keyhole further on). Go forward and use the key on the door on the right. This goes into the room where you found the revolver. Go up the stairs and press the switch at the top of the stairs. This closed the door beside up but opens up the kitchen door. The switch next to the shelves downstairs gives a camera view of a crawlspace just be sure NOT to use that again as that will turn on the electricity of the water.
Get out this area and into the hallway on the right, open the door, this is the room with the crawl space and at the end of the room you can pick up some Flares and behind the box another keyhole. Get into that crawlspace and find in the water another Key (pink key). If the water has electricity that means you have to go back and use that switch to turn it off.
Back out this crawlspace and use this Key (pink) on the lock behind the crate and enter the gate that is open now. Use the switch to turn on the lights and a hound will attack. In the room is a map on the wall, remember this as you need this later and also pick yet another Key (pink) from the floor.
Go back out to the square and go to the far left door (NE) and straight into the kitchen. Get the laser sight, R on the stove. Pull out the crate and get behind it, into the crawlspace and find yet another Key (small silver).
Back
outside again and straight across to the office (S) to the keyhole on the
East wall. Use the key and the door to the basement opens near you. But before
going there open the door beside this key. It goes into a toilet, shoot the
hound and get the Medipack.
Weapons ready as you go out to kill a hound.
Now go back to the door down to the basement. Use the key at the bottom of
the stairs and turn to shoot another hound (sheesh, these guys show up as
the most awkward places).
You can push the crate on the right and get some Shotgun ammo but a
gate is still closed so for now go into the basement. When the flyby stops
step back into the corridor as something is eating away at Lara's health and
I couldn't figure out what it was. It happens again but I can't explain it.
(Theyre invisible maggots I think -D)
Get the Revolver and Shotgun ammo from the crates. Pick up the Key
(silver) off the floor, and shoot the fuse box on the South East wall.
Pull down the middle three switches and the centre gate opens. Go in and get
the Torch. Go to the end of the stairs and leave the torch there for
a minute. Go up the stairs and kill another hound. The gate behind the pushable
crate is open now and on top of that box is also a Key (small one).
Pick up the torch and light it on one of the fires outside.
Bring the torch back to the basement and down the stairs, and light the two
torches either side of the entrance door.
First turn all the switches up and the two right ones down. In the next room are some crates and a gate that is closed. On the boxes is yet another Key (silver one). As long as you are in this room use one key at the lock there. Enter and pick up some Flares, turn around and there is another lock. When you use that the staircase in the other room is filled with water. Time to get out as there isnt anything more to do here just now. Turn all levers up and the last two on the left down. You need to go outside again as there is nothing to be done in the basement yet.
Go to the opening on the West wall of the square there is still a gate closed and use your last Key. You see a camera flash showing you some pillars. Immediately climb up L and push the block. It hides a diagram of the pillar room, so take notice. The switch turns on the light. Pick up some Arrows and in the next room is another hound waiting for you. Get the last SECRET # 3, a Medipack, some Flares and the Crossbow. Now go back to the basement and pick up the torch. Enter the opening on the left. (Youll probably are being attacked again jus run out and re-enter) Light the two wall torches and throw away the torch; you dont need it anymore, and enter that corridor. I would save here.
Here is a room with burning columns. Remember that diagram? So start jumping. A running jump to the column left, another one to SW wall. Standing jump to NW. Jump and grab the next (it will start burning, shimmy around and get up in a corner) and a standing jump to the wall where the electric switch is. Switch, you get a camera shot of the other room. South is a small Medipack, get that with a running jump. Back to the switch and standing jump plus grab to the column in front of you, running jump to SE, another one SE and one to the entrance.
In the room where you left the torch is in the corner a Medipack. Again you will loose some health here and leave this room. Outside turn the switches up and the last two on the left down. Now jump into the water and before you swim in that crawlspace the ledge on the right has some Uzi ammo. Swim through and in the next room get into that crawlspace and once again you are outside, walk down into the ghostly forest and back into the theater.
Secret count 40.
Walkthrough by CC
15. The Movie Theatre. (part 5). Distant Galaxies. Director: Michael Prager.
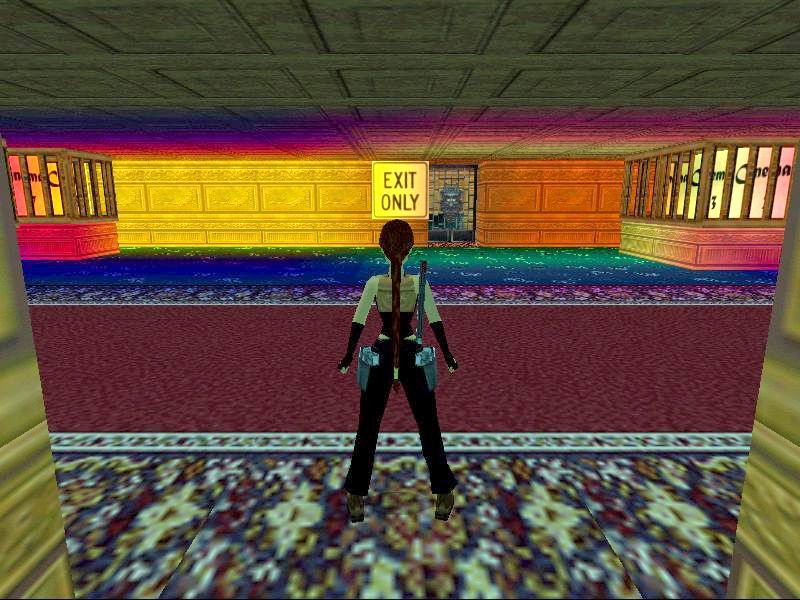 Secret:
The Jump pit.
Get the Walk of Fame Star and go to a passage leading to a pit with sloped ledges, hop backwards off the 1st and grab, go L and drop, keep jumping L to the Secret ½ MP. Turn and see a small ledge under the one on eye level, slide and jumpgrab this ledge, go L and to the center of the L square, drop and slide, the camera changes to behind a glass wall, jumpgrab the lowest ledge in front. Pull up and keep jumping, at the 6th jump, grab the flat ledge. Turn around and jump to the ladder, go up to the exit. Go straight past all the entrances which are closed by the way and into an opposite passage, to the L of this room is a receptacle for the star, enter the door and get Movie Star 4, youll hear the gate to Cinema 5 opening up
Time for another movie
Secret count 41.
Walkthrough by Dutchy
16. Star Wars-Episode 1. Tatooine. Director: Scott Ginn (EssGee).

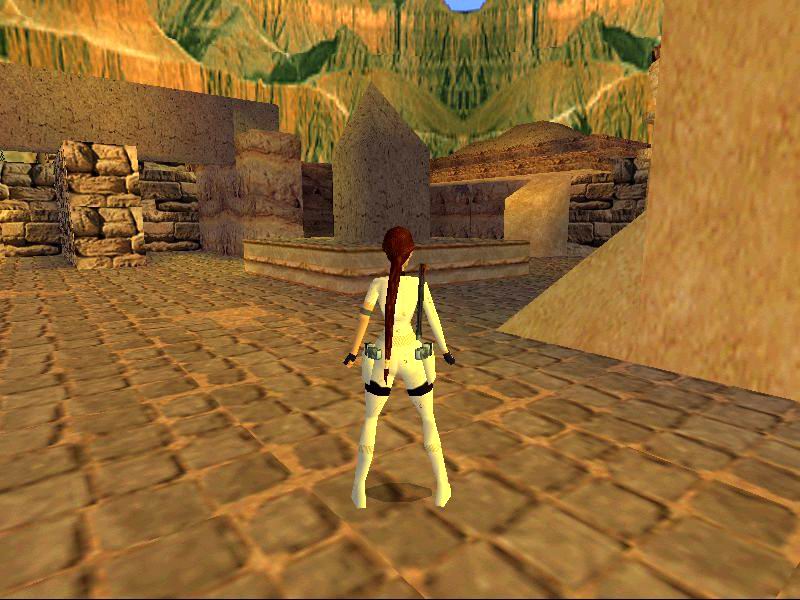
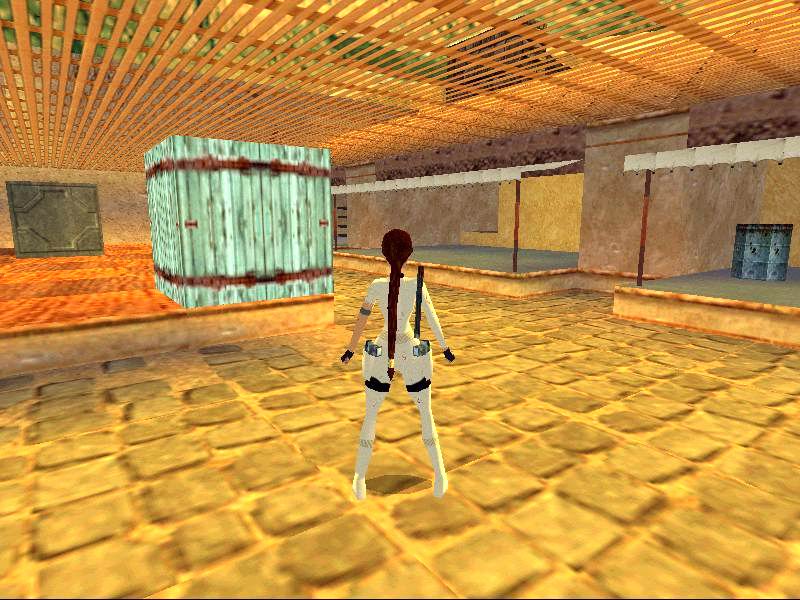

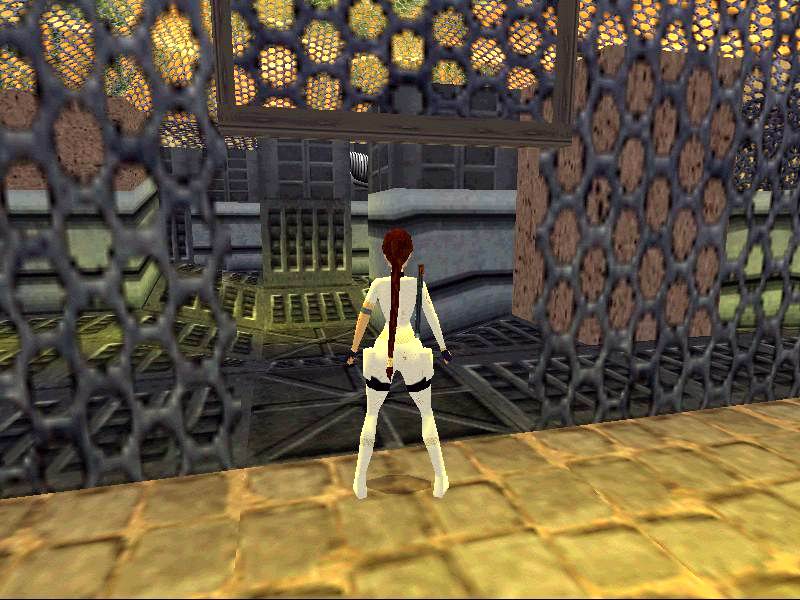
Secrets: 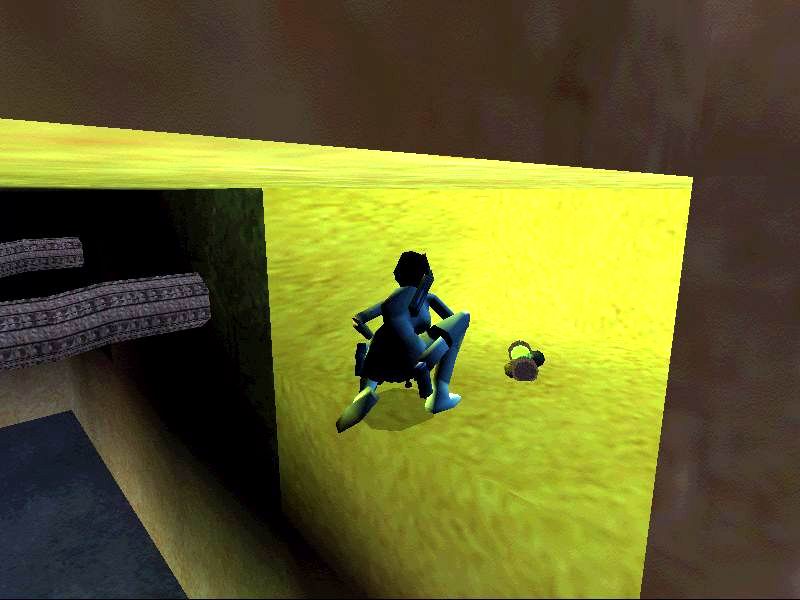
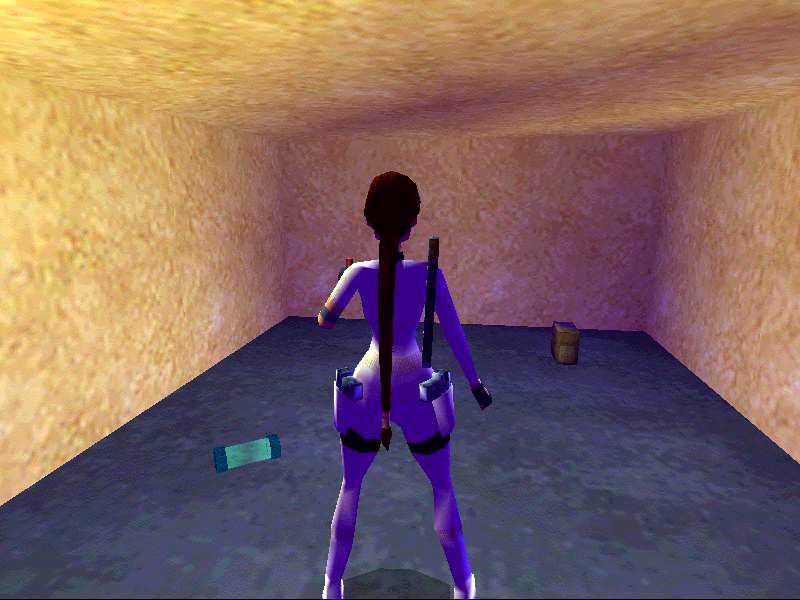
Its possible that the walkthrough might miss an enemy or a pickup someplace, but nevertheless it serves its purpose and guides you to the end of the level.
Designations: Enemies, Pickups, Secrets, Cardinal Points, Level name, Individual tasks of the level.
Tatooine.
The level starts with Lara and R2D2 arriving at an entrance of the city on the desert planet Tatooine, but theres a fight between a [rogue alien (1) and 2 storm troopers (2, 3) going on right now, so dont interfere watch till either the alien or the storm troopers win, and then kill the victor of this battle. Pick up the light saber (1) and general access key (2) the troopers left and use the key to open the door to the main city section.
Lasersight quest.
If you already have the laser-sight from other cinemas you may avoid this little task, but if you havent found or needed it yet, Ill explain how you can get this. As you enter the city turn left and go till the city wall along the street head in the SW direction to find a doorway in the corner. If you investigate the small den with the fiery bin, then an Ewok (4) will greet you on the way to this doorway. These guys are cute, but don't underestimate them they will hurt Lara, so shoot it before entering the doorway. Enter and kill a trooper (5) go to the end and climb in a higher room. Shoot the brown seat to reveal the small health pack (3) beneath it and enter the room with the grated floor to your right, by the western wall of this room should lay the desired Lasersight (4).
Console Key.
Head for the central pillar (you can see it in the levels load screen) its straight ahead, as you enter, and a street that goes north leads there from where you return after getting the laser-sight. In this courtyard keep in mind the house in the north, where R2D2 is in, but go west[ now instead. Ignore the building here for now and go straight till you reach an obvious green wooden movable crate (nearby is a grated door). Push it till you can enter the next room and in here position the movable crate on the concrete tile in the corner (on right as you enter), to open the door right next to you in this room. Enter it and go right down the steps. See the door? A dead end? Wrong! Turn around and look up for a high jumpswitch, activate it to open the door ahead. Straight after the door turn right and climb up in the high crawlspace for secret #1 light saber ammo (5) and small health pack(6). Go further into the room and left, and there will be a yellow movable block (light a flare, if difficult to recognize), get it out of the way and pick up the Console key(7), that was beneath it. Return to the main courtyard with the central pillar and go into the northern house I mentioned earlier.
The Holy Gem quest.
Enter the house with R2D2 and use the console key to open the trapdoor behind you drop down and go left in the next room to find a low crawlspace which leads to a hidden room.
(note: in the downloadable version once through the crawlspace turn around to find a push button on the back of the computer console. Press this to open a gate in the next area. Enter the next room and press the button to open the outer cell door to release the Ewok and then kill him. Press the button again to re-open the same door and quickly enter the first cell avoiding the red floor tile. Save. You are temporarily trapped inside the first cell as the outer gate shuts behind you.)
Press the button to open the door to the glass cage take out the ewok (6) from the distance and save before this sequence as youll have to do it in one go. As you step on the tile before the door all but one doors open up, but only for a period of time, so hurry! (but dont panic hitting every wall you see, lol, the openings are made very conveniently in this cage, use it to your advantage and sprint!). Press the button next to the innermost gate; get the Holy Gem (8) and rush out of here as fast as Laras legs can carry her! If you dont succeed youll die, so it isnt recommended to save in the middle of the sequence, do save once youre done though and are completely clear of all the cells! Exit the same way you got here, back to the main courtyard. Turn right (west) and go to the building here now you can also explore the street (you also could do this earlier), but all youll find at the end will be an ewok (7), a flying sphere (8) and a small health pack (9). Enter the church type of building. Behind the 2nd left pillar is a high crawlspace, where you can find a small health pack (10). Place the holy gem on the wall tablet to open the door to the next room. Drop into the pit, and activate the lever on the left to operate a rising floor tile climb up and pull a block onto it return to lever and lower it. Push the block onto the right side and push it on the differently looking tile at the closest end it will sink and the wooden tile will rise at the other side. Operate the lever to raise the tile again, and pull another block onto it lower the tile again and now push the block onto the brown tile. Now you should get a camera hint of a wall lowering in the main courtyard, so go there now. A trooper (9) will greet Lara, so return the favor and after killing him get his General Access key (11). If you wish, you may go where the wall lowered, but theres no need for it now go where you pushed the green box, and use your key by the till now closed door.
Hunt for the bribe. Part 1.
As you open the door, go right and kill the [colo=red]trooper (10) and flying sphere (11) shoot the crate below the small market tent to get a large health pack (12). Go into the tavern now and down the stairs fight another trooper (12) and an ewok (13). Keep in mind that you can shoot the seats, and so gather the small medipack (13), light saber ammo (14) and flares (15) beneath them. Approach the dancefloor no time to enjoy the light show and the groovy beats, as another rogue alien (14) like the one from the start and another ewok (15) will attack. After theyre down go to the dancefloor Lara will look at something, and not only cause she is amazed by the pretty lights. Draw your Light saber, attach the lasersight to it and aim at a ring attached to the ceiling where the light rig pulley rope enters the roof once you shatter it a rope will drop and allow you to swing into the DJ's booth up higher. Crawl into an adjacent store room, and shoot the vase to get the Republic Credits 1 (16). Drop down, explore the adjacent back rooms to meet another ewok (16) and trooper (17). The ewok leaves the Penthouse key (17). Also in the room here, look in the corner for a high crawlspace there you can find some light saber ammo (18). As you leave face the dancefloor again, and there should be another way on the left go there to find a crawlspace which leads to a hidden room secret #2 a large medipack (19) and light saber ammo (20). Leave the disco now. Go south and around the corner youll be attacked by another trooper (18) and a flying sphere (19). Use the deformed platform to climb higher and use the recently acquired key from the disco to open the penthouse door. Press the button in here at the bedside drawer to open a door a bit further on and leave here.
Part 2.
Return to where you opened the door with the General Access Key, and go left now instead (straight ahead along the alley when leaving the previous area). As you enter, go right and into the enclosed market area. Theres a board with movable box you have to push it on 3 specific tiles. They have some lighter striped scratches on them 1 is nearby the box, the 2nd is behind the gray solid block and the third in the corner of the board. After the box has been on all 3 tiles a wall will lower under the middle shed, revealing a hidden room so go there and activate the lever to open a door a bit further on. Exit to the main street and go right, where the door opened, a flying sphere (20) will emerge, so dispose of it. Enter the now open hallways and kill the trooper (21) along the way. As you enter the underground generator room, go left (east) first and collect a small medipack (21) from the ground at the very end of this room, then go to the middle of the room opposite from where you entered to enter another room. There will be a button, save before pressing it.
This is a timed run, but a rather simple one press the button, youll see the door opening behind the grate, run out of here and a bit on the left jump into this room and sprint past the door, before it falls. Before doing anything here go to the corner of the room and look up when facing the door you just ran past there is a high crawlspace secret #3 a large health pack (22). SAVE before attempting this next run, as it is better for your health if you to do this in one go (or reload and do till you succeed), Press the button, turn towards the door that just opened, sprint in, and roll on the tile where the Republic Credits 2 (23) are. As you pick them up the doors that closed reopen, so sprint past them to get out of here in one piece.(note: if you don't make it out first go you can re-pull the lever run back into the second set of spikes taking some damage, roll and sprint out the re-opened door). Combine the 2 credits to get Jabbas Bribe. The name already suggests what to do now but lets return to the central courtyard first.
Jabbas Challenge.
Remember the large building in the main courtyard where the wall panel lowered earlier? Go there and enter Jabbas room where he will greet you with some disdain. Below him is a round container, place the bribe in there and youll fall in the room below you. Jabba has double-crossed you! In here go to the right and activate the jump-switch in the corner on the northern wall. As you do so the doors at the bottom of the ramp will open and an ewok (22) attacks. Kill him and loot his corpse for a small medipack (24). As you go towards the now open doors look on the right wall when the ramp starts to go downwards and find a crawlspace with the last secret of this level secret #4 2 light saber ammos (25, 26). Enter the next room and as you go deeper a Rancor (23) will come stomping towards Lara. He can be killed easily by getting as close as it gets and using your light saber (or shotgun, though the first one has higher guarantee of success) against it even 1 shot should be enough, but killing him isnt so important, so if it doesnt work, dont waste your ammo on him.
Go where he came from and go up the long slope on the left. Thought the lighter tile looks suspicious? Rightly so! As soon as you get to it, roll and dash back as a rolling metal cog will be coming towards Lara. Once the coast is clear go up the slope to the top. In this next room press the button to open a door in a hallway behind you. Go there left and in the SE corner should be a crawlspace which yields the Skywalker key (27) and a lever that opens the door in the room with the button earlier so go there. Maneuver through the hallways till you get out in an open space, where 2 more troopers (24, 25) should await Lara kill them and take the General Access key (28), left by one of them. Return to the keyhole, which was in a corridor on the left just after traversing the arched yellow bridge. Using it opens the cage in the area with the troopers, so return there. Before entering the cage, do a quick circuit of the perimeter to find a crawl space at the rear wall for some more light sabre ammo (29).
The cage.
As you will soon notice, not all tiles are safe, so youll have to maneuver around them safely. Start with a standing jump, then with a running jump to the next one diagonally on the left. Grab the metal grate above this one and swing till you can drop then jump to the next tile, which is in the NE corner direction. From there the next tile is south. Then you must simply clear the next 3 with standing jumps, while avoiding the steams the best you can. The 3rd is a trapdoor actually that leads you in the rooms below the cage. A trooper (26) will be waiting for you there already. Crawl beneath the pipes to get to an enclosed part of the room there press a button to open a door back in a corridor just near the cage entry. Continue to the next rooms, past the fiery floors into the next room and straight again in here get into a crawlspace for a large medipack (30) and return to the fiery floor room again. Jump over the floor to get deeper into the rooms past the ladder, look for a jump-switch to open the trapdoor at the top of the ladder now you can climb out, so do so. Get out of the cage. Go through the now open door in the corridor in this room go right first and get the small health pack (31) from the crawlspace - then continue and kill a trooper (27) in the next room. Go down the stairs but turn right first and press a button behind a machine. Continue till you can get into a familiar building and so the beginning of the level again.
Preparing for the race.
Return to where you used the penthouse key earlier and use the Skywalker key on the ground floor door. Enter the house and go to the second room shoot the vase to reveal Wattos Key (32) and open a trapdoor nearby. Opposite the key is a crawlspace, where the trapdoor was go down and in this room, move the yet unfinished C3PO out of the way and get the Podrace Validation (33) exit Skywalker's house now, and go east, where the 2nd movable box was, but this time go left, to use Wattos key and explore his house. Watto isn't home so you can steal the equipment you have so desperately been searching for. Pick up the Hyper Drive Generator (34) from the second floor and a door opposite the balcony will open revealing a shootable disc. Use your light saber to do the job and get a fly-by showing Skywalkers house again, and a hidden room near the penthouse go there and drop through the open trapdoor into the outer compound of the podrace arena. Shoot the trooper (28) use the podrace validation and so enter to end this level, and go on to the next one
Levels Summary:
Possible kills: 28
Possible pickups: 34
Secrets: 4
Walkthrough written by Elvis t. aka eTux with additional help from the author.
17. Star Wars-Episode 1. Podrace Director: Scott Ginn (EssGee).
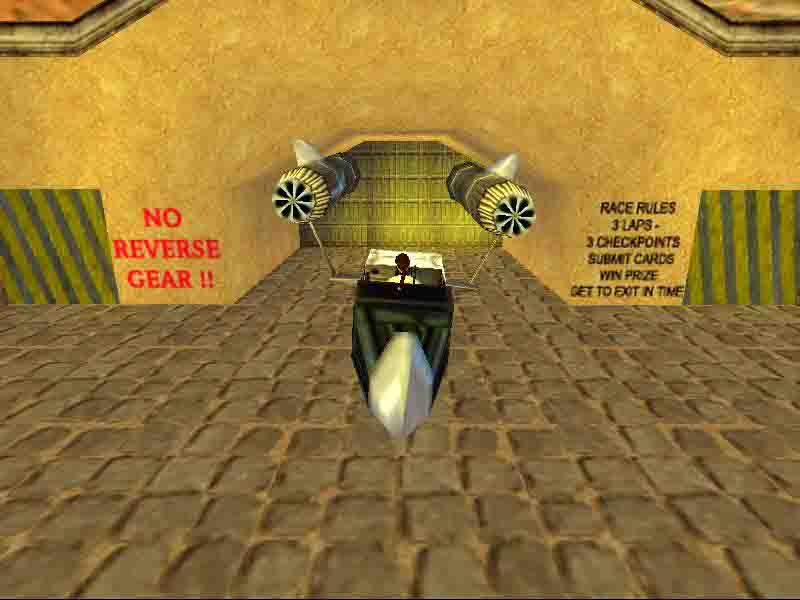

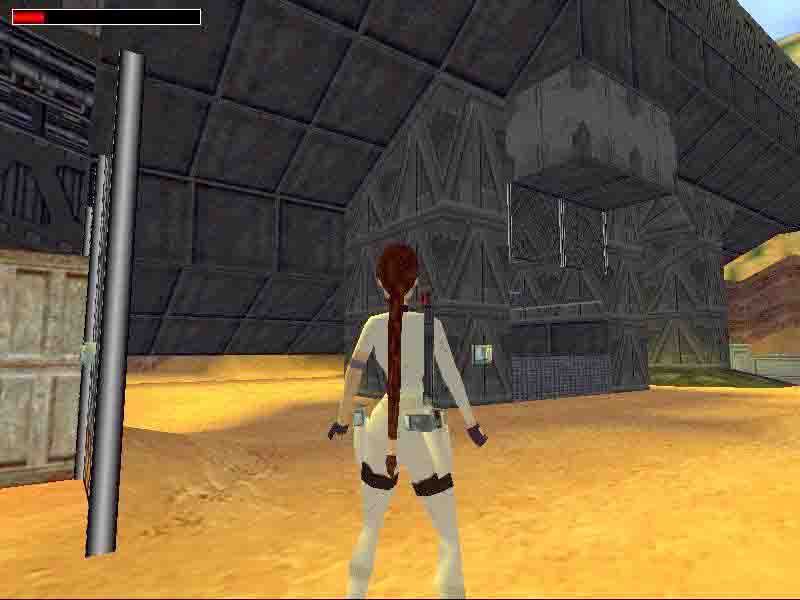
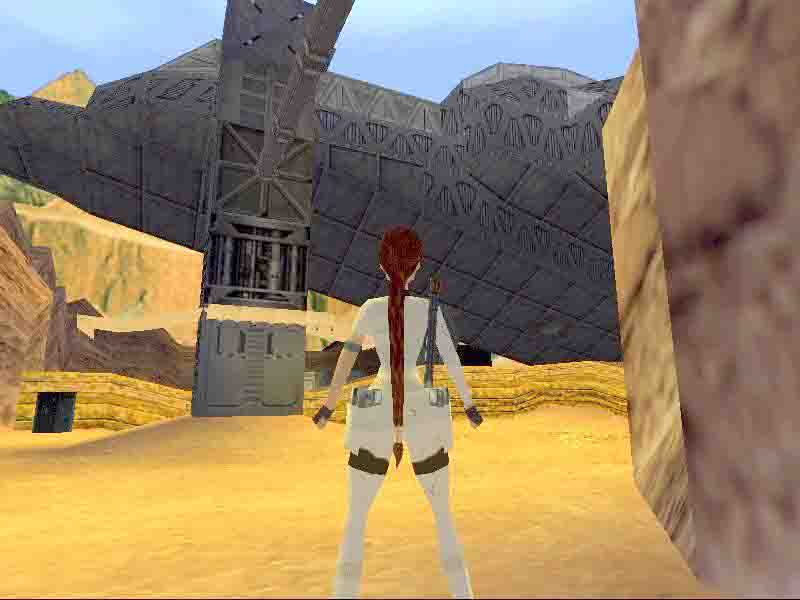
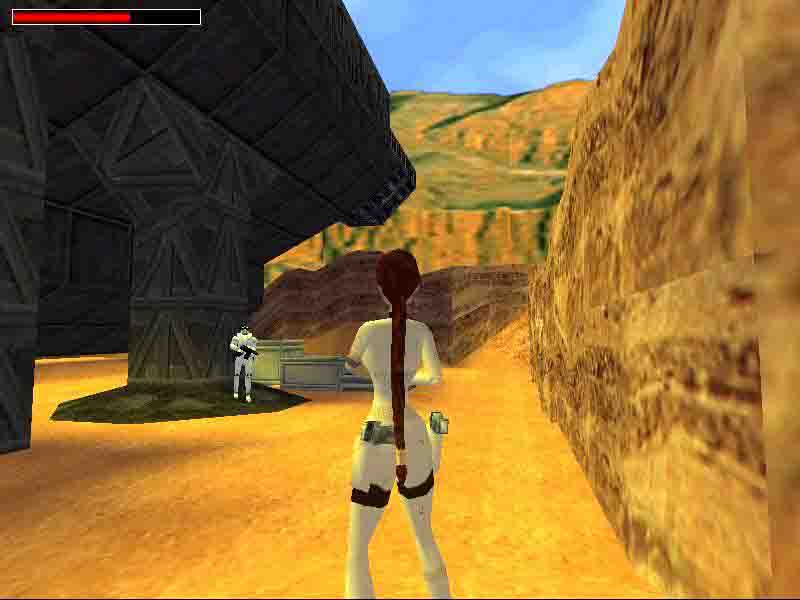 Secret1:
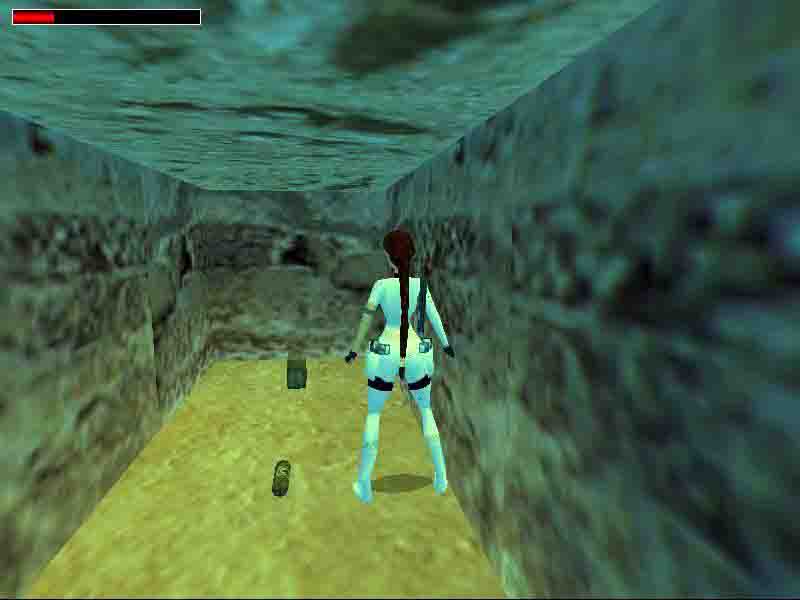
Note: If youve finished cinema 4 before this one, your Pod will automatically have the turbo boost (Sprint-key), which is helpful here and there, but the level can be finished without this little extra.
Enter the outside area and kill the 2 troopers (1, 2). In the right section of this area, go and push the button behind the tables to open the door in the middle. In the next area shoot the crate and get the large health pack (1) from it. A flying sphere (3) will attack, so dispose of it. Place the Hyper Drive Generator you got from the previous level in the opening at the back of the cage (you were facing it when you entered this area) and itll power up the pod and open the front of the cage. Before getting into the pod, read the warning (no reverse gear!) and Race rules. Get into the pod and float/drive towards the door to open it where you reach the start line the first lap begins I recommend saving before this.
Lap 1.
Drive past the outside area (youll hear Jabba again calling out from his seat in the grandstand) and inside left past the silver grid tiles and then just along the road till the green arrow sign float in the direction it shows. Drive so until the lava lake ignoring the Tusken Raider (4) use the slope to drop over to the next platform, and on this, drive a bit to the left, as theres no platform straight ahead of you here past that you only have to make it to the furthest open door in time (what isnt as easy as it sounds) some time saving tips:
1) Drive through the track as you would normally to first get acquainted with it.
2) Drive carefully, but not slowly around the corners, where you drive down by the green arrow sign.
3) Take up full speed past the lava blocks steer left a bit already when jumping to the 2nd platform once youve jumped on the last one, if with full speed, you should be able to float over the small lava bit, and have no need to take the curves.
4) Ignore the other Tusken raider (5) meanwhile if you think youll make it.
If it closes go through the only passage available itll open the doors, and youll have to return to the start of the level and do this lap again. If you did this in time, then simply go to the end of the right hand hallway and pick up the Check Point 1 card (2), get rid of the Tusken raider, if hes still there (i.e. you havent drove/floated over him). As the sign by the card pickup said return to the start via the open tunnels now and prepare for the second lap. Along the way you can pick up a small medipack (3) and kill another Tusken Raider (6) but you might as well ignore him and float over another lap.
Lap 2.
Before you approach the starting gate for Lap 2 (Middle gate) Save to preserve your first accomplishment. Same as in lap 1, but as youll approach the arrow; youll see its pointing elsewhere so drive there instead. Drive and jump over the hole, by the next one drop carefully as you have take a sharp turn left. From here on its pretty much the same as the escape route after the first checkpoint, you only will have the chance drive over another Tusken Raider (7) besides the earlier one along the way. Where you drive up the slope by the exit gate, turn right and drive as fast as you can through the overhead tunnel and with driving over 2 more Tusken Raiders (8, 9) jump into the 2nd checkpoint's hallway. If you didnt make it same procedure as for lap 1, simply pass the doors, and go try again (or simply reload and try so till you succeed). Tips:
1) Same as for lap 1 get acquainted with the track before you start, even though youll know most of it anyway.
2) Dont bump into anything take out corners carefully.
3) Dont stop to get pickups or kill the enemies along the way.
4) Save in a different slot if you think you did good up until a point, so you wouldnt have to redo the whole lap if you fail.
Anyway, once done, pick up Check Point 2 card (4) and carry on so you could do the third lap.
Lap 3.
Do the same as before when you have completed Lap 2 and are approaching the start gates again to commence Lap 3 Save.
For a while (till the exit gate signs) this really doesnt feel any different than lap 2 (another Tusken raider (10) will appear somewhere along the way though), so if there are any obscurities till the exit gate signs, refer to that section. When you go up to where you turned right the last time go straight now, and so till the checkpoint. Tips are the same as for lap 2, but I cant emphasize enough how important points 2 & 4 are here! Anyway once you get Check Point 3 card (5), drive into the now open hallways run over the Tusken raider (11), and shatter the left vase to get a large health pack (6). On the yellow striped block a bit further on is a switch, which opens the check-in terminal. Activate it and return to the start.
To the exit.
Drive as you would take another lap but the path should be enclosed now by the raised silver grid blocks climb out and notice the small alley in the cliffs go there, thats the checkin terminal submit your 3 cards. The door on the side will open pick up the Dark Side invitation (7) in there. Save before activating the switch, as besides opening the exit gate it also starts a timed run for the levels only secret. Activate the switch and get on your pod and rush to the exit gate as fast as you can, bearing in mind all the tips Ive given before. I found the secret (a large and a small health pack (8, 9)) to be no more tricky than any of the check points so its manageable, though you must lose no time to get it right! Outside you will be attacked by 3 Tusken Raiders (12, 13, 14). Grab a small medi (10) behind one of the transport crates. Approach the gate, push the box to one side and activate the button to get to the battlecruiser. 2 more troopers (15, 16) and a flying sphere (17) will attack so dispose of them, or if you have enough health and dont want to battle them endure their attacks, while placing the dark side invitation in the computer. A camera suggests where you have to get now, so quickly step on the grated floor tiles of the elevator next to you and wait for the elevator to start rising up. When its done step inside and welcome to the battle cruiser!...
Levels summary:
Possible kills: 17
Possible pickups: 10
Secrets: 1
Walkthrough written by Elvis t. aka eTux with additional help from the author.
18. Star Wars-Episode 1-The Battlecruiser (Battleship) Director: Scott Ginn (EssGee).
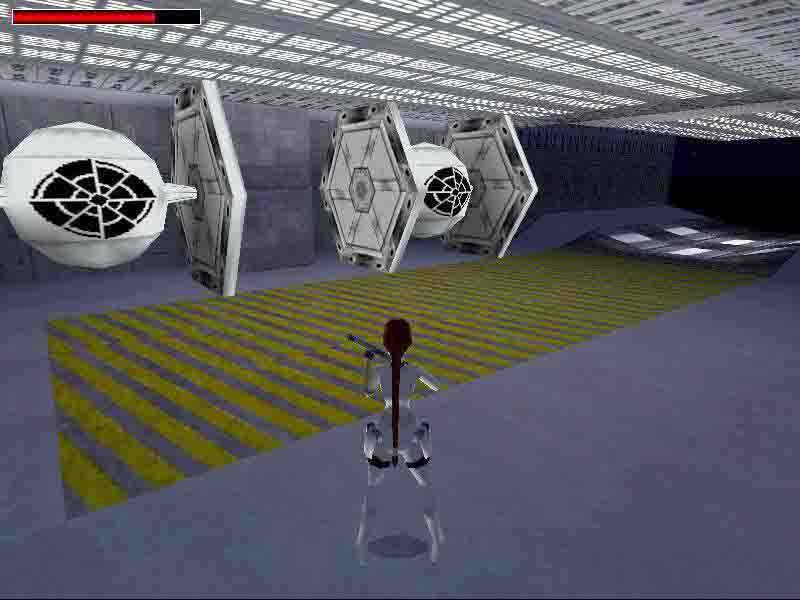
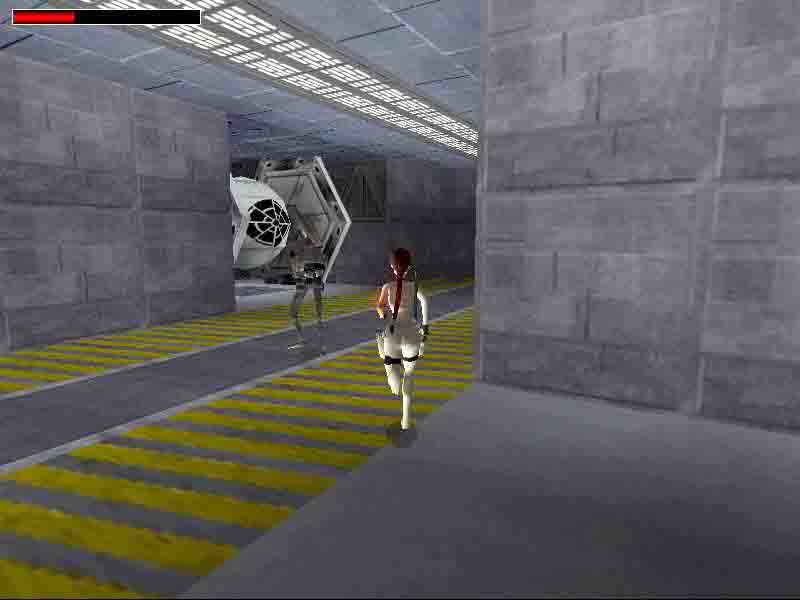
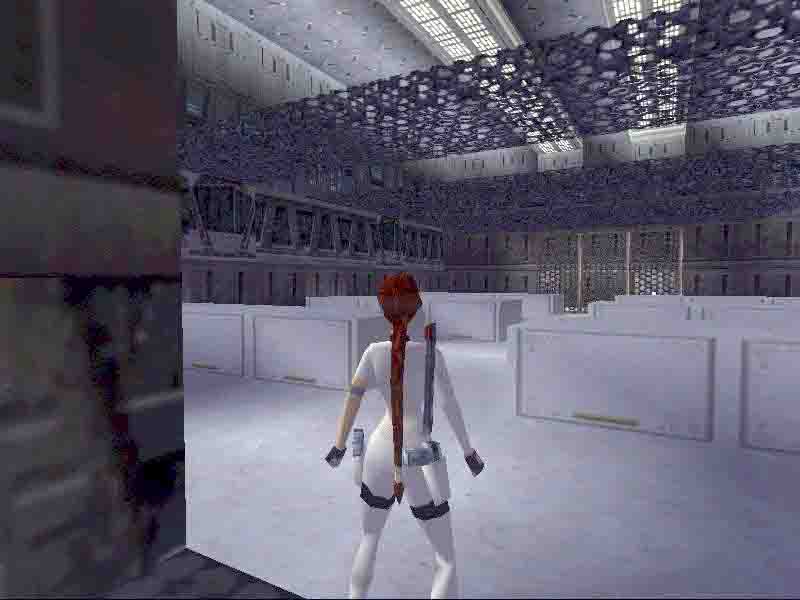
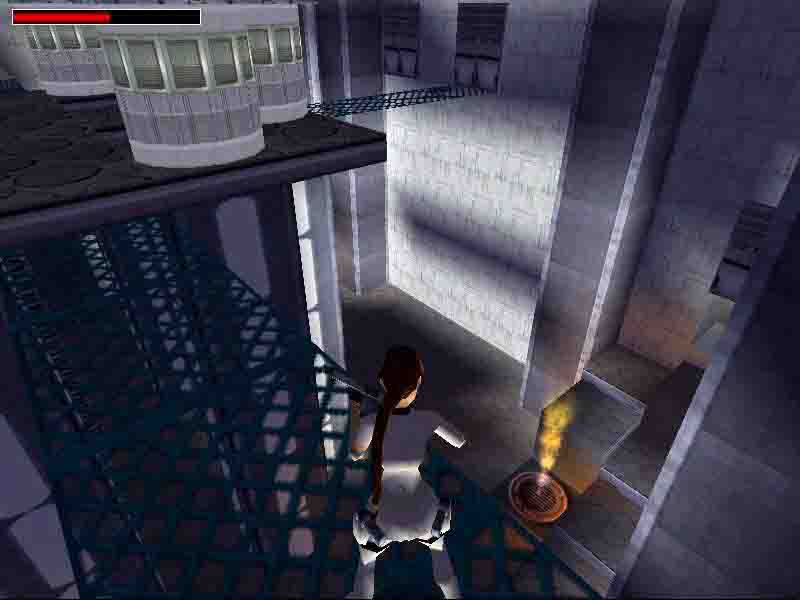
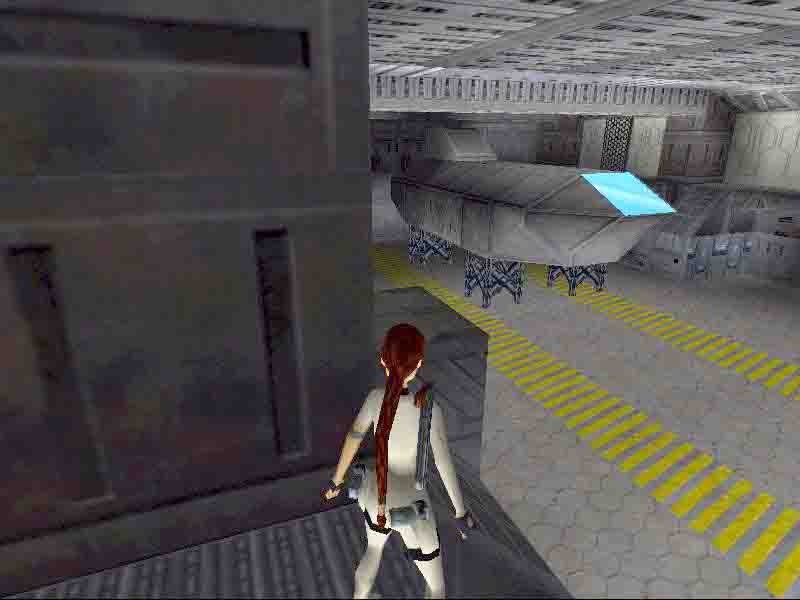
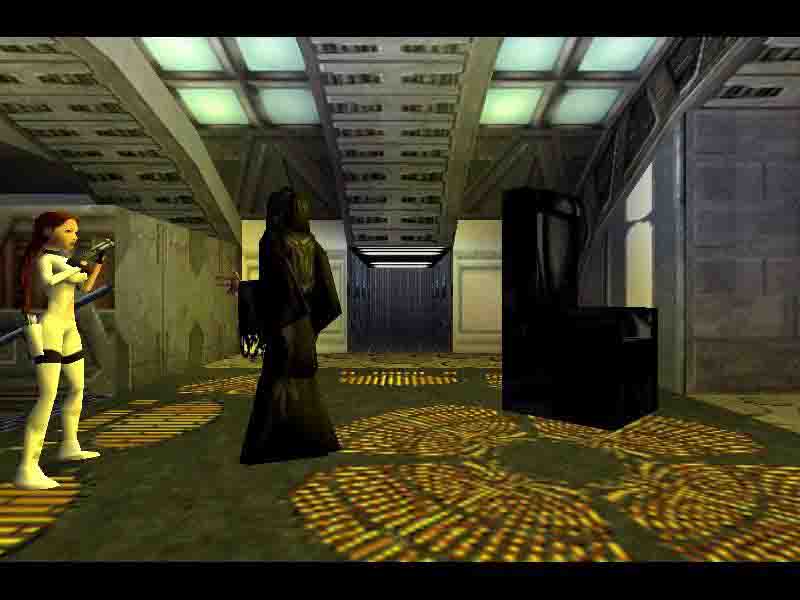

Secret 1-2-3-4-5: 
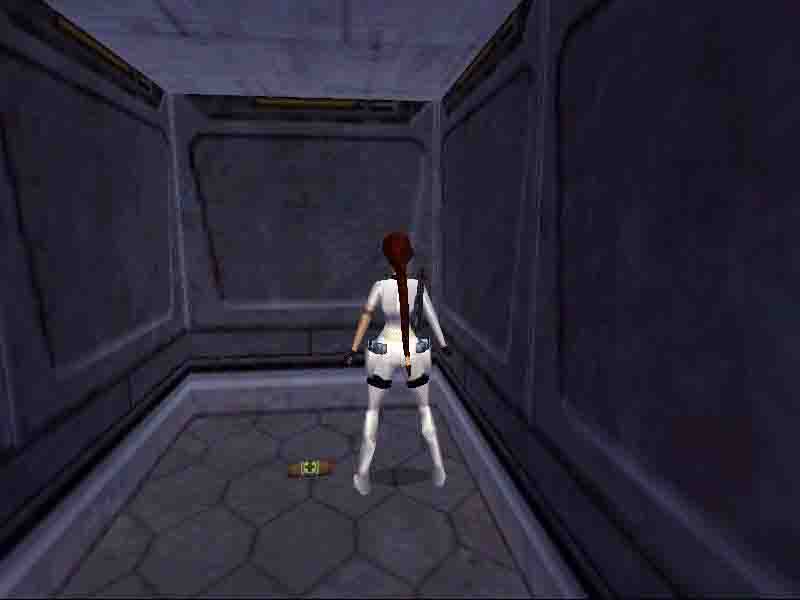
Go further, avoiding the steams and wait for the doors to open up shoot the 2 troopers and a flying sphere (1, 2, 3) waiting for you, and pick up the general access key (1) one of the troopers left. Press the button by the door to open it. Enter the next big area the main generator room youll return here several times, for now go straight to the opposite door and itll open as you approach it.
West route.
Go in and kill off the trooper (4), use your key, near where he was guarding to open the door enter the next room and pick up the small medipack (2) on the right, also press the button in here to open a door further on, exit this room. Go along the big hallway turn right to find the next hallway go there, at a moment youll be able to turn right and get into an adjacent room crawl below the pipes, and shoot the differently looking gratings crawl here into the next room. Pick up the large medipack (3) and light saber ammo (4) from here and return back to the main hallway. Go further, kill another trooper (5), and continue your journey. In the next room, approach the door with the trooper (6) and kill him (even though hes peaceful now, hell become aggressive when his buddy comes so take them out when theyre alone), drop through the trapdoor and press a button here to open a trapdoor from further on. Climb out and kill another trooper (7), snatch his general access key (5), and use it by the closed door nearby. Go where you saw the trapdoor opening activate the big silver lever, and get the explosives (6) from the crawlspace- activate the button by them too, in order to re-open the trapdoor that shut behind you. Exit to the main room and go into the white hallways now youll come into another room, but theres not much to do here either so go further into the next hallway at the start you have the choice of either going left or right. Go left first theres not much to find in the shelves themselves, but go behind them and shoot the grating crawl in for secret #1 light saber ammo (7), now go into flight deck room on the right. 2 more troopers (8, 9) here one of them leaves flares (8) leave and continue in the hallway, when done here. At the end, push a block aside in one of the side rooms, pick up a large health pack (9) and activate the wall-switch here, to open the door, a bit back. Go there, and kill the Battle droids (10, 11) in this room. On the 2nd floor on the eastern wall is a submarine door you can open by turning the valve so do so. In this hallway you have 3 ways to go in the corner of the room left is a small medipack (10), in the right hand gun turret room theres another droid (12). Once done in those rooms go straight and kill the flying sphere (13) thatll attack you. In the next rooms SW corner you can shoot a grating and climb up in a service room for another small health pack (11), return to the main room and approach the 2 doors a trooper (14) will be summoned kill him to get his general access key (12), use it to open the door to the Docking Bay Control room. In this room activate the lever to open the other door to access the docking bay. Kill another droid (15) as you enter the next big room and search behind the spaceships for a jump switch to open a door to a hallway behind one of the spaceships and summon a droid (16). Climb up into the hallway and follow it to the end to arrive at a deep engine room. In the distance you can see a pole, you can get to it with a running jump and grab climb up it first to get secret #2 light saber ammo (13) and large medipack (14). Slide down the pole to the bottom level. Enter the next room with a cage on the middle step on the higher white platform duck and shoot a grating crawl in and activate a jump switch. Go further before entering the next room, look up in a corner for a grating use your light saber combined with lasersight to shoot the grating and climb up and get into the crawlspace. If youre not familiar with this move heres an explanation climb as high as you can, briefly let go the action button, and press and hold it again, then immediately press the up arrow key to get into the crawlspace, where youll find secret # 3 light saber ammo (15). Get out of here and proceed to the next room. From one of the tables jump into the southern alcove a bit higher, and use it to get onto the bridges. Press the button on the southern wall of the furthest bridge to open the gates on the first level. Approach R2D2 and hell drive up to a computer and open some doors for you, get back into the southern alcove. The door there will have opened so go there and youll find yourself at the bottom of the main big generator room. Go into the middle of the room and find that one of the pillars is climbable climb up to the top and approach the north door now.
North route.
Pass the door and enter a room with a new puzzle.
3 box puzzle.
This might look complicated, but Im sure youll find that its not too hard keep in mind that the star-like black tiles raise some floor panels and the other dark ones lower them. Lets start by pulling the closest box to you 2 times, so it would stand next to the lowering tile. Then pull it twice, so it would stand next to the metallic tile (this ones the one wholl rise), and then push it onto it. Pull the block that was in the middle of the wall once, then push twice so it would stand on the star-like tile that raises the metallic panel, on which you pushed the other box. Now carefully pass the other black tile and climb onto the higher bits push and pull the block till its on the black tile and lowers the panel next to you. Now drag the box that you just used to raise the other one, down to one of the black star tiles under the nearest alcove, located on the other side of the structure. Avoid the black tiles next to the far wall. Leave it there for a moment. Then push it on to the central metallic tile. Now grab the one remaining box and maneuver it around to the black star tile in the furthest alcove, again avoiding the other black tiles (they are there to help you lower the raising blocks if you get it wrong). This will raise the box in the middle to the top of this structure. Climb up through the tower. Push the box on the black tile and youll hear a door opening on the wall behind you.
After the box puzzle.
Look on the west wall from here and youll see where the door opened jump there, now youll be able to shimmy left till the next opening and climb up into it. From here with a running jump get back to the central structure hang down the edge and find a wall lever activate it to open the trapdoors. Climb up the structure, get the explosives (16) and jump on the far ledge. Kill the droid (17) and go into the hallway. Dont go into the new rooms to the right yet, but go through the crawlspace at the end. Herein you can find the penultimate, but also a most fun to get secret. Get down on your left to step on the star-like black tile this starts a not very tough, but still challenging timed run for the secret jump and grab the ladder backflip immediately. Turn right and jump on the slope from there jump on the grated higher platform from there grab the edge of the crawlspace get in, but remain in crawl position youll hear the chimes for the secret #4 flares (17) and light saber ammo[ (18), after getting them climb out quickly, cause if you get trapped within Laras body will be pierced by spikes. Return to the previous hallway with the grated windows now. As you enter the next room, youll hear a sphere (18) flying your way once its down, get on the lower level and shoot the gratings so you can access a crawlspace. Drop down at the end of it and first bypass the door and the button shoot the gratings between the control panels and crawl through it and get the light saber ammo (19) from the corner. Get out and press the button to open the door, enter the next room. In here from the main controls get on one of the computers and look for a jump switch behind a pillar. Shoot the droid (19), pick up his general access key (20) that appears then look for a window that looks different from the rest of the glass and shoot that as well. Enter this room and let the trooper kill the droid (20) and later kill the trooper (21) himself too if you want. Use the general access key and return to the main area. The door in south will have opened so go there.
South route.
Drop into the big hangar and shoot the droid (22). In the north, between 2 chambers is a movable block (use flare to spot it, if you dont see it immediately), pull it out of its resting place, and then pull or push to the SE chamber, beneath a light (look on ceiling to see). This raises a floor panel in the opposite chamber so go there, and use it to get to the 2nd floor of this hangar. Go where the ceiling is lower and use it to monkey-swing to the other side. On the other side find the ledge that is closest to the spaceship and with a running jump and grab get on it. Find where the closest bit is on the other side is and get there with a running jump. Step onto the tile before the door and itll open, go inside, and pick up the explosives (21) as it closes behind you. Press the button, and then activate the lever and run towards the door that just opened to get back to the hangar. Now there are 2 ways to get to the door that opened and both are pretty simple, so Ill describe them and let you decide which way to take:
1) Get back onto the spaceship and jump on the other side. Due to the low ceiling youll find that grabbing the other side is impossible so do the jump where there is no low ceiling to bother you, but curve by the end of the jump, so Lara would grab the ledge now maneuver along the side till you get to that door.
2) Drop down and go to the floor tile that raised earlier, climb up, get to the monkey swing, swing over and go to the door.
Once there, go up the stairs, shoot the droid (23), approach the next room, lay back and enjoy the cut-scene with Darth Sidious (wont go into detail here, youll have to see for yourself). After it, climb onto the gray thingy on your right, when facing the window, crawl into a separate room, and get the last explosives (22) and press the button that opens the door a bit back, so go there now. Youll be attacked by a flying sphere (24), so kill it, and get onto the higher ledge here, where the lever is and activate it. As you do, the walls of a separate sector here lower and droid (25) starts attacking you, go where he came from and a door to the main area will open again.
Using the explosives.
As the door opens Darth Maul (26) approaches, but hes easily dispatched from with the light saber (or with any other weapon too, but lets do some justice to the movie youre in the star wars and dont battle the boss characters with the light saber? ;)). As youll notice the 4 side doors of the directions the routes go will have opened. Jump in the rooms behind them, shoot the glass and place the explosives. After placing all 4 another Darth Maul (27) should come to battle with Lara, but a light saber treatment will put him at rest. Now return to the south room, and youll notice that the some wall panels will have risen here just enough for you to activate all 4 wall switches above them. After a while youll get a fly-by of the cruiser exploding and a rescue ship arriving for Lara. Meanwhile 2 more Darth Mauls (28, 29) will have appeared and will be hacking on Lara, so teach them the same lesson the previous 2 had to learn, but before you leave, climb down to the bottom of the main area, and go where the closed door was here before (south), and get the last secret secret #5 a small medipack (23). After getting it climb back up, and go where your rescue ship arrived to end the level, and so this movie altogether.
Levels summary: Whole movie summary:
Possible Kills: 29 Possible kills: 74
Possible Pickups: 23 Possible pickups: 67
Secrets: 5 Secrets: 10
Secret count 51.
Walkthrough written by Elvis t. aka eTux with additional help from the author.
19. Stargate- Military Installation. Director: Titia Drenth. (Titak)
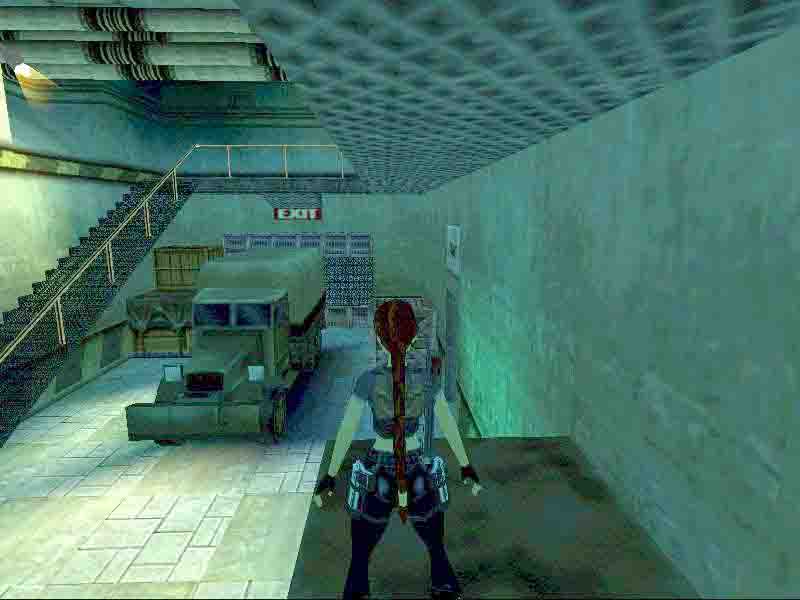
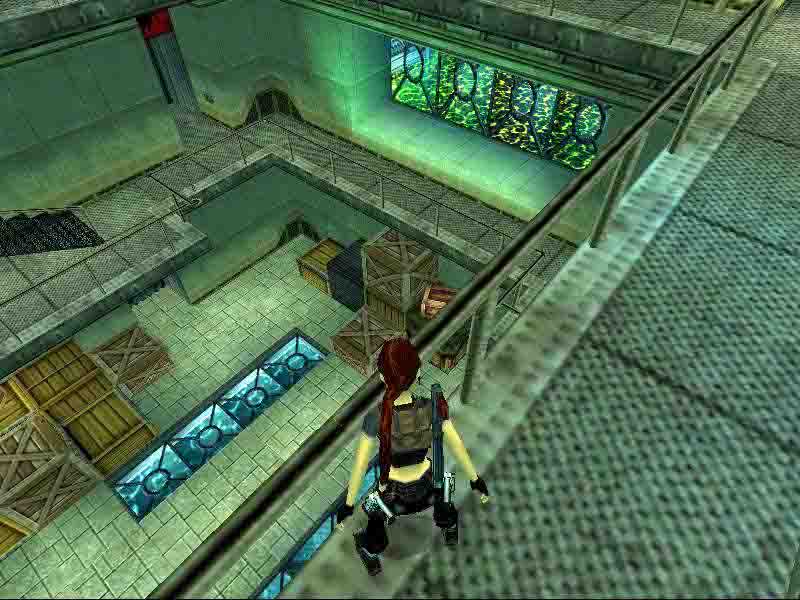
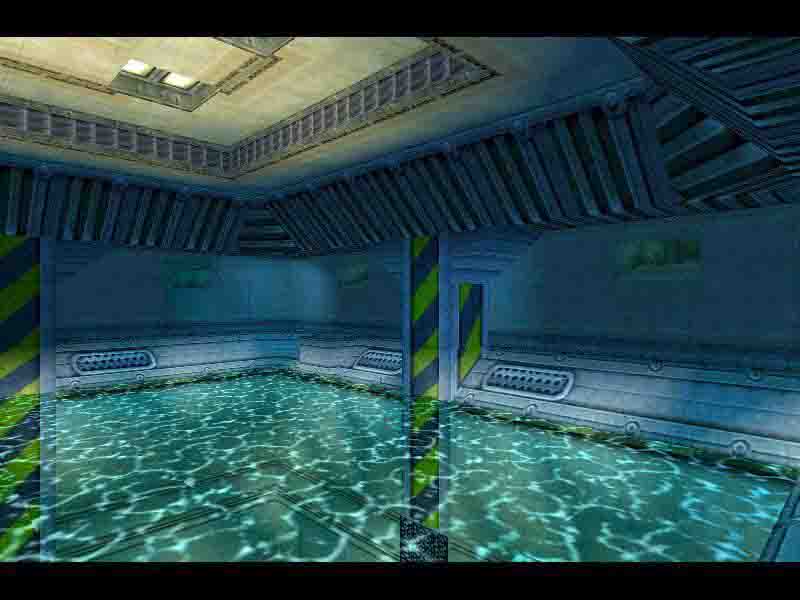

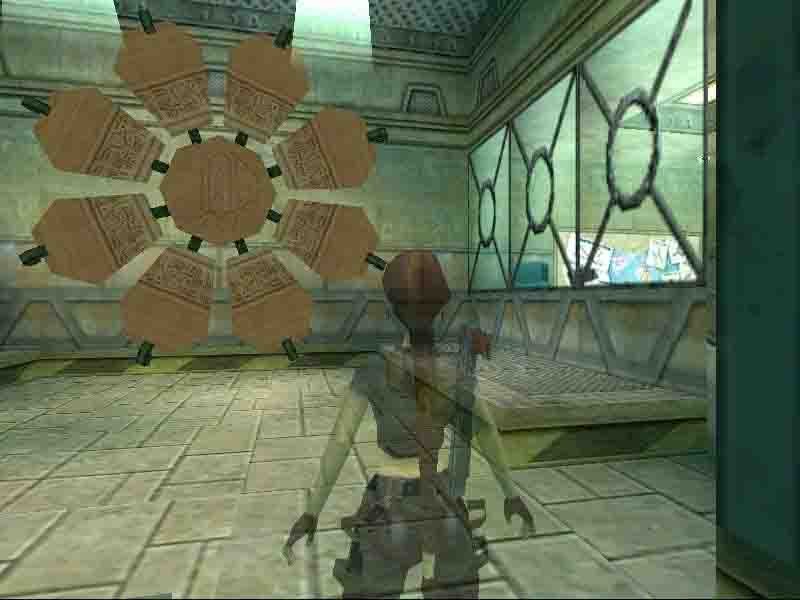
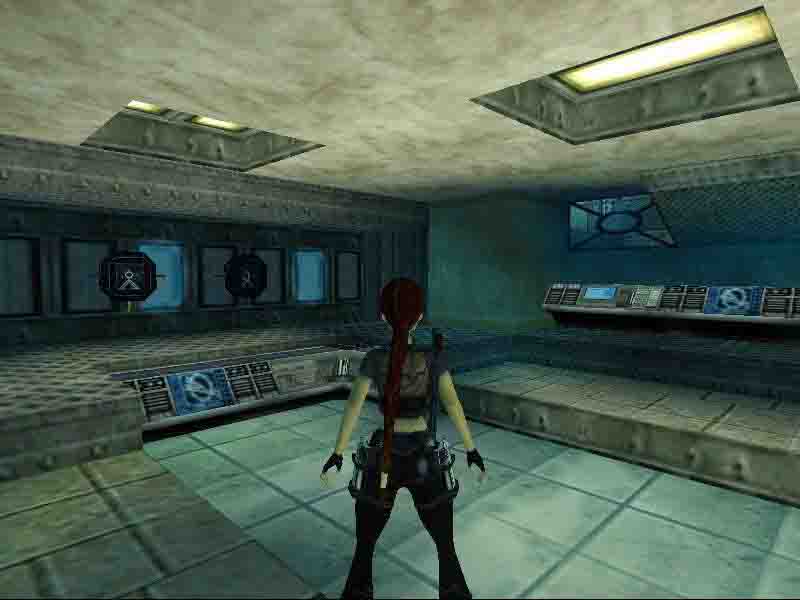
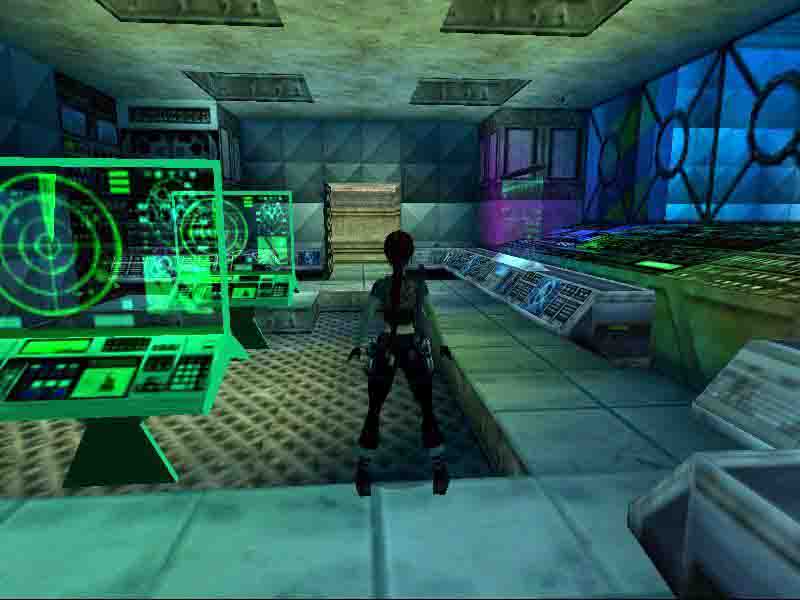
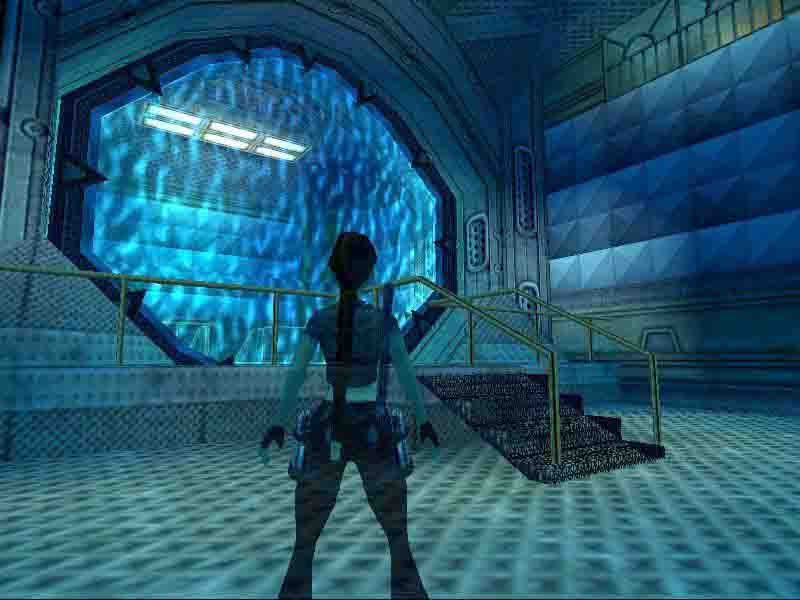
Secret 1-2-3: 
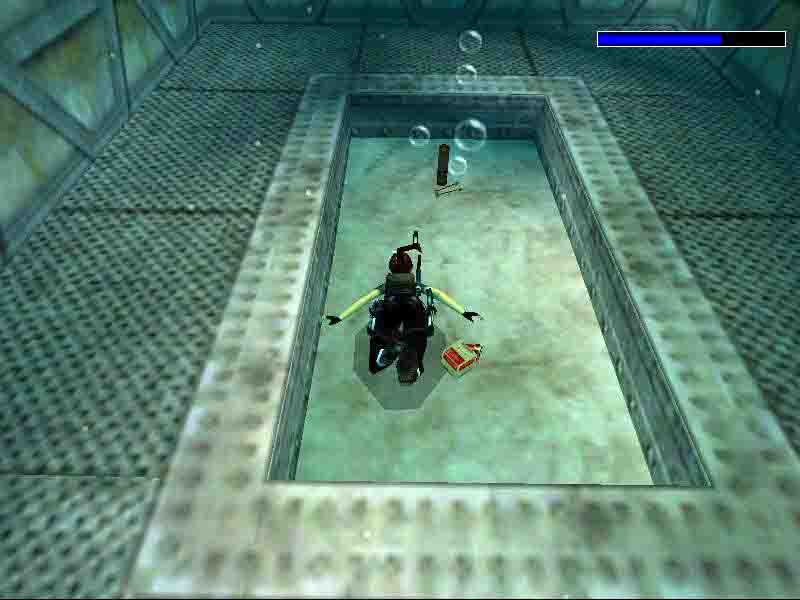
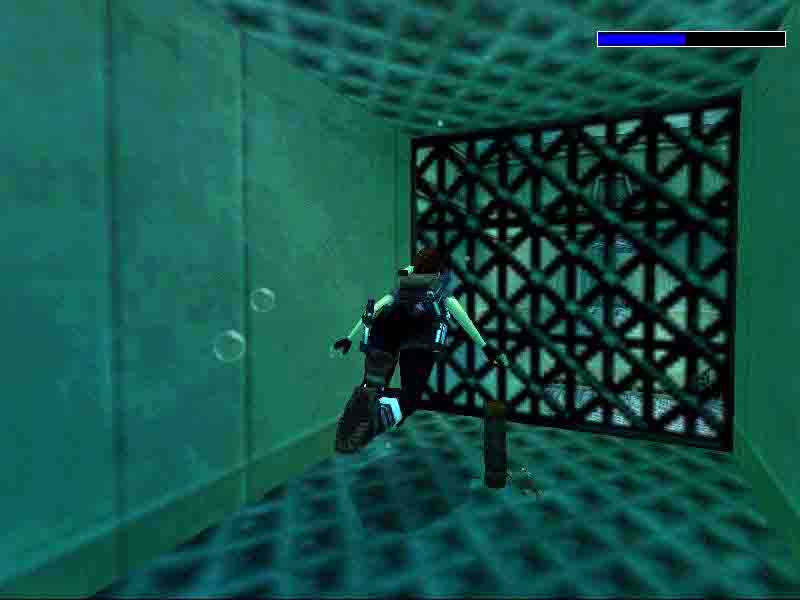
Its possible that the walkthrough might miss an enemy or a pickup someplace, but nevertheless it serves its purpose and guides you to the end of the level.
Designations: Enemies, Pickups, Secrets, Cardinal Points, Level name, Individual tasks of the level.
The level starts with Lara infiltrating into a military installation, and a fly-by showing you around the first area. As you slide down, shoot the grating, and collect the knife (1) before dropping out of here. As you do, a guard dog (1) attacks, so dispose of it, and shoot 4 or so boxes lying around the 1st floor collect the revolver ammo (2), shotgun normal ammo (3) and flares (4) you can get from them. Enter the storage and go up to a higher level here, activate the lever here. It operates a floor tile on the first floor raising or lowering it. Return to the first floor and push the box in the middle of the room onto the lowered tile, raise it and return here. Look on top of the box, and move on the tile up here that looks just like it. Lower the tile again, and this time - pull out the box from the corner of this room and onto the tile. Raise it again and do the same as with the first box. Doing so will raise tile out in the main hangar (a camera will show this) go there and activate the now reachable wall-switch. This opens a grating that blocked an entrance to a crawlspace on the 2nd floor so go there. As soon as youre up the stairs turn left, jump and shoot to shatter the grating, climb in the crawlspace and get out on the other side. Walk to the edge of this ledge now and with a standing jump and grab the furthest tile in the middle of the burner pit. Shimmy around the edges till youre closest to the opening on the other side and climb up on the corner of the tile. It will light up on fire, but since youre on the corner of the tile youre safe. Face the opening and get in. Jump over the pit and get the crossbow (5) secret #1. To return use the same strategy grab the furthest (yet) non burning tile and shimmy to the corner, climb up face the furthest non-burning tile grab it with a standing jump and simply shimmy now to the safe tile and get out. Go along the ledge here and enter the room on the left search the shelves for a large medipack (6) and normal shotgun ammo (7). Climb on the boxes and into the enclosed sector of the room for some flares (8). Ignore the crawlspace and the grating in this room as theres not much of interest there. Leave and go where you opened the crawlspace earlier. In here crawl left, and hang in the pit shimmy around the crack on the other side and get the normal shotgun ammo (9) there. Carry on in the other direction and shimmy around this pit too. At the end shoot the gratings and get out. Jump on the boxes near the high pipes and get the flares (10) from the top. Press the button to open the door and enter the top level of the warehouse.
Warehouse.
There are a couple of things to do here, but youll find that most lead to dead ends (you may explore, but Ill only describe the most efficient way of doing things) so go to the middle level of the warehouse now. Go to where the exit sign is and activate the lever to open the door youre not leaving yet exactly, but the way further is in here. Go left and in the next room turn left also. Activate the lever by the door to open it.
Toxic pool.
As you enter turn right and use the binoculars to spot a grating on the right wall in the distance. Jump up and shoot facing the grating to destroy it. You can use the laser-sight with a gun that works with it too, if you think its more comfortable. Grab the monkey swing and swing left to get some shotgun shells (11) at the end return to where you entered this room after that. Now grab the low ceiling and monkey-swing to the now open crawlspace, get in it. Slide down the slope backwards and grab the edge at the end of it. Climb up and backflip onto the next slope. Slide down as low as it goes without dying then press and hold the jump and action keys. Lara should bounce to the next slope and from it jump and grab a higher one. Climb it up and backflip to land in an alcove. Crawl into the opening on your right (or left, depending how you got there, though it doesnt matter as the opening is obvious), shoot the grating at the end and drop out. Shoot the gratings on the right wall you should see, monkey swing and drop in there. Crawl till you can get out, slide on the steep part then bounce to the next one, from there slide and bounce to the flat platform. From there do the next simple jump sequence to get to the other side. From there shoot the grating covering the crawlspace, you saw earlier and swing there first. At the end press the button, to open a door, and return to the previous room. Lets take a small detour for a secret first slide down the slope below the crawlspace you just got out of and safety drop to the ground. Jump on the next safe tile (NE corner) and crawl into the narrow passage. Get in the water and in the open room at the end get crossbow explosive ammo (12) and shotgun normal ammo (13) secret #2. Climb out on the west and use the ladders and passages (avoid the deadly pit before one of them) to get out back in the room with the slopes. Get on the other side of the pit again. Now use the monkey swing to get as close to that open door from earlier as you can. As youll soon find out, it isnt close enough but theres a helpful crack on your right swing as close to the right wall as you can, drop and grab it and shimmy left till you can stand up where the door opened. Crawl to the end here, shoot the grating and drop out in the next room. Search the shelves for some shotgun normal ammo (14) and get the shotgun (15), crossbow explosive ammo (16) and revolver ammo (17) from the higher platforms. Press the button at the end of the rocket hallway to open the door to the crawlspace in the room with the goods. In the crawlspace go right, slide down the slope and grab the opposite wall. Climb so Lara would be on the black hole and backflip and grab the wall above the opening you slid in. Then climb up and backflip to the ledge. Theres a crawlspace just above you get in and keep moving till youre outside climb up the ladder, activate the wall-switch behind you to open the door just a bit ahead of you. Slide over the barb-wire pits and get into this newly opened door. Snatch the flares (18), and shoot the grating at the end of the crawlspace. Shoot the glass in this room and get Chevron 3 (19) behind it. This sets off the alarm and a guard (2) appears outside. Get rid of him, and get back into the crawlspace. Return to the rooftops and continue where you left off getting the chevron. Operate the lever above the hole into the grating to open a nearby door in the next room time getting the valve room disc (20) from below the steam and then use the crawlspace to get back to the room before the toxic pool. Use the disc in the computer device to open the door behind you. Operate the valve in this room to make the pool safe to swim in.
Swim down to the bottom of the pool and look for a switch on the central structure. This opens the door on your right (south) swim there and inside get the small medipack (21) from your right, and activate a switch on your left. This opens the door at the opposite side of the pool. Let your air supply bar fill and save before attempting this maze, as it may take few tries.
The maze.
Swim past the now open door and turn right to enter the maze. When you have choice swim left (north) first, then swim till you have to choose where to swim again swim left (west) now, activate the switch to open a door a bit further on and use the same path to return back to the start, so you can get some air. When youre air bar is filled up, return to the maze and take the same route, but where you turned left to activate the switch swim straight, and then take the left where the tunnel goes down. Swim here till where the door opened (the grating might hint on where it was) and then swim right (north) where the way goes down straight. Swim up the steep part carefully without bumping anywhere, as that takes previous time and then swim close by to the ceiling to fit into the narrower tunnel coming up. At the end just swim up and shoot the windows to pick up Chevron 2 (22). You may return directly back to the big pool, but Ill describe a little detour to get a secret. Return as usual till the vertical swim up where the door initially was, and instead of going left and so back turn right (west) and swim down where the tunnels go, but keep Lara to the ceiling as another narrower section is coming up at the end pick up the crossbow explosive ammo (23) secret #3 and then swim as fast as possible back to where you got the chevron you might need to take a health pack along the way, but it is possible to get through without one too, if youre fast and careful enough. Now return back to the big pool the same way you got there. If you wondered what the other tunnels where you didnt go (if you followed this walkthrough) are for then I can say that they wont take you to any new areas, theyre just a detour to the same places youve been. Climb out of the pool and leave this area. A fly-by will show a door opening on the first floor and a guard being summoned. So go where the door opened.
Warehouse, bottom floor.
Kill the guard (3) and shoot the 2 boxes here to get some normal shotgun ammo (24). Go down the stairs where the guard was. Pick up the large medipack (25) at the top of the stairs, and continue your way down. Youll hear some warning music along the way so draw your guns and dispose of the guard dog (4). At the end will be a storage room with electrified floor. Jump on the boxes and to the platform by the northern wall, where above it is a wall-switch that opens a door by the chain. Jump on the box, duck and shoot the blue one hanging in the chain. Get to the chain. I found that it is easiest to jump and grab it, then climb up 3 times. Turn around and jump off backwards to land safely into the opening. If you dont succeed try higher or lower from the place you tried till you do. In the hallway go straight and activate the lever at the end, then go into the side hallway and climb up get on the bridge and then onto the rope in the middle of the room. From there swing to the wall-switch on the western wall. It opens the wall on the other bridge, so return to the rope the same way you did before and get on the other bridge. Activate the lever in the new room and the sprinklers will set off, making the deathly floor safe. Drop down on the first level, and go where the door opened, shoot the glass and get chevron 4 (26), another alarm will start and the other door on the warehouses bottom level will open setting free few more guards. Return there and shoot the 2 guards (5, 6), pick up the revolver (27) one of them leaves. Search the shelves in the room from where the guard came from to get an access code disc (28) and revolver ammo (29). Return to the top floor of the warehouse and use the disc by the laser control room door. Enter the control room and approach the left row of bulbs. Use the knife to pry the middle laser fuse (30) from its resting place. The fuse is worthless as such, but it deactivates all the lasers, so lets get busy. Go into the wider hallway of this floor at the end and on the right wall is a button that opens a door to the conference room from which you can see the stargate - to see through the windows it you have to press the button in here, which also turns on the light in this room, but otherwise theres nothing to find here. In the middle of the left wall by a double door is a button that opens it (the door). As you enter, a guard dog (7) will approach from behind. Go left and press a button to open the door ahead of you. Enter the room with the Rosetta stone and kill another guard dog (8) that attacks Lara. Go by the controls here, and get Daniels security card (31), from one of the desks (near the shatterable computer). Return to the previous room before the Rosetta stone and use this card to open the door. In here, light a flare to spot a pushable wall panel and push it as far as it goes if you were here before, youll know that there were lasers here, but now theyre deactivated so you can go to the end of the passageway and get Chevron 1 (32), kill the guard dog (9) and guard (10) when leaving back to the warehouse.
Activating the stargate.
Go to the 2nd floor now, where the authorized personnel only sign is. Kill the guard (11) along the way and pass the passage that was guarded by lasers before. Activate the lever at the end to open the next door. Turn left (south) and go down here. Kill another guard (12) and enter the next room. Shoot all the glass before the chevron symbols and place all 4 of your chevrons in the receptacles. Youll hear the stargate activating so return to the higher floor and go through the now open door into the stargate room itself. Jump through it to end the first part of this adventure .
Walkthrough written by Elvis t. aka eTux with additional help from the author.
20. Beyond the Stargate. Director: Titia Drenth. (Titak)
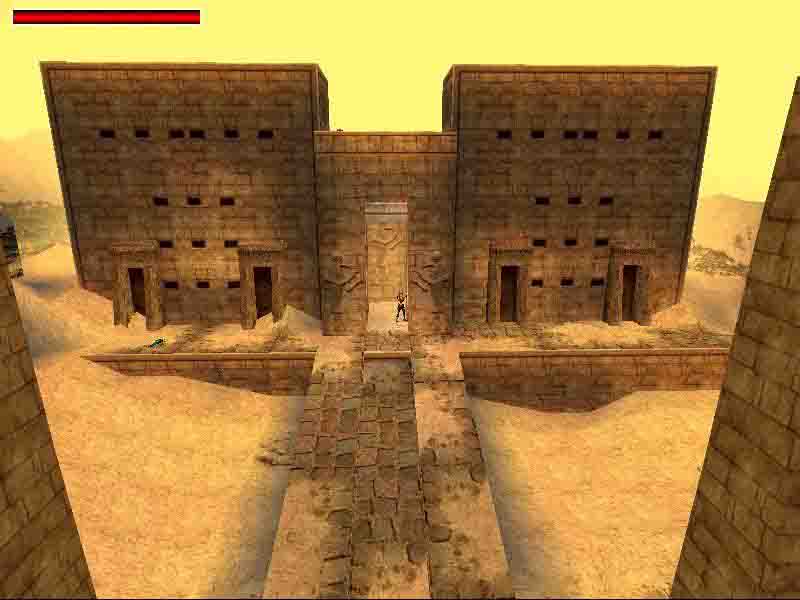
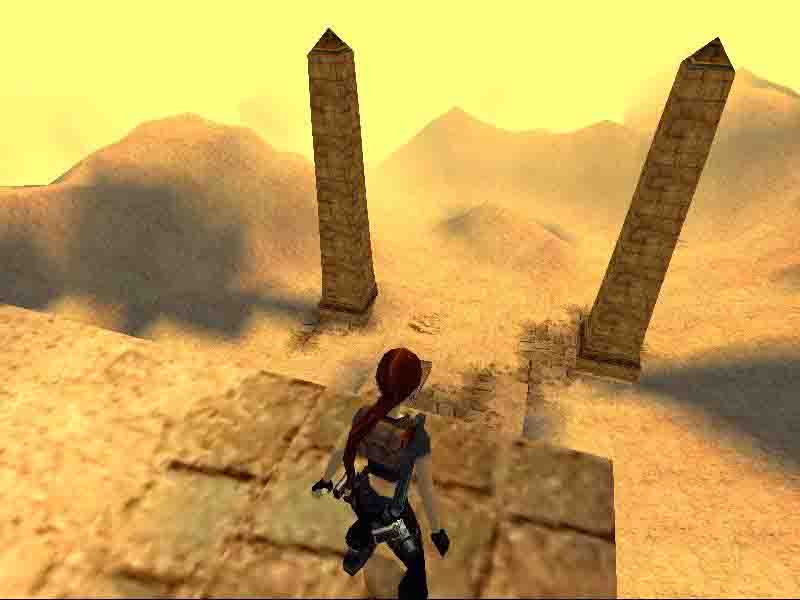
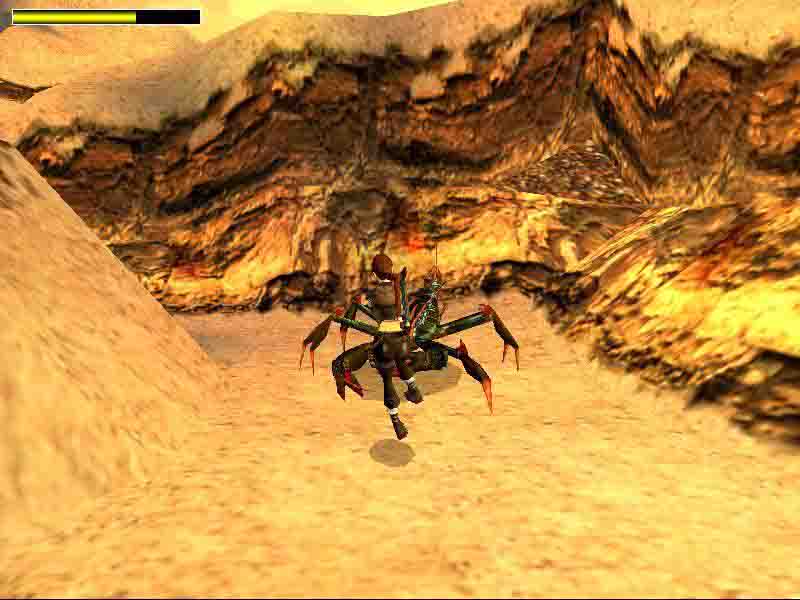
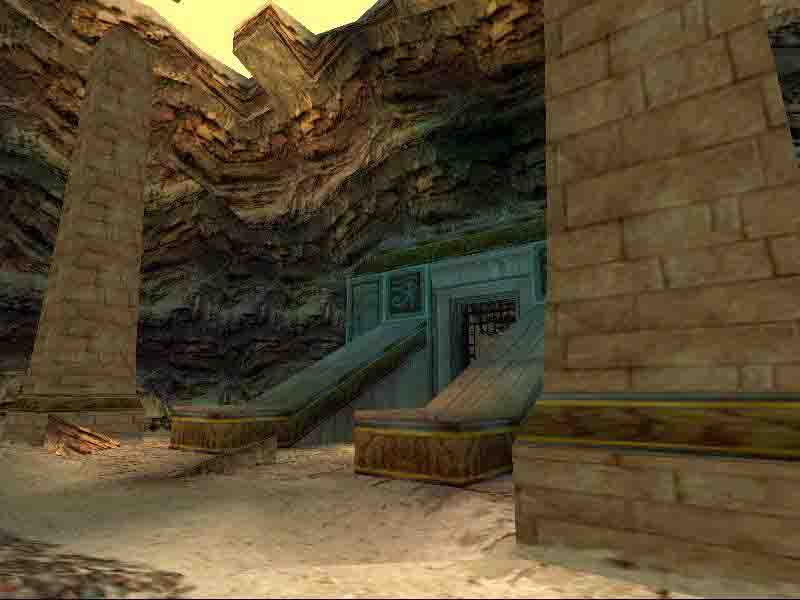
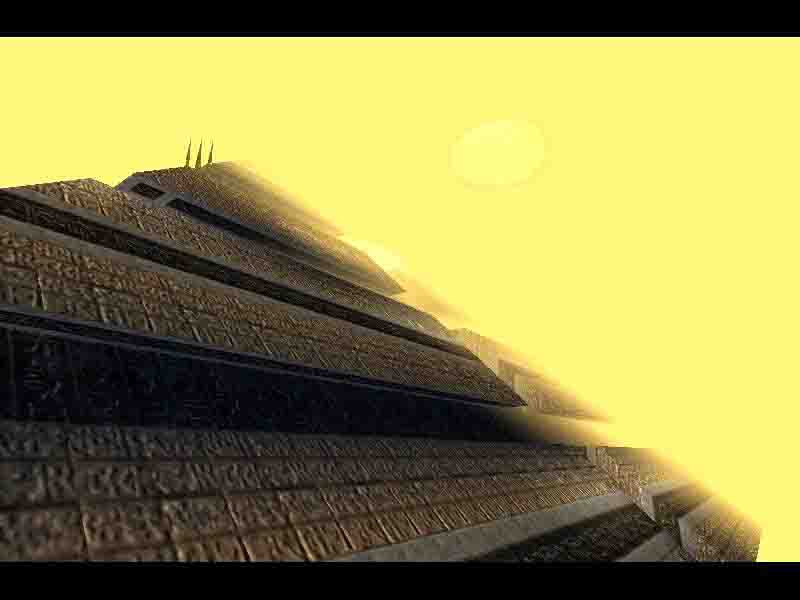
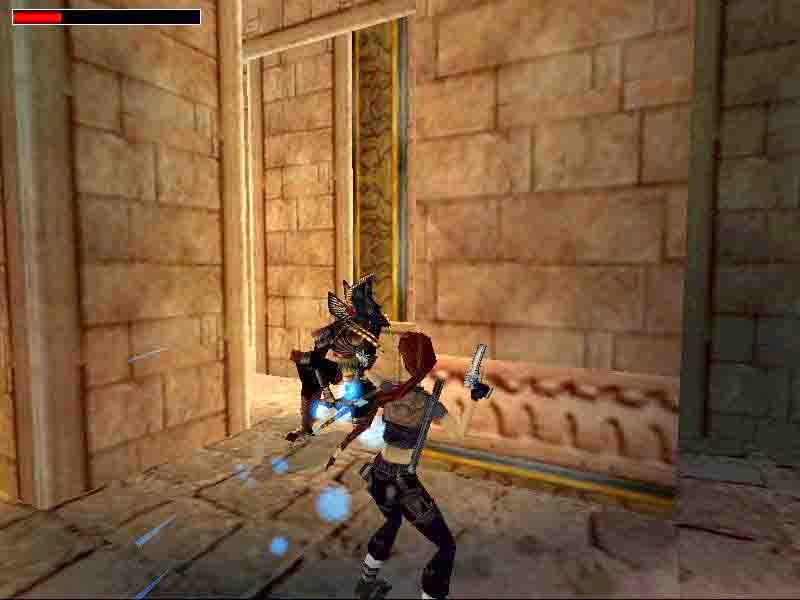 Secret1:
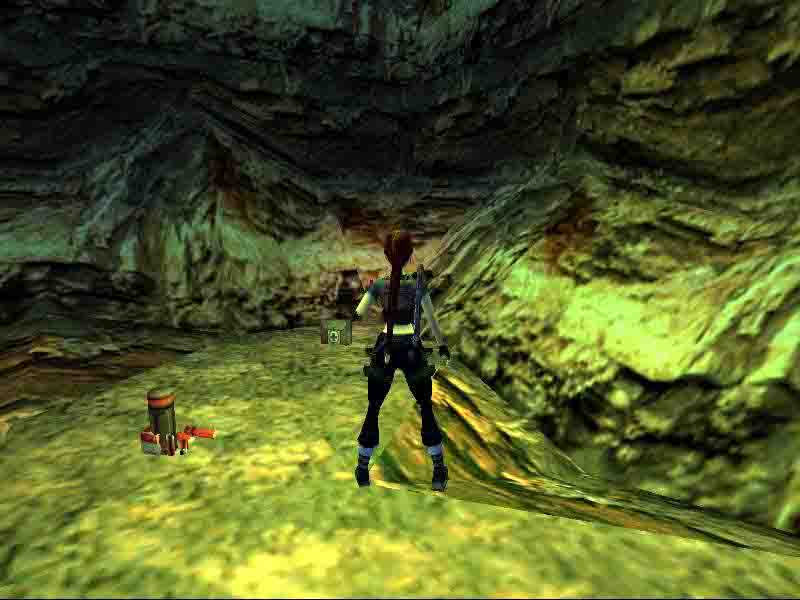
Search both niches left and right for some shotgun normal ammo (33, 34), the 2 hallways on the sides are for much later, so ignore them currently and go up. Shoot the 3 alien scorpions (13, 14, 15) and explore the temple for some shotgun normal ammo (35), large medipack (36) and flares (37), you will be attacked by another alien scorpion (16) as you do. Exit the temple for a most breathtaking view which reveals one alien wasp (17). As you go further on the desert planet another one (18) will attack from the dunes. First turn left and at the end of the small valley climb up on top of the temple. Get the small medipack (38) from one of the grated windows, and some shotgun normal ammo (39) from the roof. Climb down on the other side to get a large medipack (40) sitting on a flat rock. Go further into the desert and turn left to pick up some revolver ammo (41) at the end of the valley. Go further into the desert, and firstly ignore the big canyon on your left. Go in the opposite direction (south) and encounter 2 giant alien scorpions (19, 20). Go further south into an opening and kill 2 more alien scorpions (21, 22). Jump over the pendulum blade pits, when its safe and over the bigger gap to get the Horus Talisman (42). 2 more alien wasps (23, 24) will attack so dispose of them and get out of this cave and move on to the canyon. Hang on the ledge of the pit to spot the first sandy platform and drop on it use the other ones to get on the other side of the canyon and kill the giant alien scorpion (25) there. Move on to the 2nd canyon. Jump to the first sandy platform, turn around to spot that there are carvings onto the southern wall; you can use to get to the bottom of the canyon. Once down face the western wall and grab the crack shimmy right and get into the crawlspace. At the end theres a crawlspace to get back into the canyon opposite it is a high one that leads further continue so till you get to a big room, where youll find some normal shotgun ammo (43), a large medipack (44) and flares (45) secret #4 the only one in this section. Get back to the canyon climb up the same wall, backflip and grab the edge shimmy right and get on the sandy platform. Now cross the canyon the same as you did with the first one. An alien wasp (26) will attack as you move on towards the end of this valley. In the temple you can already place the Horus talisman you got a bit earlier, but as you see the other sitting statue is out of reach so you must look for other ways there
Quest for Anubis talisman.
Return outside before the entrance. Face north and get on the mound behind the pillar, look for a high crawlspace and get within. Get into the cave, and get rid of the alien wasp (27) jump into the water and get the flares (46), swim west till you get to a remote part of the temple. Go through the passageway, avoiding the scissor-blades till you get to checkered room where the key you need lies. Go in the SE direction over the black tiles and jump safely into the niche with the guardian key (47), after getting it, use the black tiles only again and get back to where you swam here first. Use the key next to the Horus eye symbol door to open it. In the next room you already see the desired talisman in the distance, go into the adjacent section on the left, and press the button at the end, this summons 2 translucent red platforms which help you across the pit get the Anubis Talisman (48) and return to the start of the cave where the wasp was. Climb out on the lowest platform in the middle use the other rock pillars to get into a high opening in the east wall at the end of it is the other sitting statue, use your talisman there and the door to the temple will open (If youve placed both talismans of course). Return to the temple through the same route you got here.
The temple/ caves.
Slide down into the caves go further, ignore where you see the temple bits as you cant do anything there without something, so go deeper into the caves. Shoot the 2 alien scorpions (28, 29) and go where they come from, by a pit, jump up left before a slope. Jump on the slope and bounce from one to the other and then on the other side of the pit. Go further here and drop out in another canyon. Jump over the canyon on the west side. Explore the passages here to find the starship fuel (49), return to the canyon, jump south. Kill the wasp (30) there. Now at the end of the passage you should reach the temple bits I was talking about. Place the fuel into the round opening to open the door go there and pick up the Goauld Chevron (50) to get a fly-by. This suggests you to return to the start of the level, where a door opened in one of the hallways by the stargate so do so. Kill the first demigod (31) by the temple. Enter the temple and meet the second one (32). Go where the door opened, press a button and continue up, till youre beamed into the spaceship.
Walkthrough written by Elvis t. aka eTux with additional help from the author.
21. Inside the Goauld Starship. Director: Titia Drenth. (Titak)

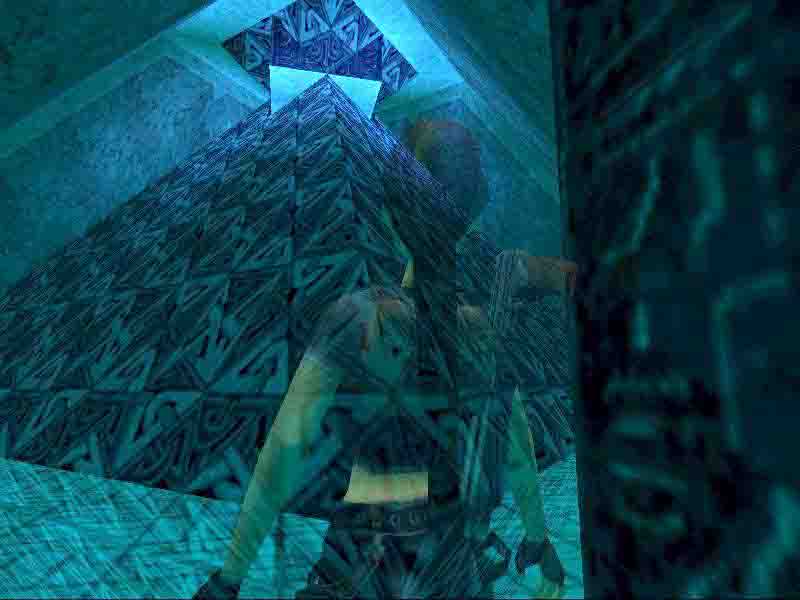
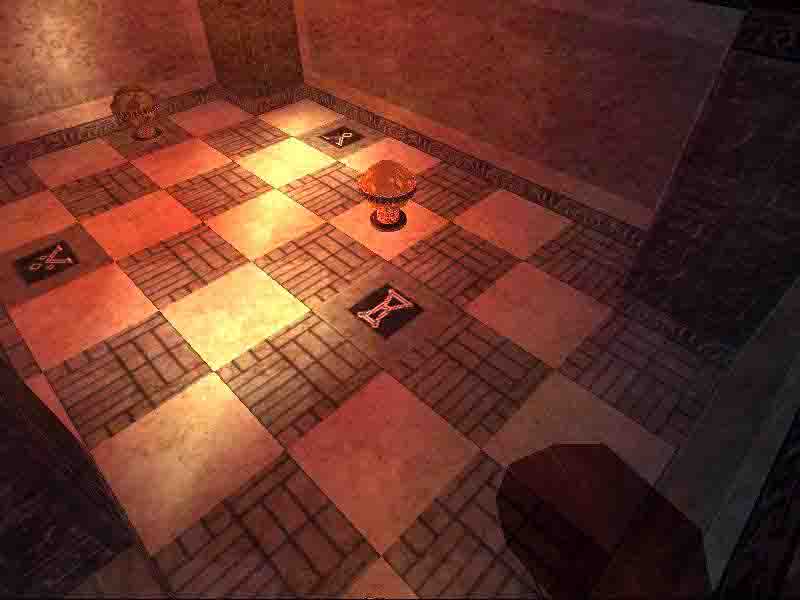
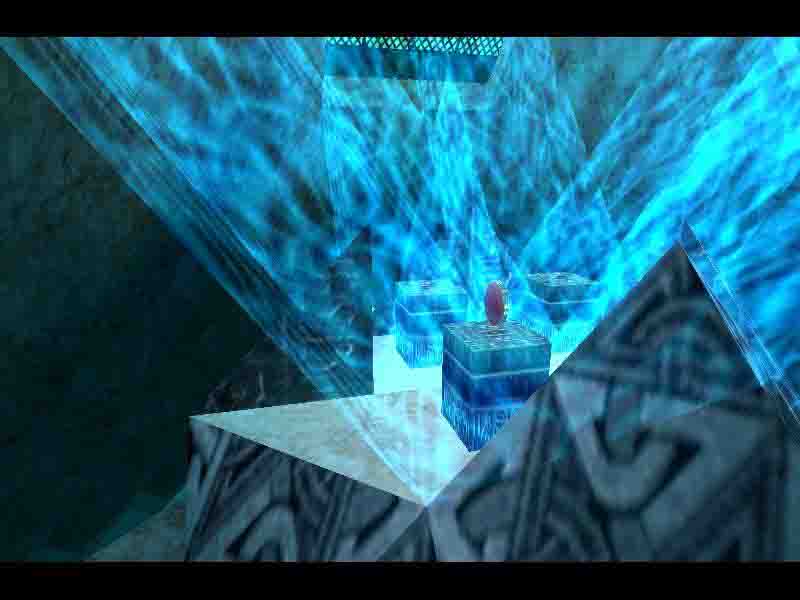
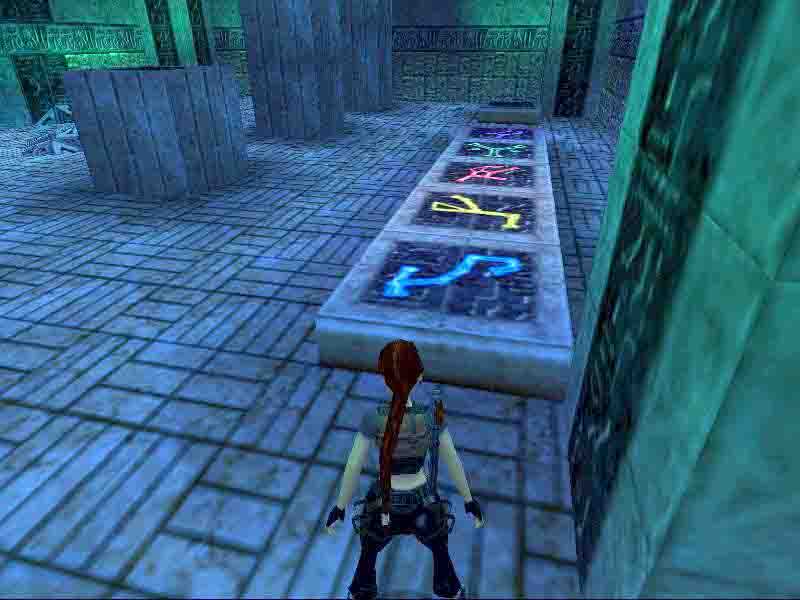
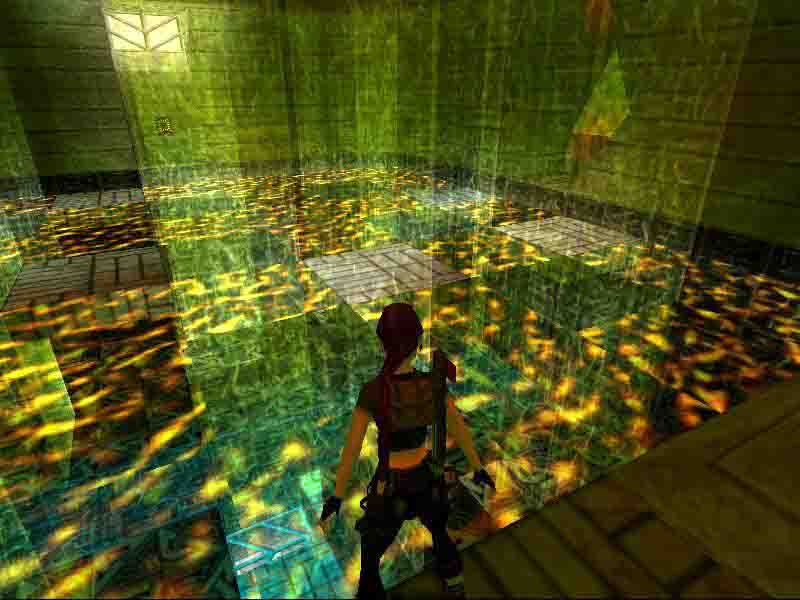

Secret 1-2-3: 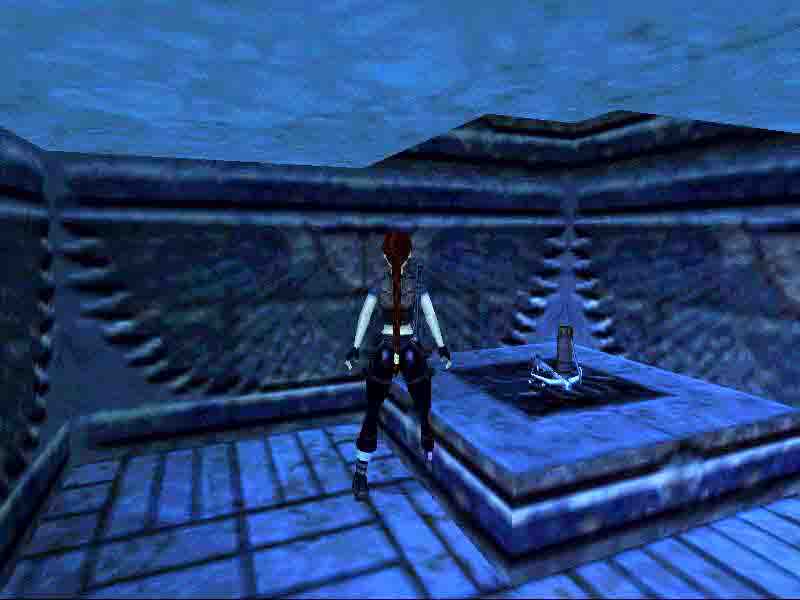
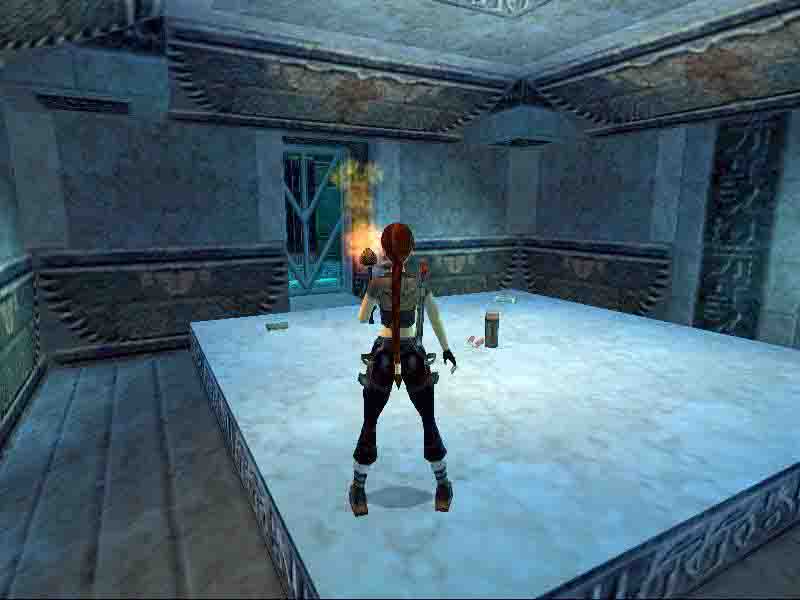
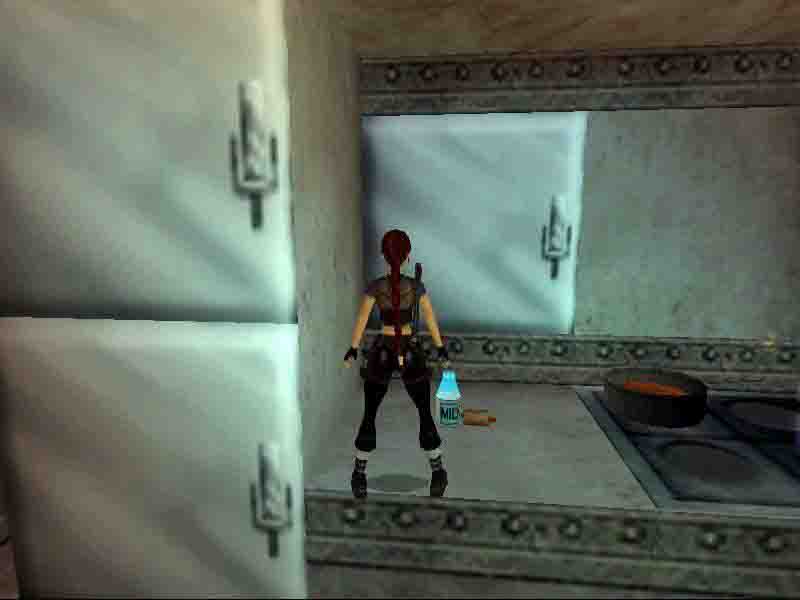
Go along the passageway and jump over the fire pit, a wall panel will lower. Step on the next elevator itll beam you higher kill the falcon demigod (33), go into the adjacent room and drop into the water, wade into the other room you saw through the room earlier then and press the button to open the door, get there. Go up and turn left (west) by the flame. Now youve arrived at the 4 beetle pyramid and have a choice between the western and southern route. Do whichever you prefer first.
Southern route.
Stop before the slide and time getting past them with the burners intervals (you may also wait in the alcoves besides the burners, youre safe there). Kill the demigod (34) and come to a room with vertical burners on pillars. If you got the crossbow secret in military installation, you might be familiar with the technique how to get to the beetle, but Ill describe again. Grab onto the edge of the pillar shimmy around till a corner, where it should be safe, from there on jump on the next pillars and so on till you get till the beetle. Pry the scarab (51) from the wall and the burners will disappear. After this a wall panel will have lowered in the previous room (south) so go there. Slide down and activate the 2 switches to open the translucent door and get into a room below the deadly water, avoid the shining tiles as theyre deadly. Slide down on the right and get down into the big pyramid room. Go south where the currently only open door is and pick up the shotgun normal ammo (52) from the pedestal. Jump on the higher block and swing past the burner. Activate the button on the other side and swing back. Go to the opposite side of the pyramid room where the door opened. Theres a movable block puzzle here, before taking any further actions look on the black line of each planet especially mark the symbols of each planet. Climb up the ladder in the passage thats in the corner of this room and get into a crawlspace at the other side press a button, this enables you seeing hints where to move each planet, so go to the top room and mark the spots, also snatch the flares (53) return down and move each planet on where the corresponding symbol was. After moving all 3 planets in the correct spots (a shining planet appears above them once theyre on the correct spot, Spoiler: Map) an earthquake occurs and youll see a fly-by of the top of the pyramid. Look on the sides of the pyramid some sectors will be broken out and youll be able to maneuver on them to the top of the pyramid. Pick up the Ras key (54) on top of it and slide down. Kill the falcon demigod (35) at the bottom. Go past the east door that is open now. Go down and enter the next puzzle room.
5 pad and 4 column puzzle.
The goal is to raise each of the 4 columns here, and you do so by stepping on the 5 tiles, which raise and lower certain columns (there is also another pad a bit off the others that resets the whole puzzle). By stepping on the tiles in the right combination you can raise all 4 columns, if it is too enigmatic, here comes a description of what each of the tiles does:
First lets start with naming each of the columns the tallest = A; the 2nd tallest = B, the 3rd = C; and the 4th (which you currently dont even see, cause it isnt risen) = D.
Now what each of the tiles do:
Violet:Green: C rises D lowers
Red: C rises B lowers
Yellow: D rises
Blue: A rises C lowers
Just step on each tiles so that in the end all 4 would be risen. If this is still too mind boggling bellows a direct combo, am not saying there arent other better ones but this works too, so dont knock it if you couldnt bother figuring it out for yourself, lol. I do recommend to do that as a last resort, thus I also made it a spoiler (i.e. select the brackets with your mouse to see solution)
(SPOILER:Violet Blue Green - Yellow.)
On the top floor explore the 4 side chambers for 2 shotgun normal ammos (55, 56) and a large medipack (57), and most importantly a scarab (58) from the south wall. By one the eastern wall pickups areas, near a pedestal light a flare to spot a movable block push it as far as it goes and get the crossbow (59) and crossbow explosive ammo (60) secret #5. As you get all the stuff a falcon demigod (36) will start roaming around the top floor and a demigod (37) on the ground floor. Return back to where you entered this area from the pyramid room and go where the wall panel lowered, when you got the scarab. Another elevator will take you up, where you can use the Ras key to escape back to the previous area. Go up and meet another falcon demigod (38), then return to the 4 scarab pyramid area. Place the 2 scarabs if you wish, but you may conserve them till youve got all 4.
Western route.
Get down by the toxic pool and maneuver around the safe tiles, to the other side, to press the button there (the jumping is pretty simple so I wont go into detail). This opens the door in the north, so get there. Slide down the slope, but dont drop in the water jump on the side and keep the jump button pressed while holding the arrow key in the direction you want to go, continue this way till Lara can stand safely on a tile. Once done go where you see the scarab on the sides are 2 burners, time the burn/not-burn intervals to activate the switches. This starts some small trembling, and opens the door to the scarab (61) this opens the southern door in the toxic pool area, but before returning to there drop in the water that is safe now. Swim through the narrow opening in the north and to the end get the torch and drop through the turquoise opening down into the water room. Return to the toxic pool, and before going into the south area, return to the 4 scarab pyramid area and to the burning vessel light your torch and go downstairs, and use it on the 2 vessels to open the rooms to one of the final secrets in this movie secret #6 flares (62), revolver ammo (63), small medipack (64). Return to the toxic pool area, you may drop your torch now, as you dont need it. Go south now; youll come to an area where you see a pillar in the middle and a toxic pool below you. Hang on the edge of this opening, drop and grab the crack below, shimmy toll you can climb up in this opening activate a lever. Continue up the hallway and climb up, now the floor has crystallized and you can right walk to the central pillar and get up on the gratings. Get the scarab (65) from the eastern niche and dispose of the falcon demigod (39) that appears. Return to the 4 scarab pyramid area the same way you got here.
Ras Throne.
Use the 4 scarabs on the pyramid and itll open up. Get the 2nd Ras key (66) and the door before the northern passage will open go there and youll be taken up to Ras throne room. Youll already see Ra roaming hes excited to meet you, as you see. Go to the SW of the room first and jump past the translucent wall use the Ras key here. This opens the door in the opposite chamber from here (SE corner of the room) get the Ras Pendelum (67) the ultimate prize in Stargate and a door to the chevron will open from the other side so go there (NE corner), get the Earths Chevron (68) and go to the only chamber left (NW corner) and drop into the hole to escape this spaceship
BUG ALERT! If for some reason you carried the torch this far after getting one of the secrets, drop it before leaving the level, or you might experience crashes when returning to the earlier Stargate levels.
Beyond the Stargate.
Press the button to open the door, slide down. Cross to the other passageway (east) and into the new room place the 2 chevrons to re-activate the stargate. Jump through it to return to the military installation.
Military Installation.
A fly-by will show you the exit route; enter the next room kill the guard (40), take the shotgun normal ammo (69) he leaves behind, also snatch the shotgun normal ammo (70) from behind a box by the steps and take the large medipack (71) from on top the boxes. Exit to the warehouse. Before going down, go into the wider hallway again and turn west to enter the canteen jump by the fire and get the milk bottle and bread breakfast (72) secret #7 this sure might come in handy :). Go down on the middle level and kill the guard (41), the other guard (42) and his dog (43) might have arrived meanwhile too. Go where the exit sign is and youll find yourself at the start again behind the truck is the escape route so go there kill the guard (44) at the end and step out to end the movie
Movie summary:
Pickups: 72
Kills: 44
Secrets: 7
Secret count 58.
Walkthrough written by Elvis t. aka eTux with additional help from the author.
22. The Movie Theatre Part 6. Director: Michael Prager.
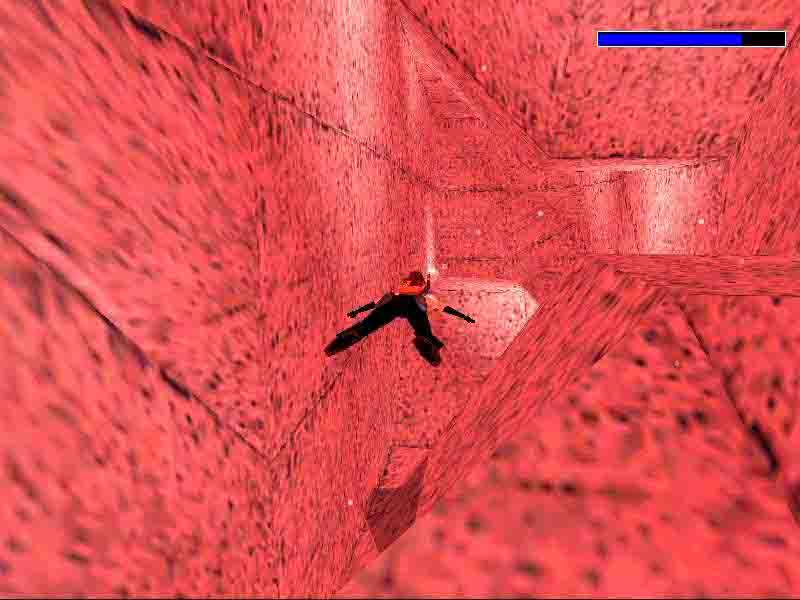

Labyrinth swim.
Not too hard, do the Star bit, dive into the water, swim L and up into a hole, the camera view changes and you go in a kind of remote control, follow the tunnel behind the glass and come out to the Theatre, get Movie Star 5 and go into Cinema 6. (Theres no Secret here.)
Secret count 58.
Walkthrough by Dutchy
23. Jurassic Park 1-2. Director: George Maciver
LEVEL ONE - Three secrets

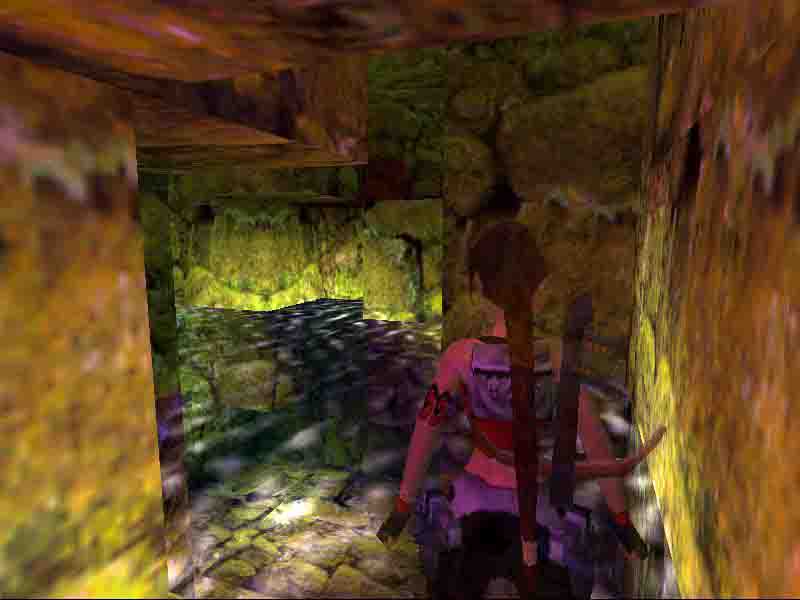
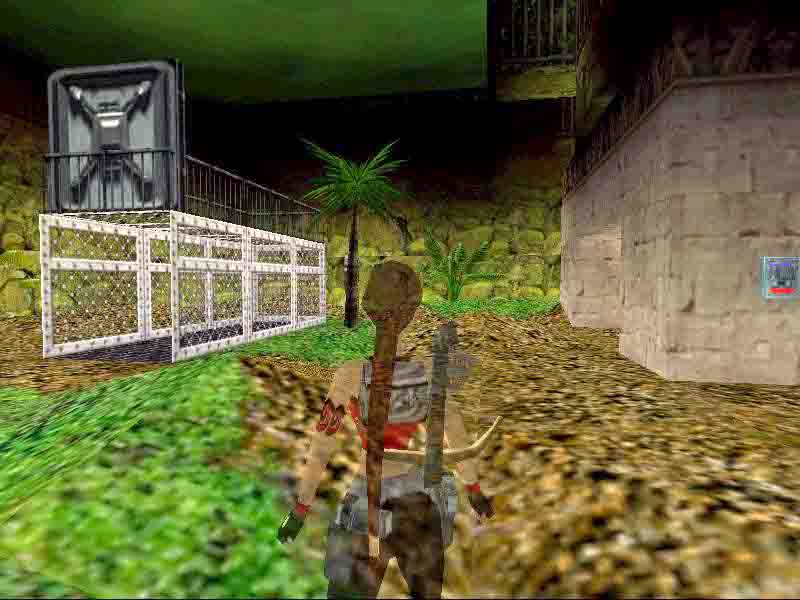
 Secret 1-2-3:
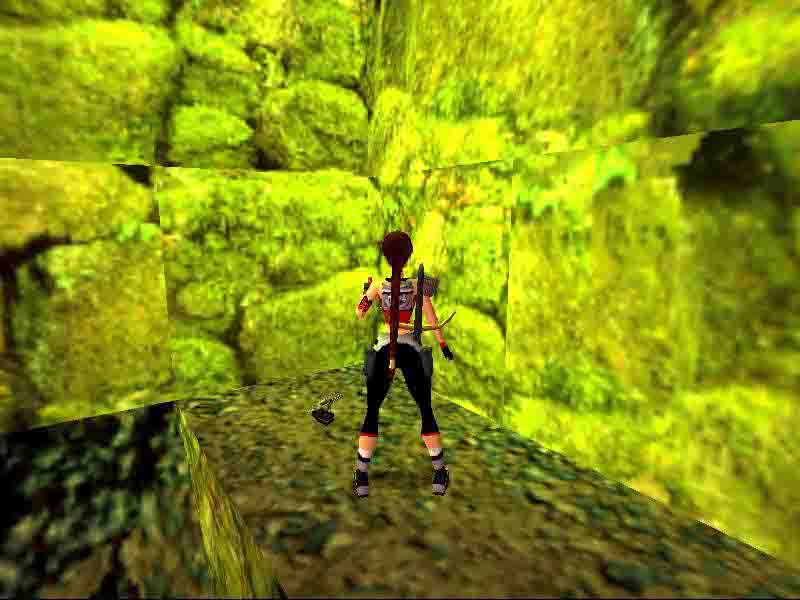
There are seven secrets to find. All secrets are included in this walkthrough
Watch the cut scene of what awaits you in the park!!! You hear gun fire and fear something terrible has happened. Could Lara ever imagine the danger she is about to face?
Go forwards into the next room and see a burning pillar to your left, this holds a key which you will collect much later. There is also a coloured tile in the SE corner so remember this as you will be returning to light it later when you have the torch.
Now you can go investigate outside.
Head right through the dark passage and enter the spooky streets, there is a dead guy on the path but theres nothing you can do for him now so take a left and head into the first door on your left.
This is what I call the machine room and in the corner behind the machine you will find the second coloured tile you have to light later on with the torch. For now though you need to look for a ceiling hatch at the north wall and climb up to a room above. You will enter a corridor, collect the flares then look up in the wall to your right for a white grate, now go into the next room and climb the box so you can shoot out the white grate in the corridor wall. Go down and climb up into the new crawl space then make your way to the end. Shoot out the next grating then crouch on the left side and see another grating to shoot in the wall of the next room. Now go enter that new crawl space and head through until you can shoot out another grate and climb down into a new room, but beware as you drop down as a Dino awaits you! Once hes seen to you need to do timed run to get out of here so use the wall lever at the south wall to open the door in the north wall and quickly get through into the next room.
In this new room you can see the third coloured floor tile which you will light later with the torch but for now go to the north hallway and use the wall lever at the north wall to open a door in the outside area. You can now leave here via the north door and go through the machine room to get back to the streets.
Go north along the streets and you will come to a right corner where a Tiny Dino will show up to greet you, pick him off as his bite is poisonous then notice the new open door in the west wall nearby, you need a disk for the computer in there so first head over to the east side of the street and go under the arches to find a second dead guy, move him and collect the 1st COMPUTER DISK then go back to the newly opened west room and use the CD on the computer to open another door nearby. Leave here and head back up the street to the south and look in the second alcove of the west wall for the new open door. Head through and the door will close behind you.
Drop down the hole into water below and climb out into the passage at the north wall, head through and shoot the Bats that show up then continue on until you reach a closed blue door ahead of you. Look up in the wall to the left of the door and see a crawl space to climb into then crawl through to a new cave. Head through and come to another water pool but you will have to jump in and then return in a bit as a crocodile attacks when you enter the east tunnel. So kill the Crocodile then return to the water tunnel and make your way to the end, go right then right again until you can swim up and climb out into a new passage. At the end of the passage climb up one level to your left then at the end you can turn and drop back and grab the edge of the passage, now shimmy right and climb up onto the block. Face out over the water and see the next block to jump to over to the NE then from there climb up into a new passage to the west. Head through until you can drop down into a new cave area where a Crocodile awaits you, pick him off then take a dip in the pool at the west side of the cave, swim through and to the right to find an under water lever, this will open a door back in the previous cave. Swim back and climb out of the pool then head over to the NE corner and drop down the hole to enter a passage, proceed along until a door opens for you then go left then left again to enter the newly opened door.
You will now enter another pool room so go to the left side of the ledge and jump over to the west ledge, then jump over to the north ledge, you can see a passage now ahead of you but beware as you enter it as a boulder crashes down and drops into the pool opening up a hatch in the pool floor. Dive in and go down the hole to find an under water lever to open a door up in the passage. Now retrace you steps back over the ledges to the north passage and head through. Drop down into the pool ahead then swim through the north wall crawl space avoiding the Crocodile that shows up as best you can. You can climb out at the west ledge of the new cave and shoot the Crocodile before using the monkey swing to get over to the other side of the pool. Drop off the monkey swing and go up the small slope, stop here and look up in the south wall for a crawl space but before you enter here go to the north side of the cave and jump the fire water to retrieve a SMP from the east alcove. Now return to the cave and enter the crawl space in the south wall.
You will arrive at a small fire pool so do a running jump over and catch the wall ladder then climb up to a new cave. A Dino attacks so either stay and fight him or simply run forwards and drop down into the water pool below.
Swim through the west wall crawl space and a Crocodile will show up, youll have to dodge him as best you can as theres no escape just yet, so swim through and youll enter an under water cave, swim round to the right and in the west wall alcove theres a lever to use before heading through the NE corner crawl space. With Crocodile still nipping at you swim through and up to emerge in an out side area. You can now shoot the Crocodile if he followed you to the top but also beware as two Dinos are lurking nearby so stay in the pool if you can and shoot them from safety.
Head over to the SW corner and jump up the mud slope to retrieve SECRET ONE - SMP then slide down and head over to the NW corner and climb the ladder below the closed door. As you approach the door it will open so go through and use the lever on the north wall to open a door back in the streets. Now go back to ground and make your way over to the SE corner where you will find a wall ladder on the south wall, climb up and go left into the passage where you will find the door out of this area to take you back to the streets.
Go left from here and then right at the street corner, go left and head up the steps into the building to your left, take the 2nd COMPUTER DISK from the desk then leave and at the bottom of the steps do a U turn and head over to the NE corner. Here you will find the newly opened door so go through and find the computer in the NW corner to use the CD on and open the next door in the streets.
Leave this room and make your way left then right then left again so you are heading south and going back to the start of the level area, you will come to the first dead guy on the path to your left so take a right here and run past the jeep to your right, keep going until you can see two closed black doors at the west wall, but before you reach them look left to see a newly opened door which will take you to your next mission.
In the new room there are three doors ahead of you. All of these doors are opened using timed levers. Also notice there is a fire block to your left and two levers in alcoves above you but dont panic because all will be revealed soon!
To start with you need to open the two black doors outside at the west wall, so go up onto the white block to your right and jump up into the right side alcove, use the lever and open the black doors outside then go out into the streets and enter those newly opened doors. There is a cage ahead of you and you can collect THE SHOTGUN from inside but dont worry if the door closes on you as it will open again when you pick the shotgun up.
Now look at the doorway you came in by and see you can climb up the pillar on the left side, so get up there and shimmy right to the other side of the doorway then climb up, from here you can jump and land on top of the cage where you will find 3rd COMPUTER DISK.
Go to ground and search the right side of the doorway pillar for a lever which will put out the flames up on the pillar back in the three door room. Ok job done in here for now but you will come back later to collect a secret so take note of the statue at the east wall then return to the three door room nearby.
Climb the pillar to your left, where the flame is now extinguished, and jump up into the alcove in the wall, there is a lever to use so be ready for your first timed door which is below you, use the lever then back flip off the alcove, land then sprint straight ahead to get through the door before it closes. Once inside the door closes and you have to run over the very corner of the coloured floor tile in the SW corner (which will ignite) to open the door to get out, you need to do this before you use your next timed lever, so once the door is open go use the lever at the south wall and sprint out through the door and round to the left, head past the middle door and enter the next door to your left before it closes. Whip out your guns as Tiny Dinos attack then run over the coloured tile edge as before to re open the door you came in by. Notice another closed door in this room which you will come back to later so make a note of this then go use the next timed lever at the east wall, sprint out and to the right, take a first right to enter the long passage to the middle door. Get your guns out and shoot the waiting Dino then relax for a while as timed runs are finally over, phew!
In the new room, go into the NE corner and use the wall lever twice to open the door out, then go to the south wall and look above the computer panel for a ceiling hatch, open it and climb up to enter a dark passage, go through and come to a room with coloured tiles on the floor, this spells fire so beware! Some floor tiles have a red marking on them, and these are safe to jump to. Once you succeed to the other side of the room you can collect THE TORCH then make you way back in the same way.
Go back down the hatch and take the torch to the right side room of the three door room, light the torch on the burning tile then take it outside. Go left to re enter the double black gates where the cage is (if the gates have closed just use the lever again up in the right alcove of the three door room to re open them) then stand on the left side of the statue and light it, this opens up a passage in the west wall. Leave the torch and jump the flames at the passage entrance then make you way down the slope to a dark room. Climb the ledge at the SW corner then jump over to the east ledges to collect SECRET TWO - SHOTGUN AMMO - LMP
Collect the torch then head back out into the streets, you need to go light the three coloured tiles you saw earlier so head back to the machine room and find your first tile in the NW corner and light it, then head through the south door in the machine room and go down to the second room, go left and find your second tile to light then make your way back out into the streets. Go right and when you reach the first dead guy take a right turn into the dark doorway to re enter the room at the start of the level. Light your third tile and a new door is now open back in the machine room so head back there and enter the south door again then take a first right to enter the newly opened door.
Use the wall lever at the south wall to open the door back in the right side room of the three door room, now head back there and enter the newly opened door. In this new room use the lever at the north wall and watch the flames go out on the pillar in the starting room of the level then go back to that room, climb the pillar and take THE GATE KEY
Now remember the second dead guy where you got the first computer disk from? You need to go back to where he is over at the east side of the streets under the arches, when you reach here look at the north wall for a black door and use the gate key to open it.
Go through and use the CD on the computer at the end of the room to open some blue double doors in a small jungle area where you will exit the level later. Now get ready for a shoot out as two Dinos attack, see them off then get back out to the streets. Go right and keep going whilst looking up in the north wall for a crawl space which will take you through to a small jungle area and the final part of this level.
There is a secret to get nearby before you go wandering off down the jungle room, so go to the first green pillar on the right then find a second one behind it, climb up then jump over to the first green pillar, now climb up into the crawl space in the east wall and go through the small passage, the door will close behind you so theres no going back! Boulders crash down and roll in front of you so line up in the middle of them and time them so you can sprint through to get over to the far east wall, now climb up the ledge and collect SECRET THREE - THE REVOLVER
The boulder room has changed now and there is a deep lava pit to get back over, its simple enough, just use the slopes to shimmy round and get back to the door which will open for you to leave. Climb down from the secrets area and make your way down the jungle room. You will meet a Dino on the way so shoot it then go all the way to the bottom of the room where you will find the newly opened blue double doors to your right. Go through and exit level one.
Walkthrough by Moonpooka
LEVEL TWO Four Secrets
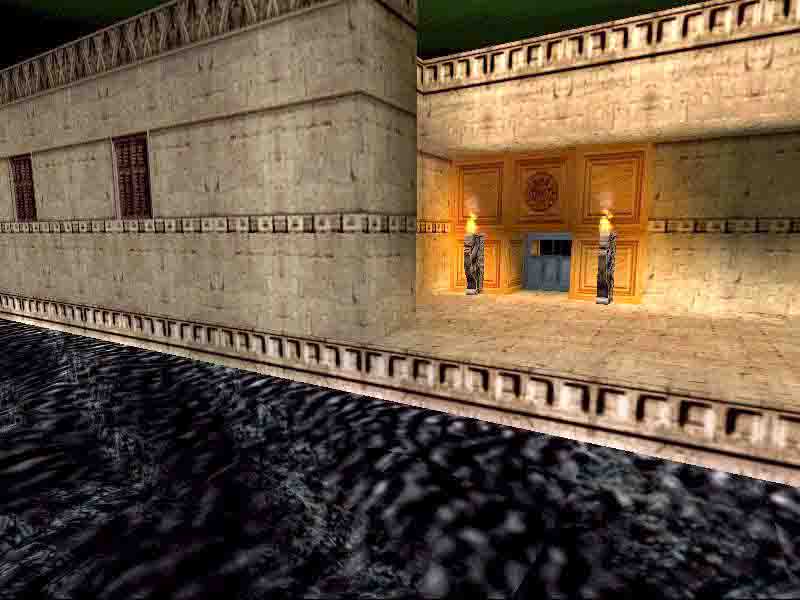
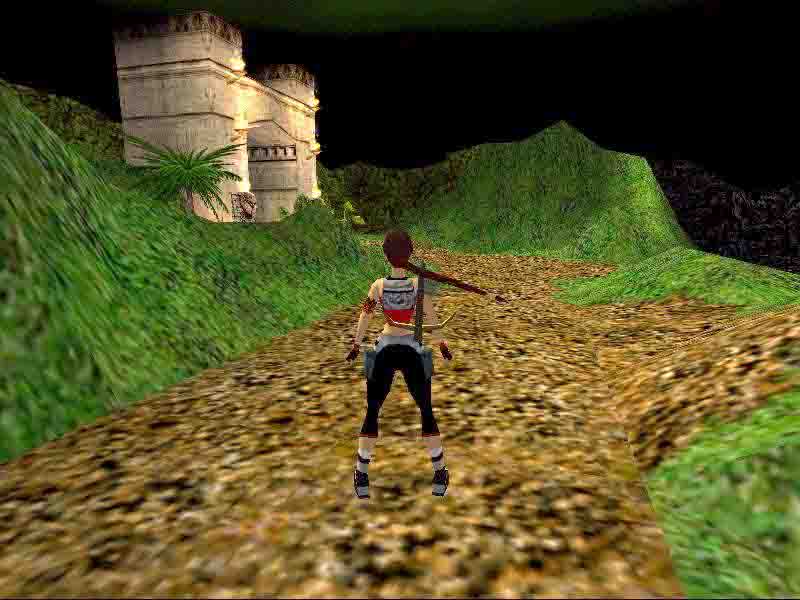
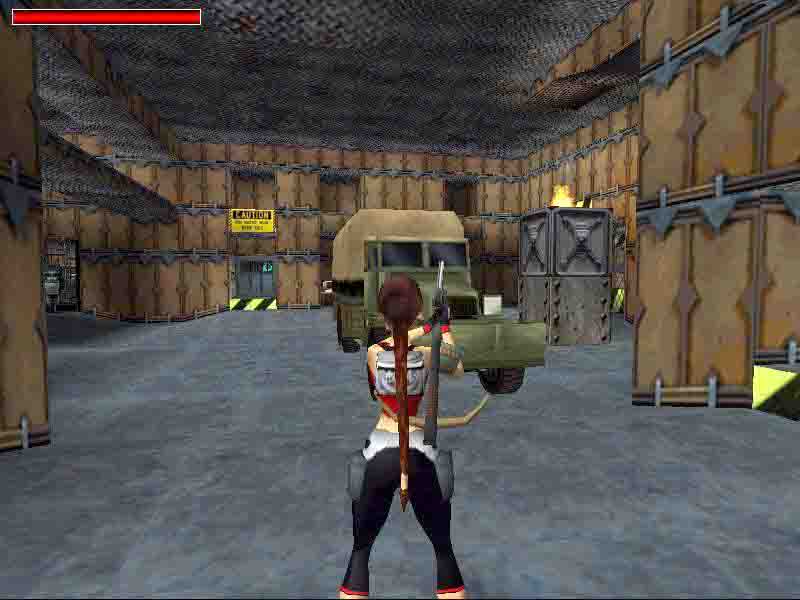
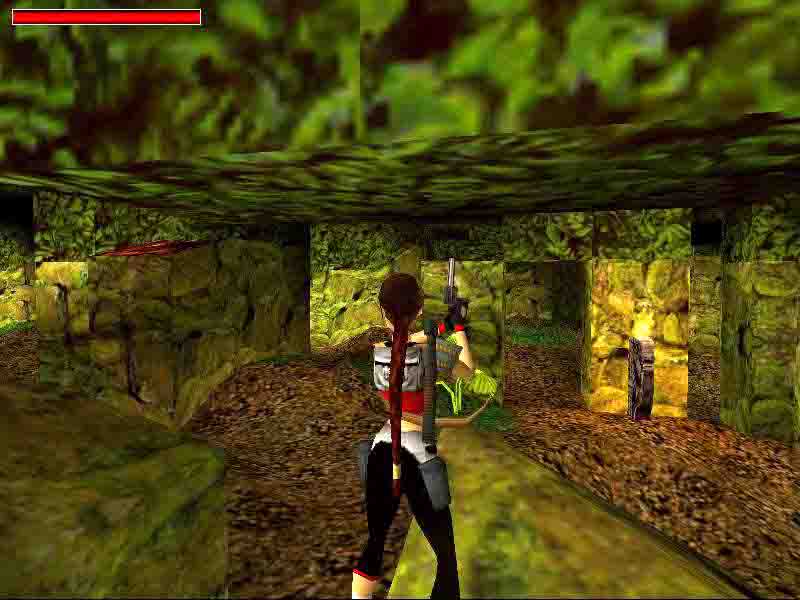
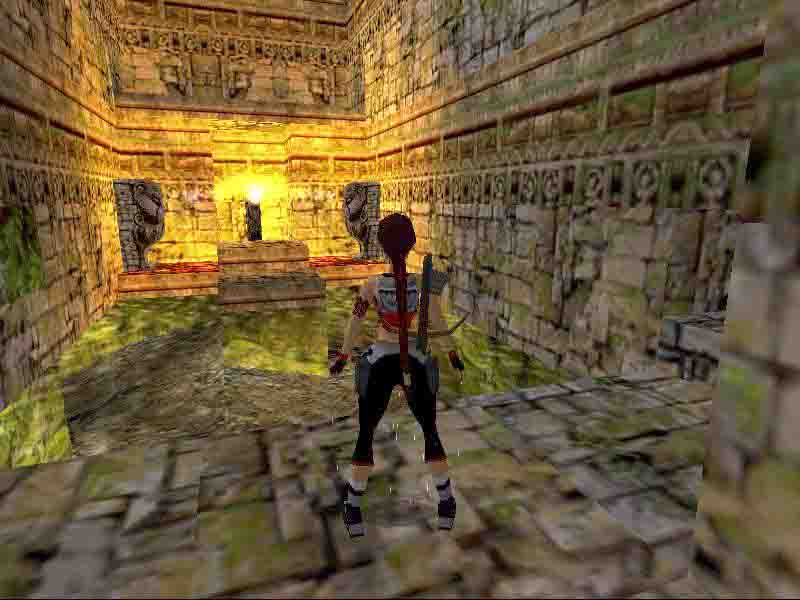
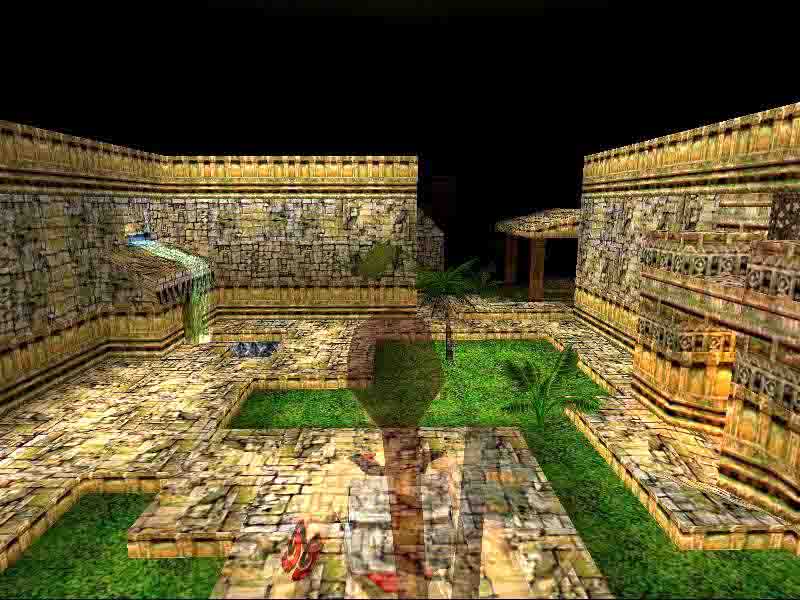
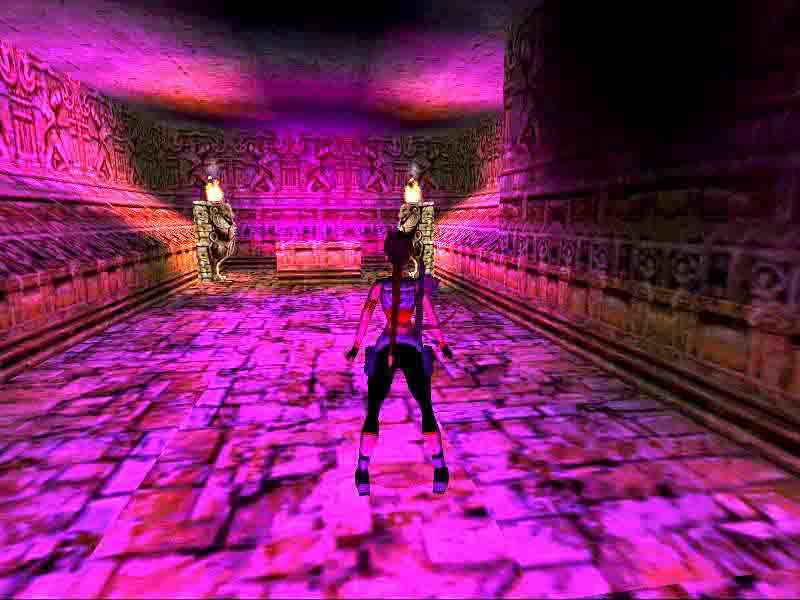
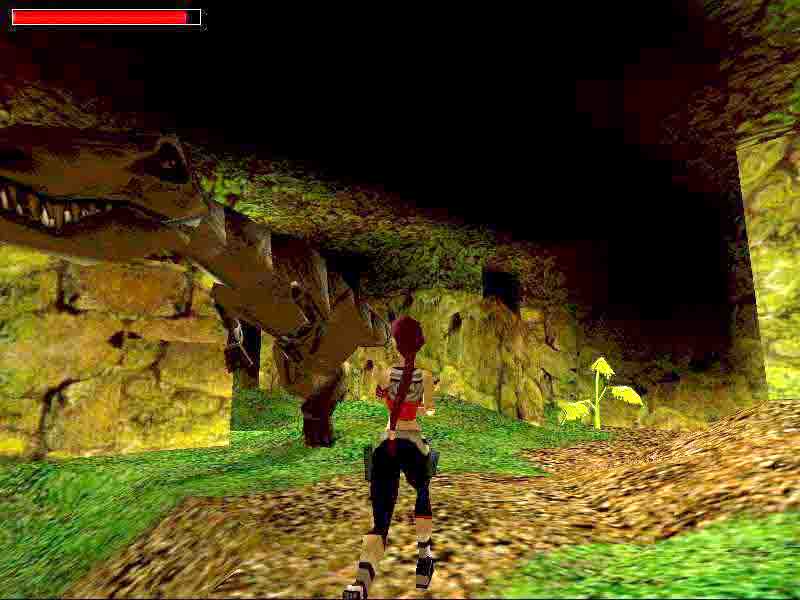
Secret 1-2-3-4: 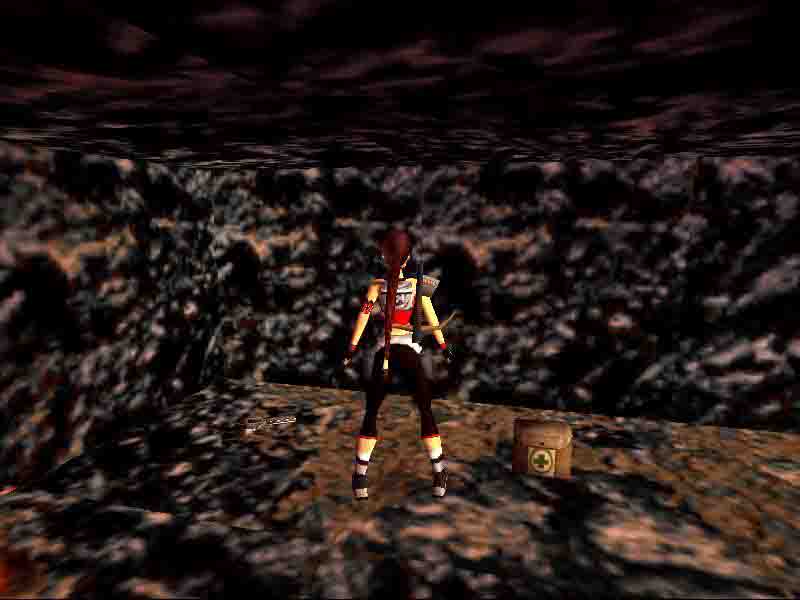

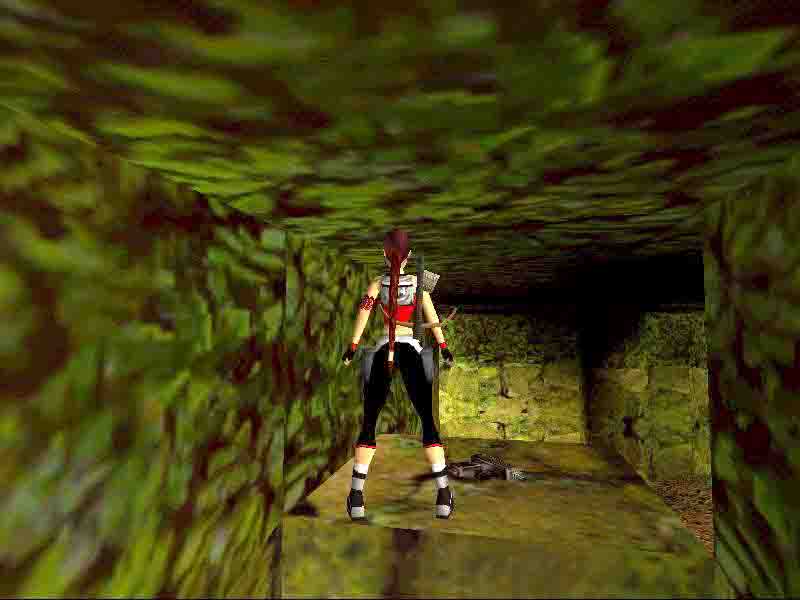
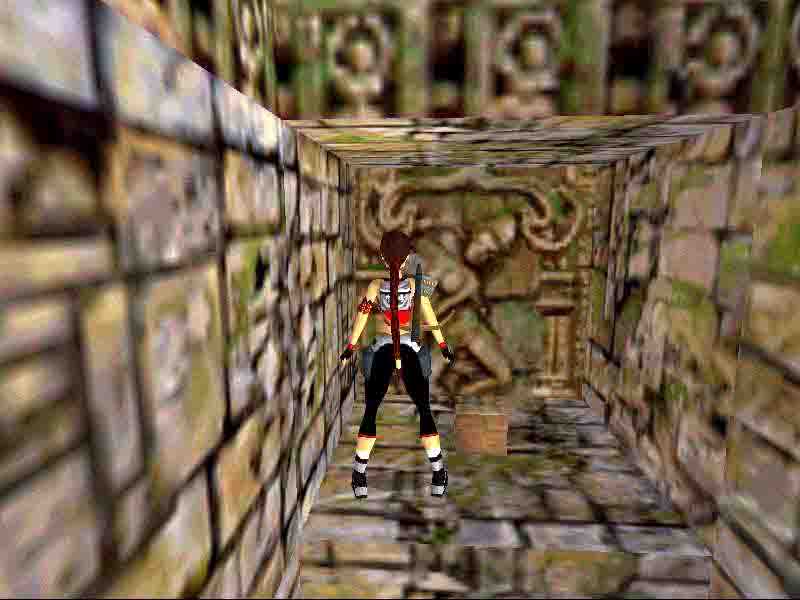
Lara enters level two with a flyby view of the new area, but also she is being attacked by Tiny Dinos, you cant do anything about this until you take control of Lara then you can shoot the tiny Dinos and top up with a small med pack to combat the effects of the Tiny Dino poison.
Your first visit is to a small cave which is to the left of the lake ahead of you. Use the black rocks to shimmy round the waters edge then climb up and make your way into the cave. As you walk further in a Dino is waiting for you so pick him off then go round to the north wall and collect some SHOTGUN AMMO. Stay in this area and look in the west wall for a lever to use, you will see a view of some fire tiles which are in a room you will visit later on. Now head to the other end of the west wall and enter the alcove where you can see a white box tucked away, pull the box towards you once then go round to the other side and find the 1st COMPUTER DISK where the box was. You can now get a secret in the cave by pushing the box forwards once which will open a hatch in the ceiling of the cave, so now make your way to the south wall and climb the white box next to the wall torch and climb up into a small lava room above the cave. Its a bit tricky to navigate but you can cross the lava floor using safe places to get to the far north wall but along the way Tinnos Wasps will attack so be quick and kill them so you can go collect SECRET FOUR - LMP - THE REVOLVER then make your way back over the lava and go down into the cave again.
Your mission is finished here now so leave the cave and shimmy across the black rocks as before to get back to the start of the level.
Now back in the streets area go south a little way until you have some green slopes to your right, from here look left and you will see a white grate up in the building wall, you can save shotgun ammo and use your pistols if you back flip on the slopes then jump and fire at the grate to break it.
Now climb through the new crawl space and enter a small room with a hole in the floor, drop down to the room below and hear the door open to let you out into the streets, but dont leave yet as there are some FLARES to collect from the corner and then a lever to use on the book case at the south wall, this opens a door across the street.
Now leave this room and head straight over the street to the newly opened door ahead of you and through to the new room. There are doorways to the left and right and you can enter either which will bring you out to a room with the fire tiles you saw earlier when you used the lever in the cave. Look across the fire tiles and see a lever at the end of the fiery passage. You need to jump round the first flame then the last flame will go out on a timer, use the lever then quickly back flip to the centre tile where you are safe for now then carefully jump the final tile to get back out into the room.
Now leave this room and head into the first room, go round to the left and find a newly opened door, go through and use the wall lever at the south wall to open a door at the other end of the street, now head back outside head eastwards up the street.
You will come to some blue double closed doors to your right and also a small closed door ahead of you so make a note of these doors as you will be back here soon. Now continue on and go left of the building where you can take a walk along the lakeside path, you will come to an indent in the path so be careful not to slide into the deadly water, walk on the first part of the indent then jump over to reach the other side of the path. You can now see ahead of you the newly opened door so go through and use the CD on the computer at the SE to open the blue double doors you saw earlier. Now make your way back there and enter the warehouse.
Walk forwards to the left of the truck and stop at its side, look left and you will see some more blue doors at the east wall, walk towards them but turn left before you reach them and look up in the east wall for a grate to shoot out, use your shotgun and aim at the grate to take it out then climb up and enter the crawl space, climb down the other side and enter a small room behind the blue doors. Jump up onto the row of boxes and move the upper box towards you once, the blue doors will now open and also another door outside; you will visit there when you leave the warehouse in a short while. But first look under the box you moved for the 2nd COMPUTER DISK then climb into the crawl space in the west wall for some SHOTGUN AMMO now leave via the blue doors and nip round to the left, theres a desk here with a SMP on it, take it then leave the warehouse.
As you enter the street outside you will see the newly opened door to your right, go through into the new room and use the CD on the computer at the west wall, you will see a door open back at the start of the level but before you leave go use the lever on the bookcase behind you to open a ceiling hatch back in the warehouse which you will use later when you return.
So now you need to head back up the streets to the first room you visited, when you get there look over in SW corner of the street for the newly opened door and head through to enter the awesome jungle area.
As you enter the jungle the door will close behind you and the ominous music spells danger so dont go wandering off or you will surely get very lost, stay by the entrance door and we will navigate from there.
First you can go collect a secret so head south from the entrance door and notice a short distance along there is a lever on a pillar to your left, this opens the entrance door but you are not going to be leaving just yet so make a note of it then continue on south until you come to a bright green plant, now go east and enter a dark corner area then take a right turn and head through the gap in the rock walls towards the south, as you pass through the walls take an almost immediate left turn and find a pillar at the north wall you can pull up on. Drop down from the pillar into a passage and head through to a large lava floor cave. Its dark in here so light a flare then check out the right side of the room, you can see a low block in the lava so jump over to it and climb up, now face north and take a running jump over to the high pillar ahead, now you can use the ceiling ladder to make your way across the room and reach the far south wall pillar to collect SECRET FIVE THE REVOLVER SMP. Draw guns and kill the Tinnos Wasps that shows up then head back over the ceiling ladder to get back to the north side of the room. Exit this room now via the north wall doorway and drop back down into the jungle. From here make you way NW and go back through the dark corner area, take a left turn and see that bright green plant to your left. Head straight on west until you come to a square arched rock formation, this will indicate you are where you are supposed to be. Keep going in a straight line for a short distance and you will come to an L shaped rock formation and its here you need to stop. Look left and see a short passage in the south wall, go through and find a wall ladder at the end then climb up and enter the crawl space at the top. Turn around and hang drop from the crawl space then shimmy right all the way round the rocks until you can drop down to a safe rock in the lava floor. You are now in the second jungle area.
Head forwards until you see two fire statues to your left which guard a small jungle room then get your guns ready as two Dinos attack. Make note of this place as you will return here later to use The Temple Stone but for now continue on until you are level with the second fire statue, now take a right turn so you are heading west and continue in a straight line until you reach the west wall, now take a right turn then left to enter a small dark area in the NW corner. Find the block to climb at the north wall then face SE and jump up to the next pillar, now jump over to the pillar to the SE then jump into the alcove in the south wall ahead. Face south and run off the ledge using the action key so Lara glides down onto a safe tile and avoids the lava floor below, now enter the small pool room ahead.
Dive in the pool and look in the south wall for a hidden hole which is obscured by green foliage, swim through and use the lever inside to open an under water door in the west wall of the pool, swim out and go through the newly opened door and enter a second pool, swim south and you will eventually emerge out into a room with burning statues and ledges above.
Face the north wall and jump to the crawl space obscured by green foliage, go through to a new room and use the fire lever to open a door up on the high ledges outside. Go back to the pool and stand by the fire statues then time your jump when the flames are all out to grab the ledge above the statues, climb up and use the monkey swing to get over to the west ledge and enter the newly opened door to your left.
You are now faced with slopes ahead so drop down backwards and grab the slope, shimmy right then do a back flip and turn to catch the slope behind you, shimmy right then climb up onto a safe ledge. Now turn east and grab the upper wall, you can now shimmy right then do a back flip with a turn to grab the wall behind you and shimmy round into the doorway. Go through the passage and enter a new room.
Go down in the new room and head over to the west wall where you will find two movable blocks. Move the right one first and push it through once, now push the left block once to the south, pull the right block out once then push it twice into the north alcove. Go into the short passage that was made by moving the right block and find another block to move, push it forwards once then pull it back once, this will open the door at the north end of the room for you to leave. Make your way around the passage and you will find the GOLD KEY lying in front of the next door and as you take the key the door will open so make your way to the edge of the doorway and stop because there is a secret to collect before you slide down the green slopes ahead. So from the edge of the doorway jump round the wall to the right, you will find a crawl space in the west wall so head through and enter a small room with slopes and high ledges. Use the first slope to your right and do a back flip from it to the slope behind you, then jump and hit the next slope then jump again to land on a safe ledge above. Now go take SECRET SIX - LMP from the south wall alcove then return to ground and head back through the crawl space. Slide down the green slope and go forwards past the two fire statues, head left and see the lava floor and block you came down to this area by and climb up back up the block, nip up onto the pillar ahead then make you way through to the right, climb down and you will arrive back at the previous jungle area.
From here you can go collect another secret nearby, so head east in a straight line until you come to the east wall, look to your left and see up in the north wall a crawl space between the wall and a pillar, climb up to take SECRET - SEVEN - THE UZI - UZI AMMO then jump down to the north. You are now back at the small lava floor area so head over to the north wall and use the shimmy gap to get back into the crawl space, climb down the ladder on the other side and arrive back at the first jungle area.
Head north into the centre of the jungle and a Dino and two Tinnos Wasps will attack, see them off then from the centre of the jungle look over to the east far wall and you will see the door to take you back to the streets. Use the wall lever you saw earlier on the east wall pillar to open the door, then head through and return to the east end of the streets to get back to the warehouse.
Go through and use the gold key on the lock at the south wall to open the door to the Temple Stone room. You cant take the Temple Stone yet as its guarded by fire so there are a few more things to do before you get your reward. Go into the SW corner of the Temple Stone room and climb up the hole in the ceiling into a tiny room above, climb over the boxes and find a movable block to the south then push it forwards to reveal a wall lever to your left, use it and see a door open out in the warehouse then return to the room below and head back out into the warehouse.
Go left of the truck then take a left turn into a small alcove, look up and see the hatch you opened earlier and climb up to the upper balconies. Go forwards then turn and face NW, you will see a newly opened door in the partitioning wall, jump over into the doorway then take another jump across to the balcony to you left and see a closed door to your left in the south wall. Now jump the ledge ahead and see another closed door in the south wall and a lever in the west wall alcove. Both of the south wall doors will be on timers and the first one is coming up now, so use the lever at the west wall then quickly head over the balcony and get into the far south wall door, now use the lever at the south wall and quickly make your way out of the room and round to the left, jump the balcony and head left into the second south wall door before it closes. Phew!!! Relax a bit now as timed runs are over so use the lever at the south wall of this room then go back out onto the balcony. Go right and jump back over into the doorway in the partition wall, jump back round to the right ledge and look over to the east partitioning wall, you will see a newly opened black door so head over and jump into the doorway. Now take a jump round to the right balcony of the next area and see a fire tile ledge ahead, stand at the edge of the ledge and jump over to grab the edge of the fire tile ledge, shimmy round to the next fire tile (which is not active yet) then quickly pull up and run into the passage before the second tile ignites. Use the lever at the end of this short passage then watch the cut scene of the Temple Stone fire go out. Now take a running jump over between the flames and drop down to the warehouse floor. You can now go take THE TEMPLE STONE from its resting place.
Now need to take the Temple Stone back to the jungle, so leave the warehouse and head back down the street to the NW corner door and re enter the jungle.
You need to go back to the second jungle room, so head straight forwards to the centre of the jungle, there will be a stone formation here with a single fire statue on it, stop here then keeping to the left of it take about ten steps forwards, now face south and make your way forwards until you arrive at the far south wall where you can re enter the small passage where the wall ladder is to take you back into the second jungle area again.
Now in the second jungle head straight on to the room thats guarded by the two fire statues and make your way over to the small room where the fire emitters are, you have to pass by the fire emitters to place the Temple Stone in its receptacle and heres how you do it
You need to shimmy past the fire emitters by using the shimmy gap on the right side of the wall, so go to the very first block of the wall and jump up to grab the shimmy gap, now shimmy left four times and stop (do not move or the fire will burn you) when the first flame has died shimmy left four times then stop again, keep still then save when you know you are safe. The next two emitters need to be done at the same time so wait until they die down then shimmy all the way to the receptacle ledge, drop down and place the Temple Stone then watch the cut scene of a door opening back in the first jungle room. You can leave here now via the water hole below then swim through the tunnel and climb out at the end, make your way out of this room and go right to get back to the shimmy gap above the lava floor then make your way back through the crawl space to get back to the first jungle area. Head out from the ladder passage and stop at the L shaped rock formation, now head over to the NW corner and see the newly opened door up in the west wall. Use the pillars nearby to get up to the door and go through to the beautiful temple area.
There are many doors as you take a look around in here and your first door to open is over at the far west wall, so go through the temple gardens until you come to a stone gazebo to your right with a small pool below it, nothing to see in there but you do need to get on top of the gazebo, so make your way over to the green tinted SE corner and climb up, there is a closed door here where you will exit this area later, but for now go left and climb the block, climb again and youre on a slope so slide forwards then jump and grab the edge of the lava pillar, now shimmy all the way round to the left until you are on the lava pillar slope, pull up and back flip with a turn to grab the edge of the gazebo roof then climb up. Take the SHOTGUN AMMO from the roof top then head over to the west side of the roof. Jump over to the pillar at the west wall then head south jumping the pillars until you reach the fire lever at the end, use the lever and hear a door open below then return to ground and enter the newly opened door in the south wall.
You now face a deep pit with a lava floor and you have to use the slopes to your right to shimmy left around the room, as you reach the end of the slope you will hear the entrance door to this room close. Continue to Shimmy and go round to south slope then drop down to a safe tile in the corner of the lava floor. Now look to the west wall and see the next doorway to jump into.
In this room you need to activate two boulders to open a door in the top of the room so go round to the right and see two slopes leading up and also three blocks, one is central and the other two are to the left and right, jump up onto the central block then jump up and nip back from the left and right blocks to activate the boulders. The door up top is now open so head up to the top of the room and see the newly opened door in the NE corner, but before you leave you have to open another door outside, so go left and find the movable block in the south wall, move it out once and you will hear another door open outside. Now you can leave this room via the door at the NE corner but stop as you exit this door and look over to the north wall to see the newly opened door. Jump the pillars and approach the doorway, load up your guns as three Tinnos Wasps attack from behind, see them off then enter the new door.
You can see a red climbable wall ahead so take a long run and jump and catch the wall, shimmy right as far as you can go then back flip and turn to grab the wall behind you, now shimmy left as far as you can and do another back flip with a turn to catch the edge of the doorway behind you, climb up and go through to a new room. Face NW and jump over to the long slope, slide down then shimmy left as far as you can go, now pull up and jump forwards with a left turn to land on the safe ledge. Collect the SMP then jump over to the triangular ledge at the south wall, time the fire lever to open the door at the east end of the room and also open a new door outside. Jump back onto the north slope and shimmy right to the end, pull up and back flip to the slope behind you then jump forwards with a turn to the right to land on the small slope in front of the door, jump as you hit the slope then press action for Lara to glide safely into the doorway. Now leave this room but stop outside the door and face the north wall to see the newly opened door and then make your way over and enter the pink tinted room.
In this small room find the torch laying on the central slab but before you take it nip up into the NW corner and take some SHOTGUN AMMO then take the torch and leave the room.
Go to ground and light the torch on the fire statue at the west wall, you will need to stand to the left of it on the higher ground for Lara to reach the flame, now take the burning torch and go light the statue over at the opposite end of the west wall. You will now get a wonderful cut scene and see a new door opening back out in the jungle.
The exit door is now open for you to leave the temple so head over to the green tinted SE corner and approach the new open door.
Yes, thats a thumping sound and the jungle is shaking, its Laras worst nightmare and its time to put the shotgun to good use as the T Rex is lurking in the jungle, so drop down and wait for him to find you then shoot him in the chest until he falls.
You now have to find that newly opened door in the jungle so if you start from where you dropped down from the temple exit door you can head SE and run between the walls in a straight line until you cant go any further, now look to your left and you should see the two fire statues guarding the Temple Stone room. Continue on towards them then take a left turn and keep going until you come back to the small lava floor area. Now look up in the east wall and see the newly opened door then use the block in the lava to jump into the doorway. Go through and shoot the Bat that shows up then stand on the left of the ledge and use the monkey swing to swing over the canopy of the jungle. You will swing over a lava pillar and another pesky Bat (a note from George ha ha ha ha ha) will show up, nothing you can do right now except keep moving so continue on and go round to the left, swing over another lava pillar then go right so youre swinging round the single fire statue structure. Keep going then take a right turn then left to enter an alcove with a lava floor, swing through with the bat still on your tail and go through to the next jungle area where at some point another Bat shows up. You can now see a new open door in the north wall so swing over and drop down to catch the edge of the doorway then run through and finally kill those pesky Bats.
In this new room is another dead guy so move him and reveal THE SILVER KEY take it then light a flare and enter the dark hole in the north wall. There is a lava floor below you so you cant just drop down, you need to turn and use the wall ladder and make your way down to near the floor, now you can shimmy right and drop off to ground where its safe from the lava. Now go pick up the SHOTGUN AMMO which is on the ground ahead of you but before you move into the cave get your guns ready as there is a timed tile ahead of you which opens the door to exit the cave and waiting behind it are two Crocodiles, a Dino and a Bat, so open the door then sprint through and kill the waiting enemy.
You are now back in the cave at the start of the level so leave here and make your way over the black rocks outside to get back to the start of the level.
Take the silver key back to the warehouse and climb up the ceiling hatch by the truck as you did before. At the top go east and jump over to the next ledge, now go into the alcove to your right and use the ceiling ladder to make your way round to the left, drop off onto the bridge and a Bat will attack so shoot it then jump into the alcove in the south wall, drop back and shimmy right to enter the next alcove, now jump to the top of the white boxes. Now nip into the alcove to your left and take THE SHOTGUN then jump back to the top of the white boxes. Facing north take a running jump over to the fire pillar and catch its edge, shimmy round to the other side and climb up in the corner so you wont catch light, now jump up and catch the ceiling ladder and swing over to the alcove in the north wall where you can now use the silver key to open a hatch above you, climb up through the hatch and enter the upper areas of the warehouse.
This area is a bit of a labyrinth and it can get very confusing so I will try to guide you through as best I can.
From the top of the hatch head left and keep going until two Tiny Dinos attack, shoot them then head into the west passage. Now go left then right then left again and you will come to a closed white door. Head left from here then go right and look up in the south wall and see a grate, shoot it out then climb up into the crawl space, you will now be in a new area and from here you can see some fire tiles ahead, make your way over to the fire tile area and notice its a tiny room, the fire guards a wall lever but you cant enter from this side so head through the passage to your left and you will go across a closed hatch in the floor, you will return here later, but for now head on and take a right turn, there is another closed hatch up in the ceiling just as you do that right turn and you will also use that later. Continue on south and see to your left a closed blue door, go right here then go forwards to the fire tile area. You can now run across the fire tile which will go out as you stand on it then go left and use the lever in the alcove which will open that blue door you saw a minute ago. Now you hear the sound of a Dino on its way through the passages so nip out to the right, wait for it to show up then blast it away.
Head east now and at the end of the passage enter the newly opened door, there is a crawl space in the wall to your right so go through and shoot the Tiny Dino and Bat that show up. Now see a closed blue door to your left and you can hear a Dino lurking in another area, spooky eh? Go right from the crawl space then left, stop in this short passage and look to the right, there is an alcove where you will find a lever to open the hatch in the floor back in the previous passage, remember the one you ran over earlier? Ok so now look SE and theres a closed black door, go over and use the crow bar to open it then before you enter notice the grating to your left, you can shoot it out now if you wish but you cant go through there yet as a fire needs to be put out first. So go through to the new room and see high up in the south wall a grate which needs to be shot out. Go to the right and climb the box in the corner, then jump up to the higher boxes and get your pistols out, now use the slopes to jump round to the grate and on the last slope shoot the grate to make a crawl space in the wall, now fall to the ground and return up the boxes, do the slopes again but this time on the last slope jump and grab the ceiling ladder and swing over to the crawl space, drop and grab the crawl space then climb through and make your way through until you are above a new room with two Dinos waiting for you.
Drop down and shoot the waiting enemies then go take some REVOLVER AMMO from the desk. Look in the west wall for a lever and use it to put out the fire back in the crawl space by the slopes room then head over to the crawl space in the dark SE corner and crawl through to a room with a fire tile floor.
In this room there is a computer disk to recover from the south side of the room but the box its on is burning, so first you need to put that fire out and you do this by manoeuvring the boxes to your right. Notice the black marked tile on the floor to your right, now go to the box in front of it and push it forwards once, a fire tile will go out to your left so you can now pull the left box back once, this has put a fire tile out behind the left box so take a careful jump round behind it and push the box onto the safe path, now you can nip back onto the safe path and push the box onto the black marked floor tile.
The fire on the computer disk box is now out so all you have to do now is make it across the fire floor to retrieve the disk and you do this by using the fire tiles from the start, when you stand on them you put out fire tiles ahead allowing you to take a long running jump over to the south side of the floor, but make sure you land on the corner of the fire tiles so not to catch light. From here you can simply nip over and take the 3rd COMPUTER DISK
Nip down and push the box to your left forwards once, this will deactivate certain fire tiles on your way back. When you have moved the box jump over to land between the fire tiles to the right of the box, now take a standing jump forwards to the right of the fire tile next to the second box, a fire tile will go out to your left so nip onto it then jump the last fire tiles to get back on the safe path. There are actually two solutions to this fire floor puzzle but thats how I managed it.
You can now leave via the crawl space and return to the previous room.
Go through the east door and make you way through the passage, you cant get lost as its a one way system. Go through the open blue door at the end then go left in the hallway until you come to the slopes room door. Remember the crawl space up in the wall to the left of the door? Thats where you have to go now, so climb through then drop down into the hole where the fire has been extinguished, face north so you can jump up and open a ceiling hatch, now face south and jump up to catch the passage above the crawl space, climb up and head through the passage then take a left turn, go to the end of the passage then go left again, make your way through the bendy passage until you come to a T junction where you will see a floor hatch open in the left side passage. Go to the right passage first and drop down into the small room to retrieve THE GATE KEY and also find THE REVOLVER in the corner. Now climb back up to the passage and go right then right again, drop down the open hatch in the floor and head west then drop down the next hole in the floor, go east through the passage and run round to the left, you will come to another hole in the floor so back drop off and shimmy round to the right until you can climb on the wall, this will help you get down into the room below.
Now use the crowbar on the door and go back out into the warehouse. Go use the gate key on the black door at the west wall then enter the room, use the final CD on the computer and watch as the last door of the level opens and a Dino is on its way, but its bringing a few more friends along so be ready for your final shoot out.
Enter the streets and hear a rumbling, the massive T Rex arrives with another Dino and a Crocodile so have your final show down then head along the lake side path to get to the newly opened door. You will see the new door to your right guarded by two burning statues so head through and end these spectacular levelsWalkthrough by Moonpooka
24. Alien-Resurrection. Director: Kerstin Schlott (Codo)

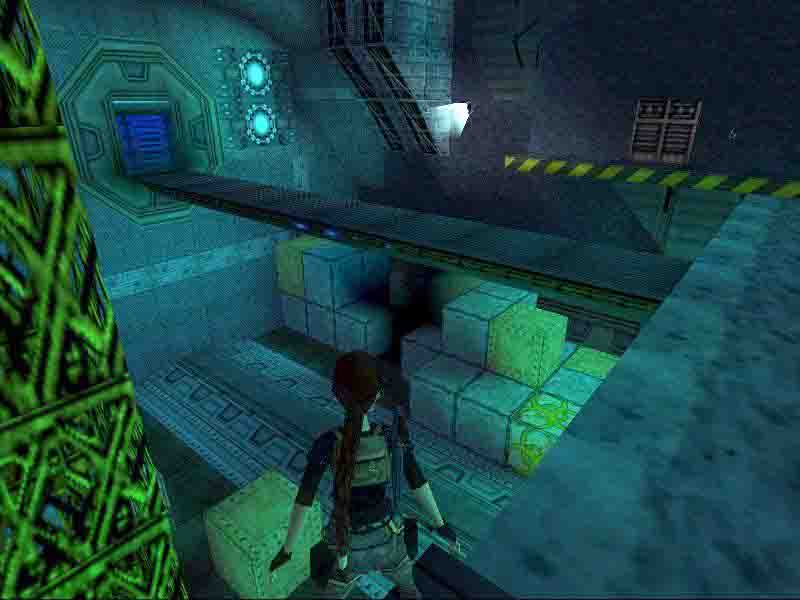
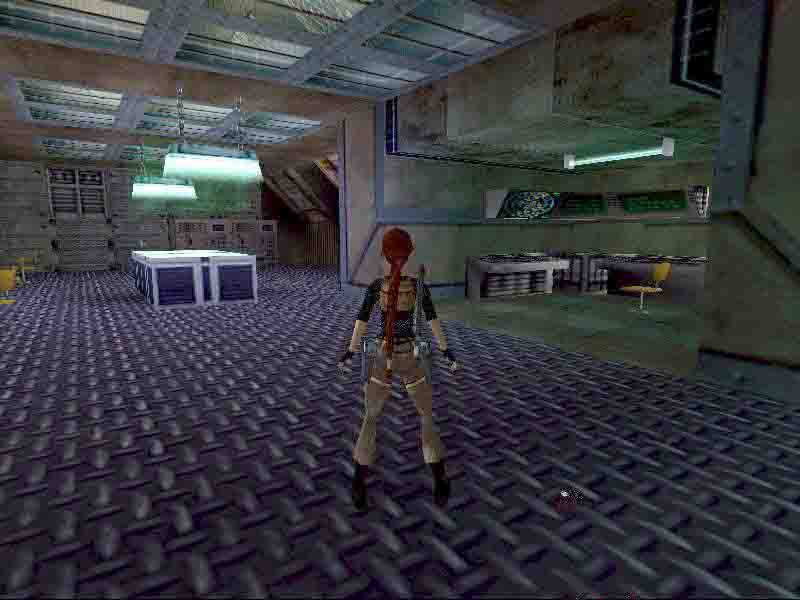
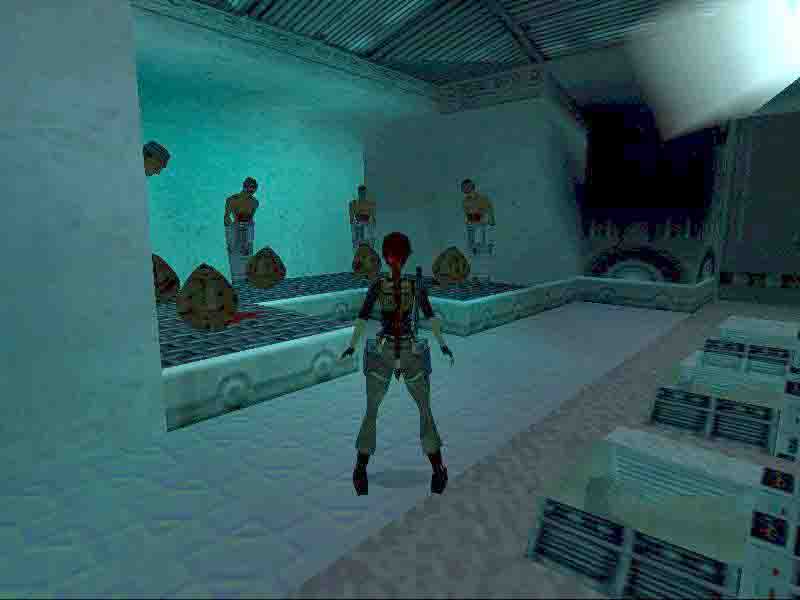
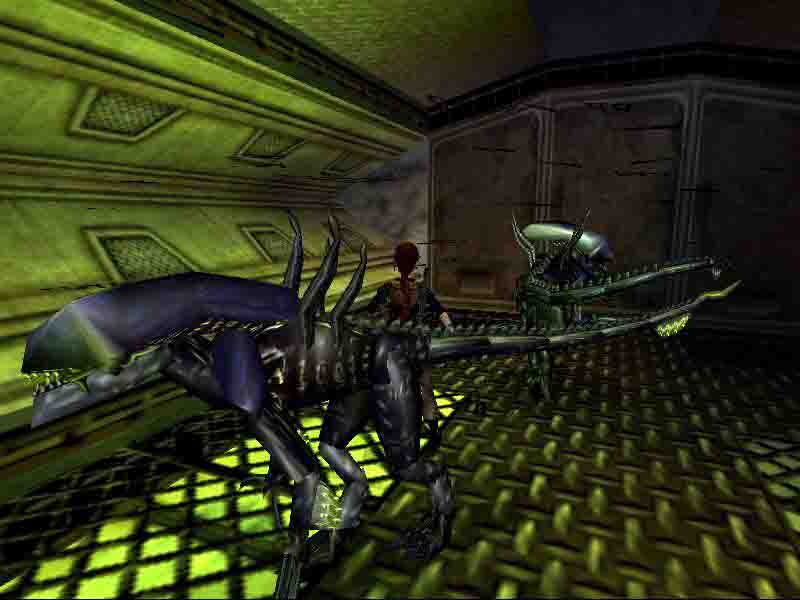
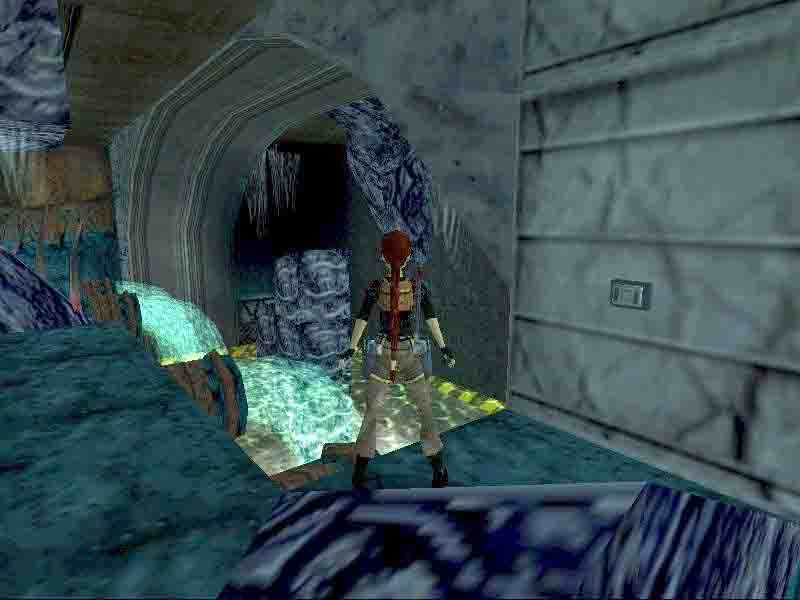
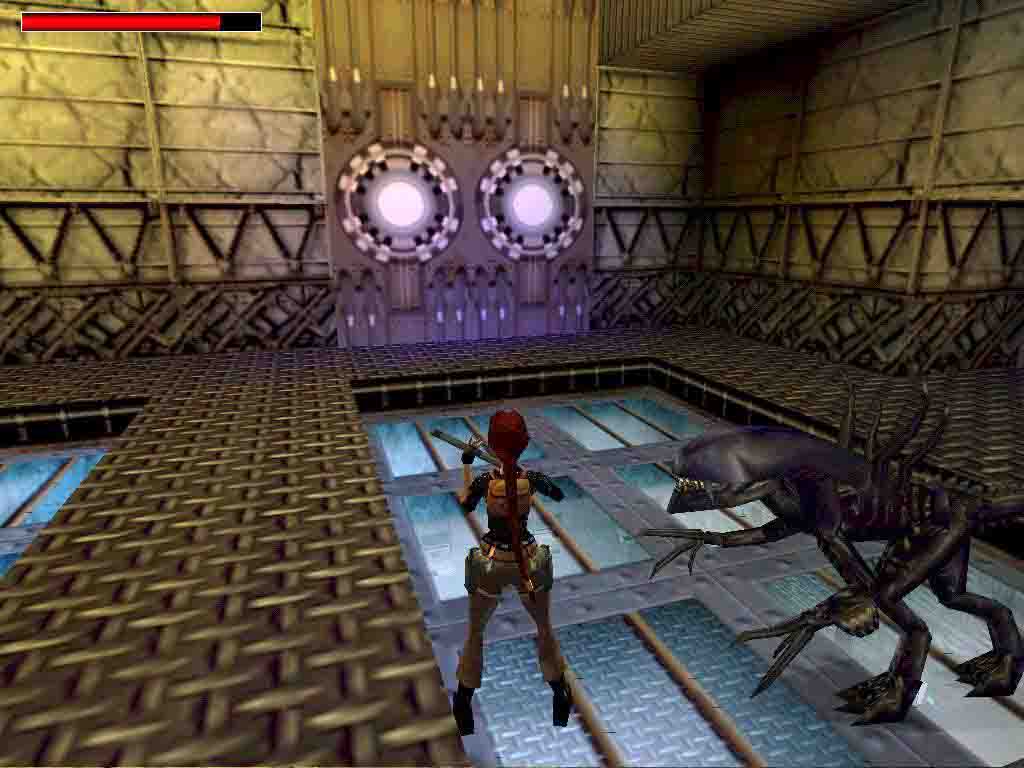

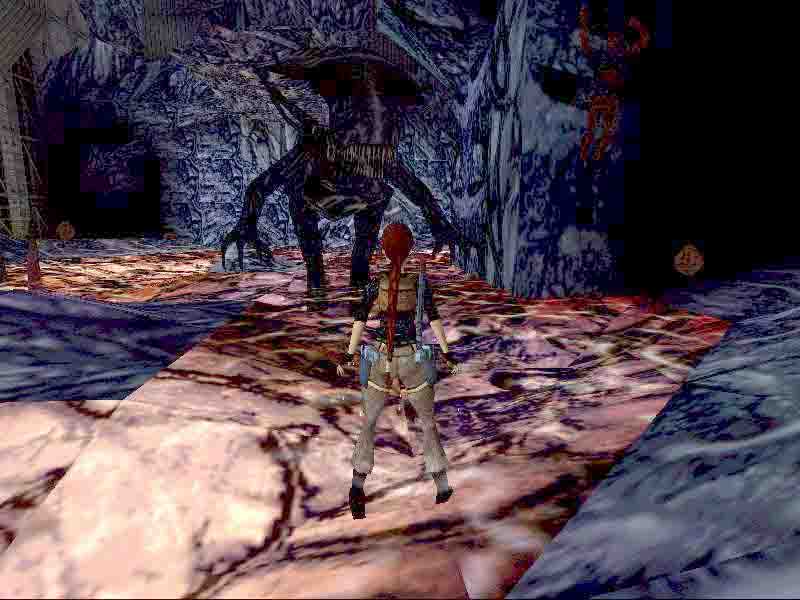
Secret 1-2-3-4: 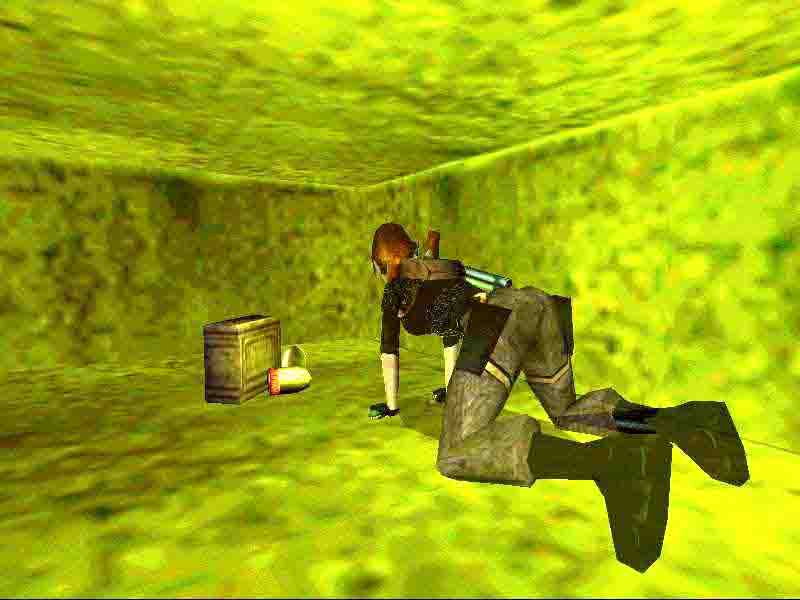
CS=crawlspace, MS= monkeyswing, MP= med-pack.
I will not tell you where you will meet all the Alien creatures to give more thrill to the level, but they are great
Enter the Base.
The Shuttle just landed at a remote Starbase. Take the Energy Cell and get out, go over the walkway (hold on to your seat when the camera pins around, I almost fell off) in the Big Hall to the yellow pillar on R side, jump/grab to it and go up to the top, slide down to the walkway and drop/grab one floor down so you can enter the CS there, by shimmying to it. Go into the office after shooting the grating and get the Red Keycard in the back office. Go back to the Big Hall, go over to the E side and one floor down to use the Card on the door there, go L and dive into a lower part of the trench to get a MP, back to the other side and through the broken grating SE, in the back room is a switch that will open an UW gate, go back, dive in the water at the broken grating and swim through to a loading dock, only take the Flares, better for your health. Climb out and get a ½ MP in the R hand corner, get into the CS next to it and retrieve another Red Keycard. Get out of the W door enter the corridor and notice the door straight ahead, where we will go into a bit later, go S and open the door to the R with the Keycard, go down to the room where you can get some Flares in the back and different kinds of Goodies from the shelves, have a look above, that Alien walking over the grated floor, Spooky! Go back up to the corridor and into the opposite door, follow to a small pool, leave that alone for now, go into the dark passage E and pull a switch in the next room to drain the pool, get the Ammo from the shelves in the back and go to the e room, dont step into the big pool of Aliensh..! Go to a small platform that will raise as soon as you step on it, find the Yellow Keycard upstairs and drop down, go to the now drained pool and get the Grenade-gun from it. Go back up to the corridor and R, L into the door you saw before.
Box Puzzle.
Push a box in the W to get a Shotgun and go up the N higher floor. On the higher floor N of this is a green block, behind it is a switch to operate the elevator (the light grey floor parts). There is a passage up the S floor where there are 2 boxes you have to pull out and move to the lower floor with the elevator (the 2nd one can stay on the elevator, you dont have to move it down). You can go around the boxes through a CS where the dead soldier lies. Then pull out the 3rd and get behind it through the CS so the passage can be entered.
When the last box is out, you can enter through the CS and go up the ladder in the end, get the Flares and shoot the grating up W there, get into the CS for Secret Ammo. Back out and into the passage over the ladder, follow to a room with a window, from which you can see a burning ledge, push the switch to kill the flames. Go back down to the room with the dead soldier and up the ladder on E wall there, get up into the CS over the ledge and follow to the end. The first big hole L leads to the shaft you picked up the Secret before, so ignore that, drop into a room with a dead soldier, pull the corpse away from the Blue Keycard and shoot a box for some Ammo, get back through the CS and down the ladder, go out of the door L of the ladder and to the Toilets. (And did I mention you can expect an Alien to attack here?) Go into the R hand door for a ½ MP, the L hand door to find a CS (in the last toilet) and some Crawly Creepers, shoot the grating and get some Ammo L, go on and find the ladder halfway down the passage, go up and into a room where you can push a button to open a CS in the Elevator shaft. Get back down to the passage with the Crawly Creepers and go S, collect 2 sets of Ammo in the corners of the large room and open the door to the Elevator shaft S.
The Elevator Shaft.
Grab the cable and slide down, look for the CS you opened before and go in, L at the crossing to get the Secret Uzis and Ammo from behind the propellers. Back out and L at the crossing, get the Flares and jump back to the cable, go up and look for the door just up and next to the entrance, turn so you can backflip into this room, where a slow Alien roams around, you can just run past him to a passage with a CS on L side, go in to a room with a Fire-trap, jump over the Burners and go L into the passage, climb backwards out of the CS at the hole in the floor and shimmy L to a CS above the door to the Quarters, go in for a Secret MP and Ammo, drop out and enter the Quarters.
The Quarters.
Get the Ammo from the table and some Crawly Creepers will come out to play, hit the light button next to the entrance and get the Microchip from the second room L, 2nd bed up on R side, check the beds for Goodies. Go back out to the corridor and R, past a Terminal and into the L hand room, get some Ammo and a Shotgun. But leave the Grenade-gun alone! Go back to that terminal and put the Chip in, the door opens.
Crawl under the low ceiling to the far R hand corner to get a ½ MP, then go SW and find a CS up in the wall, follow past the steam blowers to the end, drop out on the most L hand side and slide/grab the edge, take a MP and pull up in the corner, watch the health while you backflip onto an elevator, maybe you need a MP in the air. Climb the cable and backflip to the higher passage, shoot the grate and go into next room.
You can shoot some Eggs here if you want, this is the place they keep the fresh bodies to feed the Embryos. Go into next room and get a MP from the box, follow the next passage to a Ctrl room, open the e door with the card you have and get the Secret Revolver and Ammo, go back, open the S door and get a M16 with Ammo and some Flares in the back, now leave the Ctrl room through the W door and go N, R in the end and come to another terminal with a trapdoor close by, enter the passage ahead and in the next room overlooking a pool, is a button on a pillar, go check out the route first as the button will stop some burners for a short while and you have to get past them quickly.
Go up the ladder and look into the room at the burners, there is a dark grey rock ledge next to a grey metal pillar, you have to get to that, what I did was run in here and jump onto the sloped floor under the burners with a roll so you slide backwards off, grab the edge and go R, backflip to the ledge. So have a go at it and when you are on the ledge, look for a Valve on the ledge behind you, this will close one of the Mains. Drop down from the ledge to a shallow part of the pool and go to the side, runjump/grab the pillar in the pool and jump to a ledge in the L corner, get a ½ MP and go climb the top of that dark pillar, runjump/grab to the next ledge with a valve W of you and use that one to close the next Mains. Drop down to the pool again and get the next Micro Chip from the deepest part, climb the pillar again and jump to the valve ledge, go L and runjump around the corner up to the corroded floor W, go L and jump down over a fence to the grey ledge, push a button on the pillar to kill those burners and runjump back up to that passage, go down to where you saw that Terminal and use the Chip to open the trapdoor.
The Flooded Kitchen.
Drop into a partly flooded corridor, go E and get the Lasersight from the table, spot the door in E wall which will be an important escape route later. Go through the flooded corridor and swim into a kitchen there are some swimming Aliens here so be careful, get some stuff on the floors and go to the far R hand corner of the flooded dining room, theres and UW door you can open, go through and get out in the back pool, watch out for the Creepy Crawlers and some yellow Aliensh..! You can shoot the Aliens in the pool if you want to, they should have followed you here. Find a broken ladder in the NW corner and get up to one square from the top, backflip to a walkway behind you, runjump the gap to the central pillar and go R to the pillar with a button that will open the trapdoor on top of the ladder, go get some Ammo SE and go up the ladder to he corridor N.
Go R and be careful at those floor gratings, they will break and you will drop into the deep cave where Mama Alien rules. You can avoid meeting her by runjumping far around the L corner, so youll land on a higher ledge in the cave. But her Son is up here!! Shoot him and go look for a hole with the ladder up W, go forward in that room and get a MP, turn back, jump over the hole and shoot some Gratings up in the wall at the dead end. Climb in to the Main Control Room.
The Main Control Room, Great Escape.
Go R and down to the floor, find the ladder and door on top in the SW corner, its important to find them blind later. Go to the W side of the central core and climb the terminal block there , look for a ledge on the Core close to the Shielded switch. Do a long runjump/last moment grab to that ledge and place the Energy Cell to boost the power back up. Go down to the switch and save in front. The route is shown in the flyby, roll , sprint to the ladder get up fast, slide to the flooded kitchen and swim L, runjumps over the stairs, sprint the corridor and jump over the table, go L and sprint to a hole in the floor, you can runjump/grab over on the R hand side, now sprint over the walkway to the Shuttle to get out of here before the whole place explodes
Walkthrough by Dutchy
25. The Movie Theatre Part 7 (Grand Finale) Director: Michael Prager.
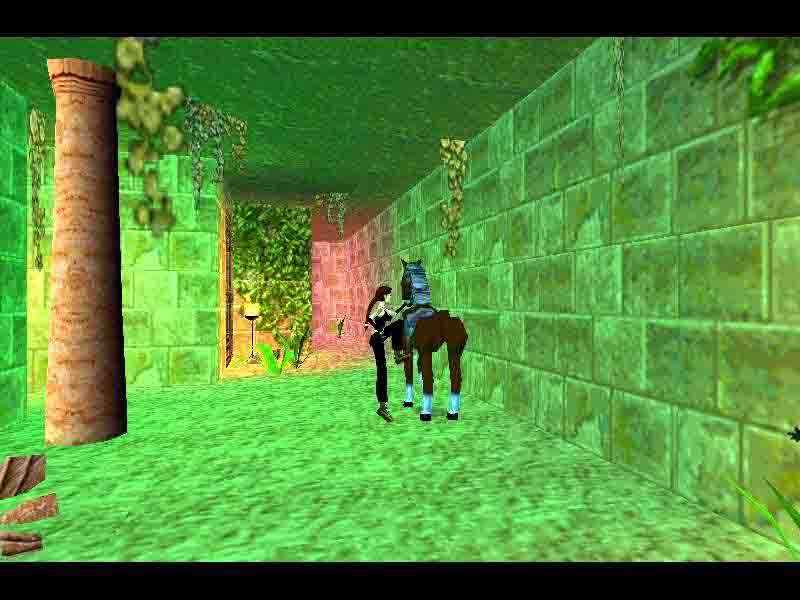
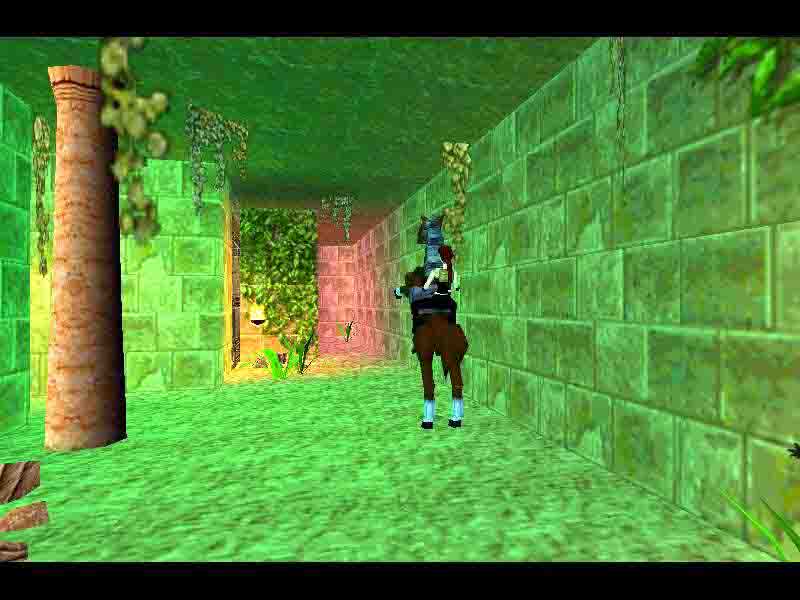
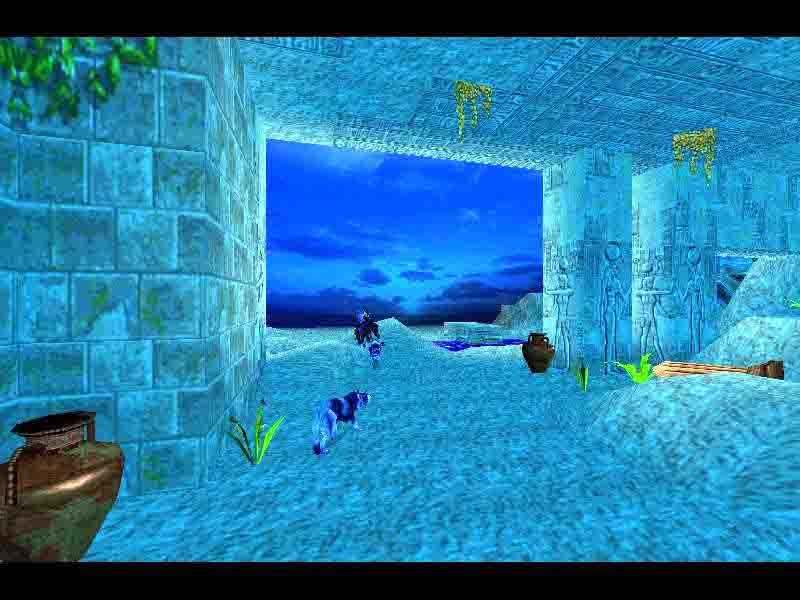
 Secret:
The Vase Puzzle.
Pry the Walk of Fame Star off the wall and enter the Vase Puzzle room, notice the vases are blocked by ledges and obviously have to go onto the marked Tiles. Theres a slope down the room, from which you can jump to ledges spanning the room. Slide and jump to the lower ledge, put the vase on the Tile and one of the exit gates opens, jump to the switch on S wall and use it to lower the ledge at the centre vase and runjump from the switch-ledge to the one where you pushed the Vase, runjump/grab to a ledge sticking out of the Slope and limb up to the top, first pull the N vase as far as possible to the now raised Tile, the move the centre Vase to the Tile, use the switch again and go to the N Vase, put it on the Tile and the exit opens. Now, you probably already noticed the Secret in the alcove of the Slope. Go stand with your back to the lower Vase and take one sidestep R from the L edge of the ledge, look L and see the sloped block, turn a bit so youll land on that block when you sidejump L, immediately jump with a L curve and grab that alcove, get the Secret ½ MP and leave the room S. Go R and place the Star to open the gate, get Movie Star 6 and go to the R in the 2nd Hall of the Theatre and through the curtain to the Exit Hall.
The Star Puzzle and the Exit Hall.
Here is a nasty puzzle, see the Cinema numbers on the walls
L and R, take a look at the Stars in your inventory and take notes of the
codes written on the back. They will give you the clue to this puzzle. 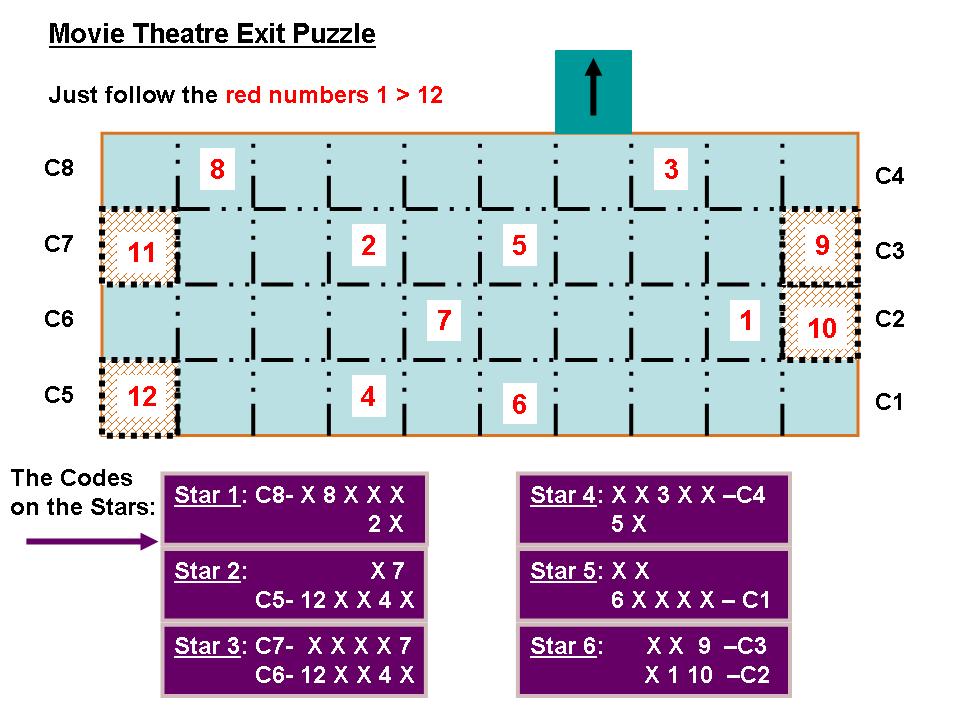
The closed gates also count as floor tiles, they will open when you completed part of the puzzle, draw a grid of the floor and put in the numbers according to the Stars, the Skulls mean Death. You can grab the ceiling over the death floor with a jump/grab and drop onto all the numbered Tiles from 1-12 and the gate will open. Go through the CS and a beautiful flyby will take over, Lara gets on a horse and rides into the sunset
My Compliments to all the Level builders for such a great game, Thanks.
The End
Walkthrough by Dutchy
Az oldalon közölt képek, a szöveges tartalom, illetve minden sajátkészítésû anyag, a © TR Editor.hu tulajdonát képezi. Azokat semmilyen formában nem lehet reprodukálni, másolni, terjeszteni, csak a szerkesztõség engedélyével.