
Tomb Raider Stigmas (Beta) - City of Lost Sands
Author: Adriel Silva
Download: Here

Walkthrough:
[Notes]
1. There is an unusual game-stopping bug in this level. The Snake Coil items must be picked up in a specific order. This walkthrough has the correct pick up order for the items.
2. The level starts with the flare bug in effect. The author mentioned this in his notes but it is still a pain. Throw the flare to use them. However, the binoculars light works.
3. The small red pointer on the fancy compass is hard to see. If I confuse the directions sometimes, sorry about that.
4. There were some doors left not opened. This is a beta version. Perhaps in the final version they may be used.
[End notes]
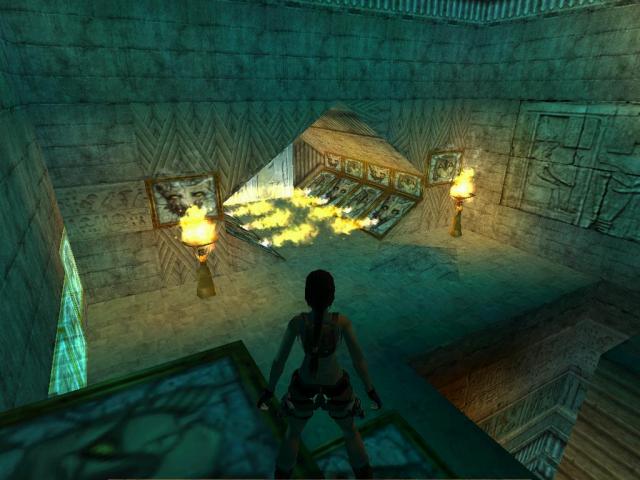
You start by falling, bouncing on slopes, and landing on the sand. Turn and go north to find steps. Run up the steps and pick up a small medipack. Return down to the sand and shoot two scorpions. Go to the south-east corner and drop into a hole. You land in a dark room. Go east near the large water pool. Turn around and shoot two scorpions behind you. Shoot the crocodile in the pool as well. Go behind the south-west pillar to pick up flares. Go behind the north-west pillar to pick up flares. Get into the pool and dive into the hole in the south-east corner. Swim south through an underwater crawlspace and surface in a large pool.
Pull up onto the south ledge. Wait there and shoot two scorpions. You see a closed door to the east and a closed gate to the south. Notice the bowl next to the column. Go to the dark south-east corner and pick up red shotgun shells. Go to the east wall and back into the crawl space to drop into a lower tunnel. To the east you see a closed door and a receptacle. Again back drop into a lower south tunnel. Follow the tunnel to a room. You can see an underwater door in a dry pool. Go into the south-west corner and press the button in the east wall. Shoot a scorpion and pull onto the upper west ledge. Run and jump to the upper south slope. Slide down and grab the edge. Shimmy to the left end. Pull up, back flip, roll, and grab the next slope. Shimmy to the right and pull up. Go forward and enter the open door.
Go to the end of the tunnel. Sprint through the next small room to avoid rolling balls from the sides. For some reason, only three balls fell and one ball stayed in place. You enter a room with spike traps. Pull up onto the south wall. Go east and run and jump to the east wall block beyond the spikes. I found nothing in the area to the north. Go south and press the button on the wall. You get a flyby back to the dry pool and it is now filled with water. The room to the east needs an item, which you do not have yet, for a receptacle. Return back to the pool and drop in.
Pull open the underwater door and swim through the tunnel. Swim into a flooded room. Go south to surface for air. Swim to the north-west and see an upper crawl space in the upper east wall of the center structure. Swim inside and down to the bottom. Pick up a large medipack for secret #1. Swim out and pull up out of the water. Go south into the next room and shoot two raptors. Go south into the next room and loop around to the right. Go the hole in the north wall behind the pillar. Grab the ceiling and monkey swing over the slope with a spike trap at the bottom. Follow the corridor to a dark room.
Swim into the west water pool and pick up flares. Get out of the pool on the north side. Run to the north wall and get into a lower crawl space in the corner. Crawl to the end and stand up. Pick up a shotgun for secret #2. Crawl back and return to the entrance area near the pool.
Climb the column at the east wall. Run and jump south to grab the top the columns near the entrance. Pull up and press the button on the side of the block. Get back onto the column. Run and jump north onto a ledge. Go west to the end of the ledge. Run and jump west to grab a hard-to-see ledge. Pull up and go the west wall. Pull up into a very dark crawl space. Crawl through the darkness until you hear Lara stand up. Go north and pull up into a tunnel. Follow the tunnel east and onto a ledge over the room you just left. Go south and pick up blue shotgun shells.
Run to the north wall and jump up to grab a crevice. Shimmy to the right and just guess when you are over the roof to drop onto it. Look for a lower crawl space in the north wall. Crawl through and stand up at the end. Press a button on the wall and crawl back out. Go south to the edge of the roof and run and jump for the water pool. Get out and enter the building. Go to the south end and pick up the Guardian Key (called Load) off the pedestal.
Exit the building and use the monkey swing over the spike pit again. Loop around to the left and enter the next room. Continue north to the water and swim back through the underwater tunnel. Jump onto the west ledge again and do the shimmy and roll trick to get onto the west ledge. Return through the tunnel and the room with the spike traps. Jump around the traps and go south to reach the doorway you ignored earlier.
Enter the doorway and loop around to the right to pick up flares. Climb the column at the east wall. Enter the alcove and place the Guardian Key in the receptacle. The screen shakes and you hear the earthquake. Exit and the earthquake stops. Drop into the room and go south between the columns. Loop around to the left and pick up the Golden Vraeus (called Eye of Horus) off the floor. Exit this room and get back through the spike trap and the tunnel to the pool room again. Enter the door in the north wall. Follow the tunnel to the end and pull up. Go to the right and place the Golden Vraeus in the receptacle to open the door at the end of the tunnel.
Enter the open door and you are on a ledge. Grab the ledge and shimmy to the right around the door. Go to the north wall and pull up into a higher crawl space. Crawl to the end and stand up. Press the button on the wall and crawl back out. Safety drop into the room below. Go into the south-east corner and pick up flares. Go to the north-east corner and pull up onto a raised trap door. Go forward and pull down the wall switch. You get a flyby back down the tunnel to the closed gates. One of the gates will open. Get back into the tunnel and go west to pull up into the room with the gate.
As you enter the tunnel you can hear the trap door drop. If you had not used the wall switch you would have been stuck. There is no way to raise the trap door again.
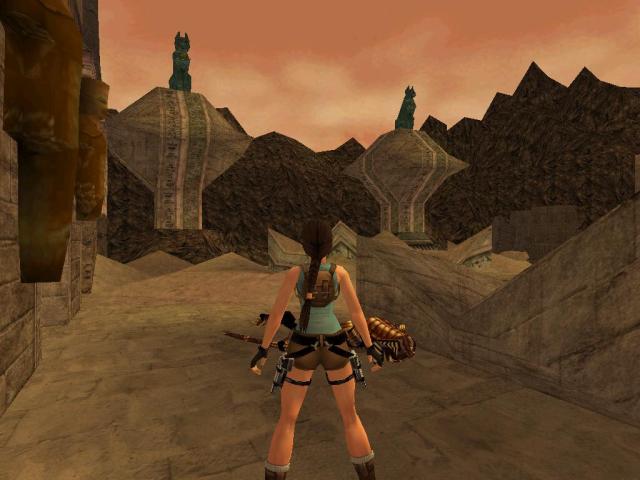
Enter the open gate and run up the steps. Exit into an outside area and shoot two raptors. Go east towards the middle of the area and over a broken wall. You see a water hole between two statues. Go south behind the first statue. Go around the corner on the small ledge and drop into a hole to pick up a small medipack. Return back to the water hole. Drop in and follow the underwater tunnel. Swim over a hole and swim to the end of the tunnel to pick up a small medipack. Swim back for air and save the game. I found the swim very tight. Dive in and now swim down into the hole. Swim north to the end. Turn the corner and swim east to the end. Follow the new tunnel. Follow the tunnel to the end and pick up the Canopic Jar (called Ba Cartouche). Swim back and get out of the water.
Go south and place the Canopic Jar in the left receptacle. You hear a door open. Return to the broken wall near the middle of the area. Go north and stand jump to grab the east wall. Go east to a wall and grab a crevice. Shimmy around the wall and drop onto a block on the other side. Run and jump to the east wall ledge. Grab a crevice and shimmy to the right around the wall. Enter the open door and see torches on the floor. Leave the torches there for now and run and jump to the south ledge with the other closed door. Grab the wall and shimmy around the corners until you can pull up into a crawl space. Stand up at the end and climb down a long ladder.
Go east into a tunnel and a door closes behind you. Run to the end and a door opens for you. Run and jump down onto a lower ledge. Go east and drop onto a block near a closed gate. Run and jump east again onto a block. Turn around and go west down some blocks to a gap. Jump over the gap onto a block with a torch for later. First run and jump north-west to a ledge. Go north and pick up a small medipack for secret #3. Go to the north wall and climb down the hole to the left. Pick up a large medipack and climb back out. Go back to the block with the torch and go east down some steps.
Go to the north-east corner and enter a crawl space. Stand up in a room and hop up onto a ledge. Pull down the wall switch and exit the room. Go up the steps and now pick up the torch. Jump to the ground and go west. You should find an open door leading to a fire. Go there and light the torch. Exit and go west to stand jump the steps and the blocks. On the last block, run and jump onto the ledge with the closed gate. Light the fire in the bowl and the gate opens. Run and jump over a pit and press the button on the wall. You hear a door open. Run and jump over the pit to exit. Stand jump into the north wall opening and go through the open door.
Climb the blocks to the top and a trap door opens. Go down the other side and pick up the Canopic jar (called Load) on the floor near the statue. Climb again and pull up through the open trap door. Go north and enter the tunnel. At the end, pull up to the west. Go south and climb the blocks to reach a higher tunnel. Pull up to the west and follow the ledge to the end. Run and jump onto the ledge to the east. Pull up onto a higher ledge and run and jump west into a tunnel. Go west and you are outside. I went forward to the last ledge and dived into the water hole below to get down.
Get out and place the second Canopic Jar to open the door above you. Return to the middle of the area with the broken wall. Jump and shimmy again to get to the open door with the torches. Pick up a torch. Run and jump to the other door. Go inside and light the torch. Jump down to the ground. Light the small wall bowl near where you land. You hear a gate open far above your head.
Keep the torch and go over the broken wall and to the north-west corner to exit this area. Return through the gates and to the pool. Light the bowl near the column and the door opens in the east wall. Enter the door and follow the tunnel. Go up the slopes and you are on a high ledge over the outdoor area. Run and jump to the east wall and grab a hidden crevice. Shimmy to the right around the corner and drop in front of the open door. Go east and enter a dark room with many columns.
Go south-east and climb onto a short column. Pull up onto the roof to the north and you can see a closed door. Jump into the tunnel in the south-east corner. You are entering a maze. The first left branch tunnel is a dead end. The third left branch tunnel is a dead end. Enter the second left branch tunnel. Follow the tunnel to the left, right, and left to a wall. Pull up into an upper crawl space in the north wall to the right. Drop on the other side and see a closed door to the east. Go west and follow the tunnel to the right and right again. You see a bowl and a vase. Shoot the vase and pick up a torch.
Go back to the closed door. Just before the door is a tunnel to the left. Go there and follow the tunnel to a fire. Light the torch and return to the unlit bowl. Light the bowl and you hear a door open. Go back to the closed door. It is still closed. Enter the tunnel on the left again. Jump up to the east wall just inside the tunnel and grab a crevice. Shimmy to the left and pull up into an open door above the fire bowl. Pull down a wall switch. Exit and shimmy back to avoid the fire before you drop. The door is now open.
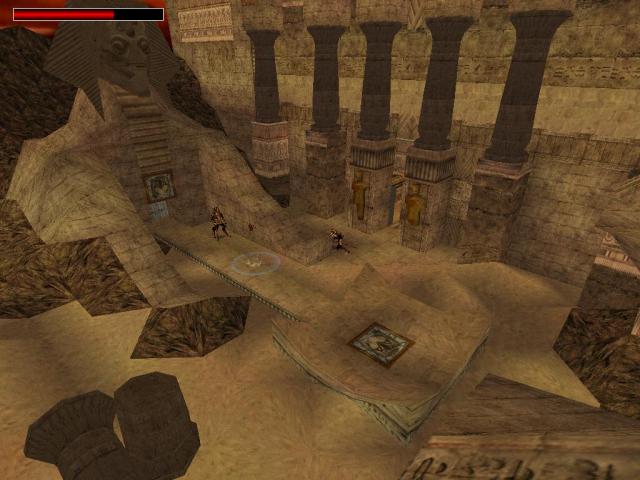
You enter another very large dark room. Go east to see some steps and attract the attention of four demigods. There are two demigods on each ledge. Run down the steps and attract the attention of four harpies. Run back behind the columns. Go into the south-west corner and hop onto a block for red shotgun shells. Here you can shoot the harpies without worrying about the demigods. However the harpies are poisonous if they sting you. I managed to shoot two demigods. Two others were stuck in the vases on the ledges. I think that this is a bug. The demigods are stuck in the vases and cannot move. Lara cannot shoot them because of the vases. But they can shoot Lara. However you can run out of range.
Go down the steps to a water trench. Loop around to the south and find blue shotgun shells in front of a statue. Loop around to the north and find blue shotgun shells in front of a statue. Go to the middle of the ledge in front of the trench. Run and jump to land on a tile where you do not slide down into the water. If you do, swim to either end of the trench to get out and try again. Stand jump to the north-east. Run and jump north. Stand jump north again three times. Stand jump to the north-east. Stand jump south-east. Stand jump south two times. Run and jump south and then go east into the open gate. Follow the tunnel to a room with slopes and fire emitters.
Go between the columns and climb the east column. When the fire goes out, back flip and jump forward to grab the column and climb again. The fire emitter timing seems variable. Every third pause seems longer so that you can climb up before getting burned. Just count the fires and back flip. Pull up onto the top and jump to the north ledge. You see many fires in front of closed door. Go west and see two closed doors. Climb the blocks between the doors and climb a ladder. At the top, pull up and turn around and see more fire emitters. Stand near the left wall. Hop back twice and run forward. Start to jump before you reach the edge. With a few tries you should land on the first fire emitter tile at the outside corner and be safe from the fire. Time the fire emitters and go from corner to corner. On the last corner jump to grab the ladder and climb up.
Pull up into a crawl space. Crawl forward and at the end, crawl to the left. The crawl spaces are triangular shaped so stay at the right side where the crawl space is higher. Stand up in a cave. Jump the left side slopes to proceed. Go through an opening and slide down into a large room. Pull up onto the north ledge. Go to the far end and pick up red shotgun shells. Go to the moveable block on the lower ledge. Push it around the ledge to the north-east corner. Go to the west side of the center structure and pull down a wall switch. The block has been raised. Push the block onto the north ledge. Push the block to the west end over a fancy tile. Two doors open the upper west wall. Pull the block in the south-west corner of the room under the doors. Climb up and pull up into the open doors.
Go down the slopes and run through a dark room. Continue to a large outdoor area and see two demigods behind a wall. Lure them out one at a time to shoot them. You can see two receptacles on the walls where they were hiding. You do not have those items yet.
Go west and enter a maze. Go left, right, right, and left. There is a closed door to the east. Go west to the end and go left. Pull down a wall switch. Go east and turn to the right in the third side tunnel. Follow the tunnel and loop around to the right and enter an open door. Notice the two closed doors to the west. Pull down the wall switch. Exit back to the long tunnel and loop around to the left to enter an open door. Push the wall button. Exit and go east to the open door. Enter and loop around to the right to pull down a wall switch. Exit and go west to the fourth side branch. Enter the open door and push the button. Exit and go back to where you saw the two closed doors. One of the doors is open.
Enter another outside area. Go to the south wall and push open two brown doors. Enter the room and go west. Push the button on the wall to open the gate. Enter the dark room to lure a bull. Run back and stand in front of a target with a painted eye. Get the bull to smash the target and not you if possible. Return to the room and see the open door in the south wall.
You enter a room with columns with fire on them. You have a choice:
Method 1. You can go behind the door on the ledge and pull down a timed wall switch. This turns off the fires on the columns. Run and jump columns to reach the highest column. If you fall into the water, you can pull up in the north-east corner and try again. I found the timing too tight or I am too slow.
Method 2. Stand to the left or right in line with the second block. Run and jump with no grab and you should land on the safe inside corner of the second column with fire. Drop and grab the edge and shimmy to the next corner. Stand jump to grab the higher column and pull up. Continue the stand jump onto the corners and shimmying to the next corner along the columns with the fire. You finally reach the highest column.
On the last column, get onto the north corner and pull up into an overhead crawl space to the north. Crawl through to a room with a moveable block. Move the block on the ledge onto the fancy tile to the north. Go back through the tunnel and drop onto the highest column. The fire is off. Dive into the water and pull up in the north-east corner. Grab the edge to shimmy around the door and exit the room. Be careful of the bull and go to the open door in the north wall. Run over the breakable tiles but be careful to not break all the tiles. You have to make this trip a second time.
Climb a wall and pull up into a room. Go south-east and pull up into an upper south wall crawl space. Crawl to the end and stand up. Slide down a slope and you are above the tunnel with the many doors and switches. Jump onto the top of the wall and pick up red shotgun shells. Go east to about the middle area. Look down on the north side of that area. You should see an item. Drop down onto the lower ledge and pick up Scarab Necklace #1 (called Load). Do not drop down but pull up onto the wall again. Go to the east end and look for a crawl space in the brown wall to the north. Run and jump to the wall. Grab, release, drop, and grab the crawl space to get inside.
Go through and drop on the other side. Run and jump north onto a block and pull down a wall switch. Climb down and go north-west to climb a column and pull down a second wall switch. Climb down and go to the east wall. Climb a column and pull down a third wall switch. Get down and go south to an opening in the wall. Go forward and drop down two ledges. Shoot a vase and pick up crossbow explosive ammo. Go east and run off the end to land on a block. Follow the steps down to the ground. Go to the right and enter a dark opening. Run down some steps. Turn and sprint down a slope. At the bottom, quickly go to the left and stop. There is a see-through wall here for a missing texture. You avoid a rolling ball behind you and stop before a fire pit. Grab the edge of the fire pit and shimmy to the left. It is a long shimmy. Pull up and follow the short tunnel. Pick up Scarab Necklace #2 off the pedestal. The room on the other side of the gate is where you started earlier. There is no way to go but back the same way you came.
Shimmy back over the fire trap and run up the slope and the steps in reverse order. Go up the large steps again and stand jump to grab the ledge and pull up. Go through the openings to get to the room with the three switches. Climb the closest column and jump to the south ledge. You will come back here later for an item. If you pick the item up now, you get a game-stopping bug. Crawl through the crawl space again and drop on the other side. When I got back, the bull was waiting for me. Run through the tunnels to get back to the two doors again. Place the Scarab Necklaces in the receptacles on the sides of the center fountain structure. A block rises on the fountain ledge.
Pull up onto the block and jump onto the middle structure. Run and jump to grab the tunnel in the east wall. Pull up and run to the end to pick up the Snake Coil #1 (called Load) off the pedestal. Get out and safety drop to the ground. Go to the north wall door again. Run over the breakable tiles again. Climb the wall again and pull up into the room. Go to the corner and go through the crawl space again. Slide down and jump to the wall again. Go east and go back through the crawl space in the brown wall. Drop to the floor and this time go to the north wall. Run through the tunnel to the end. Turn right and see a mirror room.
You can see the safe path in the mirror. But it is a lie and you do not see Lara either. Step inside and run and jump at an angle to the base of the center column. Pull up to the central column and pick up Snake Coil #2 (called Load). Run and jump diagonally back to the door and exit this area.
If you had picked up this item earlier, the other item on the pedestal would not have been there. This was the specific order bug and a game-stopper for sure.
Go back to the room with the three switches. Go back through the crawl space and drop on the other side. Exit the room and take the first left branch tunnel. Follow this to the area with the two dead demigods. Go north and place the two Snake Coils in the receptacles. A door opens in the north wall. Go there and pull out a moveable block. Push the block south onto a face tile. You get a flyby showing doors opening back in the room with the bull. Then the level ends.
20-sep-2010
Walkthru by Harry Laudie
Az oldalon közölt képek, a szöveges tartalom, illetve minden sajátkészítésû anyag, a © TR Editor.hu tulajdonát képezi. Azokat semmilyen formában nem lehet reprodukálni, másolni, terjeszteni, csak a szerkesztõség engedélyével.